
Most small consumer drones weighing under 250g can safely carry a payload of 50 to 100 grams without risking immediate motor failure. However, adding weight significantly reduces flight time and can compromise stability, often decreasing battery life by over 30% for every 50g added.
🎯 Key Takeaways
- Sub-250g drones usually lift between 50g and 100g safely.
- Every 50g added can cut flight time by 20-30%.
- Exceeding 250g total weight may require mandatory FAA registration.
- Overloading causes motors to overheat and reduces flight maneuverability.
- Maintain a 2:1 thrust-to-weight ratio for safe, stable flight.
Most small consumer drones can safely carry between 10% and 25% of their own take-off weight without losing stability or crashing. For the popular sub-250g “Mini” class, this translates to a modest 50g to 100g payload. Larger hobbyist drones, weighing between 500g and 900g, can usually handle 200g to 500g of extra gear. If you push your drone beyond these specific limits, the flight controller will struggle to maintain level flight, and your aircraft may simply drop from the sky during a sharp turn.
Prime for Young Adults — 6 Months Free
Exclusive Offer Amazon Prime for Young Adults, Students and 18–24s get six months of Prime free, then half price.
Start 6 Months Free As an Amazon Associate I earn from qualifying purchases.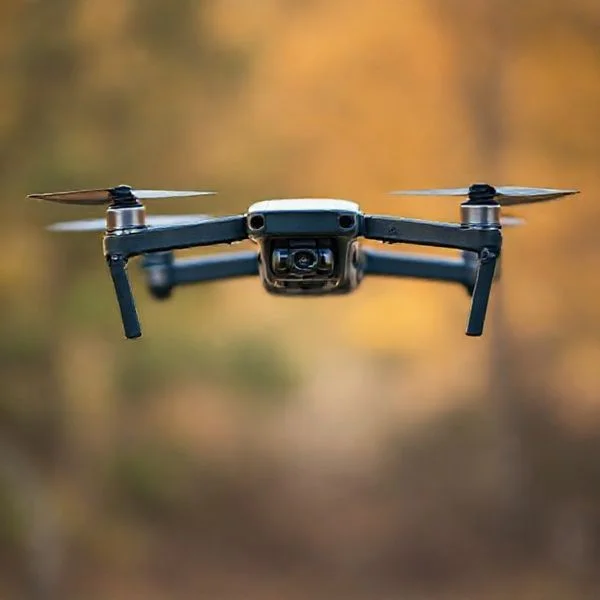
Understanding these limits is critical because every gram you add changes the drone’s center of gravity and power requirements. Whether you are mounting an external action camera, a searchlight, or a fishing line release, you are trading flight performance for utility. Overloading your drone doesn’t just make it sluggish; it puts immense strain on the Electronic Speed Controllers (ESCs) and can lead to permanent motor damage or a catastrophic mid-air battery failure.
Payload Capacity Comparison: Nano vs. Mini vs. Hobby Drones
Recommended Best Deal Products


The amount of weight your drone can carry depends almost entirely on its motor thrust-to-weight ratio. Most consumer drones are designed with a 2:1 ratio, meaning the motors produce twice as much thrust as the drone weighs. This provides the “overhead” needed for maneuvers and fighting the wind. When you add a payload, you eat into that overhead. Here is how the capacities break down across the most common small drone categories.
Ultralight and Nano Drones (Under 250g)
Drones like the DJI Mini 4 Pro or the Autel Evo Nano are engineered to stay under the 250g regulatory limit. Because they are so lightweight, they have very little spare thrust. Adding even a small accessory can significantly alter their flight characteristics. For these drones, the “safe” payload is generally 50g to 80g. Examples of common payloads for this class include:
- Lightweight LED strobes: 10g – 20g (Safe)
- Propeller guards: 25g – 40g (Safe, but reduces flight time)
- Small action cameras (like Insta360 GO 3): 35g – 60g (Limit-pushing)
Mid-Size Hobby Drones (500g to 1kg)
This category includes “prosumer” models like the DJI Air 3 or the Mavic 3 series. These drones have much larger motors and higher voltage batteries, providing significantly more lifting power. You can generally expect a payload capacity of 300g to 600g. At this level, the drone is stable enough to carry professional gear that would ground a smaller aircraft. Common payloads for this class include:
- Full-sized action cameras (GoPro Hero 12): 150g (Very stable)
- Payload drop mechanisms for fishing: 100g – 200g (Stable)
- External battery kits: 200g – 400g (Maximum limit)
Everything You Need to Know About Small Drone Payload Capacity
Determining the payload capacity of a small drone is more than just a matter of “will it fly.” It involves a delicate balance of physics, aerodynamics, and electrical engineering. If you overload a drone, you risk burning out the Electronic Speed Controllers (ESCs), overheating the motors, or causing a lithium-polymer (LiPo) battery to fail under extreme current draw. This guide will walk you through the precise steps to calculate, test, and verify the maximum weight your drone can safely carry while maintaining flight stability and safety. By following this walkthrough, you will avoid common pitfalls that lead to mid-air failures and ensure your equipment remains within its operational limits.
Step 1: Identify Your Drone’s Maximum Takeoff Weight (MTOW)
What you need: Your drone’s manufacturer user manual, technical specification sheet, or the manufacturer’s official website.
Instructions: Every drone is engineered with a specific Maximum Takeoff Weight (MTOW). This is the absolute maximum mass at which the aircraft is certified to fly while still being able to maneuver safely. Locate this figure in your manual. For small consumer drones like the DJI Mini series, the MTOW is often very close to the drone’s actual weight (around 249g) to comply with regulatory categories. For custom-built FPV (First Person View) drones, you may need to look at the thrust data for your specific motors. If the manual lists a “Payload Capacity,” note that this usually includes the battery. You must subtract the weight of the drone and its battery from the MTOW to find your “Available Payload Weight.”
Prime for Young Adults — 6 Months Free
Exclusive Offer Amazon Prime for Young Adults, Students and 18–24s get six months of Prime free, then half price.
Start 6 Months Free As an Amazon Associate I earn from qualifying purchases.Pro Tip: Never assume the MTOW is a “suggestion.” Flying even 10% over this limit significantly changes the drone’s inertia, making it much harder for the flight controller to stop the drone’s momentum during a descent.
Step 2: Calculate the Thrust-to-Weight Ratio
What you need: Motor thrust data sheets (usually found on the motor manufacturer’s website) and a digital kitchen scale (accurate to 0.1g).
Instructions: To fly safely, a drone should generally have a 2:1 thrust-to-weight ratio. This means if your drone weighs 500g, your motors should be capable of producing 1,000g of total thrust. For “small” drones, search for your motor model and look for the thrust output at 100% throttle with your specific propeller size and battery voltage (S-rating). Multiply the thrust of one motor by the number of motors (usually four). Divide this total thrust by two to find your ideal maximum flying weight. If your current drone weight plus your intended payload exceeds this 50% thrust mark, your drone will feel “sluggish” and may struggle to recover from wind gusts or rapid maneuvers.
Pro Tip: For racing or high-performance drones, a ratio of 4:1 or higher is common, but for utility or photography, 2:1 is the industry standard for stability and longevity.
Step 3: Measure the “Dry Weight” and “All-Up Weight” (AUW)
What you need: A high-precision digital scale and all components (drone, battery, props, and any existing accessories).
Instructions: Place your drone on the scale without the battery; this is the “Dry Weight.” Then, add the battery you intend to use to find the “All-Up Weight” (AUW). It is crucial to use the actual battery you will fly with, as different capacities (mAh) and cell counts (S) vary greatly in weight. For example, a 3S 1500mAh battery is significantly lighter than a 4S 1500mAh battery. Record the AUW in grams. Subtract this AUW from the MTOW identified in Step 1. The resulting number is your theoretical maximum payload. If your drone weighs 400g and the MTOW is 650g, your maximum payload is 250g, including any mounting brackets, screws, or cables used to attach the load.
Pro Tip: Don’t forget to include the weight of zip ties, velcro straps, or 3D-printed mounts, as these can add 10-30g surprisingly quickly.
Prime for Young Adults — 6 Months Free
Exclusive Offer Amazon Prime for Young Adults, Students and 18–24s get six months of Prime free, then half price.
Start 6 Months Free As an Amazon Associate I earn from qualifying purchases.Step 4: Factor in Environmental Density Altitude
What you need: A thermometer, a barometer (or a weather app), and a density altitude calculator.
Instructions: Drone payload capacity is not a static number; it changes based on the air density. High temperatures, high humidity, and high altitudes all result in “thin air,” which provides less lift for the propellers. If you are flying in a location 5,000 feet above sea level or on a very hot day (above 90°F), your drone’s lift efficiency can drop by as much as 15-20%. In these conditions, you must reduce your payload accordingly. If you calculated a 200g payload limit at sea level in cool weather, you should consider a 160g limit for high-altitude or high-heat environments to ensure the motors don’t overwork and desync.
Pro Tip: If your motors sound higher-pitched than usual just to maintain a hover, the air is thin, and you are likely pushing the limit of your payload capacity.
Step 5: Determine the Center of Gravity (CoG)
What you need: Your payload, the drone, and a steady finger or a balancing jig.
Instructions: How you carry the weight is just as important as how much weight you carry. The payload must be mounted as close to the Center of Gravity (CoG) as possible, which is usually the dead center of the frame where the two diagonal lines between motors intersect. If you mount a heavy camera too far forward, the front motors will have to spin significantly faster than the rear motors just to keep the drone level. This leads to uneven motor wear and reduced total lift capacity. Place the drone on a thin edge or balance it on your finger at the center point. If it tips, adjust the payload position until it remains perfectly level.
Pro Tip: If you must mount a payload off-center, you may need to offset the battery in the opposite direction to bring the CoG back to the geometric center of the motors.
Step 6: Perform an Incremental Stress Test
What you need: Small weights (coins or fishing sinkers), tape, and a safe, low-altitude testing area (indoors or a calm day outside).
Instructions: Do not jump straight to your maximum calculated payload. Start by attaching 25% of your intended weight. Hover the drone at eye level for two minutes and observe the “stability.” Look for “oscillations” (shaking) which indicate the flight controller is struggling to manage the weight. Gradually increase the weight in 25g increments. After each flight, land and touch the motors. If they are too hot to hold for more than five seconds, you have reached the thermal limit of your system. The maximum payload is the point where the drone can still climb vertically at a decent rate (at least 2-3 meters per second) at 75% throttle.
Pro Tip: Use a flight log app to check your “PWM” or “Motor Output” values. If your drone requires more than 60% throttle just to hover, you have very little “headroom” left for safety maneuvers.
Step 7: Monitor Battery Voltage Sag and Flight Time
What you need: An On-Screen Display (OSD) or telemetry-enabled radio controller.
Instructions: Adding weight increases the current draw (Amps) from your battery. This causes “voltage sag,” where the battery voltage drops temporarily under load. During your test flights, watch your voltage closely. If a 4S battery (normally 16.8V full) drops immediately to 14.0V upon takeoff, the weight is too heavy for the battery’s “C-rating” (discharge rate). Furthermore, calculate your new flight time. A drone that flies for 10 minutes empty might only fly for 4 minutes with a heavy payload. Set your low-battery warnings higher than usual (e.g., 3.6V per cell instead of 3.5V) because the extra weight makes an emergency “forced landing” much more dangerous.
Pro Tip: Heavy payloads put massive stress on the battery connectors (XT30 or XT60). Check for signs of melting or discoloration on the plastic connectors after a heavy-lift flight.
✅ Final Checklist
- Verified the manufacturer’s MTOW and subtracted the drone’s AUW to find the remaining capacity.
- Confirmed the thrust-to-weight ratio is at least 2:1 for safe maneuvering.
- Balanced the payload perfectly over the drone’s Center of Gravity (CoG).
- Performed a hover test and confirmed the motors are not overheating (warm is okay, hot is not).
- Adjusted flight timer and voltage alarms to account for increased battery drain.
Important Notes:
- Safety First: Adding weight increases the kinetic energy of the drone. A 249g drone is relatively safe, but a 500g drone carries significantly more force in an impact. Always fly away from people and property when testing new payloads.
- Legal Compliance: In many regions (like the US under FAA rules), adding a payload that brings a “sub-250g” drone over the 250g threshold requires you to register the drone and follow stricter flight regulations.
- When to seek professional help: If your drone wobbles uncontrollably or fails to lift off at 80% throttle, do not continue. You may need higher-KV motors or larger propellers, which requires advanced knowledge of ESC limits.
- Estimated Time: 1 to 2 hours for calculation and incremental testing.
- Cost Range: $0 – $50 (Depending on if you need to purchase a scale or specific mounting hardware).
The Impact of Extra Weight on Battery Life and Motor Health
Recommended Best Deal Products



Adding weight to your drone is never “free.” Even if the drone can physically lift the object, you are forcing the motors to spin at a much higher RPM just to maintain a hover. This creates a direct, linear decline in battery life and an exponential increase in heat generation within the internal components. You must calculate the cost of your payload in minutes, not just grams.
The Flight Time Trade-off
As a general rule of thumb for small drones, for every 100g of extra weight you add, you can expect to lose 2 to 5 minutes of flight time. A drone that typically flies for 30 minutes may only stay airborne for 18 minutes if it is carrying a heavy external camera. This happens because the battery must discharge at a higher rate (higher amperage) to provide the necessary power to the motors. This increased discharge rate also causes “voltage sag,” which might trigger a Low Battery Return-to-Home (RTH) much earlier than you anticipate.
Mechanical Strain and Motor Longevity
Your drone’s motors and ESCs are rated for specific thermal limits. When you fly a “heavy” drone, the motors work harder and get significantly hotter. If the motors are too hot to touch after a flight, you are likely overloading the aircraft. Prolonged use at maximum payload capacity will:
- Degrade motor bearings: The extra weight creates more vibration and friction.
- Risk ESC burnout: The speed controllers may overheat trying to manage the high current.
- Reduce maneuverability: The drone will have “momentum” that makes it harder to stop or change direction, increasing the risk of hitting obstacles.
To keep your drone healthy, aim to keep your total take-off weight (drone + accessories) at no more than 70% of the manufacturer’s maximum rated thrust. This ensures you still have enough power to recover from a sudden gust of wind or a rapid descent.
Critical Factors Affecting Drone Lifting Power and Thrust
It isn’t just about the size of the drone; several internal and external factors dictate how much your drone can actually lift before it struggles to stay airborne. Understanding these variables will help you avoid “brownouts” or motor failures during flight.
Battery Performance and Voltage
Your drone’s battery is the heart of its lifting capability. When you add a payload, the motors must spin faster to create the necessary thrust, which draws significantly more current from the battery. The voltage of your setup (often referred to as “S” ratings, like 3S or 4S) determines the potential RPM of your motors. A higher voltage setup generally provides more “punch” for lifting heavier objects, but the trade-off is a much faster drain on your energy reserves. Adding even a small accessory can slash your total flight time by 30% or more.
- Thrust-to-Weight Ratio: For a stable and safe flight, aim for a ratio of at least 2:1. This means your drone should be capable of producing twice as much thrust as its total weight, including the payload.
- Motor Heat: Carrying a heavy load forces motors to work at higher percentages of their capacity. Always check your motor temperature after landing with a new payload; if they are too hot to touch, you are carrying too much.
Air Density and Environmental Conditions
The environment plays a massive role in lifting capacity because drones rely on pushing air downward. If you are flying at high altitudes, the air is thinner, meaning your propellers have less to “grab.” This effectively reduces your maximum payload capacity compared to flying at sea level. Similarly, high humidity and extreme heat reduce air density. Conversely, while cold air is denser and provides better lift, it can drastically reduce battery efficiency, creating a different set of risks for a heavy drone.
Legal and Safety Implications of Modifying Small Drone Weight
Recommended Best Deal Products


Before you strap a heavy camera or a custom lighting rig to your small drone, you need to consider the rules of the sky. In many regions, the total takeoff weight of your drone dictates which laws apply to your flight.
The 250g Regulatory Threshold
Most popular “small” drones are specifically engineered to weigh exactly 249 grams. This is a critical number in the eyes of the FAA and other global aviation authorities. Drones weighing under 250g often enjoy fewer restrictions and may not require formal registration for recreational use. However, the moment you add a payload that pushes the weight to 251g, your drone moves into a new legal category. This usually requires you to register the aircraft, display a registration number, and comply with Remote ID regulations.
- Registration Requirements: In the US, any drone over 250g must be registered with the FAA, even for hobbyist use.
- Insurance Risks: Many drone insurance policies are only valid if the aircraft is operated within the manufacturer’s specified weight limits. Overloading your drone could void your coverage in the event of a crash.
Structural Integrity and Flight Stability
Every drone frame has a physical breaking point. Overloading a small drone places immense stress on the plastic or carbon fiber arms and the motor bearings. Furthermore, adding weight often shifts the Center of Gravity (CoG). If your payload is not perfectly centered, the flight controller will force specific motors to work harder than others to keep the drone level. This imbalance leads to “oscillations,” reduced wind resistance, and a much higher likelihood of a mid-air system failure. Safety isn’t just about following the law; it’s about ensuring your equipment doesn’t become a falling hazard.
Conclusion
Determining how much weight a small drone can carry is a delicate balancing act between physics, hardware limits, and legal regulations. While it is tempting to see how much your quadcopter can lift, remember that every extra gram affects your flight time, maneuverability, and safety margins. Most small consumer drones are built for agility and portability rather than heavy lifting, so treat their weight limits with respect to ensure a long life for your gear.
Ready to explore the possibilities of drone payloads? Your next steps should be to check your manufacturer’s manual for the Maximum Takeoff Weight (MTOW) and conduct a short test flight in a controlled, low-altitude environment whenever you add new accessories. Fly smart, stay within the legal limits, and enjoy the new perspectives your drone can capture!
❓ Frequently Asked Questions
How does altitude affect how much weight a drone can carry?
Higher altitudes have thinner air, providing less lift for the propellers. This means a drone’s effective payload capacity decreases as you fly at higher elevations compared to sea level.
Can I upgrade the motors to carry more weight?
While possible on DIY builds, upgrading motors usually requires larger batteries and ESCs. This increases the base weight, often resulting in diminishing returns for actual payload capacity.
What happens if I exceed the maximum takeoff weight (MTOW)?
Exceeding MTOW makes the drone sluggish, increases the risk of motor burnout, and can cause a brownout where the battery cannot supply enough peak current during maneuvers.
Are there specific accessories designed for carrying weight?
Yes, payload release mechanisms and landing gear extensions exist, but they should only be used if the total weight remains within the drone’s rated lifting capacity.
Why does flight time drop so drastically with even a small payload?
Small drones operate on a thin margin of efficiency; extra weight requires the motors to spin much faster to maintain hover, consuming battery power exponentially rather than linearly.
How do larger propellers change lifting capacity?
Larger propellers can increase lift but draw more current. If the motors aren’t rated for that load, they will overheat and potentially fail mid-flight.


