
Achieve a cinematic look by matching your shutter speed to double your frame rate using high-quality ND filters. Mastering multi-axis flight maneuvers like the parallax effect and orbit creates the dynamic depth found in professional cinema. Prioritize Golden Hour lighting and the Rule of Thirds to transform basic aerial clips into compelling visual stories.
🎯 Key Takeaways
- Takeaway 1:Apply the 180-degree shutter rule using ND filters for natural-looking motion blur.
- Takeaway 2:Combine gimbal tilts with lateral flight for professional multi-axis cinematic shots.
- Takeaway 3:Shoot at 24fps or 30fps to maintain a traditional filmic motion cadence.
- Takeaway 4:Utilize the Parallax effect by flying sideways while rotating the camera opposite.
- Takeaway 5:Plan flights during Golden Hour for soft shadows and rich, cinematic color tones.
To achieve professional, movie-like drone footage, you must master the intersection of manual camera control and multi-axis flight maneuvers. Cinematic results are not achieved through high-end hardware alone; they require locking your shutter speed to the 180-degree rule and executing deliberate, slow-speed movements that mimic expensive dolly and crane systems. By removing the drone’s automated decision-making, you gain the consistency needed for high-quality post-production and color grading.
Prime for Young Adults — 6 Months Free
Exclusive Offer Amazon Prime for Young Adults, Students and 18–24s get six months of Prime free, then half price.
Start 6 Months Free As an Amazon Associate I earn from qualifying purchases.
The transition from a “hobbyist” look to a “cinematic” aesthetic happens when you stop flying for speed and start flying for composition. This involves using specific camera settings to create natural motion blur and mastering stick inputs that involve two or more directions of travel simultaneously. In this guide, we will break down the exact settings and flight techniques used by professional aerial cinematographers to create high-value visuals.
Essential Camera Settings for a Filmic Aesthetic
Recommended Best Deal Products
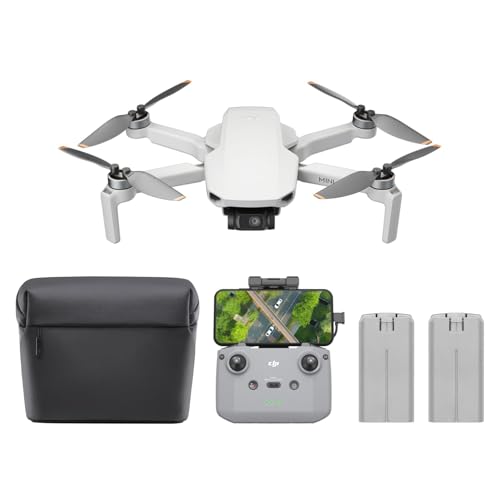


Professional cinema is defined by how motion is captured. To replicate the look of a big-budget film, you must move away from Auto mode. In Auto, the drone’s camera will constantly adjust exposure and white balance, leading to distracting shifts in the middle of your shot. Locking your settings ensures a uniform look from the first frame to the last.
Frame Rate and the 180-Degree Rule
The most important setting for a cinematic look is your frame rate. For the most natural, film-like motion, set your drone to 24 frames per second (fps). To achieve natural motion blur at 24fps, you must follow the 180-degree rule, which dictates that your shutter speed should be double your frame rate. This means your target shutter speed is 1/50th of a second.
- 24fps: The standard for cinematic motion blur.
- 60fps or 120fps: Only use these if you intend to slow the footage down for slow-motion shots in a 24fps timeline.
- Shutter Speed: Always aim for 1/50 (at 24fps) or 1/120 (at 60fps) to keep motion looking fluid rather than choppy.
Manual White Balance and Color Profiles
Never leave your White Balance on “Auto.” As the drone turns toward or away from the sun, the color temperature will shift, making it impossible to color grade properly. Set a manual Kelvin value (e.g., 5600K for daylight). Additionally, use a “Log” or “Flat” color profile (like D-Log or D-Cinelike). These profiles capture more dynamic range, preserving detail in the highlights and shadows that would otherwise be lost in standard profiles.
How to Capture Cinematic Drone Footage Like a Pro: A Practical Walkthrough
Creating professional-grade cinematic drone footage is about much more than just taking a camera into the sky; it requires a blend of technical camera knowledge, precise piloting skills, and an artistic eye for composition. This guide covers the essential techniques that transform shaky, amateur clips into breathtaking, cinematic sequences. By following these steps, you will learn how to manipulate light, control your aircraft with surgical precision, and use advanced camera settings to achieve that “big-screen” look. Whether you are filming a sweeping mountain range or an urban landscape, these principles are the foundation of high-end aerial cinematography.
Step 1: Configure Your Camera Settings for Motion Blur
What you need: A drone with a manual camera mode, a set of Neutral Density (ND) filters (ND4, ND8, ND16, and ND32), and a high-speed microSD card (U3 or V30 rated).
Instructions: To achieve a cinematic look, you must follow the “180-degree shutter rule.” First, set your frame rate to 24fps or 30fps, which are standard for film and television. Next, set your shutter speed to exactly double your frame rate (e.g., 1/48 or 1/60 of a second). Because this shutter speed is quite slow, your footage will likely be overexposed in daylight. This is where ND filters come in; attach the appropriate filter to block incoming light until your exposure meter reads 0 or +0.3. Finally, set your White Balance to a fixed “Sunny” or “Cloudy” setting rather than “Auto” to prevent the colors from shifting mid-flight.
Prime for Young Adults — 6 Months Free
Exclusive Offer Amazon Prime for Young Adults, Students and 18–24s get six months of Prime free, then half price.
Start 6 Months Free As an Amazon Associate I earn from qualifying purchases.Pro Tip: Never use Auto ISO. Keep your ISO at the lowest possible base setting (usually 100) to ensure your footage is free from digital noise, especially when filming during the golden hour.
Step 2: Master the Slow and Steady Reveal
What you need: A gimbal-stabilized drone and a subject obscured by a foreground element (like a line of trees or a building).
Instructions: The “Reveal” is a classic cinematic technique where the viewer is slowly introduced to a stunning landscape. Position your drone behind an obstacle so the main subject is hidden. Begin flying forward at a slow, consistent speed. As you clear the obstacle, the landscape should “pop” into view. The key here is “stick sensitivity.” Go into your drone’s controller settings and turn down the “Gimbal Pitch Sensitivity” and “EXP” values. This makes the drone react more slowly to your thumb movements, preventing jerky starts and stops that ruin the cinematic illusion.
Pro Tip: Practice “feathering” the sticks. Instead of pushing the control sticks to their edge, use micro-movements with the pads of your thumbs to create a slow, creeping motion that feels like a heavy Hollywood crane.
Step 3: Execute the Parallax Orbit Shot
What you need: A prominent, tall subject (like a lighthouse, church spire, or isolated tree) and a clear 360-degree flight path around it.
Instructions: The parallax effect occurs when the background moves at a different speed than the foreground, creating a sense of depth and scale. To perform a manual orbit, fly toward your subject and then simultaneously push the left stick (yaw) to the right and the right stick (roll) to the left (or vice versa). You are essentially flying in a circle while keeping the camera pointed at the center. Adjust the intensity of your stick inputs to keep the subject perfectly centered in the frame. Aim for a full 360-degree rotation over a span of 20 to 30 seconds for a majestic, slow-burn effect.
Pro Tip: If your drone has a “Point of Interest” (POI) autonomous mode, use it to get a perfect circle, but add a slight manual gimbal tilt-up during the move to make the shot feel less robotic and more intentional.
Prime for Young Adults — 6 Months Free
Exclusive Offer Amazon Prime for Young Adults, Students and 18–24s get six months of Prime free, then half price.
Start 6 Months Free As an Amazon Associate I earn from qualifying purchases.Step 4: Perform the “Dronie” and Rocket Shots
What you need: An interesting subject (like yourself or a vehicle) and a significant amount of vertical airspace.
Instructions: The “Dronie” is a reverse-away shot. Start with the drone just a few feet away from the subject. Simultaneously pull back on the right stick (pitch back) and push up on the left stick (throttle up). This creates a diagonal movement that pulls the viewer away from the subject, revealing the vastness of the surroundings. For a “Rocket” shot, point the camera straight down at the subject and push the throttle stick straight up. As the drone climbs, the subject stays in the center while the ground appears to shrink away. This is highly effective for transitioning between scenes.
Pro Tip: When doing a Dronie, add a slight gimbal tilt-down as you rise to keep the subject in the lower third of the frame, which creates a more balanced and professional composition.
Step 5: Utilize the Top-Down “God’s Eye” View
What you need: A location with strong geometric patterns, such as a winding road, a forest, or a shoreline.
Instructions: Tilt your gimbal to exactly -90 degrees so it is looking straight down. This perspective removes the horizon and turns the world into a two-dimensional canvas of patterns and textures. Fly the drone in a straight line following a road or the tide line. The key to making this cinematic is to move slowly. If you move too fast, the ground textures will become a blur. If you are following a moving object, like a car, match its speed exactly. This shot works best at altitudes between 100 and 200 feet to capture enough detail while still showing the larger pattern.
Pro Tip: Slowly rotate the drone (yaw) while flying forward in a top-down view. This “vortex” movement adds a layer of complexity and high-production value that is common in modern travel cinematography.
Step 6: High-Speed Low-Altitude Tracking
What you need: A wide-open space with some foreground interest (tall grass, rocks, or bushes) and a moving subject.
Instructions: Cinematic shots aren’t always high up. Flying low to the ground (between 3 and 10 feet) increases the perceived sense of speed because the foreground objects pass by the lens quickly. Position the drone behind or to the side of a moving subject, such as a person running or a cyclist. Maintain a consistent distance while staying low. If your drone has obstacle avoidance, ensure it is turned on, but be aware that sensors might struggle with thin branches or tall grass. This shot creates an intimate, high-energy feeling that mimics a “pursuit” camera car.
Pro Tip: Use “Sport Mode” for faster subjects, but be extremely careful as most drones disable obstacle avoidance in this mode. Only attempt this in wide-open areas where you have a clear line of sight.
Step 7: Color Grading in Post-Production
What you need: Video editing software (DaVinci Resolve, Adobe Premiere Pro) and footage shot in a “Log” or “Flat” color profile (like D-Log or D-Cinelike).
Instructions: Straight-out-of-the-camera footage often looks “digital” and overly sharpened. To get a cinematic look, you must color grade. If you shot in a Log profile, your footage will look gray and washed out initially. In your editor, apply a “Rec.709” LUT (Look Up Table) to bring back natural colors. Then, manually adjust the “Curves” to add contrast by lowering the blacks and raising the highlights. Finally, add a slight “Teal and Orange” tint—pushing blues into the shadows and warm oranges into the highlights—to give the footage that classic Hollywood color palette.
Pro Tip: Reduce the “Sharpening” in your drone’s internal settings to -1 or -2 before you fly. You can always add digital sharpness in post-production, but you cannot easily remove the harsh “over-sharpened” look that many drone sensors produce by default.
✅ Final Checklist
- Is the frame rate set to 24fps or 30fps with the 180-degree shutter rule applied via ND filters?
- Are all flights conducted in manual exposure and fixed white balance to prevent mid-shot flickering?
- Did you verify that “Airspace Authorization” (LAANC) was obtained if flying in controlled airspace?
- Have you checked for “micro-jitters” in the footage and adjusted gimbal sensitivity accordingly?
- Is the microSD card cleared and formatted for the current session to avoid “Card Slow” errors?
Important Notes:
- Safety: Always maintain a Visual Line of Sight (VLOS) with your drone. Do not fly over people or moving vehicles unless your drone meets specific weight categories or you have a waiver.
- Professional Help: If you are filming for a commercial client, you must have a Part 107 license (in the US) or the equivalent certification for your country.
- Estimated Time: Expect to spend 2-3 hours on-site for a 30-minute flight session to account for lighting changes and battery swaps.
- Cost Range: ND filters typically cost $50–$150; high-end editing software ranges from free (DaVinci Resolve) to $20/month (Adobe Premiere).
The Role of ND Filters in Achieving Motion Blur
Recommended Best Deal Products


Because the 180-degree rule requires a slow shutter speed (like 1/50), your footage will be extremely overexposed in daylight. Drone cameras typically have fixed apertures (usually f/2.8), meaning you cannot “stop down” the lens to let in less light. This is where Neutral Density (ND) filters become the most important accessory in your kit.
Selecting the Right Filter Strength
ND filters act as sunglasses for your drone’s sensor. They reduce the amount of light entering the lens without changing the color of the scene, allowing you to maintain that crucial 1/50 shutter speed even in bright sun. Choosing the right filter depends on the intensity of the light:
- ND8: Best for “golden hour” or heavily overcast days.
- ND16: Ideal for moderately bright or partly cloudy conditions.
- ND32: The standard for bright, sunny days.
- ND64: Necessary for extremely bright conditions, such as high-altitude snow or desert sun.
Why Motion Blur Matters
Without an ND filter, your drone will likely shoot at a shutter speed of 1/1000 or higher to compensate for the light. This creates a “staccato” or “jittery” effect where every frame is perfectly sharp, lacking the motion blur our eyes expect to see. Proper motion blur smooths out small vibrations and makes the movement of the ground feel faster and more cinematic, especially when flying low to the surface.
Mastering Professional Flight Maneuvers
Cinematic shots are defined by multi-axis movement. This means you are moving the drone in at least two directions while simultaneously adjusting the camera gimbal. The goal is to avoid “robotic” movements. Instead, aim for fluid, sweeping motions that guide the viewer’s eye toward a specific subject.
The Classic Parallax (Point of Interest)
The Parallax shot is the gold standard of drone cinematography. It involves circling a subject while keeping it perfectly centered, creating a sense of depth as the background moves faster than the foreground. This requires coordinated input from both control sticks.
- The Setup: Fly toward your subject and position it in the center of the frame.
- Left Stick (Yaw): Gently push the stick left to rotate the drone’s nose.
- Right Stick (Roll): Simultaneously push the stick right to strafe (slide) the drone in the opposite direction.
- Refinement: The speed of your yaw must match the speed of your roll to keep the subject locked in the center. Start with very small, light touches on the sticks.
The Reveal (The Slow Crane)
This maneuver mimics a Hollywood crane shot. It starts with a low-detail foreground or a downward-facing camera and slowly reveals a vast landscape. It is highly effective for opening a scene or establishing a location.
- The Setup: Fly low to the ground or an object, with your gimbal tilted 90 degrees straight down.
- Left Stick (Throttle): Push up slowly to gain altitude.
- Gimbal Dial: As you rise, slowly rotate the gimbal dial to tilt the camera up toward the horizon.
- Key Tip: The “reveal” should be timed so the camera reaches the horizon exactly as the drone reaches its peak height. Smoothness is critical; any sudden jerks in the gimbal tilt will ruin the immersion.
Advanced Flight Maneuvers for Dynamic Visuals
Recommended Best Deal Products

Once you have mastered basic hovering, the key to truly cinematic footage lies in multi-axis movement. Static shots are useful, but motion creates a sense of scale and emotion that draws the viewer in. By combining vertical and horizontal movements, you can replicate the look of high-end Hollywood crane shots or dollies.
The Power of the Parallax Effect
The parallax effect occurs when objects in the foreground move across the frame faster than objects in the background. This technique adds an incredible sense of depth to your aerial videos. It is most effective when you fly close to a specific subject—like a lone tree or a rocky outcrop—while moving the drone laterally.
- The Reveal Shot: Start low behind an obstacle and fly upward while tilting the camera down to unveil a stunning landscape.
- The Orbit: Flying in a perfect circle around a subject keeps the focus centered while the background sweeps by dramatically.
- The Helix: This combines an upward climb with a circular rotation, creating a dizzying, grand perspective of a location.
Intentional Tracking and Proximity
Cinematic shots often rely on “passing” movements. Flying through a narrow gap between trees or skimming just a few feet above a riverbed creates a rush of speed that high-altitude shots lack. This proximity to the ground or obstacles translates into a more visceral experience for the audience. When tracking a moving subject, such as a car or a cyclist, maintaining a consistent distance is vital for a professional look. Smoothness is your best friend here; jerky movements immediately break the immersion of a cinematic sequence.
Composition and Lighting Strategies for Aerial Cinematography
Even the smoothest flight can fall flat if the composition is cluttered or the lighting is harsh. Aerial photography follows many of the same rules as traditional ground-based filming, but with the added challenge of a much wider field of view. Mastering how you frame your environment is what separates a casual “drone video” from a piece of cinema.
Framing the “God’s Eye View”
The top-down perspective, often called the God’s Eye View, is a staple of modern drone cinematography. By pointing the gimbal 90 degrees straight down, you turn the world into a two-dimensional canvas. This is perfect for capturing patterns, textures, and symmetry that are invisible from the ground.
- Leading Lines: Use roads, shorelines, or forest edges to lead the viewer’s eye through the frame.
- The Rule of Thirds: Avoid placing your main subject dead-center; instead, align them with the grid intersections to create a more balanced and interesting image.
- Negative Space: Don’t be afraid of “empty” areas like a vast ocean or a desert. Large patches of uniform color can emphasize the isolation of your subject.
Chasing the Golden Hour Glow
Lighting is arguably the most important factor in drone filming. High-noon sun creates harsh, vertical shadows that often look unflattering and “flat” from above. To get that rich, cinematic glow, you should aim to fly during the Golden Hour—the hour after sunrise or before sunset. During this time, the sun is low on the horizon, casting long, dramatic shadows that define the topography of the land. This side-lighting adds texture to mountains and buildings, giving your footage a high-production-value aesthetic without the need for heavy color grading.
Conclusion
Mastering cinematic drone shots is a journey that blends technical camera settings with creative flight maneuvers. By prioritizing manual control, understanding the physics of the parallax effect, and timing your flights to coincide with the best natural light, you can transform simple aerial clips into breathtaking visual stories. Remember that the best equipment is only as good as the pilot’s eye for composition.
Next Steps: Head to a wide-open park to practice your multi-axis orbits at different speeds. Once you feel comfortable, try incorporating foreground elements to add depth to your frames. Every flight is an opportunity to refine your style, so keep your batteries charged and stay creative. The sky is no longer the limit—it’s your canvas!
❓ Frequently Asked Questions
How do ND filters impact the quality of cinematic drone shots?
ND filters reduce the light hitting the sensor without altering color, allowing you to lock your shutter speed to the 180-degree rule. This prevents ‘jittery’ footage and introduces organic motion blur that mimics high-end film cameras used in Hollywood.
What are the best gimbal settings for smooth cinematic transitions?
Set your gimbal pitch speed and smoothness (expo) to lower values in your drone’s flight app. This ensures that camera tilts start and stop gradually, avoiding the mechanical, robotic appearance often seen in amateur aerial footage.
How do I choose between 4K 24fps and 4K 60fps for my project?
Use 24fps for standard storytelling where you want a classic film look and don’t plan to change the speed in post. Switch to 60fps if you intend to slow the footage down to 40% for dreamy, butter-smooth slow-motion sequences.
Why is manual exposure better than auto for cinematic drone work?
Auto exposure causes the brightness to shift mid-flight as the drone moves toward or away from light sources, which looks unprofessional. Manual exposure locks your settings, ensuring consistent lighting across the entire duration of your cinematic flight path.
What is the difference between a ‘Reveal’ shot and a ‘Fly-over’?
A reveal shot typically starts focused on a foreground object and tilts up or moves forward to show the landscape. A fly-over maintains a consistent altitude and angle, moving directly over a subject to convey scale and progression.
How does the Rule of Thirds apply specifically to aerial cinematography?
By placing your subject on the grid intersections of your controller screen, you create a more balanced and engaging composition. It helps guide the viewer’s eye through the vast landscape and prevents the ‘centered-subject’ look that can feel static.


