
Mastering basic joystick controls is the primary foundation for any new pilot to ensure a safe and controlled flight. By implementing a rigorous pre-flight safety checklist and maintaining situational awareness, you can significantly reduce the risk of crashes and equipment damage.
🎯 Key Takeaways
- Practice stick movements like throttle and roll in a wide, open field.
- Verify a strong GPS lock before takeoff to ensure reliable return-to-home functionality.
- Always maintain a visual line of sight to avoid collisions and signal loss.
- Check local drone regulations and no-fly zones before every flight session.
- Monitor battery levels closely and land when you reach 25% remaining power.
To safely operate your drone for the first time, you must master the four primary directional inputs—throttle, yaw, pitch, and roll—while strictly adhering to a pre-flight safety checklist. Success in drone piloting is not about speed; it is about muscle memory and environmental awareness. By focusing on smooth, incremental stick movements and ensuring your hardware is synchronized with GPS satellites before takeoff, you eliminate the most common causes of beginner crashes and legal infractions.
Mastering these basics matters because it protects your investment and ensures public safety. A single jerky movement or a forgotten compass calibration can lead to a “flyaway” or a collision with obstacles. This guide focuses on the mechanical foundations of flight, stripping away complex cinematography to give you the practical skills needed to launch, hover, and navigate with total confidence.
Prime for Young Adults — 6 Months Free
Exclusive Offer Amazon Prime for Young Adults, Students and 18–24s get six months of Prime free, then half price.
Start 6 Months Free As an Amazon Associate I earn from qualifying purchases.Core Flight Controls: Understanding Pitch, Roll, Yaw, and Throttle
Recommended Best Deal Products


Most modern consumer drones use a control configuration known as “Mode 2.” In this setup, the left joystick handles the vertical and rotational movements, while the right joystick manages the horizontal direction. Understanding how these inputs interact is the first step toward becoming a proficient pilot. You should treat the joysticks with extreme gentleness; a millimeter of movement on the controller can result in several feet of movement in the air.
Mastering the Left Stick: Throttle and Yaw
The left stick is your primary tool for managing the drone’s position in 3D space relative to the ground and its own axis. Throttle (pushing the stick up or down) controls the speed of the motors. Pushing up increases RPMs, causing the drone to climb, while pulling down decreases RPMs for a descent. Yaw (pushing the stick left or right) rotates the “nose” of the drone. This does not change the drone’s location, but it changes the direction the camera and sensors are facing.
- Pro Tip: When practicing yaw, visualize the drone spinning on a fixed vertical pole.
- Smooth Ascent: Slowly push the throttle until the drone is at eye level, then let go. Most modern drones will hover perfectly in place once you release the stick.
- Orientation: If you rotate the drone 180 degrees (so it faces you), the directional controls will feel reversed. Practice keeping the drone’s “tail” facing you during your first few flights to keep movements intuitive.
Navigating with the Right Stick: Pitch and Roll
The right stick controls the drone’s lateral movement. Pitch (up and down) moves the drone forward and backward. Roll (left and right) slides the drone sideways. Unlike a car, a drone can move in any direction without turning its nose first. This is called “strafing.” Mastering the right stick allows you to navigate around obstacles while keeping your camera pointed at a specific target.
- Pitching Forward: Pushing the stick up tilts the drone’s nose down, propelling it forward.
- Rolling: Pushing the stick left tilts the entire craft to the left. This is useful for adjusting your position against a light crosswind.
- Combining Inputs: To move diagonally, push the right stick into the corners (e.g., top-right for a forward-right diagonal).
Master Drone Piloting in 8 Simple Steps
Taking to the skies with a drone is an exhilarating experience that combines technology, photography, and pure skill. However, without a structured approach, your first flight can quickly lead to a costly crash or a violation of local regulations. This guide is designed to take you from a complete novice to a confident pilot by breaking down the complexities of flight dynamics, safety protocols, and control mastery. By following these steps, you will ensure the longevity of your equipment and the safety of those around you while capturing stunning aerial perspectives.
Step 1: Understanding Legal Requirements and Site Selection
What you need: A smartphone with airspace awareness apps (like B4UFLY or AirControl), your drone’s registration number (if applicable), and a local map.
Instructions: Before you even power on your drone, you must ensure you are flying legally. In many regions, drones over 250g must be registered with civil aviation authorities (like the FAA in the US or CAA in the UK). Use a verified app to check for “No Fly Zones” or Temporary Flight Restrictions (TFRs) in your area. Avoid flying near airports, military bases, or crowded events. Once legalities are cleared, choose a wide-open practice field—ideally a park with at least 100 square feet of unobstructed space, no power lines, and short grass. Grass is much more forgiving than asphalt if you experience a hard landing during your first few attempts.
Pro Tip: Always keep your drone within your “Visual Line of Sight” (VLOS). Even if your drone has a high-definition video feed, looking at the drone directly helps you understand its physical orientation and avoid nearby obstacles that the camera might miss.
Prime for Young Adults — 6 Months Free
Exclusive Offer Amazon Prime for Young Adults, Students and 18–24s get six months of Prime free, then half price.
Start 6 Months Free As an Amazon Associate I earn from qualifying purchases.Step 2: Decoding the Remote Controller (Transmitter)
What you need: Your drone’s remote controller and the user manual.
Instructions: Most drones use “Mode 2” configuration for the sticks. The left stick controls the Throttle (vertical movement: up and down) and the Yaw (rotation: turning left or right). The right stick controls the Pitch (forward and backward movement) and the Roll (lateral movement: sliding left or right). Spend at least 15 minutes holding the controller while the drone is off, visualizing how each movement affects flight. Understand the auxiliary buttons as well, such as the “Return to Home” (RTH) button and the gimbal wheel, which tilts the camera. Knowing these controls by muscle memory is vital for reacting quickly during unexpected gusts of wind.
Pro Tip: Practice “pinching” the control sticks between your thumb and index finger rather than just using your thumbs. This “pinch” method offers significantly more precision for fine adjustments during flight.
Step 3: Pre-Flight Hardware Inspection
What you need: Fully charged flight batteries, a high-speed microSD card, and a microfiber cloth.
Instructions: Safety begins on the ground. Check each propeller for hairline cracks or chips; a damaged blade can shatter mid-air due to high centrifugal forces. Ensure the battery is clicked firmly into place—a loose battery can disconnect during flight maneuvers, leading to a catastrophic “drop from the sky.” Clean the camera lens with a microfiber cloth and ensure the gimbal protector is removed. Check that your microSD card has enough space and is formatted correctly. Finally, calibrate the drone’s compass if the app prompts you. This usually involves rotating the drone 360 degrees horizontally and vertically to ensure the internal GPS understands its orientation relative to the Earth’s magnetic field.
Pro Tip: Never calibrate your compass near large metal structures, reinforced concrete, or cars, as the metal interference can cause the calibration to fail or lead to “flyaways” once you are in the air.
Step 4: Executing a Controlled Takeoff and Hover
What you need: A flat, level landing pad or a clear patch of ground.
Prime for Young Adults — 6 Months Free
Exclusive Offer Amazon Prime for Young Adults, Students and 18–24s get six months of Prime free, then half price.
Start 6 Months Free As an Amazon Associate I earn from qualifying purchases.Instructions: Power on your remote first, then the drone. Wait for a solid GPS lock (usually indicated by a green icon or at least 10–12 satellites). Gently push the left stick (throttle) upward until the drone rises to about 5 to 10 feet (eye level). Let go of the sticks and observe. A healthy drone should hover in place using its GPS and downward sensors. If it drifts slightly, resist the urge to over-correct; small, “tickling” movements on the sticks are all that is required. Spend 5 minutes just watching the drone hover to build confidence in the technology and to ensure the aircraft is stable before moving further away.
Pro Tip: If your drone has an “Auto-Takeoff” button, use it for your first few flights. It will automatically bring the drone to a stable hover at a safe altitude, reducing the risk of a ground-loop tip-over.
Step 5: Mastering Basic Directional Movement
What you need: An open area with at least 50 feet of clearance in all directions.
Instructions: Once you are comfortable with the hover, it is time to move. Push the right stick forward to fly 20 feet away, then pull it back to return. Repeat this moving left and right (rolling). The goal is to keep the drone at a constant altitude throughout these movements. Next, practice the “Square Pattern”: fly forward, roll right, fly backward, and roll left until you return to your starting point. Keep the “nose” (the camera side) of the drone facing away from you at all times during this step. This ensures that “left” on your stick remains “left” from your physical perspective, preventing orientation confusion.
Pro Tip: Imagine the drone is connected to your controller by a piece of string. Move slowly and smoothly; jerky movements can cause the drone to oscillate and make it harder to control.
Step 6: Understanding and Practicing Yaw
What you need: A visual marker on the ground (like a cone or a specific patch of grass).
Instructions: Yaw is the rotation of the drone on its vertical axis. While hovering, slowly push the left stick to the left or right. Notice how the drone spins in place without changing its position in the sky. This is how you “aim” the camera. Combine Yaw with Pitch to fly in circles. Start by flying forward while slowly applying a small amount of Yaw. This is one of the most difficult skills for beginners because it changes the drone’s orientation. When the drone is facing you, the controls for Pitch and Roll will feel “reversed.” Practice rotating the drone 90 degrees, flying a bit, and then rotating it back until you are comfortable with how direction changes relative to the nose.
Pro Tip: If you ever get disoriented and don’t know which way the drone is facing, look at your screen’s map or “radar” icon, or simply let go of the sticks and hit the “Return to Home” button to let the computer take over.
Step 7: Safe Landing Procedures
What you need: A clear, dust-free landing zone.
Instructions: As your battery reaches 25-30%, it is time to land. Bring the drone back to a hover directly over your landing spot at an altitude of about 10 feet. Slowly pull down on the left stick (throttle). As the drone nears the ground, maintain a steady, slow descent. Do not “slam” the stick down. Once the drone touches the ground, continue holding the throttle stick down for 2-3 seconds until the motors stop spinning completely. If you are landing on tall grass, be careful that the blades do not get tangled in the motors. Once the motors stop, power off the drone first, and then the remote controller.
Pro Tip: Avoid “Hand Catching” your drone until you are an expert. The spinning propellers can cause serious injury if the drone suddenly compensates for a gust of wind while your hand is near the sensors.
Step 8: Post-Flight Maintenance and Data Management
What you need: A battery fire-safe bag (LiPo bag) and a computer.
Instructions: After your flight, check the temperature of your batteries. If they feel hot, let them cool down to room temperature before charging them; charging a hot battery significantly shortens its lifespan. Remove the microSD card and transfer your footage to a computer to clear space for your next session. Wipe down the drone body to remove any grass stains or dead bugs, particularly around the motor vents. Store your batteries at a “storage charge” (usually 50-60%) if you do not plan to fly again within the next 48 hours. Keeping batteries fully charged or fully depleted for long periods causes permanent capacity loss.
Pro Tip: Keep a flight log. Recording your flight time, location, and any mechanical issues will help you track the health of your batteries and propellers over the long term.
✅ Final Checklist
- Check local airspace for restrictions and weather conditions (wind under 15 mph).
- Inspect propellers for damage and ensure the battery is securely locked.
- Calibrate the compass and Wait for a strong GPS signal (10+ satellites).
- Verify that the “Return to Home” altitude is set higher than the tallest obstacle in the area.
- Ensure the microSD card is inserted and has enough storage for the flight.
Important Notes:
- Safety First: Never fly over people, moving vehicles, or private property without permission. Always yield right-of-way to manned aircraft.
- When to Seek Help: If your drone exhibits “toilet bowl effect” (spinning in widening circles) or if the gimbal vibrates excessively, contact the manufacturer or a professional technician.
- Estimated Time: Initial setup and first flight typically take 60–90 minutes.
- Cost Range: Beginner GPS drones range from $300 to $800, plus $100–$200 for essential accessories like extra batteries and a carrying case.
Essential Pre-Flight Safety Protocols and Equipment Checks
Recommended Best Deal Products
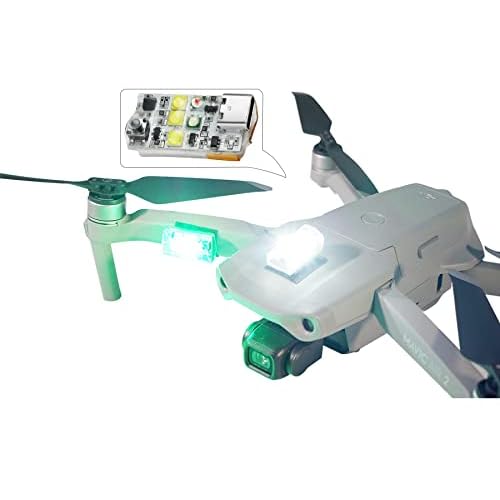
Safe flying begins long before you push the throttle. A systematic pre-flight check ensures that the technology is functioning correctly and that you aren’t violating local airspace regulations. Skipping these steps is the leading cause of “mid-air glitches” that can destroy your equipment.
Hardware and Software Readiness
Physical inspections are mandatory every time you fly. Start by examining your propellers for hairline cracks or chips. Even a tiny nick can cause high-frequency vibrations that destabilize the flight controller. Ensure your batteries are fully seated and “clicked” into place; a loose battery can disconnect during high-G maneuvers, leading to a total power failure and a free-fall.
- Firmware Updates: Always check the manufacturer’s app for firmware updates before leaving your home Wi-Fi. Updates often include critical patches for flight stability and updated “No-Fly Zone” databases.
- Compass Calibration: If you have moved more than 20 miles since your last flight, or if the app prompts you, perform a compass calibration. This prevents “toilet bowling,” where the drone circles uncontrollably because its internal map doesn’t match the magnetic north.
- SD Card Check: Ensure your high-speed SD card is inserted and has enough space. While not a safety risk, landing just to fix a storage issue wastes precious battery life.
Securing a Safe Launch Zone and GPS Lock
Your environment dictates your safety. Before powering on, scan the area for “invisible” hazards like power lines, thin tree branches, and birds. Birds, particularly hawks and magpies, often view drones as threats and may attack them mid-air. Once you power on the drone, do not take off immediately.
- Wait for Satellites: Your drone needs to connect to at least 10–12 satellites to establish a reliable “Home Point.”
- Verify the Home Point: Check your screen to ensure the “H” icon matches your actual location. This ensures that if the signal is lost, the drone will return to you rather than flying to a previous launch site.
- Check Interference: If the app warns of high electromagnetic interference (common near cell towers or large metal structures), move your launch point at least 50 feet away.
- Set RTH Altitude: Set your “Return to Home” (RTH) altitude higher than the tallest obstacle in the area (usually 100–150 feet) to prevent the drone from hitting a tree on its way back to you.
Legal Compliance and Navigating Airspace Regulations
Understanding Regional Restrictions
Before you even power up your drone, you must understand that the sky is not a free-for-all. Every country has specific governing bodies—like the FAA in the United States or CAA in the UK—that set the rules for unmanned aerial vehicles (UAVs). Many beginners assume that small drones do not require registration, but in many regions, any drone weighing over 250 grams must be officially registered with the government. Failing to comply with these local mandates can lead to hefty fines or even equipment seizure.
- Maximum Altitude: Most regions cap recreational flights at 400 feet (120 meters) above ground level. This ensures you stay well below the paths of manned aircraft like helicopters and planes.
- Privacy and Trespassing: Avoid flying over private property without explicit permission. “Prying eyes” are a major concern for neighbors, and respect for privacy is key to keeping the hobby accessible for everyone.
- Strict No-Fly Zones: Airports, military bases, and national parks are typically off-limits. Flying near an airport is not just a violation of the law; it is a significant safety hazard that can shut down commercial travel.
Leveraging Airspace Apps
You do not need to be an aviation expert to know where it is safe to fly. Modern technology has made compliance much easier through dedicated mobile applications. Apps like B4UFLY or Aloft provide real-time maps that highlight restricted zones, temporary flight restrictions (TFRs), and nearby helipads. Always check these apps before you take off, as temporary restrictions can pop up unexpectedly due to sporting events, VIP movement, or emergency wildfire operations. Using these tools ensures that you are always flying in “clear” air, giving you peace of mind while you focus on your piloting skills.
Common Beginner Mistakes and Crash Prevention Strategies
The Dangers of “Return to Home” Over-Reliance
Most modern drones feature a “Return to Home” (RTH) button that uses GPS to bring the craft back to its takeoff point automatically. While this is a lifesaver, many beginners treat it as a “magic fix” for poor navigation. A common mistake is failing to set the RTH altitude in the settings menu before taking off. If your RTH altitude is set to 60 feet and there is an 80-foot tree between you and the drone, your aircraft will fly straight into the branches during its automated return. Relying on this feature during low-battery situations is also risky, as strong head-on winds might drain the remaining power before the drone reaches you.
- Obstacle Awareness: Do not assume your drone’s sensors will detect everything. Thin wires, power lines, and bare tree branches are often invisible to obstacle avoidance systems.
- Battery Management: Always aim to land with at least 25% battery remaining. Lithium-polymer batteries can drain rapidly during the final few percentages, especially in cold weather or high winds.
- Propeller Health: Check your props for small nicks or cracks before every flight. Even a tiny chip can cause vibrations that lead to a mid-air motor failure.
Maintaining Visual Line of Sight (VLOS)
One of the most frequent causes of crashes is “screen fixation.” Beginners often spend so much time looking at their tablet or phone screen that they lose track of the drone’s actual position in the sky. This is how drones end up stuck in distant canopy layers or lost behind buildings. By keeping your eyes on the aircraft—known as maintaining Visual Line of Sight (VLOS)—you can react much faster to sudden gusts of wind or birds that might be showing interest in your gear. For example, if you see your drone tilting aggressively, it is likely battling a high-altitude breeze that you wouldn’t have noticed by just looking at the camera feed. Seeing this visually allows you to descend to calmer air before the drone is blown out of range.
Conclusion: Your Journey to the Skies
Mastering the art of drone flight is an incredibly rewarding experience that perfectly blends technology with creativity. By focusing on safety, legal compliance, and consistent practice, you transform from a nervous beginner into a confident pilot. Remember that the best pilots are those who respect their equipment and the environment around them. Your goal shouldn’t just be to fly high, but to fly responsibly so you can enjoy this hobby for years to come.
As an actionable next step, find a wide-open field away from crowds and trees to practice your hovering and basic movements. Once you feel comfortable, start exploring the unique camera angles that only a drone can provide. Safe flying, and enjoy the view from above!
❓ Frequently Asked Questions
Why is a GPS lock vital before taking off?
A solid GPS lock ensures the drone can hover precisely in one spot without drifting. It also records the ‘Home Point,’ allowing the drone to return safely if the signal drops or the battery gets too low.
Do I need to register my drone before flying?
In many countries, including the US, drones weighing over 250g must be registered with the aviation authority (like the FAA). Even for smaller drones, you should check local laws regarding recreational flight exams.
What is ‘Headless Mode’ and should I use it?
Headless Mode makes the drone move relative to the pilot’s orientation rather than the drone’s ‘nose.’ It is helpful for absolute beginners who struggle with orientation, but it is better to learn standard flight for long-term skill building.
How do I avoid losing my drone during a flight?
Always keep the drone within your visual line of sight and avoid flying behind large obstacles like buildings or trees which can block signals. Set your Return to Home altitude higher than the tallest obstacle in the area.
What are the best environmental conditions for a first flight?
Look for a day with clear visibility, very light wind, and no precipitation. An empty park or a large field away from power lines and crowds is the ideal location for practice.
How should I handle a low battery warning?
When the first low battery warning triggers (usually around 25-30%), start flying the drone back toward yourself immediately. Do not wait for the critical warning, as wind or distance might prevent a safe landing.