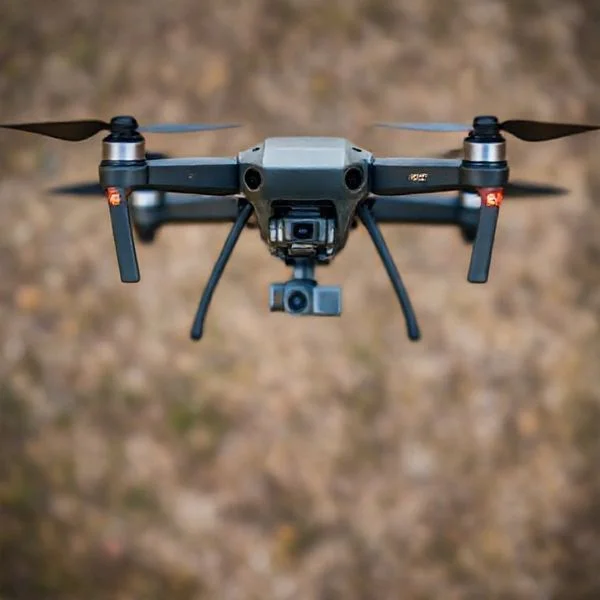
To turn off a DJI drone, use the universal ‘press once, then press and hold’ sequence on the power button. This method prevents accidental shutdowns during flight and is consistent across the aircraft and all DJI remote controllers.
🎯 Key Takeaways
- Use the ‘short press then 2-second long press’ sequence for all DJI devices.
- Wait for the gimbal to go limp before moving or storing the drone.
- Turn off the aircraft first, followed by the remote controller, for safety.
- Monitor the LED indicators to confirm the power-down cycle is complete.
- Remove the Intelligent Flight Battery if storing the drone for over 10 days.
To turn off a DJI drone, you must perform the specific “short-press, then long-press” sequence on the Intelligent Flight Battery. Press the power button once quickly to check the current charge level, then immediately press and hold the button for approximately two seconds. You must continue holding until the status LEDs blink in a descending sequence and the drone emits its signature power-down chime. This exact rhythm is the universal standard across the DJI ecosystem, including the Mini, Air, Mavic, and Avata series.
Prime for Young Adults — 6 Months Free
Exclusive Offer Amazon Prime for Young Adults, Students and 18–24s get six months of Prime free, then half price.
Start 6 Months Free As an Amazon Associate I earn from qualifying purchases.
This safety mechanism exists for one primary reason: to prevent accidental power loss while your drone is airborne. A single-press system would be a catastrophic design flaw, as a minor bump to the battery during a high-speed maneuver could lead to a total loss of power. By requiring a deliberate, two-step action, DJI ensures that your drone only shuts down when you are safely on the ground and ready to pack away your gear. Proper shutdown also allows the onboard computer to save flight logs and park the gimbal motors safely.
Understanding the DJI Double-Press Safety Mechanism
Recommended Best Deal Products


The “Press-then-Hold” sequence is the cornerstone of DJI’s hardware safety protocol. When you tap the button the first time, the Intelligent Flight Battery wakes up its internal processor to display the remaining capacity. The second, longer press signals the Electronic Speed Controllers (ESCs) to cut power to the motors and tells the flight controller to begin the software shutdown routine. This process typically takes between 1.5 and 2 seconds of continuous pressure.
Mastering the Timing of the Second Press
Timing is everything when powering down. If you wait too long between the first and second press, the battery will simply time out and show the charge level again. If you press too quickly, the system may not register the second input. Follow these steps for a perfect shutdown every time:
- The Initial Tap: Press the button for less than half a second. The LEDs will glow to show the battery health.
- The Transition: Release the button for a fraction of a second.
- The Hold: Press again and keep your finger firmly on the button.
- The Release: Only let go once the last LED light has extinguished and the cooling fans stop spinning.
Remote Controller Variations: RC-N1, DJI RC, and RC Pro
While the drone itself always uses the battery button, the sequence for your Remote Controller (RC) is identical but located on the face of the device. Whether you are using the smartphone-dependent RC-N1 or the DJI RC with a built-in screen, the double-press rule applies. On the DJI RC and RC Pro, the power button is usually on the top right or face; holding it for two seconds triggers the screen to go dark. It is critical to turn the drone off before the remote controller to maintain a constant signal link until the aircraft is fully powered down.
Master Shutting Down Your DJI Drone in 7 Simple Steps
Shutting down a DJI drone might seem like a straightforward task, but doing it correctly is vital for the long-term health of your Intelligent Flight Battery and the safety of your flight data. Improperly powering off your aircraft can lead to corrupted video files, shortened battery life, or even accidental motor activation. This guide covers the specific physical sequences, safety protocols, and storage preparation required to ensure your DJI drone—whether it’s a Mini, Air, Mavic, or Enterprise series—is powered down safely every single time.
Step 1: Secure a Safe Landing and Stabilization
What you need: A flat, dry landing surface (preferably a landing pad) and clear surroundings.
Instructions: Before you even think about the power button, you must ensure the aircraft is fully grounded and immobile. Bring the drone to a hover at approximately 3 feet, then use the left stick to descend slowly until the drone touches the ground and the motors stop automatically. If you are landing on uneven terrain or tall grass, use a portable landing pad to prevent the gimbal from getting caught. Once the propellers have completely stopped spinning, wait an additional 5 to 10 seconds. This allows the internal cooling fans to circulate air one last time and ensures the flight controller has logged the final GPS coordinates of your flight path before the power is cut.
Prime for Young Adults — 6 Months Free
Exclusive Offer Amazon Prime for Young Adults, Students and 18–24s get six months of Prime free, then half price.
Start 6 Months Free As an Amazon Associate I earn from qualifying purchases.Pro Tip: Avoid “hand-catching” the drone unless you are an experienced pilot, as moving your hand near the sensors during the landing sequence can cause the drone to abruptly ascend or tilt, making the power-down process much more hazardous.
Step 2: Locate and Inspect the Power Button
What you need: Physical access to the drone body; a clean microfiber cloth (optional).
Instructions: DJI designs its drones with different power button locations depending on the model. On the Mavic 3 and Air series, the button is typically located on the top of the battery itself. On the Mini series, such as the Mini 3 or Mini 4 Pro, the power button is usually found on the bottom of the aircraft’s belly. Take a moment to inspect the button for any dirt, sand, or debris that might have accumulated during flight. If you see grit around the button housing, gently blow it away or use a soft brush. Pressing a button with sand trapped inside can cause it to stick in the “on” position, which will drain your battery or prevent you from being able to turn the unit off in the future.
Pro Tip: If your drone was flying in high-humidity environments, look for condensation around the battery contact points near the button before touching it to avoid any static discharge issues.
Step 3: Execute the “Press and Hold” Power Command
What you need: Steady hands and a firm grip on the drone body.
Instructions: DJI uses a specific “double-press” safety sequence to prevent the drone from turning off accidentally mid-flight. To initiate the shutdown, press the power button once quickly. You will see the battery level LEDs light up. Immediately following that first press, press the button a second time and hold it down firmly for approximately 2 to 3 seconds. You must maintain pressure until you hear the signature descending “power down” chime and see the LEDs begin to flash in a descending pattern. Once the lights go completely dark and the internal fan noise ceases, you can release the button. This specific timing—short press followed by a long press—is universal across almost all DJI consumer and professional aircraft.
Pro Tip: If the LEDs flash but the drone stays on, you likely released the second press too early. Ensure the second press is held long enough for the final LED to blink out before letting go.
Prime for Young Adults — 6 Months Free
Exclusive Offer Amazon Prime for Young Adults, Students and 18–24s get six months of Prime free, then half price.
Start 6 Months Free As an Amazon Associate I earn from qualifying purchases.Step 4: Power Down the Remote Controller (RC)
What you need: Your DJI RC, RC-N1, or RC Pro controller.
Instructions: It is a best practice to always turn off the aircraft first and the remote controller second. This ensures that the drone never loses its connection to the pilot while the motors are still potentially active. To turn off the remote, use the same “short press, then long hold” technique used on the drone. For controllers with integrated screens (like the DJI RC), you will see a shutdown animation on the display. Once the screen goes black and the status LED turns off, the controller is safely powered down. If you are using a smartphone-connected controller, ensure you also close the DJI Fly or DJI GO 4 app to prevent background battery drain on your mobile device.
Pro Tip: If you turn off the remote controller while the drone is still on, the drone may trigger its “Return to Home” (RTH) protocol or begin beeping loudly to alert you of a lost signal, which can be startling and unnecessary.
Step 5: Allow for Battery Cooling and Removal
What you need: 5-10 minutes of patience; a cool, shaded area.
Instructions: DJI Intelligent Flight Batteries can become quite hot during operation, especially in sport mode or high-temperature environments. After the drone is powered off, do not immediately remove the battery and place it in a sealed, foam-lined carrying case. Heat is the primary enemy of lithium-polymer (LiPo) cells. Allow the drone to sit in a shaded, well-ventilated area for at least five minutes until the battery casing feels cool to the touch. Once cooled, press the release buckles on the sides or top of the battery and slide it out of the drone’s battery compartment. Inspect the gold-plated terminal pins for any signs of scorching or oxidation before storing the battery separately.
Pro Tip: Never store a DJI battery inside the drone for more than 24 hours, as a tiny “parasitic” draw can slowly deplete the battery over time, leading to a “deep discharge” state that may permanently damage the cells.
Step 6: Reinstall the Gimbal Protector and Guards
What you need: The original plastic gimbal clamp/protector provided with your drone.
Instructions: Now that the power is completely cut and the electronics are dormant, the gimbal (the camera stabilization system) will go limp. The gimbal is the most fragile part of the drone. Carefully center the camera and slide the plastic gimbal protector back into place. Listen for the “click” that indicates it is locked. This prevents the camera from rattling or hitting the sides of the frame during transport, which can lead to motor overload errors the next time you power on. After the gimbal is secured, fold the arms of the drone in the specific order required by your model (usually front arms first, then rear arms) and secure the propellers using a propeller holder strap if available.
Pro Tip: If you find it difficult to fit the gimbal protector, do not force it. Ensure the camera is level and the gimbal motors aren’t resisting you; if they are resisting, the drone might not be fully powered off.
✅ Final Checklist
- Confirm that all LED lights on the drone and the battery are completely dark.
- Verify that the Remote Controller is powered off and the app is closed on your device.
- Check that the gimbal protector is securely fastened and the camera cannot move.
- Ensure the battery has been removed from the aircraft for long-term storage (over 24 hours).
- Perform a quick visual check of the propellers for any chips or cracks sustained during the flight.
Important Notes:
- Safety Warning: Never attempt to turn off the drone while it is still in the air. The “press and hold” command is disabled during flight as a safety feature, but forcing a battery removal or using emergency stop commands can cause the drone to fall like a stone.
- Seeking Help: If the power button becomes unresponsive or the drone fails to turn off despite the correct button sequence, do not submerge it or force it. Use the DJI Fly app to check for firmware errors, or allow the battery to drain naturally in an open, fire-safe area before contacting DJI official DJI support and product manuals”>Support.
- Estimated Time: 2-3 minutes for the shutdown process; 10 minutes for cooling.
- Cost: $0 (Maintenance procedure only).
Visual and Audible Indicators of a Successful Shutdown
You should never assume the drone is off just because the propellers have stopped spinning. Modern DJI drones perform several background tasks during the shutdown phase, such as writing video data to the microSD card and discharging capacitors. Relying on the built-in feedback loops is the only way to confirm the unit is truly “cold” and safe for storage or a battery swap.
Interpreting the LED Light Patterns
DJI Intelligent Flight Batteries use a four-LED system to communicate with the pilot. When you initiate the shutdown sequence, the lights will not just turn off instantly. Instead, they will perform a “countdown” animation. On most models, like the Mavic 3 or Air 3, the lights will blink sequentially from four down to one. Once the final light at the edge of the button disappears, the internal circuit is broken. If the lights flash all at once or stay solid, the shutdown command was not registered, and you must repeat the sequence.
Audible Chimes and Mechanical Feedback
Beyond the lights, your drone provides two other physical cues that it has successfully turned off:
- The Power-Down Chime: The drone will emit a four-note descending tonal scale. This sound is generated by the motors vibrating at a specific frequency.
- Gimbal Relaxation: Once power is cut, the gimbal motors will lose their rigidity. You will often see the camera tilt downward or “go limp.” This is your cue that it is safe to install the gimbal protector.
- Fan Cessation: High-performance drones like the DJI Avata or Mavic series have internal cooling fans. You will hear the mechanical whirring stop completely when the power sequence finishes.
Handling the “Stuck” Shutdown
Occasionally, a drone may refuse to turn off if it is still processing a large video file or if the battery is overheating. If the LEDs continue to pulse after the long press, wait 30 seconds for the internal buffer to clear. Do not pull the battery out while the lights are still on, as this can lead to corrupted SD card files or “ghost” errors in your flight log history. Always wait for the visual and audible confirmation before physically removing the power source.
Critical Differences Between Remote Controller Power Cycles
While powering down the aircraft is the most immediate task, managing your remote controller (RC) correctly is equally vital for flight safety. The sequence you choose isn’t just a habit; it is a safeguard against the drone’s autonomous programming. If you deviate from the standard protocol, you might trigger unintended behaviors that could lead to a stressful end to your flight session.
The “Drone First” Rule for Signal Stability
The most important rule in the DJI ecosystem is to always power off the drone before the remote controller. Think of the RC as the drone’s lifeline. If you kill the signal from the controller while the aircraft is still active, many DJI models will interpret this as a “signal lost” event. Depending on your settings, the drone might initiate a Failsafe Return to Home (RTH) or begin an automatic landing right where it sits. This can be particularly dangerous if you are in a confined space or an area with overhead obstacles.
Handling Different Controller Models
Whether you are using the DJI RC-N1, the DJI RC 2 with the built-in screen, or an older Smart Controller, the internal logic remains the same. However, controllers with integrated screens require a moment longer to “shutdown” their operating system.
- Integrated Screens: These controllers are essentially Android tablets. Ensure the screen has fully dimmed and the status LED has turned off before packing it away to avoid battery drain.
- Mobile Device Links: If you use a phone-connected controller, always close the DJI Fly app before disconnecting the cable to ensure your flight logs are properly synced and saved.
Post-Flight Battery Management and Storage Best Practices
DJI’s Intelligent Flight Batteries are remarkably sophisticated, but they are also the most sensitive component of your kit. How you handle them in the minutes and days following a flight will directly determine their lifespan and your future flight times. Proper storage is the difference between a battery that lasts three years and one that swells and becomes a fire hazard in six months.
The Importance of the Cool-Down Period
One of the most common mistakes pilots make is plugging a battery into a charger immediately after landing. During flight, batteries generate significant internal heat. Charging a hot LiPo (Lithium Polymer) battery causes chemical stress that degrades its capacity.
- Wait 20 Minutes: Always let your batteries reach room temperature before connecting them to a power source.
- Avoid Direct Sunlight: After powering down, place your batteries in a shaded, ventilated area rather than leaving them in a hot car or a sealed gear bag.
Maintaining Optimal Storage Voltage
LiPo batteries hate being completely full or completely empty for long periods. If you don’t plan to fly within the next 24 to 48 hours, you need to manage their charge levels.
- The 40-60% Sweet Spot: For long-term storage, batteries should be kept at roughly half charge. Most DJI batteries feature an auto-discharge function that will slowly lower the voltage to a safe level after a few days of inactivity.
- Firmware Checks: Occasionally, battery updates are released alongside drone updates. Always check the DJI Fly app for “Battery Firmware” notifications to ensure the power management system is running the latest safety algorithms.
Conclusion
Mastering the power-down sequence and post-flight care is just as important as knowing how to take off. By prioritizing the “Drone First, RC Second” rule, you protect your aircraft from accidental failsafe triggers and ensure every flight ends predictably. Couple this with disciplined battery management—allowing for cool-down periods and maintaining proper storage voltages—and you will significantly extend the life of your expensive equipment.
For your next steps, take a moment to check your DJI Fly app settings and ensure your “Auto-Discharge” time is set to your preference. Also, perform a quick physical inspection of your battery pins for any debris. Stay safe, keep your firmware updated, and enjoy many more hours of worry-free flying!
❓ Frequently Asked Questions
Why does the DJI drone use a specific ‘press then hold’ sequence?
This design is a deliberate safety feature intended to prevent the drone from being accidentally powered off by a single bump or vibration while in the air. By requiring two distinct actions, DJI ensures that the user intentionally initiates the shutdown process.
Is the power-off process different for the RC-N1 versus the DJI RC?
No, the physical button sequence remains the same across almost all modern DJI controllers, including the RC-N1, DJI RC, and RC Pro. You simply tap the power button once to check battery status, then tap and hold to turn the unit off.
Can I turn off the drone while the motors are still spinning?
Generally, no; the power button sequence will not function if the drone’s logic board detects high motor RPM or flight status. You must land the drone safely and ensure the motors have stopped before the shutdown sequence will register.
What should I do if the power button is unresponsive after landing?
If the standard sequence fails, check for debris under the button or try a ‘forced shutdown’ by removing the battery directly, though this is a last resort. Ensure the battery isn’t currently performing a firmware update, which disables the power button.
Why is it important to wait for the gimbal to go limp before storage?
The gimbal motors are actively stabilized as long as the drone is powered on; forcing the gimbal into a protector while the motors are fighting back can cause mechanical strain. Only once the drone is off and the gimbal is relaxed should you secure it.
Does the sequence change for older Phantom or Mavic models?
While the modern ‘press-hold’ is standard for current DJI hardware, the specific timing (1.5 vs 2 seconds) may vary slightly on legacy models. However, the core logic of a short tap followed by a long press remains the foundation of the DJI ecosystem.