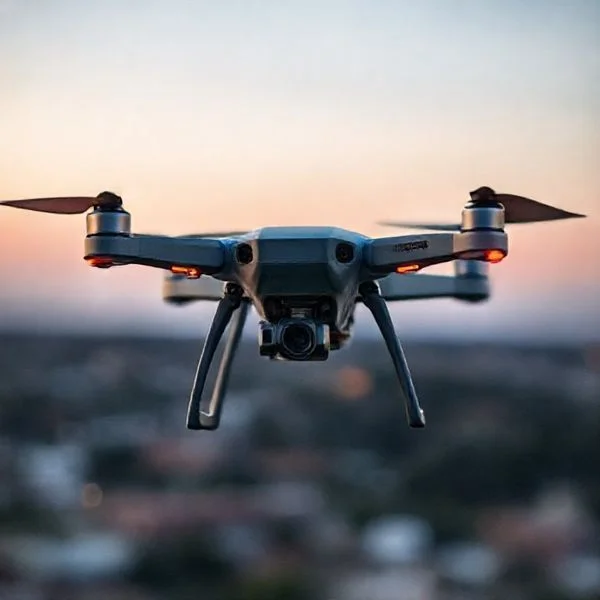
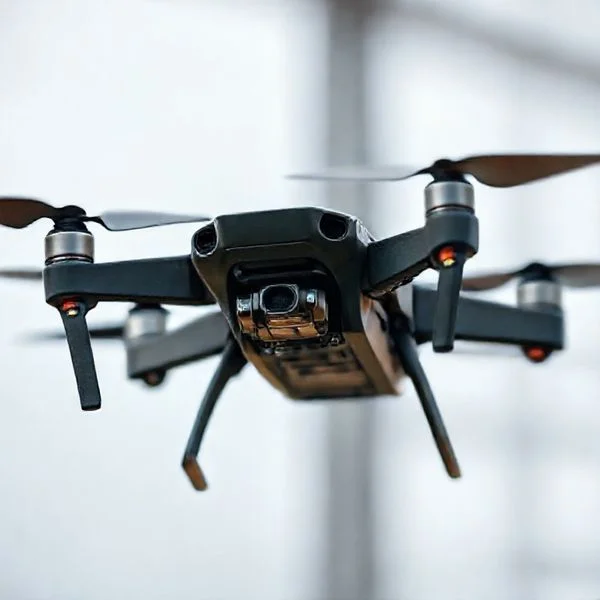
Drones achieve flight by varying the speed of individual motors to generate lift and manage directional movement. This complex process is orchestrated by a flight controller that translates pilot inputs and sensor data into precise electrical signals for stabilized aerial maneuvers.
🎯 Key Takeaways
- Drones use differential motor speeds to control pitch, roll, and yaw movement.
- The flight controller acts as the brain, processing sensor data 1000s of times per second.
- Electronic Speed Controllers (ESCs) precisely regulate power from the battery to each motor.
- Gyroscopes and accelerometers provide the data necessary for automatic self-leveling and stability.
- Counter-rotating propellers cancel out rotational torque to keep the drone from spinning uncontrollably.
A quadcopter achieves flight by precisely balancing the forces of gravity and air resistance through the manipulation of four independent rotors. Unlike a traditional airplane that relies on forward momentum and fixed wings to generate lift, a drone creates its own upward thrust by spinning propellers fast enough to displace a mass of air downward that exceeds the weight of the aircraft. This process is governed by a constant feedback loop where an onboard computer adjusts the speed of each individual motor thousands of times per second to maintain stability.
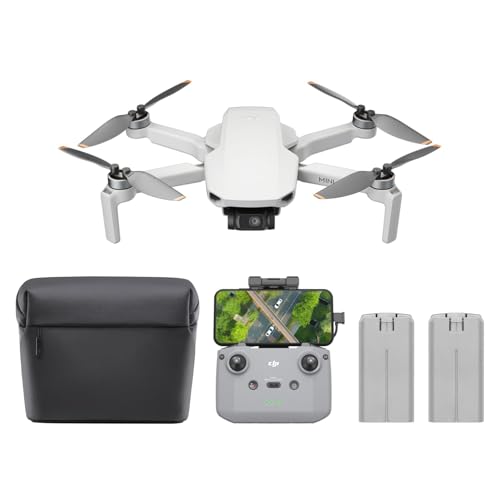
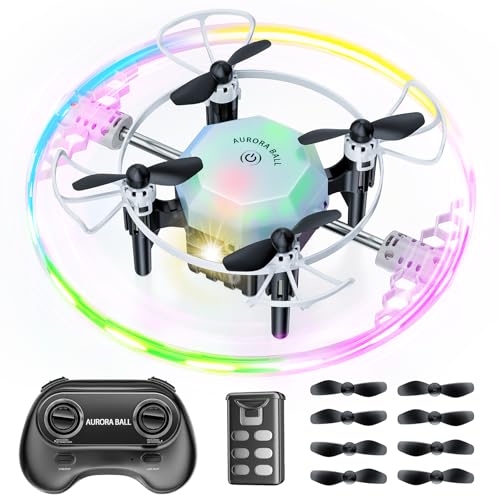
Recommended Best Deal Products


Understanding these mechanics is essential for any enthusiast looking to master flight or troubleshoot hardware issues. When you push the throttle, you aren’t just “going up”; you are initiating a complex interplay of torque, thrust, and gyroscopic stabilization. By learning how these physical forces interact with the electronic components, you gain the ability to predict how your drone will react in different environments, such as high-altitude thin air or gusty wind conditions, ultimately making you a more skilled and responsive pilot.
The Physics of Flight: Lift, Thrust, and Torque Mechanics
The primary physical challenge for a drone is managing torque. In physics, Newton’s Third Law states that for every action, there is an equal and opposite reaction. When a motor spins a propeller clockwise, the body of the drone naturally wants to spin counter-clockwise. To solve this, drones use a “counter-rotation” setup. Two motors spin clockwise (CW), and the other two spin counter-clockwise (CCW). By positioning these in a diagonal “X” pattern, the rotational forces cancel each other out, allowing the drone to remain pointed in a single direction without a tail rotor.
Vertical and Horizontal Translation
Movement in a 3D space is achieved by varying the RPM (revolutions per minute) of specific motors to create an imbalance in thrust. To hover, the drone matches its thrust exactly to its weight. To move, it creates a “pressure differential” by spinning some motors faster than others. This causes the drone to tilt, or “tip,” in the direction of the lower-speed motors, redirecting a portion of the vertical thrust into horizontal momentum.
- Thrust and Lift: Increasing the speed of all four motors simultaneously increases upward force, causing the drone to climb.
- Pitch (Moving Forward/Backward): To move forward, the rear motors spin faster than the front motors. This lifts the back of the drone, tilting the nose down and pushing the aircraft forward.
- Roll (Moving Left/Right): To roll right, the motors on the left side of the craft spin faster than those on the right, creating a sideways tilt.
- Yaw (Rotating): To rotate the nose left or right, the drone increases the speed of the two motors spinning in the direction opposite of the desired turn while slowing the other two. This breaks the torque balance, causing the drone to spin on its vertical axis.
The Importance of Propeller Pitch
The efficiency of this lift is dictated by propeller pitch—the theoretical distance a propeller would move forward in one single rotation. A “steep” pitch moves more air but requires significantly more torque from the motor. In a drone environment, propellers are designed to balance high-speed response with the ability to maintain grip on the air. Because drones rely on rapid RPM changes to stay stable, the propellers must be light enough to accelerate and decelerate instantly. This is why carbon fiber and high-grade polycarbonate are the standard; they offer the rigidity needed for lift without the rotational inertia that would lag the flight controller’s commands.
The Ultimate Quadcopter Mechanics Walkthrough
To the casual observer, a drone seems to defy gravity with effortless grace, but beneath the sleek plastic or carbon fiber shell lies a complex symphony of physics, electronics, and software. Understanding how a drone works requires breaking down the chain reaction that begins the moment you move a joystick and ends with the craft maneuvering through the three-dimensional sky. This guide will walk you through the operational lifecycle of a drone flight, explaining how individual components communicate to achieve stable, controlled flight. Whether you are a hobbyist or an aspiring engineer, mastering these principles is the first step toward becoming a proficient pilot or builder.
Step 1: Initiating the Command Signal
What you need: A Radio Transmitter (Remote Control), a paired Receiver (RX) on the drone, and a charged 2.4GHz or 5.8GHz frequency link.
Instructions: The process begins with the pilot. When you move the gimbals on your transmitter, you are generating mechanical input that the remote converts into digital packets of data. These packets represent four main channels: Throttle (altitude), Yaw (rotation), Pitch (forward/backward), and Roll (left/right). The transmitter broadcasts these signals via radio waves. The receiver mounted on the drone is constantly “listening” for these specific packets. Once it captures them, it translates the radio frequency back into a digital signal (often via protocols like SBUS or CRSF) and sends it directly to the drone’s central brain. This happens hundreds of times per second to ensure near-instantaneous response times.
Pro Tip: Always power on your transmitter before your drone. This ensures that the moment the drone’s receiver gains power, it immediately connects to your specific controller rather than picking up stray interference or entering an uncontrolled “failsafe” mode.
Step 2: Processing Data in the Flight Controller
What you need: A Flight Controller (FC) with a modern processor (such as an STM32 F4 or F7 chip) and firmware like Betaflight or ArduPilot.
Instructions: The Flight Controller is the “brain” of the drone. It receives the pilot’s commands from the receiver, but it doesn’t execute them blindly. Instead, it compares your desired input with data coming from internal sensors. For example, if you push the stick forward to “Pitch,” the FC calculates exactly how much faster the rear motors need to spin compared to the front motors to tilt the craft. It uses a mathematical algorithm known as a PID loop (Proportional, Integral, Derivative) to calculate these adjustments thousands of times per second (loop frequencies of 4kHz to 8kHz are common), ensuring the movement is smooth and resistant to outside forces like wind.
Pro Tip: The “Orientation” setting in your Flight Controller software is critical. If the FC thinks it is facing forward but is actually mounted sideways, the drone will flip instantly upon takeoff as it tries to correct for the wrong axis.
Step 3: Distributing Power via the Electronic Speed Controllers
What you need: Electronic Speed Controllers (ESCs), which can be individual components or a “4-in-1” board, and a LiPo (Lithium Polymer) battery.
Instructions: The Flight Controller cannot power the motors directly because it lacks the amperage capacity. Instead, it sends low-voltage instructions to the ESCs. The ESCs are connected directly to the high-voltage battery and act as the drone’s “nervous system.” Their job is to take the signal from the FC and determine exactly how much electrical current to send to each motor. Modern ESCs use MOSFETs (Metal-Oxide-Semiconductor Field-Effect Transistors) to switch power on and off incredibly fast, effectively controlling the RPM of the motors. By varying the speed of individual motors, the ESC allows the drone to tilt, turn, or change altitude with precision.
Pro Tip: Check your ESC “Protocol” settings. Using DShot600 or DShot1200 allows for digital communication that is faster and more resistant to electrical noise than older analog PWM signals.
Step 4: Converting Electricity to Torque with Brushless Motors
What you need: Four Brushless DC motors, typically categorized by “KV” (RPM per volt) and stator size (e.g., 2207 or 2306).
Instructions: Once the ESC sends current to the motors, electromagnetism takes over. Unlike the brushed motors found in cheap toys, high-performance drones use brushless motors. These consist of a fixed center (stator) with copper windings and a rotating outer shell (bell) containing permanent magnets. As the ESC pulses electricity through different coils in the stator, it creates a rotating magnetic field that pulls the magnets in the bell around, creating high-speed rotation. Because there are no physical brushes wearing down, these motors are incredibly efficient and can reach speeds exceeding 30,000 RPM, providing the raw torque necessary for flight.
Pro Tip: Periodically check the motor bells for “play” or vertical movement. A loose motor bell can cause vibrations that confuse the flight controller’s sensors, leading to “mid-air washouts” or overheating.
Step 5: Generating Lift through Propeller Aerodynamics
What you need: Two Clockwise (CW) propellers and two Counter-Clockwise (CCW) propellers, usually made of polycarbonate.
Instructions: Propellers are essentially spinning wings. As they rotate, their curved shape (airfoil) creates a pressure difference—lower pressure on top and higher pressure underneath. This generates lift. On a quadcopter, the motors spin in opposing pairs: two spin clockwise and two spin counter-clockwise. This configuration is vital because it cancels out the “torque effect.” If all four motors spun the same way, the body of the drone would rotate uncontrollably in the opposite direction. By spinning in opposite directions, the rotational forces are neutralized, allowing the drone to stay pointed in one direction until the pilot commands a “Yaw” maneuver by slightly changing the balance of speed between the pairs.
Pro Tip: Look for the “R” designation on your propellers (e.g., 5043 vs 5043R). The “R” stands for Reverse (CCW). Installing a CW prop on a CCW motor will result in the drone pushing itself into the ground rather than taking off.
Step 6: Maintaining Stability with the IMU
What you need: An Inertial Measurement Unit (IMU), which includes a Gyroscope and an Accelerometer, built into the Flight Controller.
Instructions: Even without pilot input, a drone must fight gravity and wind to stay level. This is handled by the IMU. The gyroscope measures the rate of rotation (angular velocity), while the accelerometer measures the direction of gravity. If a gust of wind tips the drone 5 degrees to the left, the IMU detects this change instantly. It sends this data to the Flight Controller, which then tells the ESCs on the left side to increase motor speed. This counter-movement happens so fast (milliseconds) that the drone appears to remain perfectly still in the air. This “self-leveling” is the secret to why modern drones are so much easier to fly than traditional RC helicopters.
Pro Tip: Mount your Flight Controller on soft rubber “gummies” or vibration dampeners. High-frequency vibrations from the motors can create “noise” in the gyro, making the drone twitchy or causing the motors to run dangerously hot.
Step 7: Navigation and Global Positioning
What you need: A GPS Module (and often a Magnetometer/Compass) connected to the Flight Controller’s UART ports.
Instructions: While the IMU handles “leveling,” it doesn’t know where the drone is in the world. A GPS module communicates with satellites (GPS, GLONASS, Galileo) to determine the drone’s latitude, longitude, and altitude coordinates. When you let go of the sticks on a GPS-enabled drone, it uses this data to “Loiter,” or hold its exact position in space despite the wind. Furthermore, if the radio signal is lost, the “Return to Home” (RTH) feature triggers. The FC calculates the path back to the takeoff coordinates and automatically flies the drone home. The compass helps the drone maintain its heading, ensuring it knows which way is “home” regardless of which way the nose is pointed.
Pro Tip: Never take off until you have a “3D Fix” (usually 6 or more satellites). Taking off with fewer satellites can lead to “GPS drift,” where the drone incorrectly calculates its position and begins flying away on its own.
Step 8: Transmitting Real-Time Telemetry and Video
What you need: An FPV (First Person View) Camera, a Video Transmitter (VTX), and a set of FPV Goggles or a Monitor.
Instructions: To fly “Like a Pro,” you need to see what the drone sees. The FPV camera captures a live feed, which is sent to the VTX. The VTX then broadcasts this signal (usually on the 5.8GHz band to avoid interference with the 2.4GHz control link). Most modern drones also overlay “OSD” (On-Screen Display) data onto the video. This allows the pilot to see critical real-time information such as battery voltage, current draw, and signal strength. This feedback loop is essential for the pilot to make informed decisions, such as landing before the battery reaches a critically low level (typically 3.5V per cell for LiPos).
Pro Tip: Match your VTX power output to your environment. Indoors, use 25mW to prevent signal “multipathing” (bouncing off walls). Outdoors, you might use 600mW or more for long-range penetration through trees and obstacles.
✅ Final Checklist
- Radio Link: Ensure the transmitter is bound to the receiver and that all “Channel Map” settings (AETR vs TAER) are correct in the software.
- Motor Direction: Verify that motors spin in the correct direction (props off!) and that the “Motor Order” matches the diagram in your configuration tool.
- Propeller Security: Ensure prop nuts are tightened securely; a loose nut can fly off under high torque, causing an immediate crash.
- Battery Voltage: Check that each cell is balanced (within 0.05V of each other) and that the total voltage is sufficient for the planned flight time.
- Failsafe Test: Ensure that “Drop” or “Return to Home” is configured so the drone doesn’t fly away if the radio signal is lost.
Important Notes:
- Safety First: Never test your drone with propellers on while it is connected to a computer or inside your house. A software glitch can trigger full throttle unexpectedly.
- Professional Help: If your drone displays “I2C Errors” or “Gyro Not Found,” it usually indicates a hardware failure on the Flight Controller that requires a professional replacement or expert soldering.
- Legal Compliance: Always check local regulations (such as FAA in the US or EASA in the EU). Many drones over 250g require registration and Remote ID.
- Estimated Cost: A standard hobbyist drone setup ranges from $300 (budget) to $1,500+ (professional/cinematic).
- Timeframe: Mastering the basics of how these components work takes about 2-4 hours of study, while becoming a proficient pilot usually requires 10-20 hours of simulator practice.
The Electronic Brain: How Flight Controllers and Radio Systems Communicate
While physics provides the “how” of flight, the electronics provide the “control.” The communication ecosystem of a drone is a high-speed digital loop that begins at your handheld transmitter and ends at the motor bells. This process happens with such low latency (often under 10-20 milliseconds) that the drone feels like an extension of your own hands. The core of this system is the communication between the Radio Frequency (RF) link and the internal processing units.
The Signal Chain: From Stick to Motor
When you move a control stick, the transmitter converts that physical position into a digital packet of data. This packet is broadcast over the 2.4GHz or 900MHz frequency bands to the receiver (RX) mounted on the drone. The receiver then passes this data to the Flight Controller (FC) using protocols like SBUS or ELRS. The FC is the “brain” that decides how to execute your command based on the drone’s current orientation in space.
- The Flight Controller (FC): A small circuit board containing a microprocessor (usually an STM32 chip). It calculates the necessary motor adjustments.
- The IMU (Inertial Measurement Unit): A sensor inside the FC consisting of a gyroscope and accelerometer. It detects the drone’s tilt and acceleration hundreds of times per second.
- The PID Loop: A mathematical algorithm (Proportional-Integral-Derivative) the FC uses to compare your desired stick position with the drone’s actual orientation, correcting any errors instantly.
The Electronic Speed Controller (ESC) and DShot
The Flight Controller does not power the motors directly; it sends a low-voltage signal to the Electronic Speed Controllers (ESCs). The ESC is the “muscle” of the operation. It takes high-voltage DC power from the LiPo battery and converts it into three-phase AC power to drive the brushless motors. Modern drones use a digital protocol called DShot. Unlike older analog signals, DShot is high-resolution and less prone to electrical noise, allowing the FC to tell the ESC exactly how much power to deliver with extreme precision.
This digital precision is what allows for “Active Braking” or “Damped Light.” When you decrease the throttle, the ESC doesn’t just let the motor coast to a stop; it actively uses the motor’s magnets to slow the propeller down. This near-instantaneous control over RPM is what gives modern drones their “locked-in” feel, allowing them to stop on a dime and change direction with robotic accuracy.
Precision Power Management: The Role of ESCs and Brushless Motors
The flight controller might be the brain, but the motors and Electronic Speed Controllers (ESCs) are the muscles. In modern drones, these two components work in a rapid-fire feedback loop to ensure the aircraft moves exactly where you want it to go. Unlike standard toy motors, professional-grade drones use brushless motors for their superior power-to-weight ratio and incredible longevity.
The Efficiency of Brushless Technology
In a brushless motor, the “work” is done through magnetic induction rather than physical contact. Because there are no brushes rubbing against a commutator, there is less friction, less heat, and significantly more power. This efficiency is what allows a racing drone to hit 100 mph or a camera drone to hover perfectly still for 30 minutes. When choosing accessories, always look for high-quality bearings in your motors, as these reduce vibrations that can ruin your video footage.
- Durability: No physical brushes mean these motors can last for hundreds of flight hours.
- Power: They provide instant torque, which is essential for rapid maneuvers and gusty conditions.
- Maintenance: Keep your motors clean and free of sand or metal shavings to maintain peak performance.
ESCs: The Digital Translators
The Electronic Speed Controller (ESC) acts as the bridge between the flight controller and the motor. It takes the low-voltage signal from the “brain” and translates it into high-frequency pulses of electricity sent to the motor. These adjustments happen hundreds of times per second. For example, if a sudden gust of wind tilts your drone to the left, the ESCs on the left side will instantly increase the motor speed to push it back level. This is why high-quality ESCs are a must-have accessory for anyone looking for smooth, professional flight characteristics.
Mastering Stability: How Sensors and GPS Enable Hovering and Navigation
If drones relied only on manual pilot input, they would be incredibly difficult to fly. The reason a modern drone feels “locked in” is due to an array of internal sensors that constantly monitor the environment. These sensors allow the drone to understand its orientation, altitude, and position in 3D space with pinpoint accuracy.
The IMU: The Drone’s Inner Ear
The Inertial Measurement Unit (IMU) is the most critical sensor package on your drone. It contains a gyroscope to measure rotation and an accelerometer to measure linear motion. Together, they tell the drone if it is level, pitching forward, or rolling sideways. Without a functional IMU, a drone would drift uncontrollably. Pro tip: If your drone feels “drifty” or leans during a hover, it usually means your IMU needs a quick recalibration on a perfectly level surface.
- Barometers: These measure air pressure to help the drone maintain a consistent altitude without pilot input.
- Compass (Magnetometer): This allows the drone to know which way is North, which is vital for GPS-assisted navigation.
- Optical Flow Sensors: Often found on the bottom of the drone, these use cameras to “see” the ground and hold position indoors where GPS signals are weak.
GPS and Intelligent Navigation
GPS is what makes features like “Return to Home” and “Waypoints” possible. By communicating with multiple satellites, the drone establishes its precise coordinates on Earth. When you let go of the controller sticks, the drone uses GPS data to lock its position, fighting against wind or momentum to stay in a single “box” in the sky. For photographers, this is essential; it allows you to focus on the shot while the drone handles the physics of staying still.
Conclusion: The Synergy of Flight
Understanding how a drone works reveals the incredible synergy between physics and electronics. From the lift generated by the propellers to the lightning-fast calculations of the flight controller and ESCs, every component plays a vital role. By mastering the basics of motor efficiency and sensor stability, you become a more informed pilot and a better buyer when it comes to upgrading your gear. Technology continues to evolve, making drones smarter, faster, and more accessible than ever before.
Next Steps:
- Check your drone’s sensor health in your flight app before your next takeoff.
- Consider upgrading to higher-efficiency propellers to extend your flight time.
Now that you know the science behind the flight, it’s time to get out there and experience it for yourself. Happy flying!
❓ Frequently Asked Questions
How do drones stay level even in windy conditions?
The flight controller uses an Internal Measurement Unit (IMU) consisting of gyroscopes and accelerometers. It detects tiny tilts caused by wind and instantly adjusts individual motor speeds to counteract the movement and maintain a level orientation.
What is the difference between pitch, roll, and yaw?
Pitch moves the drone forward or backward, roll tilts it left or right, and yaw rotates the nose of the drone. These movements are achieved by varying the relative speeds of specific motor pairs to create unbalanced forces.
How does the remote controller talk to the drone?
The handheld transmitter sends radio frequency signals, typically on the 2.4GHz or 5.8GHz bands, to a receiver on the drone. This data is then passed to the flight controller to be interpreted as movement commands.
Why are propellers installed in different directions?
Two propellers spin clockwise (CW) and two spin counter-clockwise (CCW). Their blade pitch is reversed so they all push air downwards, which cancels out the rotational torque that would otherwise cause the drone to spin.
What role does the battery play in flight performance?
High-discharge Lithium Polymer (LiPo) batteries provide the massive bursts of current needed for rapid motor acceleration. The battery’s voltage level directly influences the maximum RPM and the overall thrust capacity of the motors.
How do brushless motors differ from standard DC motors?
Brushless motors are more efficient and durable because they use electronic commutation rather than physical brushes. This allows for the incredibly rapid and precise speed changes required to keep a multi-rotor aircraft stable.