
To achieve professional motion blur, you must master the 180-degree rule by setting your shutter speed to exactly double your frame rate. Using manual exposure controls and ND filters prevents flickering and maximizes dynamic range for high-quality post-processing.
🎯 Key Takeaways
- Match shutter speed to double your frame rate for natural motion blur.
- Use ND filters to maintain cinematic settings in bright daylight conditions.
- Lock White Balance manually to prevent distracting color shifts during flight.
- Shoot in Log profiles to maximize dynamic range for professional color grading.
- Keep ISO at the base level to ensure the cleanest possible image.
To achieve professional, cinematic drone footage, you must master the relationship between your frame rate and shutter speed. This is known as the 180-degree shutter rule. It creates the natural motion blur our eyes expect to see in high-end cinema. Leaving your drone in “Auto” mode is the fastest way to ruin a shot. Auto settings constantly shift exposure, creating distracting flickers and a “jittery” digital look that screams amateur production.
Recommended Best Deal Products
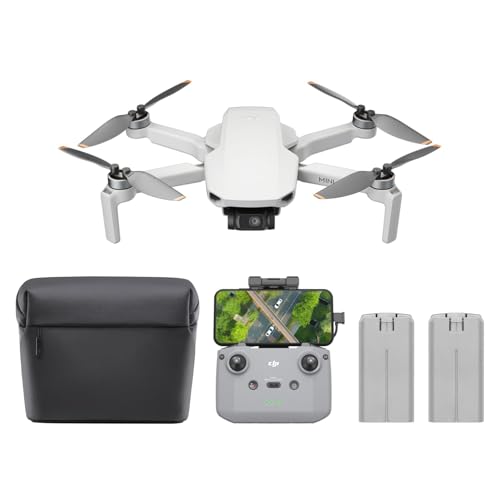

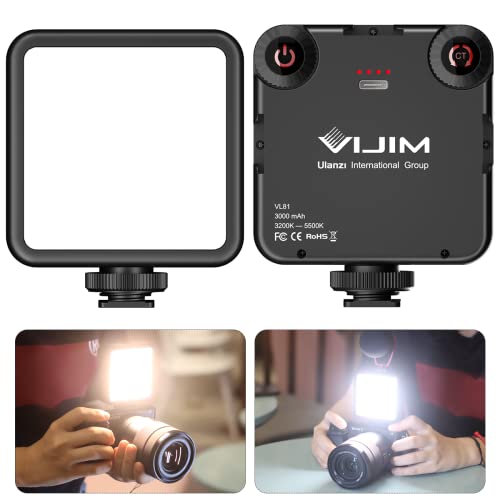
Locking your settings manually ensures every frame maintains a consistent look from takeoff to landing. By controlling your shutter speed and using Neutral Density (ND) filters, you dictate how motion is captured. This guide focuses on the technical precision required to move beyond basic recording. You will learn how to sync your settings to create fluid, dream-like sequences that look like they belong on the big screen.
Core Principles of Cinematic Motion: Frame Rates and Shutter Speed
The foundation of cinematic video is the 180-degree shutter rule. This rule states that your shutter speed should be the reciprocal of double your frame rate. For example, if you are shooting at 24 frames per second (fps), your shutter speed should be set to 1/50th of a second. This specific timing creates a slight blur on moving objects. Without this blur, your video looks unnaturally sharp and “staccato,” resembling a cheap soap opera rather than a film.
The Golden Ratio for Common Frame Rates
Most drone pilots stick to a few standard frame rates depending on the desired output. To maintain the 180-degree rule, use these specific pairings:
- 24fps (The Cinematic Standard): Set your shutter speed to 1/50s. This provides the most “filmic” motion blur.
- 30fps (Standard Video): Set your shutter speed to 1/60s. This is common for YouTube and web content.
- 60fps (Slow Motion): Set your shutter speed to 1/120s. Use this when you plan to slow the footage down in post-production.
Why Faster is Not Better
It is a common mistake to think a higher shutter speed equals better quality. In photography, 1/1000s is great for freezing a bird in flight. In video, a 1/1000s shutter speed makes every frame crystal clear. When played back, this results in “motion judder.” Your eyes perceive this as a series of distinct, flickering images rather than a smooth flow of motion. Keeping your shutter slow is the secret to that professional, buttery-smooth aesthetic.
Master Cinematic Drone Filming in 8 Simple Steps
Capturing breathtaking aerial footage requires more than just a high-end drone; it demands a precise understanding of manual camera settings. Relying on “Auto” mode often leads to flickering exposures, unnatural motion blur, and inconsistent colors that ruin an otherwise perfect flight. This guide will walk you through the technical nuances of setting up your drone for cinematic success, ensuring your footage looks professional, polished, and ready for the big screen.
Step 1: Select Your Resolution and Frame Rate
What you need: A drone capable of 4K recording and a high-speed U3/V30 microSD card.
Instructions: Start by setting your resolution to the highest available setting, ideally 4K (3840×2160). For a “cinematic” look, set your frame rate to 24fps or 30fps. If you plan on slowing down your footage in post-production for a dreamlike effect, switch to 60fps or even 120fps (if supported). High frame rates require faster shutter speeds, which we will address in the next step. Ensure your aspect ratio is set to 16:9, as this is the standard for modern displays and video platforms. Avoid using digital zoom, as it degrades the pixel quality of your sensor output.
Pro Tip: Always shoot in 4K even if you plan to export in 1080p. This allows you to crop or re-frame your shot in editing without losing perceptible detail.
Step 2: Apply the 180-Degree Shutter Rule
What you need: A set of Neutral Density (ND) filters (ND4, ND8, ND16, and ND32).
Instructions: To achieve natural-looking motion blur, your shutter speed should be double your frame rate. If you are shooting at 24fps, your shutter speed should be 1/50th of a second. At 60fps, it should be 1/120th. On a bright day, setting such a slow shutter speed will result in an overexposed (white) image. This is where ND filters come in. Think of them as sunglasses for your drone. Attach an ND filter that reduces the light enough to allow you to hit that 1/50th or 1/60th shutter speed while maintaining a balanced exposure. If the image is still too bright, move to a higher-rated filter like an ND32.
Pro Tip: If your shutter speed is too high (e.g., 1/1000th), your video will look “jittery” or “staccato,” making the motion feel digital and cheap.
Step 3: Lock Your ISO to the Base Value
What you need: Access to the manual (M) camera settings in your drone’s flight app.
Instructions: ISO determines the camera sensor’s sensitivity to light. For the cleanest possible image with the least amount of “noise” or grain, you must set your ISO to its lowest native value, which is typically 100. Avoid using “Auto ISO” at all costs, as the drone may increase sensitivity mid-flight if it enters a shadow, causing a visible shift in graininess. If you are filming in low-light conditions (blue hour or sunset), you can push the ISO to 200 or 400, but try never to exceed 800 on drones with small 1-inch or 1/2.3-inch sensors, as the image quality will degrade rapidly.
Pro Tip: In extremely bright conditions, it is better to use a stronger ND filter than to try and compensate with a lower ISO if you are already at 100.
Step 4: Choose a Flat Color Profile
What you need: A drone that supports D-Log, D-Cinelike, or 10-bit color recording.
Instructions: “Normal” color profiles often apply too much contrast and saturation in-camera, which “bakes in” the look and limits your ability to edit later. Instead, select a flat profile like D-Log or D-Cinelike. To the naked eye, this footage will look grey and washed out, but it preserves a much higher dynamic range, capturing details in both the brightest clouds and the darkest shadows. This gives you the flexibility to “color grade” the footage in software like DaVinci Resolve or Adobe Premiere Pro. If your drone supports 10-bit color, enable it to avoid “banding” in the sky during color grading.
Pro Tip: If you don’t plan on color grading your footage, use the “Cinelike” profile as a middle ground—it’s easier to work with than a true Log profile.
Step 5: Set a Custom White Balance
What you need: A basic understanding of light temperature (Kelvin scale).
Instructions: Never leave White Balance (WB) on “Auto.” When a drone flies over different terrains—like moving from green trees to a blue lake—the Auto WB will shift the color temperature mid-shot, making the trees look too warm and the water too cool. This is nearly impossible to fix in post-production. Instead, select a preset like “Sunny” (5600K) or “Cloudy” (6500K). For total control, use the manual Kelvin slider. On a standard clear day, 5600K is the industry standard for recreating natural sunlight. This ensures that every clip you film during the flight has consistent coloring.
Pro Tip: If you are filming during the “Golden Hour” (just before sunset), setting your WB manually to 6000K-6500K will help emphasize those rich orange and gold tones.
Step 6: Utilize Exposure Tools (Histogram and Zebras)
What you need: The Histogram and Overexposure Warning (Zebra stripes) enabled in your app settings.
Instructions: Your drone’s tablet or phone screen can be misleading in bright sunlight. To ensure perfect exposure, look at the Histogram—a small graph showing the distribution of light. You want the “mountain” of data to be centered. If the graph is touching the far right edge, your highlights are “clipping” (losing detail in the whites). Turn on “Overexposure Warnings” or “Zebras.” This will overlay diagonal stripes on parts of the image that are too bright. Adjust your ND filter or shutter speed until the zebras mostly disappear from the sky, ensuring you aren’t “blowing out” the highlights.
Pro Tip: It is generally better to slightly underexpose a shot than to overexpose it. You can recover detail from shadows, but “clipped” white highlights are gone forever.
Step 7: Adjust Gimbal Pitch and Smoothness
What you need: The “Gimbal Settings” or “Advanced Settings” menu in your flight controller app.
Instructions: Even with perfect camera settings, jerky camera movement will ruin the shot. Navigate to your gimbal settings and look for “Gimbal Pitch Speed” and “Gimbal Pitch Smoothness” (sometimes called Expo). Lower the Pitch Speed to around 10-15 to ensure that when you tilt the camera up or down, it moves slowly and elegantly. Increase the Smoothness/Buffer value to 20 or higher. This creates a “ramping” effect where the camera starts and stops moving gradually rather than instantly, mimicking the movement of a professional Hollywood crane or jib.
Pro Tip: Test your gimbal tilt while hovering to ensure the movement feels “heavy” and fluid rather than robotic and twitchy.
Step 8: Configure Video Compression and Bitrate
What you need: Selection between H.264 and H.265 (HEVC) codecs in settings.
Instructions: High-quality video requires a high bitrate to avoid “blocky” artifacts in complex textures like grass or water. If your drone offers the choice, select H.265 (HEVC). This codec is more efficient and preserves more detail at the same file size compared to the older H.264. Ensure your “Video Caption” or “Subtitle” setting is turned off unless you specifically need flight telemetry data embedded in a separate file. Finally, check that your storage is set to the SD card rather than the drone’s limited internal memory to avoid running out of space mid-flight.
Pro Tip: Ensure your computer is powerful enough to edit H.265; if not, you may need to create “proxies” (lower-resolution temporary files) during the editing process.
✅ Final Checklist
- ND Filter is cleaned and securely attached to the lens.
- White Balance is set to a fixed Kelvin value (e.g., 5600K), not Auto.
- Shutter Speed is exactly double the Frame Rate (e.g., 1/50 for 24fps).
- ISO is locked at 100 for maximum image clarity.
- Color Profile is set to D-Log or D-Cinelike for maximum dynamic range.
Important Notes:
- Safety First: Always calibrate your IMU and Compass before flying in a new location, regardless of camera settings.
- Hardware Limits: Small drone sensors struggle in high-contrast scenes; always prioritize exposing for the sky/highlights.
- SD Cards: Use only U3 or V30 rated cards; slower cards (U1/Class 10) will cause the video to buffer or fail to save.
- Time and Cost: Setting up these parameters takes roughly 5-10 minutes per location. A good set of ND filters will cost between $50 and $150.
Essential Hardware for Exposure Control: The Role of ND Filters
Achieving a 1/50s shutter speed on a sunny day is impossible without help. Because most drone cameras have a fixed aperture (usually f/2.8), your sensor will be flooded with too much light at slow shutter speeds. Your image will be completely blown out and white. To maintain the 180-degree rule while keeping your exposure balanced, you must use Neutral Density (ND) filters. These act as “sunglasses” for your drone’s lens, cutting the light without changing the color of the scene.
Matching Your ND Filter to Lighting Conditions
Choosing the right filter depends entirely on the intensity of the sun. You want a filter strong enough to allow for that 1/50s or 1/60s shutter speed while keeping your ISO at its base level (usually 100). If your image is still too bright, you need a stronger filter; if it is too dark, move to a lighter one.
- ND4 or ND8: Best for “Golden Hour,” sunrise, or very cloudy days.
- ND16: The “workhorse” filter for moderately bright or partly cloudy days.
- ND32: Necessary for bright, direct midday sunlight.
- ND64: Required for extreme brightness, such as filming over snow or white sand beaches.
Why Manual Exposure Trumps Auto Every Time
In “Auto” mode, the drone’s computer reacts to light changes in real-time. If you fly from a dark forest toward a bright horizon, the drone will suddenly darken the image. This “exposure stepping” is impossible to fix in editing. By using an ND filter and locking your shutter speed and ISO manually, you ensure the exposure stays identical throughout the entire flight. This gives you a professional, reliable canvas for color grading later.
Maximizing Post-Processing Potential with Color Profiles and Bitrates
Capturing high-quality footage is only half the battle; the real magic often happens in the editing suite. To give yourself the most flexibility during color grading, you need to look beyond the standard color profiles. Shooting in “Log” profiles—such as D-Log, D-Cinelike, or V-Log—is the gold standard for professional drone cinematography. While these profiles look flat and desaturated straight out of the camera, they preserve a much higher dynamic range, allowing you to recover details in bright highlights and deep shadows that would otherwise be lost.
The Advantage of 10-Bit Color and High Bitrates
When selecting your recording settings, always opt for the highest bitrate and bit-depth your drone supports. Most prosumer drones now offer 10-bit recording, which captures over a billion colors compared to the 16.7 million found in standard 8-bit files. This is a game-changer for drone pilots who film vast landscapes or skies, as it virtually eliminates “banding”—those ugly, blocky lines often seen in gradients like a sunset or a clear blue horizon.
- Log Profiles: Essential for high-contrast scenes, like a bright sky over a dark forest, to prevent clipping.
- High Bitrate: Captures more data per second, reducing compression artifacts in complex textures like moving water or rustling leaves.
- Color Gamut: Using a wider color gamut ensures your footage looks vibrant and lifelike after your final grade.
Critical Manual Adjustments for Consistent Visual Quality
One of the most common mistakes in drone filming is leaving the camera in “Auto” mode. Because a drone is constantly moving through different lighting conditions, an automatic camera will frequently adjust its exposure and color temperature mid-flight. This results in “flickering” footage that is nearly impossible to fix in post-production. By locking in your manual settings, you ensure that every frame of your shot maintains a consistent look and feel from takeoff to landing.
Locking White Balance for Seamless Transitions
White balance is perhaps the most overlooked setting. If left on auto, your drone might shift from a warm tone to a cool tone simply because you panned the camera toward a patch of green trees or a blue body of water. Setting a fixed Kelvin value or choosing a preset (like “Sunny” or “Cloudy”) keeps your colors stable. For example, when filming a long reveal shot over a coastline, a locked white balance ensures the sand and water look the same at the end of the clip as they did at the beginning.
Mastering Manual Focus and Sharpness
While modern drones have excellent autofocus, manual focus is often safer for cinematic sweeps. In many landscape scenarios, setting your focus to “Infinity” or utilizing focus peaking ensures your subject remains tack-sharp even as the drone moves at high speeds. Additionally, consider lowering the in-camera sharpness setting; drone sensors can often over-sharpen footage, making it look digital and “crunchy.” A softer, more natural look is usually preferred by professional colorists.
- Fixed Kelvin: Use a specific temperature (e.g., 5600K for daylight) to avoid mid-air color shifts.
- Focus Peaking: A visual aid that highlights sharp edges in red or yellow, helping you confirm focus on distant landmarks.
- In-Camera Sharpening: Dial this back to -1 or -2 for a more “filmic” and organic texture.
Conclusion
Mastering your drone’s camera settings is the quickest way to elevate your footage from hobbyist clips to professional-grade cinema. By moving away from automatic modes and taking control of your color profiles, white balance, and bitrates, you gain total creative authority over your final image. Remember that the best settings are those that provide the most “clean” data for your post-processing workflow, giving you the freedom to craft a specific mood and atmosphere.
To start seeing immediate results, head out for your next flight with a “manual-only” mindset. Focus on locking your white balance and experimenting with a flat color profile. Once you see the depth and consistency of your new footage, you’ll never want to go back to auto. Grab your controller, check your sensors, and go capture something spectacular!
❓ Frequently Asked Questions
Why does my drone footage look ‘jittery’ or ‘stuttery’?
This usually occurs when your shutter speed is too high, which happens in bright light if you aren’t using ND filters. Lowering the shutter speed creates the natural motion blur necessary to smooth out the movement in the frame.
Which color profile should I choose: Normal, D-Cinelike, or D-Log?
Use D-Log if you plan to color grade your footage, as it preserves the most dynamic range. Choose D-Cinelike for a semi-processed look, or ‘Normal’ only if you need to use the footage immediately without any editing.
How do I choose the right ND filter strength for a sunny day?
Use an ND16 or ND32 for moderately bright days, and an ND64 for extremely bright, direct sunlight. The goal is to darken the image enough to reach a shutter speed that is exactly double your frame rate.
What is the impact of White Balance on aerial shots?
Setting White Balance to ‘Auto’ causes the camera to shift colors as the drone turns toward or away from the sun. Manually locking it to a specific Kelvin value or preset ensures color consistency throughout the entire clip.
Does bitrate matter for drone filming camera settings?
High bitrates are crucial because they record more data per second, significantly reducing compression artifacts in complex textures like forests or moving water. Always select the highest available bitrate in your drone’s video settings.
Should I use a high ISO for low-light drone shots?
While sometimes necessary, increasing ISO introduces digital noise that is very difficult to remove. It is better to use a drone with a larger sensor and keep the ISO as low as possible to maintain image clarity.


