Achieve professional results by mastering Auto Exposure Bracketing (AEB) and capturing the ‘Hero Shot’ at a 45-degree angle. Prioritize shooting in RAW format to maximize dynamic range and ensure high-end listing quality during post-processing.
🎯 Key Takeaways
- Use AEB (Auto Exposure Bracketing) to capture high-dynamic-range photos of bright skies and shaded properties.
- Shoot exclusively in RAW format to retain maximum detail for professional color grading.
- Maintain an altitude of 30–60 feet to capture the best residential property perspectives.
- Capture neighborhood context shots to highlight proximity to parks, schools, and amenities.
- Utilize ND filters to manage shutter speed and prevent blown-out highlights in midday sun.
Professional real estate drone photography relies on a balance between technical precision and storytelling composition. To produce listing-ready images, you must move beyond simple “eye in the sky” shots and focus on capturing the property’s relationship with its environment. This requires a specific shot list that highlights boundaries and amenities, paired with technical settings that preserve detail in both bright skies and shaded porches.
Prime for Young Adults — 6 Months Free
Exclusive Offer Amazon Prime for Young Adults, Students and 18–24s get six months of Prime free, then half price.
Start 6 Months Free As an Amazon Associate I earn from qualifying purchases.
Mastering these techniques ensures your images do not just show the house, but sell the lifestyle and the location. By using Auto Exposure Bracketing (AEB) and deliberate framing, you eliminate the washed-out horizons and flat lighting that characterize amateur work. This guide focuses on the exact angles and camera settings you need to deliver high-end architectural visuals that stand out in a competitive market.
Essential Composition: The 7 Must-Have Angles for Every Listing
Recommended Best Deal Products


In real estate, your drone is more than a flying camera; it is a tool to explain the property’s layout. Buyers want to see how the house sits on the lot and where it is located relative to the neighborhood. To provide a comprehensive view, you should always capture these seven specific angles to ensure no detail is left to the imagination.
Mapping the Property: Top-Down and Boundary Shots
The first set of images should focus on the “land” aspect of the listing. These shots define the property lines and the overall footprint of the structures.
- The Birds-Eye Plan View: Position the drone directly over the center of the home with the camera at a 90-degree downward tilt. This “map” view is perfect for showing the roof condition, the layout of the backyard, and the proximity of the house to the street.
- The Lot Profile: Capture the home from the side at a medium altitude (approx. 50–70 feet). This shot illustrates the depth of the property and how much space exists between the house and the neighbors.
- The Neighborhood Context: Fly higher (150–200 feet) and tilt the camera slightly toward the horizon. Your goal is to show the nearest park, school, or waterfront. Use a wide-angle perspective to place the property within its community.
The Hero and Lifestyle Angles
Once you have established the boundaries, shift your focus to the aesthetic appeal of the home itself. These shots are meant to be the “money shots” that lead the listing gallery.
- The Front Hero: Position the drone at a 45-degree angle to the front corner of the house. Fly at an altitude of 30–40 feet—high enough to see the roofline but low enough to feel inviting. This is typically the primary thumbnail image for the listing.
- The Rear Hero: Similar to the front hero, but focused on the backyard. This angle should emphasize outdoor living spaces like decks or patios.
- The Amenity Link: This shot connects an outdoor feature (like a pool or detached shop) to the main house. Frame the shot so the viewer can see the path or distance between the two structures.
- The Low-Level Perspective: Fly at just 10–15 feet. This mimics a tall tripod shot and provides a dramatic, “architectural” feel that highlights the front entryway and landscaping.
Technical Mastery: Camera Settings for High-Dynamic Range Aerials
Outdoor architectural photography is notoriously difficult because of high contrast. You are often dealing with a bright sky and a house that is partially in shadow. Relying on “Auto” mode will result in either a “blown-out” white sky or a house that looks like a dark silhouette. To fix this, you must take manual control of your sensor.
Harnessing High Dynamic Range with AEB
Auto Exposure Bracketing (AEB) is your most powerful tool for professional results. Instead of taking one photo, the drone takes 3 or 5 photos at different exposure levels (under-exposed, standard, and over-exposed). You then merge these in post-processing to create a single image with detail in both the brightest clouds and the darkest shadows.
- Enable AEB Mode: Set your drone to “5-shot AEB” for maximum flexibility.
- Shoot in RAW (DNG): Never use JPEG for professional listings. RAW files contain significantly more data, allowing you to recover colors and details that would otherwise be lost.
- Set ISO to 100: High ISO introduces “noise” or grain. Since you are outdoors, keep your ISO at its lowest setting (usually 100) to ensure the sharpest possible image.
- White Balance: Set this manually to “Sunny” or “Cloudy.” If you leave it on Auto, the color of the grass or the house might shift between shots, making your gallery look inconsistent.
The Role of ND and Polarizing Filters
Filters are essentially sunglasses for your drone’s lens. They are critical for managing light and glare, especially when shooting properties with pools or large windows.
Prime for Young Adults — 6 Months Free
Exclusive Offer Amazon Prime for Young Adults, Students and 18–24s get six months of Prime free, then half price.
Start 6 Months Free As an Amazon Associate I earn from qualifying purchases.- ND/PL Filters: A Circular Polarizer (PL) combined with a Neutral Density (ND) filter is the gold standard for real estate. The Polarizer removes reflections from windows and water, allowing the viewer to see “into” the pool rather than just seeing a glare on the surface.
- Color Saturation: Polarizers naturally deepen the blues of the sky and the greens of the lawn, making the property look more vibrant without looking “over-edited.”
- Shutter Speed Rule: While less critical for stills than video, using an ND filter allows you to keep your shutter speed at a manageable level, preventing “rolling shutter” artifacts if there is any movement in the trees or surrounding environment.
The Role of ND Filters and Essential Drone Accessories for Real Estate
Recommended Best Deal Products


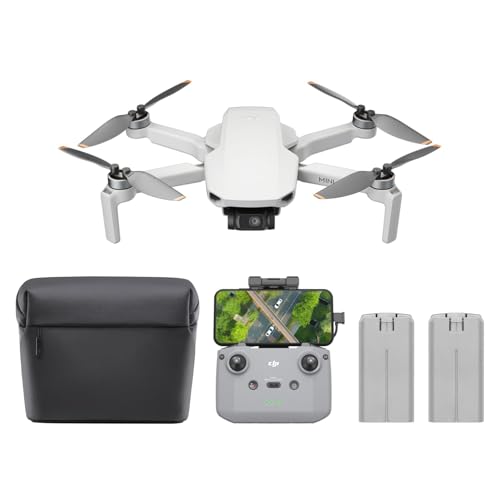
While the drone itself is the star of the show, the right accessories often make the difference between an amateur snapshot and a high-end listing photo. Investing in a few key pieces of gear ensures that you are prepared for varying lighting conditions and long days on-site without technical interruptions.
Mastering Exposure with ND and PL Filters
Neutral Density (ND) filters are essentially sunglasses for your drone’s camera lens. In bright sunlight, drones often struggle with overexposure or “jittery” video caused by excessively high shutter speeds. Using an ND filter allows you to slow down the shutter, creating that smooth, cinematic motion blur that buyers love to see in property walkthroughs. For real estate, a vibrant, natural look is the goal.
- ND8 or ND16: These are ideal for slightly overcast days or the “golden hour” just before sunset.
- ND32 or ND64: Necessary for high-noon shoots in bright, direct sunlight to prevent “blown out” highlights on white roofs or concrete driveways.
- Polarizing (PL) Filters: These are lifesavers for homes with large pools or glass-heavy architecture. They cut through glare and reflections, making the water look crystal clear and the interior visible through windows.
Must-Have Support Gear for Field Work
Nothing kills the momentum of a professional shoot faster than a “Low Battery” warning or a full memory card. For a standard residential property, you should carry at least three batteries. This allows for one in the air, one on deck, and one charging in the vehicle. Additionally, always use V30-rated microSD cards to ensure the drone can write high-resolution 4K data without dropping frames or corrupting files.
Another often-overlooked accessory is a high-quality tablet or a high-brightness monitor. Trying to frame a shot on a small smartphone screen in the middle of a sunny day is difficult. A larger, brighter display helps you spot distracting elements—like a trash can in the driveway or a neighbor’s car—before you hit the shutter button.
Navigating Legal Compliance and Privacy Boundaries in Residential Airspace
High-quality photos won’t matter if you run into legal trouble or upset the local community. Operating a drone for real estate is considered a commercial activity, which brings specific responsibilities and ethical considerations into play that go beyond casual hobby flying.
Professional Licensing and Airspace Awareness
In most regions, including the United States under FAA regulations, drone pilots must hold a commercial remote pilot certificate (such as the Part 107) to take photos for a real estate listing. This applies even if you aren’t being paid directly for the photography, as the photos are being used to “further a business.” Before you take off, it is vital to check for temporary flight restrictions or controlled airspace near local airports.
- Digital Tools: Use apps like B4UFLY or Aloft to secure instant LAANC authorization if your subject property sits in restricted zones.
- Liability Insurance: Always carry “on-demand” drone insurance for the duration of the shoot. It protects you and the homeowner in the unlikely event of property damage or equipment failure.
- ID Display: Ensure your drone is properly registered and displays its registration number clearly on the exterior of the craft.
Respecting the “Privacy Buffer”
Privacy is a major concern for homeowners and their neighbors. When capturing a property, you must be mindful of the “privacy buffer” to avoid complaints. Avoid hovering directly over adjacent backyards or angling the camera directly into neighbors’ windows. Transparency is your best tool for neighborhood relations; if a neighbor approaches you, be polite, explain that you are filming a specific listing for a real estate agent, and offer to show them the screen to prove you are focusing only on the target property.
Prime for Young Adults — 6 Months Free
Exclusive Offer Amazon Prime for Young Adults, Students and 18–24s get six months of Prime free, then half price.
Start 6 Months Free As an Amazon Associate I earn from qualifying purchases.Final Thoughts on Elevating Your Real Estate Imagery
Recommended Best Deal Products


Mastering real estate drone photography is a blend of technical skill, artistic vision, and professional responsibility. By utilizing the right camera settings, investing in essential accessories like ND filters, and staying compliant with local laws, you can provide a perspective that traditional photography simply cannot match. High-quality aerial shots don’t just sell a house; they tell a story about the neighborhood and the lifestyle that comes with the property.
Next Steps: Spend some time practicing your “orbit” and “top-down” shots in an open park before heading to a client’s home. Once you are comfortable with the flight paths, look into obtaining your commercial drone license to fly legally and build trust with your clients.
Ready to transform your listings? Grab your gear, check the weather, and start capturing those stunning bird’s-eye views today!
❓ Frequently Asked Questions
Why is Auto Exposure Bracketing (AEB) necessary for real estate?
Real estate often involves high-contrast scenes where the sky is bright and the house is in shadow. AEB takes multiple shots at different exposures, allowing you to merge them into a single, perfectly balanced HDR image that looks professional.
What camera settings should I use for the sharpest results?
Keep your ISO at 100 to minimize noise and set your aperture between f/2.8 and f/5.6 depending on your drone’s hardware. Ensure your shutter speed is fast enough to avoid motion blur caused by wind or drone movement.
How do I handle privacy concerns when flying over neighborhoods?
Focus the camera strictly on the subject property and avoid capturing identifiable features of neighbors’ interiors or backyards. Always follow FAA Part 107 regulations and local privacy laws to maintain professional standards and avoid liability.
Which ND filter is best for bright midday sun?
An ND16 or ND32 filter is typically best for bright, direct sunlight to prevent overexposure and maintain a natural look. These filters allow you to manage the light hitting the sensor without forcing extreme camera settings.
What are ‘context shots’ and why are they important?
Context shots are wide-angle views taken from a higher altitude that show the property in relation to the surrounding neighborhood. They help buyers understand proximity to cul-de-sacs, waterfronts, or nearby schools, which adds significant value to the listing.
Do I need a specialized drone for professional real estate work?
While many drones work, you ideally need one with at least a 1-inch sensor for high-resolution images. Features like adjustable aperture and the ability to shoot in RAW/DNG are considered industry standards for professional-grade marketing.