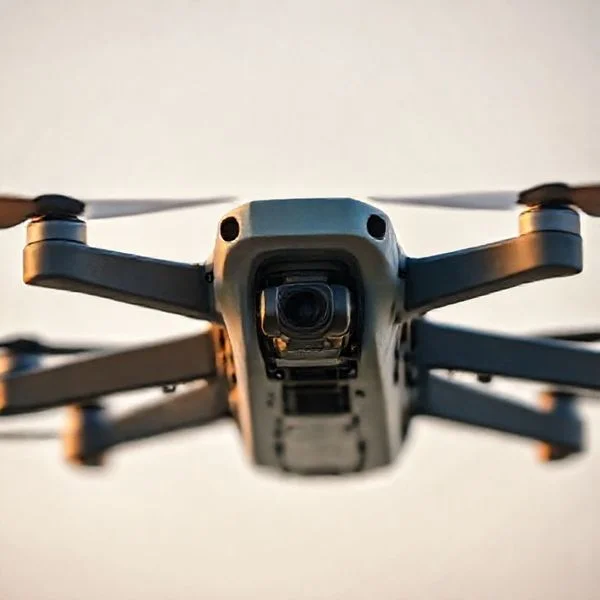
Prioritize safety by assessing branch stability and electrical hazards before attempting any recovery. Most drones can be successfully retrieved using telescoping poles or weighted lines followed by a rigorous post-flight damage inspection.
🎯 Key Takeaways
- Assess proximity to power lines before attempting any drone retrieval.
- Use telescoping poles for drones lodged in lower branches.
- A weighted fishing line helps dislodge drones from higher heights.
- Avoid climbing trees without professional-grade safety equipment and experience.
- Inspect motors and propellers for debris immediately after recovery.
The most effective way to retrieve a stuck drone is through a combination of mechanical reach and physics-based leverage. You can usually recover your aircraft using a telescoping fiberglass pole or a weighted throw line paired with high-tensile paracord. These DIY methods are significantly safer than climbing the tree yourself and far more cost-effective than hiring a professional arborist. Using the right tool prevents you from shaking the tree violently, which often causes the drone to fall deeper into the canopy or sustain camera gimbal damage upon impact.

Safe retrieval matters because your drone’s LiPo battery remains a potential fire hazard while the device is trapped. Furthermore, every hour the drone spends in a tree increases its exposure to moisture and sap, which can corrode sensitive flight controllers and electronic speed controllers (ESCs). Mastering these specialized retrieval techniques ensures you get your gear back on the ground in one piece without risking personal injury or permanent hardware failure.
Prime for Young Adults — 6 Months Free
Exclusive Offer Amazon Prime for Young Adults, Students and 18–24s get six months of Prime free, then half price.
Start 6 Months Free As an Amazon Associate I earn from qualifying purchases.Essential Retrieval Tools and Specialized Equipment Analysis
Recommended Best Deal Products


Successful drone recovery starts with having the right mechanical advantage. You cannot rely on household brooms or light PVC pipes, as they lack the rigidity required to manipulate a drone caught in thick foliage at height. You need equipment designed for tension and reach to exert precise pressure on the specific branch holding your aircraft.
High-Reach Telescoping Poles and Attachments
For drones stuck under 30 feet, a telescoping fiberglass “hot stick” or a dedicated window cleaning pole is your best option. Fiberglass is non-conductive, making it a safer choice than aluminum if you are working near any residential lines. Look for a pole that collapses to six feet but extends to at least 24 feet. The flex at full extension can be significant, so choose a model with a locking flip-cam mechanism rather than a twist-lock, which can slip under the weight of the drone.
- The Drone Hook: Attach a sturdy “S” hook or a specialized tree saw head (with the blade removed) to the tip. This allows you to snag a motor arm or a landing gear strut.
- Rigidity Ratings: Use poles with a base diameter of at least 1.5 inches to ensure the tip doesn’t whip uncontrollably when you are trying to make a delicate snag.
- Padding: Wrap the hook in electrical tape or foam to prevent scratching the drone’s carbon fiber frame or plastic shell.
Weighted Throw Lines and Arborist Gear
If the drone is higher than 30 feet, telescoping poles become too heavy to manage. You must switch to a weighted throw system. This setup consists of a 10-ounce to 16-ounce lead-shot throw bag and 150 feet of 1.75mm polyethylene slick line. Unlike standard rope, slick line (often called “Zing-It”) is designed to slide over bark without snagging, allowing you to position the line exactly over the branch supporting the drone.
- Mechanical Reels: Use a heavy-duty spinning reel loaded with 50lb test braided fishing line for the initial shot. Once the line is over the branch, use it to pull up a thicker paracord.
- Friction Management: Avoid using cotton or nylon ropes for the initial throw, as the friction against the bark will likely trap the rope alongside the drone.
How to Rescue Your Drone Like a Pro: A Practical Walkthrough
Seeing your expensive drone lodged high in a leafy canopy is a heart-sinking moment for any pilot, whether you are a hobbyist or a professional. While your first instinct might be to start throwing rocks or climbing the trunk, these impulsive actions often lead to more damage to the aircraft or, worse, serious personal injury. This guide covers a range of calculated recovery methods, from low-tech manual techniques to specialized equipment usage. By following this systematic approach, you will maximize your chances of a successful retrieval while ensuring that both you and your drone remain in one piece.
Step 1: Situational Assessment and Safety Inspection
What you need: Binoculars (optional), a high-visibility vest, and a clear perimeter around the tree base.
Instructions: Before you attempt any physical recovery, you must conduct a thorough 360-degree assessment of the situation. Use binoculars to determine exactly how the drone is snagged. Is it resting on a thick limb, or are the propellers tangled in smaller twigs? Most importantly, look for nearby power lines or utility cables; if your drone is within 10 feet of a power line, stop immediately and call the utility company. Evaluate the health of the tree—dead or rotting branches are extremely dangerous. Clear the area of bystanders and pets, as the drone could dislodge at any moment and fall with significant force. Note the wind conditions; if it is gusty, the drone might shift, potentially falling on its own or becoming more deeply wedged.
Pro Tip: Take a high-resolution photo of the drone’s position from the ground. Zooming in on the photo can help you see if the battery is still engaged or if the gimbal is under stress, which informs how “gentle” your recovery needs to be.
Prime for Young Adults — 6 Months Free
Exclusive Offer Amazon Prime for Young Adults, Students and 18–24s get six months of Prime free, then half price.
Start 6 Months Free As an Amazon Associate I earn from qualifying purchases.Step 2: The Fishing Line and Sinker Technique
What you need: A heavy-duty fishing rod with at least 20lb test braided line and a 2-ounce lead sinker or a specialized “throw weight.”
Instructions: This is the most effective non-climbing method for drones trapped between 20 and 50 feet high. Attach the sinker securely to the end of the line. Your goal is not to hit the drone, but to cast the line over the specific branch that the drone is resting on. Stand back from the tree to get a better angle. Once the sinker clears the branch and falls back to the ground, you will have both ends of the fishing line. Gently pull the line back and forth to vibrate the branch. This vibration is often enough to shimmy the drone loose. If it doesn’t fall immediately, walk the line further down the branch to find a better leverage point for shaking.
Pro Tip: Never pull the line downward with full force if it gets snagged on the drone itself, as this can snap the gimbal or arms. Use a “sawing” motion to clear the line if it gets caught in the propellers.
Step 3: Utilizing Telescopic Poles or PVC Extensions
What you need: A dedicated fiberglass telescopic rescue pole (often sold for 30–50 feet) or several 10-foot lengths of 1-inch PVC pipe and duct tape.
Instructions: For drones stuck at moderate heights (under 30 feet), physical reach is the most reliable method. If using PVC pipes, slide them together and tape the joints securely with heavy-duty duct tape to prevent them from separating mid-air. On the tip of the final segment, create a “hook” or a “Y” shape using more tape or a wire coat hanger. Carefully lift the pole vertically, keeping it as close to the tree trunk as possible for stability. Once the tip reaches the drone, try to lift it upward off the branch rather than pushing it sideways. Pushing sideways often results in the drone flipping over and becoming more entangled in the foliage.
Pro Tip: Poles become extremely heavy and “wobbly” the higher they go. Have a partner stand at the base to help stabilize the bottom of the pole while you guide the top toward the aircraft.
Step 4: The Arborist Throw Line and Rope Method
What you need: 100 feet of 1/8-inch paracord or arborist throw line, and a small weighted bag (a tennis ball filled with sand works well).
Prime for Young Adults — 6 Months Free
Exclusive Offer Amazon Prime for Young Adults, Students and 18–24s get six months of Prime free, then half price.
Start 6 Months Free As an Amazon Associate I earn from qualifying purchases.Instructions: This method is for drones lodged in very tall trees where fishing lines might snap. Tie your weighted bag to the paracord. Use an “underhand” or “pendulum” swing to lob the weight over the branch holding the drone. Once the weight reaches the ground, you can replace the paracord with a thicker 1/2-inch rope by tying them together and pulling the paracord through. With a thicker rope over the branch, you can apply significantly more “shake” to the limb. This is particularly effective for heavy professional drones like the DJI Inspire series that require more force to move. Ensure you are standing at a 45-degree angle from the drop zone to avoid being hit when the drone finally breaks free.
Pro Tip: If the branch is too thick to shake, you can use the rope to create a “loop” around the branch and pull it slightly downward and then release it quickly, creating a “snap” effect that pops the drone into the air.
Step 5: Safe Ladder Deployment and Spotting
What you need: An A-frame or extension ladder rated for your weight, and a second person to act as a spotter.
Instructions: If the drone is within 15–20 feet, a ladder is often the quickest solution. However, this is where most accidents happen. Always ensure the ladder is on level, firm ground. If using an extension ladder against the tree, follow the “4-to-1 rule”: for every 4 feet of height, the base should be 1 foot away from the tree. Never climb to the top two rungs of an A-frame ladder. Your spotter must keep their hands on the ladder rails and their eyes on you (not the drone) at all times. Once you are high enough, use a reach tool (like a broom handle) rather than overextending your body. If you cannot reach the drone while maintaining three points of contact on the ladder, climb down and try a different method.
Pro Tip: Wear a backpack while climbing. Once you grab the drone, place it inside the backpack to keep your hands free for a safe descent. Never try to climb down a ladder holding a drone in one hand.
Step 6: Post-Recovery Inspection and Maintenance
What you need: A soft brush, compressed air, a microfiber cloth, and a fresh set of propellers.
Instructions: Once the drone is back on the ground, do not immediately attempt to fly it. The impact of the crash and the recovery process can cause “invisible” damage. Use compressed air to blow out any organic debris, dirt, or bark from the motor bells and the gimbal assembly. Inspect the battery for any punctures or swelling; if the battery is damaged, dispose of it safely. Check the propeller blades for “stress whitening” or hairline cracks—even if they look okay, it is best practice to replace them after a tree strike. Perform a “bench test” by powering on the drone without propellers to ensure the gimbal calibrates correctly and the motors spin smoothly without grinding noises.
Pro Tip: Always recalibrate the IMU (Inertial Measurement Unit) and the Compass in your drone’s settings app after a collision. The jarring impact can knock these sensors out of alignment, leading to erratic flight behavior or “Toilet Bowl Effect” in future flights.
✅ Final Checklist
- Power lines and utility hazards have been ruled out before starting.
- The recovery area is cleared of people, pets, and fragile property.
- The drone has been visually inspected for battery integrity before being handled.
- All organic debris (leaves, twigs, sap) has been cleaned from the motors and sensors.
- A full flight system calibration (IMU/Compass) has been performed post-recovery.
Important Notes:
- Safety Warning: Never attempt to climb a tree without professional arboriculture equipment and training. Falling from even 10 feet can be fatal.
- When to Seek Help: If the drone is higher than 50 feet or near power lines, hire a local arborist. Many tree service companies offer “drone rescue” for a small fee ($75–$150), which is much cheaper than a hospital bill or a new drone.
- Estimated Time: 30 minutes to 3 hours depending on height and equipment.
- Estimated Cost: $0 (manual shaking) to $60 (PVC pipes/fishing gear).
Critical Safety Risks and Environmental Hazards to Evaluate
Recommended Best Deal Products


Before you attempt any retrieval method, you must perform a thorough 360-degree risk assessment. Impatience is the leading cause of injuries during drone recoveries. You are dealing with gravity, unstable footing, and potentially lethal electrical currents. Identifying these hazards before you deploy your tools can save your life and prevent legal liability for property damage.
Electrical Hazards and Proximity Rules
The most dangerous element of drone retrieval is the proximity to power lines. Even if your drone is not touching a wire, your retrieval tool could create an arc if it gets too close. Always maintain a minimum 10-foot clearance from any overhead power lines. Remember that wind can sway branches and power lines, closing the gap instantly. If the drone is within this 10-foot “danger zone,” do not attempt a DIY retrieval; call your local utility company instead.
- Conductivity Awareness: Never use aluminum poles, wet wooden sticks, or carbon fiber rods near power lines. Carbon fiber is highly conductive and will behave like a lightning rod.
- Arcing Risks: High-voltage lines can jump gaps. Just because you aren’t touching the wire doesn’t mean you are safe if the air is humid or the pole is damp.
Branch Stability and Structural Integrity
You must evaluate the health of the tree before applying any tension to the branches. Dead wood (widowmakers) can snap without warning when you pull on a throw line or nudge a limb with a pole. Look for signs of decay, such as peeling bark, fungal growth, or holes from boring insects. If the drone is resting on a dead branch, shaking the tree is prohibited, as the entire limb could fall on you.
- The Center of Gravity: Calculate where the drone will fall. It rarely drops straight down. It usually tumbles through lower branches, changing trajectory. Ensure your “drop zone” is clear of people and fragile property.
- Ladder Safety: If using a ladder, follow the 4-to-1 rule: for every four feet of height, the base should be one foot away from the tree. Never stand on the top two rungs, and always have a spotter to stabilize the base on uneven terrain.
- Weight Limits: Most outer branches are not designed to support the weight of a leaning ladder or a climbing human. Keep your weight centered on the main trunk.
Comparison of Manual vs. Mechanical Recovery Solutions
When your drone is lodged firmly in a canopy, you generally have two paths to take: the manual “muscle” approach or specialized mechanical assistance. Choosing between them depends largely on the height of the tree, the value of your aircraft, and the density of the foliage. Manual methods often rely on improvised tools, while mechanical solutions utilize purpose-built hardware designed for arborists or drone enthusiasts.
The Low-Tech Approach: Simplicity and Risk
Manual recovery usually involves extending your reach using basic physical principles. These methods are cost-effective and immediate, making them the first choice for drones stuck in lower branches. However, manual attempts require significant physical coordination and can sometimes cause more harm to the drone if it falls unexpectedly.
- Telescoping Poles: These are the gold standard for manual recovery. Lightweight fiberglass or carbon fiber poles can reach up to 30 or 40 feet, allowing for a controlled “nudge” rather than a chaotic shake.
- Arborist Throw Lines: A weighted bag attached to a slick line is a classic manual tool. It allows you to isolate specific branches, though it requires a fair amount of practice to master the aim.
- Safety Considerations: Manual recovery often tempts pilots to climb. Professionals always advise against unassisted climbing, as the structural integrity of a tree branch is unpredictable when under the stress of a human weight.
Mechanical and Powered Solutions: Precision Recovery
Mechanical solutions often involve more advanced drone accessories or professional-grade equipment. These are preferred for high-value cinema drones or situations where the aircraft is stuck 50+ feet in the air. While more expensive, these methods prioritize the safety of the hardware and the person performing the rescue.
- Recovery Drones: Some pilots use a second “rescue” drone equipped with a mechanical claw or a magnetic release hook. This is a high-skill maneuver but avoids the need for ladders or poles.
- Mechanical Winches: Used primarily by professional recovery services, these tools can apply consistent, directional tension to a branch to lower it safely without the snapping motion associated with manual pulling.
- Motorized Ascenders: For those with climbing gear, motorized ascenders allow for a slow, steady approach to the drone, ensuring it can be hand-retrieved rather than dropped.
Post-Recovery Inspection and System Recalibration Requirements
Once your drone is back on solid ground, the temptation is to immediately swap the battery and take off again. Resist this urge. A collision with a tree—and the subsequent time spent trapped—can cause subtle damage that leads to a catastrophic mid-air failure during your next flight. A systematic “health check” is essential to ensure airworthiness.
Visual and Structural Hardware Assessment
Start with a deep-dive visual inspection. Tree sap, moisture, and fine organic debris can wreak havoc on sensitive electronics and mechanical joints. Even a drone that looks perfect may have developed hairline fractures during the impact or while being freed from the branches.
- Motor Integrity: Manually spin each motor. Listen for grinding sounds or resistance, which usually indicates sand, grit, or bits of wood lodged inside the bell.
- Propeller Stress Marks: Examine the blades for “stress whitening”—small white lines in the plastic that indicate the material has been pushed to its limit. If you see these, always replace the props.
- Gimbal Alignment: The gimbal is the most fragile part of the system. Check for any slight tilts or “jitters” when the unit is powered on, which could signal a bent motor shaft or a torn ribbon cable.
Digital Health Check: Sensor Recalibration
The physical jar of hitting a tree can knock internal sensors out of alignment. Even if the exterior is pristine, the “brain” of the drone may be confused about its orientation or its environment. Skipping recalibration often results in “toilet bowl” circling or unpredictable drifting during your next hover.
Always perform a full IMU (Inertial Measurement Unit) recalibration on a perfectly level surface. This resets the drone’s internal gyroscopes and accelerometers. Follow this with a compass recalibration away from any metal structures. Finally, check your vision sensors; if your drone has obstacle avoidance, the cameras may need to be re-aligned using manufacturer-specific software to ensure they are accurately measuring distances to the next potential tree.
Conclusion
Retrieving a drone from a tree is a test of patience as much as it is a test of skill. Whether you opt for a simple telescoping pole or a more advanced mechanical solution, the priority should always be safety—both yours and the drone’s. Remember that the rescue doesn’t end when the aircraft hits the ground; a thorough post-flight inspection and sensor recalibration are the only ways to guarantee your next flight won’t end in another “treed” situation.
Next Steps: Before your next takeoff, check your flight logs to see exactly what led to the incident and update your “Return to Home” altitude to clear the local treeline. Stay safe, stay patient, and keep your eyes on the horizon!
❓ Frequently Asked Questions
What are the risks of leaving a drone in a tree overnight?
The primary risks include moisture damage from dew or rain, which can short out the motherboard, and the battery reaching a state of deep discharge.
How do I use a weighted line without causing further damage?
Attach a light weight to a high-tensile fishing line, throw it over the specific branch holding the drone, and gently vibrate the branch to shake it loose.
When should I call a professional arborist for help?
If the drone is higher than a standard ladder can reach or if the tree structure is too complex for ground-based tools, a professional climber is the safest option.
How can I check for motor damage after a tree crash?
Manually spin each motor to feel for resistance or grit, then perform a low-altitude hover test to listen for abnormal vibrations or sounds.
Is a ladder the best way to get a drone out of a tree?
Ladders are useful for low branches, but they must be placed on stable ground and should never be leaned against thin, unstable limbs.
Why is recalibration necessary after a tree retrieval?
The impact with branches can jar the IMU and compass; recalibrating ensures the drone’s flight controller has accurate data for stable future flights.