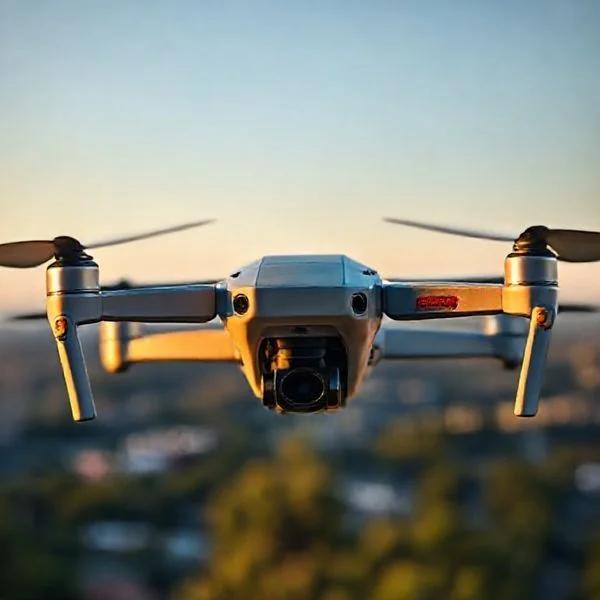
To successfully operate a drone, you must first master the four basic joystick movements: throttle, yaw, pitch, and roll. Always perform a rigorous pre-flight calibration of the GPS and compass to ensure the drone can return home safely if the signal is lost.
🎯 Key Takeaways
- Use the left stick for throttle (height) and yaw (rotation) adjustments.
- Use the right stick for pitch (forward/back) and roll (side-to-side).
- Always verify your ‘Home Point’ is set before taking off.
- Maintain a clear line of sight to avoid signal interference.
- Practice hovering at eye level before attempting long-distance maneuvers.
How to Operate a Drone: A Beginner’s Guide to Safe Flight
To successfully operate a drone without crashing, you must master the physical coordination between your thumb movements and the aircraft’s response. Safe flight is built on two pillars: precise joystick control and rigorous pre-flight calibration. By understanding exactly how the remote interacts with the motors, you transform from a passive observer into a pilot who can react instinctively to wind or obstacles.
Prime for Young Adults — 6 Months Free
Exclusive Offer Amazon Prime for Young Adults, Students and 18–24s get six months of Prime free, then half price.
Start 6 Months Free As an Amazon Associate I earn from qualifying purchases.This mastery is the difference between a controlled landing and a costly repair. Whether you are flying a compact consumer drone or a larger photography rig, the fundamentals of flight dynamics remain the same. Learning these mechanics early ensures that you focus on the sky rather than fumbling with your controller in a panic. Let’s start with the physical controls you will hold in your hands.
Understanding the Anatomy of Drone Flight Controls
Recommended Best Deal Products

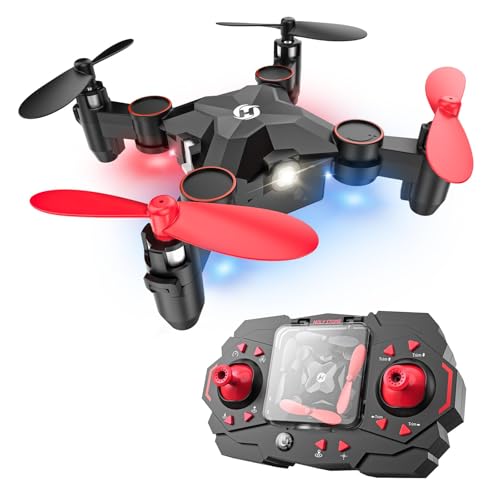

Most modern consumer drones utilize a “Mode 2” configuration on the remote controller. In this layout, your left hand manages the drone’s height and orientation, while your right hand controls its movement through the air. Developing muscle memory for these joysticks is the single most important step in preventing accidents. Every movement should be smooth; jerky inputs lead to instability and crashes.
The Left Joystick: Throttle and Yaw
The left stick is your primary tool for managing verticality and direction. Small, incremental movements are key here. Jamming the stick upward can send the drone skyrocketing into restricted airspace or power lines, while a sudden drop can cause a hard impact with the ground.
- Throttle (Up/Down): Pushing the stick forward increases motor speed, causing the drone to rise. Pulling it back decreases speed, allowing the drone to descend. Most drones will hover in place if you leave this stick in the center.
- Yaw (Left/Right): Moving the stick horizontally rotates the drone on its vertical axis. This “spins” the nose of the drone to face a new direction. It does not move the drone’s location in space, but it changes which way the camera and “front” of the drone are pointing.
The Right Joystick: Pitch and Roll
Think of the right stick as your steering wheel. It dictates the drone’s horizontal path across the landscape. Because the drone tilts its body to move, these movements are often referred to as Pitch and Roll. When you move this stick, the drone leans in that direction to catch the wind and propel itself forward.
- Pitch (Forward/Backward): Pushing this stick forward tilts the drone’s nose down, propelling it forward. Pulling back tilts the tail down, moving the drone toward you.
- Roll (Left/Right): Moving the stick left or right “strafes” the drone sideways. The drone tilts to the side but maintains its forward-facing orientation. This is vital for framing a shot or avoiding a side-on obstacle.
Combining Movements for Fluid Flight
Once you understand the individual axes, you can combine them for fluid movement. For example, pushing the right stick forward while gently moving the left stick left will create a wide, banking turn. To practice, try the “Square Drill”: fly in a perfect square using only the right stick, then try it again while using the left stick to keep the camera facing the center of the square at all times.
Pro Tip: Always keep the drone’s “nose” pointing away from you during your first few flights. This ensures that “left” on the stick is “left” in the sky. If the drone faces you, the controls become inverted, which is the leading cause of beginner pilot error.
How to Pilot Your Drone Like a Pro: A Practical Walkthrough
Operating a drone is an exhilarating blend of high-tech robotics and artistic cinematography. However, taking to the skies involves much more than just pushing a joystick; it requires a deep understanding of hardware, local regulations, and spatial physics. This guide is designed to take you from a nervous beginner to a confident pilot by covering every critical aspect of flight. Following these steps ensures not only the safety of your expensive equipment but also the safety of the people and property around you. Whether you are aiming to capture stunning aerial landscapes or simply enjoy the thrill of flight, mastering these fundamentals is your first step toward becoming an expert aviator.
Prime for Young Adults — 6 Months Free
Exclusive Offer Amazon Prime for Young Adults, Students and 18–24s get six months of Prime free, then half price.
Start 6 Months Free As an Amazon Associate I earn from qualifying purchases.Step 1: Understanding Hardware and Legal Requirements
What you need: Your drone, the manufacturer’s manual, a smartphone or tablet, and your local aviation authority’s registration (e.g., FAA in the US).
Instructions: Before you even power on the device, you must understand the rules of the air. In many countries, drones weighing over 250 grams must be registered. If you are in the United States, you are required to pass the TRUST (The Recreational UAS Safety Test) and carry proof of passage. Once legalities are handled, spend 30 minutes reading your specific model’s manual. Identify the gimbal (the camera stabilizer), the sensors, and the battery compartment. Understanding the layout of your remote controller—specifically which stick controls the “Throttle” (altitude) versus the “Pitch” (forward/backward movement)—is vital for preventing accidental crashes during your first flight.
Pro Tip: Use a permanent marker or a label maker to stick your registration number onto the drone’s fuselage. Most aviation authorities require this to be visible on the exterior of the craft.
Step 2: Battery Preparation and Management
What you need: Drone batteries, remote controller, charging cables, and a fireproof LiPo safety bag.
Instructions: Drone batteries are typically Lithium Polymer (LiPo), which are powerful but require careful handling. Charge your drone batteries and your remote controller to 100% before heading out. Most modern drones use “Intelligent Flight Batteries” that will auto-discharge to a safe storage level after a few days of inactivity, so always top them off the morning of your flight. Check the battery casing for any signs of swelling or “puffing,” which indicates a damaged cell that should never be used. Ensure the batteries click firmly into the drone’s housing; a loose battery is a common cause of mid-air power failures.
Pro Tip: Never fly your battery down to 0%. Aim to have the drone back on the ground with at least 20-25% remaining to prolong the lifespan of the chemical cells.
Step 3: Selecting a Safe Flight Location
What you need: A weather app (like UAV Forecast) and an airspace map app (like B4UFLY or DJI Fly).
Prime for Young Adults — 6 Months Free
Exclusive Offer Amazon Prime for Young Adults, Students and 18–24s get six months of Prime free, then half price.
Start 6 Months Free As an Amazon Associate I earn from qualifying purchases.Instructions: Your first flight should take place in a wide-open area, such as a large park or an empty field, at least 300 feet away from trees, power lines, or buildings. Check your airspace app to ensure you are not in a No-Fly Zone (NFZ) or near a restricted airport. Weather is equally important; for beginners, wind speeds should be under 15 mph. High gusts can easily carry a light drone away. Avoid flying in high humidity or fog, as moisture can short-circuit the sensitive electronic speed controllers (ESCs) inside the arms of the drone. Ensure you have a clear line of sight to the horizon in all directions.
Pro Tip: Early morning “Golden Hour” is the best time for beginners. The wind is usually at its lowest, and the soft light makes it easier to see your drone’s orientation against the sky.
Step 4: The Pre-Flight Inspection
What you need: A flat landing pad (or a piece of flat cardboard) and a microfiber cloth.
Instructions: Set your drone on a flat, level surface. This is crucial because the drone’s Internal Measurement Unit (IMU) calibrates its sense of “level” during the boot-up sequence. Inspect each propeller for tiny chips or stress fractures; even a small crack can cause a prop to shatter under the high RPM of flight. Wipe the camera lens with a microfiber cloth to ensure clear footage. Ensure your microSD card is inserted and has enough space for your flight. Finally, check that the gimbal guard (the plastic clip protecting the camera) has been removed. Powering on the drone with the guard attached can burn out the tiny gimbal motors.
Pro Tip: Always carry a spare set of propellers. If you have even a minor “tip-over” during landing, replacing the props is cheap insurance against a future mechanical failure.
Step 5: Powering Up and Establishing GPS Lock
What you need: The drone, the remote, and your connected mobile device.
Instructions: Follow the “Remote First” rule: always turn on your remote controller before powering on the drone. This ensures the drone immediately finds a transmitter signal rather than searching for one. Open your flight app and wait for the drone to acquire satellites. You should wait for at least 8 to 12 satellites before taking off. This establishes a “Home Point.” If the drone loses connection, it will use these GPS coordinates to automatically fly back and land. Check your “Return to Home” (RTH) altitude settings in the app; set it to 150-200 feet, or high enough to clear the tallest obstacle in your vicinity.
Pro Tip: Don’t rush the takeoff. Wait until the app explicitly states “Home Point Updated” or “Safe to Fly (GPS)” to avoid “flyaways” where the drone drifts with the wind.
Step 6: Mastering Takeoff and Basic Hovering
What you need: The remote controller and a clear 10-foot radius.
Instructions: Most drones have an “Auto-Takeoff” button, but learning manual takeoff is better for skill development. Move both control sticks down and toward the center to arm the motors. Gently push the left stick (throttle) upward until the drone rises to about 6 to 10 feet. Stop and let go of the sticks. The drone should hover perfectly in place using its GPS and downward-facing vision sensors. This is the “Safety Hover.” Watch the drone for 30 seconds to ensure it isn’t drifting or vibrating. Practice “Yawing,” which is rotating the drone in place, to get a 360-degree view of your surroundings before moving horizontally.
Pro Tip: If you feel overwhelmed, just let go of the sticks. Most modern drones are designed to stop and hover in place the moment they stop receiving input.
Step 7: Executing Directional Maneuvers
What you need: Sufficient open airspace (at least 50 yards in all directions).
Instructions: Now that you are hovering, use the right stick to control “Pitch” and “Roll.” Pushing the stick forward moves the drone away from you; pulling it back moves it toward you. Pushing it left or right causes the drone to slide sideways. Start by flying in a large square pattern, keeping the “nose” (the camera) facing away from you. This ensures that the drone’s “left” is your “left.” Once comfortable, try a “Figure Eight” pattern. This requires coordinating both sticks: using the left stick to rotate (Yaw) while using the right stick to move forward and bank. This is the foundation of smooth, cinematic flight.
Pro Tip: Use “Cine” or “Tripod” mode on your controller for your first few flights. This limits the maximum speed and desensitizes the sticks, making the drone move much more slowly and predictably.
Step 8: Monitoring Telemetry and Safe Landing
What you need: Constant visual contact and the flight app interface.
Instructions: While flying, keep an eye on your screen for “Telemetry” data. This includes your distance from the home point, your current altitude, and your signal strength. If the signal bars turn red or yellow, stop and fly closer. When your battery reaches 30%, it is time to land. Bring the drone back to your landing spot. Hover at 3 feet, ensure the area is clear of debris or pets, and slowly pull the left stick down. Hold the stick down until the drone touches the ground and the motors spin down completely. Power off the drone first, then turn off the remote controller.
Pro Tip: Avoid “Hand Catching” your drone until you are an expert. The high-speed propellers can cause serious injury if the drone suddenly compensates for a gust of wind while you are grabbing it.
✅ Final Checklist
- Verify that the “Home Point” was updated on the map before exceeding 20 feet of altitude.
- Check that all propeller nuts are tight and blades are free of nicks or debris.
- Confirm that your “Return to Home” altitude is higher than any nearby trees or buildings.
- Ensure the microSD card is recording and the gimbal moves smoothly through the app.
- Verify the flight battery is physically latched and shows no signs of swelling.
Important Notes:
- Safety First: Never fly over crowds of people, moving vehicles, or near emergency response scenes (like fires or accidents).
- Professional Help: If your drone suffers a hard crash, do not attempt to fly it again if the shell is cracked or a motor feels “gritty” when spun by hand; seek a certified repair technician.
- Estimated Time and Cost: A typical flight session lasts 20-30 minutes per battery. Entry-level GPS drones range from $400 to $800, while professional kits can exceed $2,000.
- Legal Reminder: Always maintain Visual Line of Sight (VLOS). You must be able to see the drone with your own eyes without the aid of binoculars or the camera feed.
Critical Pre-Flight Safety Protocols and Calibrations
Recommended Best Deal Products


Before the propellers even spin, your drone needs to understand its environment. Skipping these digital handshakes is a leading cause of “flyaways,” where the drone loses its connection and drifts away uncontrollably. Modern drones are flying computers; they require accurate sensor data to stay level.
Compass Calibration and GPS Sync
Every time you fly at a new location—or if you have moved more than a few miles from your last flight—you must calibrate the internal compass. This tells the drone where “North” is, which is vital for navigation and stability. Magnetic interference from concrete rebar or metal structures can confuse these sensors.
- The Calibration Dance: Follow your app’s prompts to rotate the drone 360 degrees horizontally and then 360 degrees vertically. The lights on the drone will usually flash green once successful.
- Satellite Lock: Never take off until the drone has a “Strong GPS” signal. Wait for the drone to connect to at least 10 to 12 satellites. This ensures the flight controller knows exactly where it is in 3D space.
Setting the Home Point and Return-to-Home (RTH)
The “Home Point” is the exact GPS coordinate the drone will return to if the battery gets low or the signal is lost. You must confirm this point is recorded on your screen before takeoff. If you take off too quickly, the drone might set the Home Point a mile away from your current location.
- Verify the Map: Look at your controller’s screen to ensure the “H” icon matches your physical standing location.
- Set RTH Altitude: Program your Return-to-Home altitude in the settings. Ensure it is higher than the tallest obstacle in the area (usually 100-150 feet). This prevents the drone from flying into a tree or building while trying to land itself automatically.
- Check Battery Health: Ensure your flight battery and your remote controller are at least 80% charged. High-speed maneuvers consume more power than hovering, and batteries can drain faster in cold weather.
Essential Factors for Choosing a Safe Flight Environment
Before you even power up your motors, the environment you choose will dictate whether your flight is a relaxing success or a stressful rescue mission. For beginners, the ideal location isn’t just about beauty; it is about unobstructed space and minimal interference. A wide-open field, away from crowds and private property, is the gold standard for your first few dozen flights.
Avoiding Physical and Electronic Interference
Physical obstacles like trees and power lines are obvious hazards, but invisible interference can be just as dangerous. High-voltage power lines, cell towers, and even large metal structures can disrupt the GPS signal or the radio connection between your controller and the drone. This “magnetic interference” can cause your drone to behave erratically or lose its Return to Home accuracy.
- The 50-Foot Rule: Try to keep at least 50 feet away from any major structure to ensure a clean signal.
- Open Horizons: Choose a spot where you have a clear line of sight in every direction; if you can’t see your drone, you can’t react to sudden obstacles.
- Mind the Birds: Local wildlife, especially territorial birds like hawks, can view a drone as a threat. If you notice birds circling, it is best to land and move to a different spot.
Monitoring Weather and Airspace Restrictions
Drones are lightweight machines, and even a moderate breeze can make a beginner lose control. Always check the wind speed at the altitude you plan to fly, not just at ground level. Additionally, being a responsible pilot means knowing where you are legally allowed to be. Utilizing apps like B4UFLY or AirAware is essential for identifying No-Fly Zones (NFZ) near airports or sensitive government installations.
- Wind Gusts: If the wind is blowing harder than 15-20 mph, it is usually safer to keep the drone on the ground.
- Visibility: Avoid flying in fog or heavy mist, as moisture can damage internal electronics and significantly reduce your depth perception.
Best Practices for Post-Flight Maintenance and Storage
Operating a drone doesn’t end when the propellers stop spinning. Consistent maintenance ensures that your investment stays airworthy for years. Think of your drone as a high-performance aircraft; it requires a quick inspection after every landing to catch small issues before they become mid-air failures.
Caring for Your Batteries and Propellers
Your batteries and propellers are the most critical “consumable” accessories. Propellers with even tiny chips or hairline cracks can cause excessive vibration, which wears out the motor bearings and degrades video quality. Batteries, specifically Lithium Polymer (LiPo) types, require specific care to avoid swelling or permanent capacity loss.
- The Propeller Flex Test: Gently flex your blades after every flight session. If you see any white stress marks or feel rough edges, replace them immediately.
- Storage Voltage: Never store your batteries fully charged or completely empty for more than two days. Most smart batteries will self-discharge, but aim for roughly 50% charge for long-term storage.
- Cool Down Period: Wait at least 15 minutes after a flight before putting a battery on the charger to allow the cells to reach room temperature.
Long-Term Storage and Cleanliness
Dust, grass stains, and moisture are the enemies of drone longevity. Using a dedicated drone carrying case is the best way to protect the gimbal—the most fragile part of the machine—from being bumped or misaligned. A quick cleaning routine after a day in the field will prevent debris from entering the motor housings.
- Soft-Bristle Brush: Use a small, clean paintbrush or a can of compressed air to clear dust out of the vents and motor gaps.
- Firmware Check: Once you are home, check for firmware updates. These often include critical safety patches and improved flight stability features.
- The Gimbal Guard: Always reattach your gimbal protector before placing the drone back in its bag to prevent the camera from rattling during transport.
Conclusion
Mastering the art of drone flight is a rewarding journey that blends technology with the thrill of exploration. By carefully selecting your flight environment and committing to a solid maintenance routine, you ensure that every takeoff is as safe as it is exciting. Remember, the best pilots aren’t just those with the best maneuvers, but those who respect their equipment and the airspace they share with others.
Next Steps: Before your next flight, download a flight simulator app to practice your controls in a risk-free environment. Once you feel confident, head to a local park and focus on mastering a simple “square” flight pattern.
Ready to take your hobby to the next level? Start exploring our recommended drone accessories to enhance your flight experience today!
❓ Frequently Asked Questions
What is the difference between Pitch and Roll?
Pitch moves the drone forward and backward by tilting the nose up or down. Roll moves the drone sideways to the left or right without changing its orientation.
Why is compass calibration necessary before every flight?
Calibrating the compass ensures the drone’s internal sensors align with the Earth’s magnetic field. This prevents ‘toilet-bowling’ or erratic flight patterns that can lead to crashes.
How does wind speed affect drone operation?
High winds can drain the battery faster as motors work harder to maintain position. It is generally recommended that beginners avoid flying in winds exceeding 15-20 mph.
What should I do if I lose the video transmission signal?
Remain calm and keep the controller pointed toward the drone’s last known position. If the signal doesn’t return, initiate the Return-to-Home (RTH) button or wait for the drone’s failsafe to kick in.
Are there legal restrictions on where I can fly?
Yes, most countries require drones to stay below 400 feet and away from airports or restricted airspace. Always check local regulations and apps like B4UFLY before launching.
What accessories are essential for improving the flight experience?
A high-quality landing pad protects the gimbal from debris, while ND filters help manage light for better video. Extra batteries and a dedicated carrying case are also highly recommended for longer sessions.