
Most consumer drone batteries take between 60 and 90 minutes to reach a full charge, depending on the model and charger used. To minimize downtime, you should use a high-wattage Power Delivery (PD) charger and a dedicated charging hub to manage multiple batteries efficiently.
🎯 Key Takeaways
- Expect 60–90 minutes of charging time for standard consumer drone batteries.
- High-wattage USB-C PD chargers significantly reduce wait times compared to standard USB ports.
- Charging hubs typically charge batteries sequentially, focusing on the fullest battery first.
- The final 10% of charging is the slowest due to the cell-balancing trickle phase.
- Always allow batteries to cool for 15 minutes post-flight before beginning a charge.
On average, most consumer drone batteries take between 60 and 90 minutes to reach a full 100% charge. If you are flying a smaller “mini” drone with a standard 30W charger, you should expect to wait about an hour. However, high-capacity batteries for professional rigs can take upwards of two hours if you are not using a specialized high-wattage power supply. The exact timing depends almost entirely on the battery‘s milliampere-hour (mAh) capacity and the power output of your charging hardware.
Prime for Young Adults — 6 Months Free
Exclusive Offer Amazon Prime for Young Adults, Students and 18–24s get six months of Prime free, then half price.
Start 6 Months Free As an Amazon Associate I earn from qualifying purchases.
Understanding these durations is vital for planning your flight sessions and managing your gear. Since most drones only offer 20 to 35 minutes of actual air time, the “downtime-to-flight-time” ratio is often 3-to-1. Knowing exactly how long you will be grounded allows you to manage your rotation of batteries efficiently. This ensures you never miss a golden hour shot because you were stuck waiting for a blinking red light to turn green.
Average Charging Times for Popular Drone Models
Recommended Best Deal Products
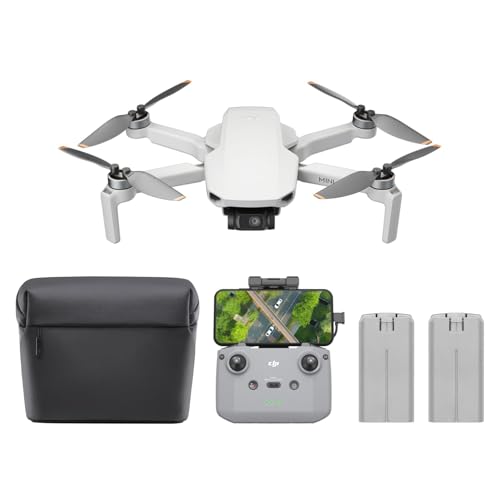


Drones are generally categorized by weight and battery size. Smaller drones use lighter, lower-capacity cells that charge relatively quickly. Larger enterprise or cinematic drones require massive power banks that demand more patience and specialized equipment. To help you estimate your specific wait time, here is a breakdown of the most common models currently on the market.
Common Consumer and Prosumer Benchmarks
Most modern DJI, Autel, and Skydio drones fall into a predictable window. For example, the DJI Mini series is designed for portability, yet its “Intelligent Flight Battery Plus” actually takes longer to charge than the standard version due to higher energy density. Below is a comparison of typical charging times using the manufacturer’s recommended power adapter.
| Drone Model | Battery Capacity (mAh) | Approx. Charge Time |
|---|---|---|
| DJI Mini 4 Pro (Standard) | 2,590 mAh | 70 Minutes |
| DJI Mini 3 Pro (Plus Battery) | 3,850 mAh | 101 Minutes |
| DJI Air 3 | 4,241 mAh | 80 Minutes |
| DJI Mavic 3 Pro | 5,000 mAh | 96 Minutes |
| Autel EVO Lite+ | 6,175 mAh | 90 Minutes |
| DJI Avata 2 (FPV) | 2,150 mAh | 45 Minutes |
- Mini Drones: These usually charge via USB-C. Expect 60-75 minutes with a 30W brick.
- Mid-Range Drones: These often require 65W chargers to keep the wait time under 90 minutes.
- FPV Drones: These often have smaller, high-discharge batteries that can finish in under 50 minutes.
Professional and Enterprise Charging Expectations
For those using professional-grade equipment like the DJI Inspire 3 or the Matrice series, the rules change. These drones use dual-battery systems to power heavy cameras and larger motors. The charging stations for these models are often built into rugged carrying cases. These stations are designed to handle massive amounts of current. They can often charge two batteries to 90% in as little as 35 minutes when set to “Fast Charge” mode. However, reaching that final 10% takes longer to protect the cell chemistry. If you are on a professional set, you are looking at a much more efficient workflow, but the hardware is significantly more expensive and bulky.
Critical Factors That Influence Battery Charging Speed
Not every 60-minute estimate is guaranteed. Several external variables can either accelerate your charging process or leave you waiting for hours. The hardware you plug into the wall is often more important than the battery itself when it comes to speed.
The Role of Charger Wattage (W)
The wattage of your power brick is the primary “speed limit” for your drone. Many users make the mistake of using an old smartphone “cube” (5W or 10W) to charge a high-capacity drone battery. This will significantly increase your downtime. Most modern drone batteries are “Intelligent Flight Batteries” that can handle much higher speeds if the power source allows it.
- Underpowered Chargers: Using a 10W brick on a Mavic 3 battery can take over 4 hours to reach 100%.
- Optimal Wattage: Most modern drones support PD (Power Delivery) fast charging. A 65W or 100W GaN charger is usually the sweet spot for the best performance.
- The “Handshake”: The battery’s internal circuitry communicates with the charger. If the charger cannot provide the requested voltage, the battery defaults to a slow “trickle” speed for safety.
Charging Hubs vs. Direct USB-C Charging
Many drone kits include a “Two-Way Charging Hub.” It is a common misconception that these hubs charge all batteries at once. Most consumer hubs charge batteries sequentially. This means the hub identifies the battery with the highest remaining juice and finishes it first. While this does not make an individual battery charge faster, it gets you back in the air sooner by prioritizing one ready-to-fly unit. If you have three empty batteries, you are looking at a total wait time of approximately three to four hours before the entire set is ready.
Prime for Young Adults — 6 Months Free
Exclusive Offer Amazon Prime for Young Adults, Students and 18–24s get six months of Prime free, then half price.
Start 6 Months Free As an Amazon Associate I earn from qualifying purchases.Temperature and Safety Throttling
Battery temperature is a hidden factor that often confuses pilots. If you just finished a high-speed flight in sport mode, your battery will be hot. Intelligent batteries have built-in thermal protection. If you plug a hot battery into a charger immediately, it will refuse to start the process until the internal temperature drops to a safe level, usually below 104°F (40°C). This can add an extra 15 to 20 minutes of “cool-down time” before the actual charging clock even starts ticking. Always let your batteries sit in the shade for a few minutes after a flight before connecting them to power.
Understanding Intelligent Flight Battery LED Indicators
Most modern drones, particularly those from leading brands like DJI or Autel, use “Intelligent Flight Batteries.” These aren’t just plastic cases with cells inside; they contain a sophisticated Battery Management System (BMS) that communicates with you via LED lights. Understanding these signals is crucial because the “charging time” isn’t always a linear process from zero to one hundred.
Deciphering the Blink Patterns
When you plug your battery in, the LEDs don’t just look pretty—they provide a real-time status report. Generally, a pulsing light indicates active charging, while a solid light indicates a completed stage. However, you might notice the final LED blinking for a significantly longer time than the others. This is often the cell balancing phase. During this time, the BMS ensures every individual cell within the battery pack has the exact same voltage. While it might look like your battery is “stuck” at 95%, this phase is vital for battery health and flight safety.
- Rapid Blinking: This often indicates a charging error or a non-compatible power source.
- Sequential Pulsing: The battery is charging normally. The number of lights lit shows the current capacity.
- All Lights Off: Usually means the battery is fully charged and the BMS has cut off power to prevent overcharging.
Temperature Alerts and Charging Delays
If you have just landed after a high-intensity flight, you might plug your battery in only to find the LEDs flashing in a specific warning pattern. Intelligent batteries will not initiate a charge if the internal temperature is too high (usually above 40°C/104°F) or too low. This safety protocol adds to your “total” wait time. It is always better to let a battery naturally cool down for 15–20 minutes before expecting the charging process to actually begin.
Hardware and Accessories to Maximize Charging Efficiency
The hardware you use is the biggest variable in how long you’ll be tethered to a wall outlet. Many entry-level drones ship with a simple USB cable, but relying on a standard phone brick or a laptop USB port can double or even triple your charging time because those sources offer very low amperage.
Multi-Battery Charging Hubs
A common misconception is that a charging hub charges three or four batteries at the same exact time. In reality, most consumer-grade hubs charge batteries sequentially. The hub identifies the battery with the highest remaining power and finishes it first, then moves to the next. While this doesn’t technically speed up the charge time of a single battery, it drastically improves efficiency for the pilot. You can plug in your entire set overnight and wake up to three full batteries without having to manually swap them out every hour.
- Parallel Chargers: These are third-party accessories that can charge multiple batteries simultaneously, though they require high-wattage power inputs.
- Power Delivery (PD) Adapters: Look for GaN (Gallium Nitride) chargers with at least 30W to 65W output to ensure your hub is getting the maximum juice it can handle.
- Car Chargers: Essential for road trips, these allow you to top off batteries between locations using your vehicle’s 12V socket.
The Role of High-Quality Cables
Not all USB-C cables are created equal. To reach the fast-charging speeds advertised by drone manufacturers, you need a cable capable of handling the specific wattage. Using a thin, cheap cable from an old device can create a bottleneck, limiting the current and extending your wait time. Always stick to the original manufacturer’s cable or a certified high-speed data and power cable to ensure you aren’t losing efficiency through heat and resistance.
Prime for Young Adults — 6 Months Free
Exclusive Offer Amazon Prime for Young Adults, Students and 18–24s get six months of Prime free, then half price.
Start 6 Months Free As an Amazon Associate I earn from qualifying purchases.Conclusion
While the average drone battery takes between 60 and 90 minutes to charge, various factors like temperature, hardware quality, and battery intelligence play a massive role in that timeline. By using high-wattage PD chargers and understanding how your battery communicates through its LED indicators, you can minimize downtime and spend more time in the air. Remember that rushing the process with uncertified hardware can lead to long-term cell damage, so patience and the right gear are your best allies.
Next Steps: Check your current charger’s wattage to see if it meets your drone’s maximum input specs, and consider investing in a sequential charging hub if you own more than two batteries. Ready to get back in the sky? Grab your gear and fly safe!
❓ Frequently Asked Questions
How long does it take to charge a DJI Mavic 3 battery?
With the standard 65W portable charger, it takes approximately 96 minutes. If using the DJI 100W Desktop Charger with the charging hub, the time remains similar but allows for more efficient management of multiple cells.
Why does the last 10% of charging take so much longer?
Drone batteries use a ‘trickle charge’ or balancing phase at the end of the cycle. This ensures all individual cells within the battery pack have an equal voltage, which is vital for flight safety and battery longevity.
Does temperature affect how fast a drone battery charges?
Absolutely. Intelligent flight batteries will throttle or even block charging if the internal temperature is too high (above 104°F) or too low (below 41°F) to prevent chemical damage.
What is the difference between a standard charger and a PD charger?
Power Delivery (PD) chargers can negotiate higher voltages and currents with the battery. A standard USB charger might only provide 5W-12W, whereas a PD charger can provide 30W, 65W, or even 100W, drastically reducing downtime.
How many batteries do I need for a full day of shooting?
For most professional or hobbyist applications, a ‘Fly More’ combo with three batteries is standard. Since one battery charges in about 60-90 minutes and lasts 30 minutes, three batteries allow for almost continuous rotation with a fast charger.
Should I charge my drone batteries to 100% if I’m not flying today?
If you plan to fly within 24-48 hours, 100% is fine. However, for long-term storage, you should only charge them to approximately 50-60% to prevent cell degradation and swelling.


