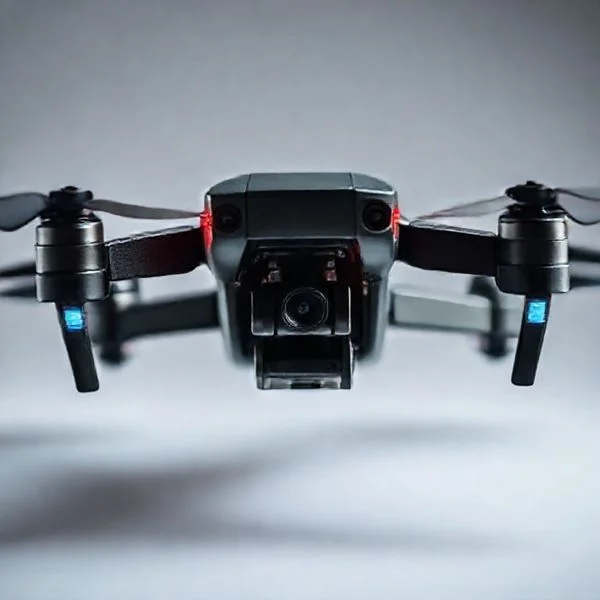
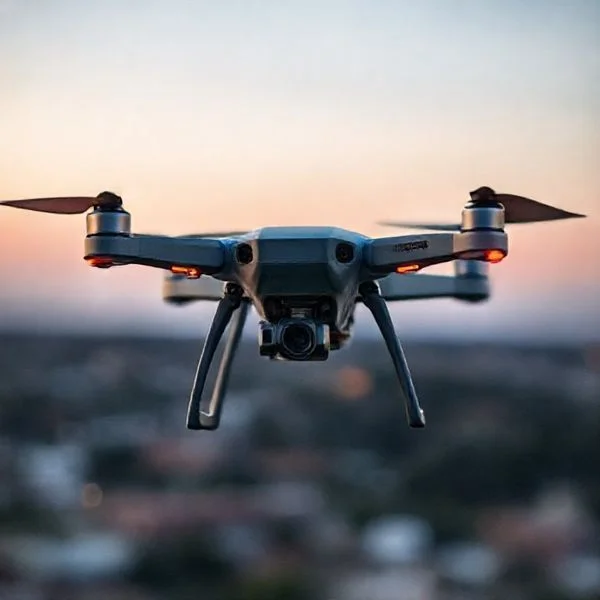
Successful drone repair begins with a comprehensive diagnostic checklist to identify whether a failure is mechanical, electronic, or software-based. Prioritizing proper tool selection and safety protocols is essential to prevent permanent damage to sensitive components like the IMU or ESC. Balancing hardware maintenance with firmware updates ensures long-term flight stability and reliability.
🎯 Key Takeaways
- Takeaway 1:Disconnect all power sources before opening the drone’s chassis.
- Takeaway 2:Inspect propellers for microscopic cracks that cause flight instability.
- Takeaway 3:Use a fine-tip, temperature-controlled soldering iron for board repairs.
- Takeaway 4:Recalibrate the IMU and compass after any hardware changes.
- Takeaway 5:Maintain a log of error codes to track recurring issues.
Fixing a drone starts with isolating whether your issue is a physical break, a component failure, or a software conflict. Most common repairs involve replacing damaged propellers, swapping out burnt-out brushless motors, or soldering new Electronic Speed Controllers (ESCs) after a high-impact crash. By following a systematic diagnostic process, you can identify the specific failure point and perform the repair yourself rather than paying for expensive manufacturer service centers.
Prime for Young Adults — 6 Months Free
Exclusive Offer Amazon Prime for Young Adults, Students and 18–24s get six months of Prime free, then half price.
Start 6 Months Free As an Amazon Associate I earn from qualifying purchases.Mastering these repairs is essential for any serious pilot. Drones are high-performance machines that operate under significant vibration and heat stress, making hardware fatigue inevitable. Understanding how to navigate the internal circuitry and mechanical assembly ensures you can maintain your aircraft’s flight worthiness and safety. This guide provides the technical steps needed to troubleshoot and fix the most frequent malfunctions found in modern FPV and GPS-stabilized drones.
Essential Tools and Specialized Equipment for Drone Repair
You cannot repair a drone effectively with standard household tools. The tight tolerances and miniature components require precision instruments to avoid stripping screws or damaging delicate traces on the Printed Circuit Board (PCB). Before opening your drone’s shell, ensure you have a dedicated workspace with an anti-static mat and high-intensity lighting.
The Precision Hardware Kit
Most drones utilize metric hardware, typically ranging from M1.5 to M3.0 sizes. You will need a high-quality set of hex drivers (1.5mm, 2.0mm, and 2.5mm) and Phillips #00 and #000 screwdrivers. Avoid cheap L-key wrenches; these often slip and round out the screw heads, making removal nearly impossible without a drill. Additionally, keep nylon spudgers or plastic pry tools on hand to separate plastic shell clips without scarring the frame.
- Precision Tweezers: Essential for seating small ribbon cables and holding wires during soldering.
- Blue Loctite (Threadlocker): Apply a small amount to motor screws to prevent them from vibrating loose during flight.
- Digital Multimeter: Crucial for checking battery voltage and testing continuity across the power distribution board.
- Isopropyl Alcohol (99%): Used with a soft brush to clean grass stains or carbon buildup from the electronics after a crash.
Advanced Electronic Repair Tools
For electronic failures, a temperature-controlled soldering iron is mandatory. Most drone components use lead-free solder, which has a higher melting point (around 217°C). You should set your iron to approximately 350°C to 400°C to ensure quick heat transfer without overheating the board. Use a chisel tip for larger power leads and a fine needle tip for signal wires on the flight controller. High-quality rosin-core solder and a flux pen will make the difference between a cold joint that fails mid-air and a professional-grade connection.
The Ultimate Drone Repair Walkthrough
Drones are intricate pieces of engineering that combine aerodynamics, high-speed computing, and delicate electronics. Whether you have experienced a minor clip of a tree branch or a high-velocity “kinetic disassembly” on a concrete surface, understanding the anatomy of your aircraft is the first step toward a successful recovery. This guide covers everything from physical structural repairs to complex electronic troubleshooting. Following these steps carefully is vital, as a poorly repaired drone can become a safety hazard, potentially falling from the sky or causing a lithium-polymer (LiPo) fire. By the end of this walkthrough, you will have the skills to diagnose, deconstruct, and revive your flying machine with professional precision.
Step 1: Damage Assessment and Post-Crash Diagnostics
What you need: A bright LED flashlight, a magnifying glass, a multimeter, and a notebook for documentation.
Instructions: Before touching any screws, perform a systematic visual inspection. Start by checking the battery for any signs of swelling, punctures, or a “sweet” smell, which indicates a dangerous electrolyte leak. If the battery is damaged, dispose of it safely immediately. Use your flashlight to inspect the frame for hairline fractures, particularly around the motor arms and the central chassis. Use a multimeter to check for continuity across your power leads to ensure there isn’t a short circuit that could fry your components the moment you power it on. Spin each motor manually; they should feel smooth with a slight, rhythmic magnetic resistance. If one feels “crunchy” or resists movement, the bearings or magnets are likely compromised. Record every anomaly you find to create a roadmap for your repair process.
Prime for Young Adults — 6 Months Free
Exclusive Offer Amazon Prime for Young Adults, Students and 18–24s get six months of Prime free, then half price.
Start 6 Months Free As an Amazon Associate I earn from qualifying purchases.Pro Tip: Never plug in a drone immediately after a crash if you smell “magic smoke” (burnt electronics). Use a “Smoke Stopper” (a fused power lead) during your first post-repair power-up to prevent destroying your flight controller if a hidden short exists.
Step 2: Preparing a Professional Workspace
What you need: An anti-static (ESD) mat, a magnetic parts tray, a set of precision hex drivers (1.5mm, 2.0mm, and 2.5mm), and isopropyl alcohol (99%).
Instructions: Drone repairs involve tiny screws that are incredibly easy to lose and sensitive electronics that can be killed by static electricity from your fingertips. Clear a flat, well-lit surface and lay down your ESD mat. Organize your tools so they are within reach. As you begin to disassemble the outer shell or the top plate of the frame, place every screw into a magnetic tray. Group them by size or section—for example, keep the “motor screws” separate from the “frame screws.” If your drone has been flying in dusty or damp conditions, use 99% isopropyl alcohol and a lint-free cloth to clean the internal boards. This allows you to see the solder joints clearly and ensures that no conductive debris is bridging the connections on your flight controller (FC) or Electronic Speed Controller (ESC).
Pro Tip: Take high-resolution photos of the wiring and screw placement at every stage of disassembly. It is much easier to refer to a photo than to guess which wire goes to which pad during reassembly.
Step 3: Propeller and Motor Maintenance
What you need: A prop nut wrench, replacement propellers, compressed air, and a replacement motor (if necessary).
Instructions: Propellers are the most common point of failure. Even a tiny chip or “white stress mark” on the plastic can cause vibrations that confuse the flight controller’s gyroscopes, leading to erratic flight. Remove all propellers before doing any bench work. If a motor was identified as “gritty” in Step 1, use compressed air to blow out any sand or metallic debris trapped between the magnets and the stator. If the motor bell is bent, it must be replaced. To replace a motor, you will need to desolder the three wires connecting it to the ESC. Ensure your soldering iron is heated to approximately 350°C (660°F) for a quick, clean release. When installing a new motor, ensure the mounting screws are not so long that they touch the internal copper windings, which would cause an instant electrical short.
Pro Tip: Always check the direction of your propellers (CW vs CCW). Installing them upside down or on the wrong motor is the number one reason why drones “flip over” immediately upon takeoff.
Prime for Young Adults — 6 Months Free
Exclusive Offer Amazon Prime for Young Adults, Students and 18–24s get six months of Prime free, then half price.
Start 6 Months Free As an Amazon Associate I earn from qualifying purchases.Step 4: Soldering and Electronic Repairs
What you need: A temperature-controlled soldering iron, 60/40 leaded solder (or lead-free with flux), a flux pen, and a “helping hands” tool.
Instructions: Many drone “failures” are simply wires that have vibrated loose or snapped during an impact. Inspect the solder joints on the Flight Controller and ESC. A good solder joint should look shiny and convex, like a small bead of water. If a joint looks dull or “cracked,” it is a cold joint and needs to be reflowed. Apply a small amount of flux to the pad, clean your iron tip, and touch it to the joint until the solder melts, then add a tiny amount of fresh solder. If you are replacing a component like a Video Transmitter (VTX) or a Radio Receiver (RX), ensure you do not bridge two adjacent pads with solder. Use your multimeter’s “beep” mode to verify that there is no continuity between the positive (VCC) and negative (GND) pads before finishing.
Pro Tip: When soldering thick battery leads (12AWG or 14AWG), you need more heat. Increase your iron to 400°C briefly to ensure the heat penetrates the thick wire quickly without melting the plastic connector.
Step 5: Structural Frame and Shell Restoration
What you need: Cyanoacrylate (Super Glue) or 2-part epoxy, replacement frame parts, and a heat gun (for heat shrink tubing).
Instructions: For carbon fiber frames, minor delamination (the layers of carbon peeling apart) can be fixed by wicking thin super glue into the layers and clamping them together. However, if an arm is snapped or has a deep crack, it must be replaced to maintain structural integrity. For consumer drones with plastic shells (like the DJI Mavic series), cracks can sometimes be fused using a plastic welding technique or replaced entirely. If you are replacing a frame arm, you will likely need to de-route the motor wires. Use this opportunity to inspect the wire insulation for any nicks or scrapes. Cover any exposed wire with heat shrink tubing and shrink it using a heat gun set to a low temperature to prevent the wire from shorting against the conductive carbon fiber frame.
Pro Tip: If you are using super glue on carbon fiber, be careful not to inhale the dust if you sand it down later. Carbon fiber dust is extremely hazardous to your lungs.
Step 6: Gimbal and Camera Calibration
What you need: Replacement ribbon cables, a set of non-conductive plastic spudgers, and manufacturer-specific calibration software.
Instructions: The gimbal is the most delicate part of a drone. If your camera feed is “jello-y” or the gimbal is limp, check the rubber vibration dampeners; they may have popped out of their sockets. If the gimbal moves but the video is black, the thin ribbon cable is likely torn. Replacing these requires steady hands and plastic spudgers to flip up the tiny ZIF (Zero Insertion Force) connectors. Be extremely gentle, as these plastic clips break easily. Once the hardware is repaired, connect the drone to your computer. Most modern drones require a software-based “Gimbal Calibration” to relearn the center point and limits of the motors. Ensure the drone is on a perfectly level surface during this process, or the horizon in your videos will always appear tilted.
Pro Tip: If your gimbal is vibrating rapidly (oscillating) after a repair, check for any tiny bits of debris or hair caught in the gimbal motors, as even a microscopic obstruction can throw off the PID tuning of the gimbal controller.
Step 7: Firmware Updates and Software Configuration
What you need: A USB data cable, a computer with Betaflight Configurator, DJI Assistant 2, or relevant software.
Instructions: Sometimes a “broken” drone is actually a software issue. Connect your drone to the appropriate configurator tool. Check the “Sensors” tab to ensure the accelerometer and gyroscope are responding correctly to movement. If the 3D model on the screen doesn’t move when you move the drone, the IMU (Inertial Measurement Unit) may be damaged. If the sensors are working, perform an “All-Way” calibration. This involves placing the drone in various orientations (top, bottom, left side, right side) to calibrate the internal compass and accelerometers. Also, check your radio tab to ensure your sticks are mapped correctly (Roll, Pitch, Yaw, and Throttle). If you replaced any electronic components, you might need to update the firmware to ensure compatibility between the old and new parts.
Pro Tip: After updating firmware, always check that your “Failsafe” settings are still configured. You want the drone to drop or return to home if it loses connection, rather than flying away into the distance.
Step 8: Final Reassembly and Pre-Flight Testing
What you need: Threadlocker (Blue Loctite 242) and a safe, open outdoor space.
Instructions: As you put the final screws back in, apply a tiny drop of blue threadlocker to any metal-on-metal screws (like motor mounts). This prevents them from vibrating loose mid-flight. Ensure no wires are pinched between frame plates. Once reassembled, perform a “dry run” without propellers. Power on the drone and your radio, arm the motors, and gently move the sticks to see if the motors react correctly. Finally, take the drone to an open field. For the first flight, hover at eye level for at least two minutes. Look for excessive heat in the motors or any unusual sounds. Check the battery voltage telemetry to ensure there are no sudden drops, which would indicate a failing cell or a high-resistance connection.
Pro Tip: During your first test hover, perform a “punch out” (rapidly increase throttle for one second) to see if the increased current draw causes any electrical resets or desyncs before you fly further away.
✅ Final Checklist
- Verify all motor screws are tight and have threadlocker applied.
- Ensure propellers are installed in the correct orientation and nuts are torqued down.
- Confirm the Failsafe mechanism is active and the “Return to Home” altitude is set higher than local obstacles.
- Check that all wiring is tucked away and cannot be nipped by spinning propellers.
- Verify the battery is securely strapped and the connector is pushed in completely.
Important Notes:
- Safety First: Never work on a drone with the propellers attached while the battery is plugged in. A software glitch or accidental arming can cause severe injury.
- Professional Help: Seek a professional repair shop if the main circuit board (PCB) has visible burn marks or if you are uncomfortable soldering components smaller than 2mm.
- Estimated Time: Simple repairs (props/arms) take 30–60 minutes; complex repairs (ESC/Gimbal) can take 3–5 hours.
- Estimated Cost: $5 for propellers to $200+ for a high-end 4K gimbal or flight controller stack.
Mechanical vs. Electronic Failure: A Diagnostic Framework
When a drone won’t take off or behaves erratically, you must distinguish between a mechanical obstruction and an electronic signal failure. A mechanical issue is usually visible or audible, such as a grinding sound in a motor. An electronic failure is often silent, involving a “bricked” component or a corrupted firmware setting that prevents the arming sequence.
Step-by-Step Mechanical Inspection
Start with the “Look, Listen, Feel” method. First, perform a visual inspection of the frame. Look for stress fractures near the motor mounts or “white stress marks” on plastic shells, which indicate an imminent structural break. Check the propellers for even the slightest chips or bends; even a microscopic imbalance can cause high-frequency oscillations that overheat your motors and confuse the Inertial Measurement Unit (IMU).
- Spin each motor by hand: They should spin smoothly. If you feel “crunchiness” or resistance, there is likely dirt, sand, or a bent bell housing.
- Check for “vertical play”: Pull the motor bell upward. If it moves significantly, the C-clip or retaining screw at the bottom is loose.
- Inspect the wiring harness: Ensure no wires are pinched by the frame or nicked by the spinning props.
Isolating Electronic and Power Issues
If the mechanics look solid but the drone won’t fly, focus on the electronic chain. This involves the battery, the Power Distribution Board (PDB), the ESCs, and the Flight Controller (FC). Connect your drone to a configuration tool like Betaflight or the manufacturer’s proprietary app. If the software cannot “see” a specific motor, the ESC for that arm is likely dead. Use your multimeter to check for continuity between the positive and negative pads on the battery lead; a “beep” indicates a short circuit that must be fixed before you ever plug in a battery.
- LED Status Codes: Most drones use a series of blinks to communicate errors. A solid red light usually indicates a critical hardware failure, while a blinking yellow light often suggests a loss of signal or calibration requirement.
- ESC Beep Patterns: When you plug in the battery, the motors themselves act as speakers. Listen for the full initialization chime. If you only hear the first three beeps and not the final two, the Flight Controller is not communicating with the ESCs.
- Heat Check: Power the drone for 30 seconds (props off), then feel the components. If one ESC or motor is significantly hotter than the others, it has an internal short and needs replacement.
Cost-Benefit Analysis: DIY Repair vs. Professional Servicing
Before you crack open the casing of your quadcopter, you need to decide if the project is worth your time and risk. While the DIY route saves on labor costs, modern drones are incredibly dense pieces of technology. A small mistake during a home repair can lead to a “flyaway” or a total short circuit. Generally, if the repair involves the external shell or simple plug-and-play components, doing it yourself is a smart financial move. However, internal soldering or optical calibrations often require specialized tools that the average hobbyist doesn’t own.
Assessing the Financials: When to Retire the Craft
There is a “golden rule” in drone repair: if the cost of parts and your estimated labor time exceeds 50% of the drone’s current market value, you should consider selling it for parts and upgrading. High-end components like 4K gimbal cameras or main logic boards can be prohibitively expensive.
- DIY Friendly: Replacing propeller guards, landing gear, or modular arms.
- Professional Required: Core motherboards, sensor recalibration, and complex gimbal ribbon cable replacements.
- Hidden Costs: Remember to factor in the cost of specialized screwdrivers (like Torx or hex bits) and anti-static mats if you don’t already have them.
The Warranty and Insurance Factor
Always check your “Right to Repair” status and existing coverage. If you have a protection plan like DJI Care Refresh or a third-party insurance policy, a DIY attempt will almost certainly void your coverage. Professional servicing provides a paper trail and usually a 30-to-90-day warranty on the repair itself. This peace of mind is often worth the extra $100 in labor fees, especially for heavy-duty enterprise drones used for photography or inspections.
Proactive Maintenance Protocols to Prevent Future Malfunctions
The best way to “fix” a drone is to ensure it never breaks in the first place. Most mechanical failures are the result of cumulative wear and tear rather than a single catastrophic event. By implementing a strict maintenance schedule, you can catch micro-cracks in the frame or grit in the motors before they cause a mid-air failure. Think of your drone like a small aircraft; it requires a “flight log” mindset to stay airworthy over the long term.
The “Clean and Tight” Routine
Dirt is the silent killer of brushless motors. Even a small amount of sand or salt spray can cause friction that leads to overheating. After flying in dusty environments, use a soft-bristled brush or a can of compressed air to clear the motor bells. Additionally, drones are subject to constant vibrations that can slowly back out tiny screws.
- Motor Check: Spin each motor by hand; they should feel smooth and silent without any “gritty” resistance.
- Structural Integrity: Use a magnifying glass to check the motor mounts for stress fractures, which often look like tiny white lines in the plastic.
- Propeller Care: Never fly with chipped props. Even a tiny nick creates an imbalance that vibrates the internal sensors, leading to “jello” in your video footage.
Battery Health and Firmware Hygiene
Your batteries are the most volatile part of the system. Storing them at 100% charge for long periods causes chemical degradation and “swelling.” Always store your LiPo batteries at a storage voltage (usually around 50-60%) in a fireproof bag. Furthermore, don’t ignore firmware updates. Manufacturers frequently release patches that fix “bugs” in the flight controller which could otherwise cause the drone to behave erratically or lose connection with the remote.
Conclusion
Fixing a drone is a rewarding skill that transforms you from a casual flyer into a true pilot. By understanding when to tackle a repair yourself and when to defer to the pros, you protect both your investment and the safety of those around you. Remember that the most effective repairs start with a solid diagnosis and a clean workspace. Moving forward, make proactive maintenance a non-negotiable part of your flight routine to extend the life of your gear.
Next Steps: Spend ten minutes today performing a deep-clean of your drone’s motors and checking your batteries for any signs of swelling. If you noticed any recurring flight errors, now is the time to check for a firmware update. Stay diligent, keep your sensors clean, and enjoy the view from above!
❓ Frequently Asked Questions
How do I know if a drone motor needs to be replaced?
Check for physical resistance when spinning the motor manually or check for excessive heat after a short flight. If the motor stutters or fails to spin while the others function, it likely has damaged internal windings or a faulty ESC.
Is it safe to solder drone components at home?
Yes, provided you have experience with small-scale electronics and use a regulated soldering iron. Always use a multimeter to check for short circuits between pads before connecting the battery to avoid blowing the flight controller.
What should I do if my drone constantly loses signal?
First, check for local electromagnetic interference and ensure antennas are correctly oriented. If the issue persists, inspect the internal U.FL connectors to ensure the antenna hasn’t vibrated loose from the receiver.
Can a cracked drone frame be repaired with epoxy?
Minor cracks in non-structural areas can be fixed with plastic epoxy, but major structural damage usually requires a frame replacement. A compromised frame can lead to ‘harmonic resonance’ which causes the flight controller to overcorrect and crash.
Why is my gimbal showing an ‘overload’ error?
This is often caused by debris like sand or hair stuck in the gimbal motors, or a failure to remove the gimbal clamp. If the motors are clear, a software calibration through the manufacturer’s app usually resolves the issue.
How do I handle a drone battery that is swelling?
Stop using a swollen LiPo battery immediately as it is a severe fire hazard. Discharge it completely using a specialized charger’s ‘disposal’ mode and take it to a certified hazardous waste recycling center.