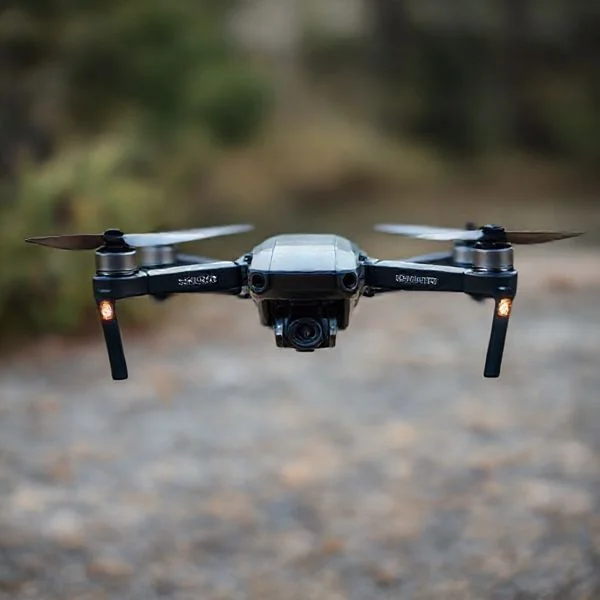
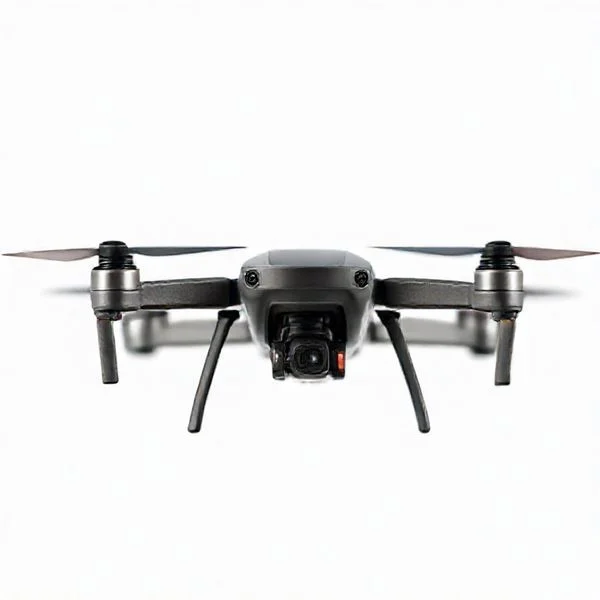
To successfully start drone photography, you must prioritize legal compliance such as obtaining an FAA Part 107 certificate and choosing a drone that fits your skill level. Investing in essential accessories like ND filters and high-speed SD cards is critical for capturing professional-grade aerial imagery.
🎯 Key Takeaways
- Register your drone with the FAA before your very first outdoor flight.
- Select a drone under 249g to simplify registration and portability requirements.
- Utilize ND filters to manage light exposure and achieve cinematic shutter speeds.
- Purchase at least two spare batteries to maximize your time in the air.
- Download airspace awareness apps to check for local flight restrictions and weather.
To start drone photography, you must first clear the “barrier to entry”: legal certification and selecting the right hardware. Most beginners fail because they focus on the camera before understanding the laws that keep them in the air. This guide provides a direct path to getting your license, choosing your first aircraft, and capturing high-quality aerial shots without the steep learning curve.
Recommended Best Deal Products

Learning the fundamentals correctly ensures you do not risk heavy fines or gear-destroying crashes. By mastering the legal requirements and hardware basics now, you can focus entirely on the creative side of composition and lighting later. Here is exactly how to navigate the transition from ground-level amateur to certified aerial photographer.
Legal Framework and Airspace Compliance Requirements
Before your first takeoff, you must understand that the sky is regulated airspace. In the United States, the Federal Aviation Administration (FAA) classifies drone pilots into two categories: recreational flyers and commercial operators. If you plan to sell your photos, use them for social media monetization, or even help a friend sell a house, you need a Part 107 Remote Pilot Certificate. Operating without this for any commercial “furtherance of a business” can result in five-figure fines.
Licensing and Registration
Even for hobbyists, any drone weighing over 250 grams must be registered via the FAADroneZone portal. For professionals, the Part 107 exam covers weather, radio communications, and flight safety. It is a 60-question test that validates your ability to operate safely in the National Airspace System. You should also ensure your aircraft is equipped with Remote ID, a digital license plate now required for most drones.
- The TRUST Test: A free, online safety test required for all recreational flyers before their first flight.
- Part 107 License: A mandatory certification for any pilot using photos for marketing, YouTube ads, or client work.
- Registration: Costs $5 for three years; the registration number must be physically displayed on the drone.
Navigating Airspace Rules
You cannot fly everywhere. Controlled airspace near airports (Class B, C, D, and E) requires specific authorization via the Low Altitude Authorization and Notification Capability (LAANC). Using apps like B4UFLY or AirControl allows you to check for Temporary Flight Restrictions (TFRs) or “No Fly Zones” in real-time. As a general rule, never fly over 400 feet, and always maintain a visual line of sight (VLOS) with your aircraft. Flying over people or moving vehicles is strictly prohibited unless you meet specific “Category” requirements defined by the FAA.
Drone Photography Made Easy: Your Essential Action Plan
Transitioning from ground-based photography to the skies offers a breathtaking perspective that was once reserved for those with helicopter budgets. However, getting started involves more than just buying a quadcopter and hitting the “take off” button. This guide covers everything from navigating strict aviation regulations and choosing the right sensor size to mastering aerial composition and post-processing. Following these steps is critical not only for the quality of your images but for the safety of the public and the longevity of your expensive equipment. By the end of this walkthrough, you will have a clear roadmap to becoming a competent, legal, and creative aerial photographer.
Step 1: Understand the Legal Landscape and Certification
What you need: An internet connection, a government-issued ID, and approximately $5–$175 depending on your country’s registration and testing fees.
Instructions: Before you even purchase a drone, you must understand the laws in your region. In the United States, the FAA requires recreational flyers to pass the TRUST (The Recreational UAS Safety Test) and commercial flyers to obtain a Part 107 Remote Pilot Certificate. Start by visiting the official aviation authority website (like the FAA or EASA) to register yourself as a pilot. If you intend to sell your photos or use them for any business purpose, you must go the commercial route. This involves studying for an aeronautical knowledge exam that covers weather, radio communications, and sectional charts. Once certified, register your drone and label it with your unique registration number. This legal foundation prevents heavy fines and ensures you understand where it is safe to fly.
Pro Tip: Download the “B4UFLY” or “Air Control” app immediately. These apps provide real-time maps of restricted airspaces, temporary flight restrictions (TFRs), and proximity to airports, ensuring you never accidentally wander into a “No Fly Zone.”
Step 2: Selecting the Right Hardware for Photography
What you need: A clear budget (usually $500–$2,000) and a list of desired specifications like sensor size and flight time.
Instructions: Not all drones are created equal for photography. For high-quality stills, prioritize sensor size over speed or range. Look for a drone with at least a 1-inch CMOS sensor, which performs significantly better in low light and offers higher dynamic range than the smaller 1/2.3-inch sensors found in budget models. Ensure the drone features a 3-axis mechanical gimbal; electronic stabilization is insufficient for professional-grade still photography. Consider the weight: drones under 250 grams (like the DJI Mini series) often face fewer regulatory hurdles in many countries, but larger drones (like the Mavic or Air series) handle wind much better. Aim for a kit that includes at least three batteries, as each battery typically only provides 20-25 minutes of actual shooting time after takeoff and landing procedures.
Pro Tip: Buy a “Fly More” combo if available. It is almost always cheaper than buying extra batteries, charging hubs, and carrying cases separately, and you will absolutely need the extra flight time to get the perfect shot.
Step 3: Master Flight Fundamentals in a Safe Environment
What you need: A large, wide-open field away from people, trees, and power lines; a fully charged drone and controller.
Instructions: Your first ten flights should focus entirely on muscle memory rather than taking pictures. Practice the “box” drill: fly in a square pattern while keeping the camera pointed forward. Then, practice the “circle” drill, keeping the nose of the drone pointed at a central object while you orbit it. Learn how to fly “nose-in” (where the drone is facing you), as the controls will feel reversed—pushing the stick left will move the drone to your right. Master the “Return to Home” (RTH) function, but do not rely on it as a crutch; know how to land manually in case of GPS interference. Set your RTH altitude higher than the tallest obstacle in the area to avoid “RTH crashes” where the drone flies straight into a tree while trying to return to you.
Pro Tip: Spend a few hours in a flight simulator (many drone brands have them built into their apps) before your first real flight. Crashing a virtual drone costs $0, while crashing a real one can end your hobby before it starts.
Step 4: Learn Aerial Composition Techniques
What you need: Your drone, a high-speed microSD card (U3/V30 rated), and a basic understanding of the rule of thirds.
Instructions: Ground-level composition rules still apply, but aerial photography introduces new perspectives. The “Top-Down” or “God’s Eye View” is a classic drone shot; point the gimbal 90 degrees straight down to capture patterns, textures, and shadows that are invisible from the ground. Look for “Leading Lines” like winding roads, shorelines, or forest edges to guide the viewer’s eye through the frame. Pay close attention to shadows, especially during the “Golden Hour” (shortly after sunrise or before sunset). Long shadows add depth and a 3D quality to otherwise flat landscapes. Experiment with different altitudes; sometimes a height of only 20 feet provides a more compelling perspective than the legal limit of 400 feet, as it keeps the subject grounded and recognizable.
Pro Tip: Turn on the grid overlay (Rule of Thirds) in your camera settings. This helps you align horizons and place subjects at the intersections of the lines for a more balanced and professional look.
Step 5: Optimize Camera Settings for Aerial Stills
What you need: Your drone controller and the manufacturer’s mobile app (e.g., DJI Fly, Autel Sky).
Instructions: Move away from “Auto” mode as soon as possible. Set your image format to RAW (DNG); this allows you to recover details from shadows and highlights during editing that would be lost in a JPEG. Keep your ISO at the lowest possible setting (usually ISO 100) to minimize digital noise, as drone sensors are small and prone to grain. Use “Auto Exposure Bracketing” (AEB) mode. In this mode, the drone takes 3 or 5 photos at different exposure levels in rapid succession. This is a lifesaver in high-contrast situations like sunsets, as you can merge these photos later into an HDR image. Lastly, check your white balance; setting it manually to “Sunny” or “Cloudy” prevents the color temperature from shifting mid-flight, ensuring consistency across your shots.
Pro Tip: Use a Circular Polarizer (CPL) filter when shooting over water. It cuts through the glare on the surface, allowing the drone to capture the colors and textures beneath the water’s surface.
Step 6: Pre-Flight Planning and Weather Monitoring
What you need: Weather apps (UAV Forecast, Windy) and a pre-flight checklist.
Instructions: Successful drone photography is 70% planning. Before leaving home, check the “UAV Forecast” app for wind speeds at the specific altitude you plan to fly. Surface winds are often much calmer than winds at 200 feet. Check the “KP Index,” which measures geomagnetic activity; a high KP index (above 5) can interfere with your drone’s GPS and compass, leading to “flyaways.” Once at the location, perform a physical inspection of the drone: check propellers for chips, ensure the battery is clicked in fully, and clean the lens. Calibrate the compass if the app prompts you, but only if you have moved a significant distance from your last flight location. Ensure your “Home Point” is updated and locked before you fly more than a few meters away.
Pro Tip: Always launch with your back to the wind. This makes it easier to control the drone during the critical takeoff phase and ensures that if you lose power, the wind might push the drone back toward you rather than away.
Step 7: Post-Processing and Image Enhancement
What you need: Photo editing software (Adobe Lightroom, Luminar, or Darktable) and a computer with an SD card reader.
Instructions: The journey doesn’t end when the drone lands. Import your RAW files into your editing software. Because drone photos can sometimes look “flat” due to atmospheric haze, use the “Dehaze” and “Clarity” sliders sparingly to bring back contrast. If you shot in AEB mode, use the “Photo Merge> HDR” function to combine your exposures into a single high-dynamic-range image. Pay special attention to the horizon; use the cropping tool to ensure it is perfectly level, as even a slight tilt can make a professional photo look amateur. Enhance the natural colors of the landscape by adjusting the “Vibrance” rather than “Saturation” to avoid a nuclear, over-processed look. Finally, export your images in the appropriate resolution and color space (sRGB for web, Adobe RGB for print).
Pro Tip: Don’t over-sharpen. Drone sensors have a tendency to produce artifacts if the sharpening slider is pushed too high. Use masking in Lightroom to apply sharpening only to the edges of objects rather than flat areas like the sky.
✅ Final Checklist
- Are you legally registered and/or certified with your local aviation authority?
- Have you checked the airspace for restrictions and the weather for high winds/KP index?
- Is your drone’s firmware updated and are your batteries/controller fully charged?
- Are you shooting in RAW (DNG) format with AEB (Bracketing) enabled?
- Have you confirmed a GPS “Home Point” lock before heading out over water or distance?
Important Notes:
- Safety First: Never fly over crowds, moving vehicles, or near emergency response efforts (like wildfires). Respect privacy and avoid hovering near residential windows.
- When to Seek Help: If your drone behaves erratically (toilet-bowl effect) or if you experience a “battery cell deviation” error, land immediately and consult the manufacturer or a professional repair technician.
- Estimated Investment: Expect to spend $600–$1,500 for a capable starter setup (drone, extra batteries, filters, and software).
- Timeframe: It typically takes 10–20 flight hours to feel truly comfortable with the controls and another 20 hours to master the photographic side of the hobby.
Essential Gear: From Entry-Level Drones to Professional Kits
The drone market is split into two primary segments: “sub-250g” aircraft and “prosumer” drones. For a beginner, weight is the most important spec because it dictates which laws apply to your flight. Choosing a drone with a 1-inch sensor or larger is the benchmark for high-quality photography that stands up to post-processing and large-scale printing.
Choosing Your First Drone
If you want to avoid the hassle of registration for recreational use, the sub-250g category is the gold standard. However, for serious photography, you need a drone that handles wind well and offers adjustable apertures. Larger drones provide better stability in high-altitude gusts and better dynamic range in the “golden hour” lighting that photographers crave.
- Best for Beginners: DJI Mini 4 Pro. It features a 48MP camera, shoots vertical video, and weighs under 249g, bypassing many weight-based regulations.
- Best for Professionals: DJI Mavic 3 Pro. This offers a triple-lens system and a Hasselblad sensor, providing 12.8 stops of dynamic range for high-end editing.
- Transmission System: Prioritize drones with OcuSync 4.0 or similar technology to ensure a stable 1080p video feed to your controller from miles away.
Must-Have Accessories for Photographers
A drone is only as good as its accessories. For photographers, the most critical tool is the Neutral Density (ND) filter. Think of these as sunglasses for your drone. They allow you to control your shutter speed and exposure without sacrificing the natural look of your image. Without them, your midday photos will often look blown out or jittery.
- ND/PL Filters: Essential for cutting glare on water surfaces and managing bright skies while saturating colors.
- Intelligent Flight Batteries: Most drones fly for 25-30 minutes; you need at least three batteries for a productive session.
- High-Speed MicroSD Cards: Use V30 or V60 rated cards to handle the high data bitrates of 4K 60fps video and RAW image bursts.
- Landing Pad: Protects your gimbal and sensors from dust, tall grass, or sand during takeoff and landing.
Must-Have Accessories for Quality Aerial Imagery
Buying the drone is just the beginning. To truly elevate your photography from hobbyist snapshots to professional-grade art, you need a few essential tools in your kit. These accessories don’t just protect your investment; they directly impact the clarity, color, and “cinematic” feel of your shots.
Neutral Density (ND) Filters: The Secret Sauce
If you take away only one tip regarding gear, let it be this: buy a set of ND filters. Often called “sunglasses for your drone,” these small pieces of glass clip onto your camera lens to reduce the amount of light hitting the sensor. This is crucial for achieving that smooth, motion-blurred look in videos and preventing overexposed highlights in bright midday sun.
- ND8/ND16: Perfect for slightly overcast or golden hour conditions.
- ND32/ND64: Essential for shooting in bright, direct sunlight to maintain a natural shutter speed.
- Circular Polarizers (CPL): Excellent for cutting through glare on water surfaces or making the blue sky pop against white clouds.
Reliable Power and Storage Solutions
Nothing kills a creative flow faster than a “Low Battery” warning or a “Storage Full” error. Because drone batteries typically last only 20–30 minutes, having at least two spare batteries is a necessity for a productive outing. Equally important is your choice of microSD card. Look for cards with a V30 or U3 rating to ensure they can handle the high write speeds required for 4K video without dropping frames.
- High-Speed microSD Cards: Stick to trusted brands like SanDisk or Samsung with at least 64GB of storage.
- Portable Landing Pad: This protects your gimbal and motors from tall grass, sand, and dust during takeoff and landing.
- Hard Carry Case: A rugged, waterproof case is vital for transporting your gear safely to remote locations.
Compositional Techniques and Camera Settings for Success
Having a flying camera gives you a perspective that ground-based photographers can only dream of. However, a high vantage point doesn’t automatically mean a good photo. Success in drone photography comes down to how you frame the world below and how you manipulate your camera’s internal settings.
Mastering the Top-Down “God View”
The 90-degree top-down shot is the hallmark of drone photography. It flattens the world, turning landscapes into abstract patterns, textures, and geometric shapes. When shooting from this angle, look for “leading lines”—like a winding road through a forest or the symmetrical rows of an orchard—to draw the viewer’s eye through the frame. Shadows also become powerful compositional elements during the early morning or late afternoon, adding depth and drama to an otherwise flat perspective.
Dialing in Your Manual Settings
To get the most out of your drone’s sensor, you must move away from “Auto” mode. Shooting in RAW format (DNG) is a non-negotiable for serious photographers; it preserves much more data than a standard JPEG, allowing you to recover shadows and highlights during editing. Pay close attention to your ISO; keep it as low as possible (usually ISO 100) to avoid digital “noise” or graininess in your images.
- The Rule of Thirds: Turn on the grid overlay in your flight app to help position your subject off-center for a more balanced composition.
- Bracketing (AEB): Use the Auto Exposure Bracketing feature to take multiple shots at different exposures. You can merge these later to create a perfectly balanced HDR image.
- White Balance: Set this manually (e.g., “Sunny” or “Cloudy”) to prevent the colors from shifting mid-flight as the drone turns.
Conclusion
Getting into drone photography is an exhilarating journey that blends technical skill with artistic vision. By starting with the right accessories—like ND filters and high-speed storage—and mastering unique aerial compositions like the top-down perspective, you’ll quickly move past the “beginner” phase. Remember that the best gear in the world is no substitute for practice and a keen eye for light.
Your next steps are simple: find a wide-open legal flying zone, experiment with your manual camera settings, and don’t be afraid to fly low to find interesting foreground details. The sky is no longer the limit—it’s your new canvas. Grab your controller, head outside, and start capturing the world from a whole new angle!
❓ Frequently Asked Questions
What is the FAA Part 107 and why is it important?
The Part 107 is a remote pilot certificate required for any drone operations that aren’t strictly for fun. It proves you understand federal safety regulations and airspace classifications, protecting you from heavy fines.
How do I choose between different drone weight classes?
Drones under 249 grams are ideal for beginners because they face fewer regulations in many countries. Larger drones offer better wind resistance and larger sensors but usually require more stringent registration and permit processes.
Why should I invest in a ‘Fly More’ combo?
Most drones only fly for 20-30 minutes per charge, which includes takeoff and landing time. A combo pack provides extra batteries and a multi-charger, ensuring you have enough flight time to capture the perfect shot.
What are the best apps for drone photographers?
Apps like B4UFLY or AirControl are essential for checking restricted airspace in real-time. Additionally, UAV Forecast is vital for monitoring wind speeds and satellite counts before you take off.
What kind of SD card do I need for 4K drone video?
You need a microSD card with a UHS Speed Class 3 (U3) or Video Speed Class 30 (V30) rating. This ensures the card can write data fast enough to prevent dropped frames during high-resolution recording.
Is drone insurance worth the cost for beginners?
Yes, especially since beginners are more prone to ‘fly-aways’ or crashes. Many companies offer on-demand insurance that covers you for a single flight or a full year at a relatively low cost.