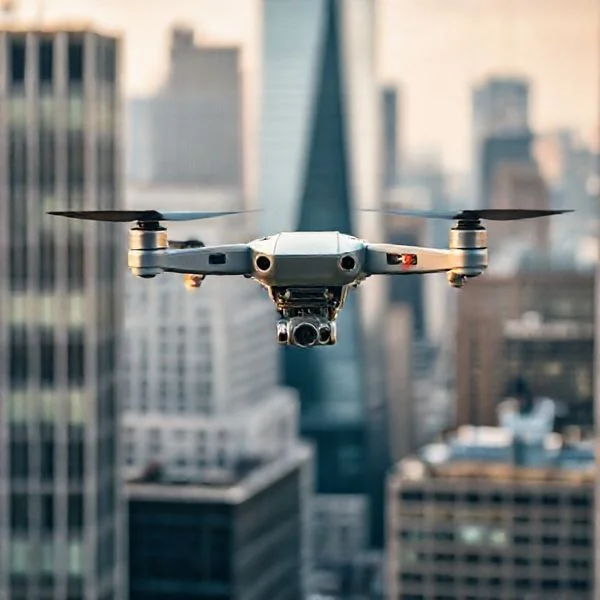
To update your DJI drone, ensure both the aircraft and controller have at least 50% battery and a stable internet connection. Use the DJI Fly app for a wireless update or DJI Assistant 2 on a PC/Mac for troubleshooting and major firmware overhauls. Regularly checking for updates is crucial for flight safety, battery longevity, and accessing new features.
🎯 Key Takeaways
- Ensure both drone and controller batteries are over 50% before starting.
- Remove propellers before updating to prevent accidental takeoff or injury.
- Use DJI Assistant 2 if the mobile app update fails repeatedly.
- Update all intelligent flight batteries individually to ensure system-wide compatibility.
- Stay connected to stable Wi-Fi to prevent firmware corruption during download.
Updating your DJI drone firmware is a straightforward process typically handled through the DJI Fly app or the DJI Assistant 2 desktop software. These updates are essential because they synchronize the software across your aircraft, remote controller, and Intelligent Flight Batteries to ensure seamless communication. Without the latest firmware, you may encounter connectivity drops, restricted flight zones, or firmware mismatch errors that prevent your drone from taking off.
Prime for Young Adults — 6 Months Free
Exclusive Offer Amazon Prime for Young Adults, Students and 18–24s get six months of Prime free, then half price.
Start 6 Months Free As an Amazon Associate I earn from qualifying purchases.This guide provides the exact steps needed to refresh your system and maintain peak performance. Whether you are using the auto-prompt feature on your smartphone or troubleshooting a failed update via a PC, following the correct sequence is critical to avoiding a bricked device or mid-air power issues. By the end of this guide, you will know exactly how to manage your drone’s internal software like a professional pilot.
The Importance of Firmware Updates for Flight Safety
Recommended Best Deal Products


Firmware acts as the operating system for your drone’s hardware. DJI regularly releases patches that go beyond simple feature additions; these updates often include critical stability improvements that keep your drone in the air during high-wind conditions or signal interference. If you skip these updates, you risk flying with outdated flight control logic that might not account for newly discovered hardware edge cases.
Critical Fixes and Battery Calibration
One of the most overlooked aspects of DJI updates is Intelligent Flight Battery management. Firmware updates often optimize how the drone calculates remaining power, preventing the dreaded forced landing scenario caused by sudden voltage drops in older battery cells. Additionally, updates refresh the FlySafe database, which contains the latest Temporary Flight Restrictions (TFRs) and No-Fly Zones (NFZ). Keeping this data current ensures you remain legally compliant and avoid accidental incursions into restricted airspace.
- IMU and Compass Calibration: Updates often refine how the drone interprets sensor data, reducing the risk of “toilet bowling” or drifting during a hover.
- Transmission Stability: Enhancements to OcuSync protocols improve the video feed quality and link reliability between your controller and the aircraft.
- Bug Patches: These updates resolve known issues where the camera might freeze or the gimbal might lose its center point during high-speed maneuvers.
- Feature Unlocks: Often, DJI releases hardware with software-locked features (like certain tracking modes) that are only activated via a later firmware release.
DJI Drone Maintenance Made Easy: Your Essential Action Plan
Keeping your DJI drone’s firmware up to date is not just about getting new features; it is a critical safety requirement that ensures your flight controller, gimbal, and battery management systems operate within the latest safety parameters. This guide covers the entire process of updating your drone via the mobile app and the desktop software, ensuring your aircraft remains stable, complies with local regulations, and benefits from the latest performance optimizations. Whether you are flying a Mini, Air, or Mavic series, following these steps will prevent “bricking” your device and ensure a seamless flight experience.
Step 1: Pre-Flight Power and Connectivity Check
What you need: Your drone, remote controller, and a fully charged smartphone or tablet.
Instructions: Before you even think about hitting the update button, you must ensure your hardware has enough juice. DJI prevents updates if the battery level is below 40% or 50% depending on the model, but for maximum safety, ensure both the drone battery and the remote controller are charged to at least 75%. Firmware updates can take 15 to 30 minutes and involve multiple reboots; if the power cuts out during a critical data write, you risk corrupting the internal storage. Additionally, ensure your mobile device is connected to a high-speed Wi-Fi network rather than a weak cellular signal, as firmware packages can range from 500MB to over 2GB.
Pro Tip: Remove the propellers before starting. During updates, the motors may spin briefly or the gimbal may move aggressively, and doing this indoors without propellers prevents accidental lift-offs or damage to the camera motors.
Prime for Young Adults — 6 Months Free
Exclusive Offer Amazon Prime for Young Adults, Students and 18–24s get six months of Prime free, then half price.
Start 6 Months Free As an Amazon Associate I earn from qualifying purchases.Step 2: Updating the DJI Fly or DJI GO 4 App
What you need: Access to the Apple App Store or Google Play Store (or the DJI website for Android APKs).
Instructions: The drone’s firmware is managed by the app on your phone. If your app is outdated, it may not “see” the latest firmware available for the aircraft. Open your app store and check for updates to “DJI Fly” (for newer drones) or “DJI GO 4” (for older models like the Mavic 2). For Android users, it is often better to go directly to DJI’s Download Center on their website to get the latest APK, as the Google Play Store versions are sometimes outdated due to licensing issues. Launch the app after updating to ensure it initializes correctly and logs you into your DJI account.
Pro Tip: Always log into your DJI account before starting the update process. Some firmware updates require account verification to sync flight records and No-Fly Zone (NFZ) databases.
Step 3: Establishing the Hardware Link
What you need: USB-C or Lightning cable and the connected RC/Drone set.
Instructions: Power on your remote controller first, then power on the drone. Connect your mobile device to the remote controller using the appropriate data cable. Once the “Aircraft Connected” status appears on your screen, the app will automatically run a background check against DJI’s servers. If a new firmware version is available, a prominent notification will appear on the main dashboard—usually a blue or orange banner saying “New firmware update available.” Tap this banner to enter the update screen. If it doesn’t appear, navigate to the “About” section in the settings menu to manually check for updates.
Pro Tip: If the app fails to recognize the drone, try swapping the USB cable. DJI controllers are notoriously picky about cable quality, and a standard charging-only cable will not work for data transfers.
Step 4: The Firmware Download Phase
What you need: A stable internet connection and patience.
Prime for Young Adults — 6 Months Free
Exclusive Offer Amazon Prime for Young Adults, Students and 18–24s get six months of Prime free, then half price.
Start 6 Months Free As an Amazon Associate I earn from qualifying purchases.Instructions: Once you tap “Update,” the app will begin downloading the firmware package. During this stage, do not turn off your phone or switch to another app. The download speed depends entirely on your internet connection. You will see a progress bar indicating the download status. Once the download reaches 100%, the app will begin transferring the data from your phone to the drone via the RC link. This is the stage where the drone’s fans might start spinning at high speed to prevent the internal processors from overheating while they handle the incoming data.
Pro Tip: Put your phone in “Do Not Disturb” mode. An incoming phone call or a heavy notification can sometimes interrupt the data transfer between the app and the controller, causing the process to fail.
Step 5: Monitoring the Installation and Reboot Cycle
What you need: Visual and auditory monitoring of the drone.
Instructions: After the transfer, the actual installation begins. This is the most critical phase. The drone will beep repeatedly, the LED lights will flash various colors (usually red and green), and the gimbal may go limp or recalibrate itself. It is perfectly normal for the drone to power off and restart several times during this process. You will see a percentage indicator on your mobile device. Do not turn off the drone or the remote controller until the app explicitly states “Update Successful.” If the update hangs at 99% for more than five minutes, do not panic; wait at least ten minutes before attempting a restart.
Pro Tip: If the update fails at the installation stage, it is often due to an SD card error. Try removing the microSD card from the drone and attempting the update again.
Step 6: Updating Additional Batteries
What you need: All spare Intelligent Flight Batteries.
Instructions: Many users don’t realize that DJI batteries have their own internal firmware for the Battery Management System (BMS). After the main drone update is finished, power down the aircraft and swap in your second battery. Turn the drone back on. If that battery needs an update, the app will show an “Inconsistent Firmware” warning. You won’t need to download the whole package again; you simply need to slide the “Update” slider to sync the battery with the drone’s current firmware version. Repeat this for every spare battery you own to ensure flight stability across all power sources.
Pro Tip: Never fly with a battery that has “Inconsistent Firmware.” This can lead to incorrect power readings or mid-air power failures because the drone and battery cannot communicate correctly.
Step 7: Using DJI Assistant 2 (The Professional Fallback)
What you need: A PC or Mac and the DJI Assistant 2 software.
Instructions: If the mobile app method fails or “bricks” the drone, you must use the desktop software. Download the specific version of “DJI Assistant 2” (e.g., for Mavic, Consumer Drones, or Enterprise) from the DJI website. Install the software and launch it. Connect your drone directly to your computer via a high-quality USB-C cable and power it on. The software should detect the drone model. Click on the device, go to “Firmware Update,” and you will see a list of all available versions. This method is much more stable than Wi-Fi because it uses a direct wired connection and can be used to “Refresh” or “Downgrade” firmware if a specific version is buggy.
Pro Tip: Ensure you are using the correct version of Assistant 2. DJI has split the software into several versions (Consumer Series, Enterprise, FPV); the wrong version will simply not recognize your drone.
Step 8: Post-Update Calibration and Testing
What you need: A flat, level surface and an open outdoor space.
Instructions: Firmware updates often reset the sensor parameters. Before your first flight, go into the app settings and check the status of the IMU and Compass. If the app shows “Calibration Required” or a yellow warning, follow the on-screen prompts to recalibrate the sensors. Place the drone on a perfectly level surface for the IMU calibration and move away from metal structures for the Compass calibration. Finally, perform a short test flight at a low altitude (3-5 meters) to ensure the gimbal is level and the controls are responsive before heading out for a serious mission.
Pro Tip: Check your “Advanced Safety Settings” after an update. Sometimes, updates reset your “Return to Home” (RTH) altitude to the factory default (usually 30m), which might be too low for your local environment.
✅ Final Checklist
- All Intelligent Flight Batteries have been updated and checked for consistency.
- IMU and Compass statuses are “Normal” in the Safety menu.
- Return to Home (RTH) altitude and Max Flight Distance settings are verified.
- The microSD card has been re-inserted and is recognized by the drone.
- Remote controller firmware is verified as compatible with the aircraft firmware.
Important Notes:
- Safety Warning: Never attempt an update while the drone is on a metallic surface or near strong magnetic interference, as this can corrupt the compass data during the write process.
- Professional Help: If the drone enters a “Permanent Beeping” state or the LEDs stay solid red after a failed update, contact DJI Support; do not attempt to force-flash the firmware repeatedly.
- Estimated Time: 30 to 45 minutes (including battery swaps and calibration).
- Cost: $0 (All DJI firmware updates are free of charge).
DJI Fly App vs. DJI Assistant 2: Choosing the Right Tool
Recommended Best Deal Products

Choosing the right method depends on your current situation and the health of your drone’s software. Most pilots prefer the DJI Fly app for its wireless convenience, while the DJI Assistant 2 serves as a robust backup for troubleshooting. Both methods achieve the same goal: ensuring your hardware and software are perfectly aligned. Understanding when to use each will save you time and frustration at the airfield.
Updating via the DJI Fly App: Step-by-Step
The DJI Fly app is designed to automate the update process using an Over-The-Air (OTA) connection. To begin, ensure your smartphone, remote controller, and drone are all charged to at least 50%. A sudden power loss during a firmware write can cause system failure. Ensure you have a stable internet connection, preferably via Wi-Fi, as firmware files can be several hundred megabytes in size.
- Power On Your Devices: Turn on your remote controller followed by the aircraft. Ensure they are linked and the video feed is visible on your screen.
- Check for the Auto-Prompt: Open the DJI Fly app home screen. If an update is available, a blue notification prompt will automatically appear on the top left. Tap “Update” to enter the download interface.
- Manual Update Check: If the prompt does not appear, enter the “Camera View,” tap the three dots in the top right corner to open the menu, go to the “About” tab, and scroll down to select “Check for Updates.”
- Download and Install: Tap the update button. The app will download the package to your phone and then transmit it to the drone. You will see a progress bar. Your drone will beep, the LEDs will flash, and the gimbal may go limp and restart during this process. Do not turn off any devices until the app confirms the update is complete.
- Update Additional Batteries: If you have multiple batteries, insert each one into the drone after the initial update. The app will usually display a “Firmware Mismatch” notification. Simply slide the on-screen prompt to update the battery to the current version.
The Desktop Alternative: DJI Assistant 2
The DJI Assistant 2 software is a powerful desktop application available for PC and Mac. This is the “hard-wired” method and is generally more stable than the mobile app. You should switch to the desktop software if you experience any of the following: failed OTA updates that get stuck at 99%, a “firmware update failed” loop, or if you need to perform a clean firmware “refresh” to fix erratic flight behavior.
- Software Versioning: Ensure you download the correct version of Assistant 2 for your specific drone series (e.g., “DJI Assistant 2 (Consumer Drones Series)” for the Mavic or Mini lines).
- Physical Connection: Use a high-quality USB-C cable to connect your drone directly to your computer. Avoid using USB hubs, which can sometimes drop the connection.
- Firmware Refresh: Once connected, you can click on your device name and see a list of available firmware. The “Refresh” option allows you to re-install the current version, which is a common fix for software glitches.
- Remote Controller Updates: Remember that you must update the remote controller and the drone separately when using the desktop software, as it can only talk to one device at a time via the USB cable.
Common Causes of Firmware Update Failures and Errors
Even with DJI’s refined software, firmware updates don’t always go according to plan. Encountering an “Update Failed” message mid-way through the process can be nerve-wracking, but these errors usually stem from a few predictable culprits. Understanding why these hiccups happen can save you hours of troubleshooting and prevent potential “bricking” of your hardware.
Network Instability and Server Timeouts
One of the most frequent reasons an update stalls—often hanging at the 99% mark—is a micro-interruption in your internet connection. DJI firmware packages are large and require a consistent handshake with DJI’s servers. If your smartphone switches from Wi-Fi to cellular data during the download, the data packet may become corrupted, leading to a verification error during the installation phase. Using a stable, high-speed home network is always preferable to using public hotspots or weak mobile signals.
Hardware Mismatches and Interference
Sometimes the update fails because the drone and the remote controller are on conflicting versions. This is common when a user updates the aircraft but forgets the controller, or vice versa. Additionally, local signal interference can disrupt the transmission between the app and the hardware. Some common failure points include:
- Insufficient Storage: If the microSD card in the drone or the internal storage on your mobile device is full, the update package has nowhere to unpack.
- Battery Thresholds: Most DJI hardware will automatically abort an update if the battery level drops below a certain percentage (usually 40-50%) to prevent a total shutdown during a critical system write.
- Temperature Throttling: Updates generate significant heat as the processor works at maximum capacity. If the drone is sitting in a hot room without airflow, it may shut down to protect its internal components.
Essential Pre-Update Checklist for DJI Drone Owners
Treating a firmware update like a pre-flight mission is the best way to ensure everything runs smoothly. Before you even tap the “Update” button, a few minutes of preparation can eliminate the most common risks associated with drone software maintenance.
Power Management and Safety Protocols
First and foremost, charge every component. This includes the drone battery, the remote controller, and your smartphone or tablet. Firmware updates can take anywhere from 10 to 30 minutes, and the aircraft often reboots multiple times during the process, which consumes a surprising amount of power. Safety Tip: Always remove your propellers before starting an update. While rare, firmware resets can occasionally trigger motor spins; removing the props ensures your drone stays on the table and your fingers stay safe.
Environment and Hardware Setup
Ensure your environment is conducive to a stable data transfer. This means finding a spot with excellent Wi-Fi and minimal radio frequency interference. You should also perform a quick “digital housecleaning” to prepare your hardware for the new software layer. Consider the following points:
- Clear the Gimbal: Remove the gimbal protector. The camera system often calibrates during an update, and a physical restriction can cause motor overload errors.
- Check SD Card Health: Ensure your microSD card is formatted and has at least 2GB of free space. A faulty or slow card can lead to write errors during the installation.
- Update the App First: Always check the App Store or Google Play Store to ensure the DJI Fly or DJI Go 4 app is updated to the latest version before attempting to push firmware to the drone.
- Stay Close: Keep the remote, the drone, and your mobile device within three feet of each other to maintain a strong connection.
Conclusion
Maintaining your DJI drone through regular firmware updates is the single best way to ensure flight safety, legal compliance, and access to the latest imaging features. While the process is mostly automated, being aware of common failure points like battery levels and network stability ensures you spend less time troubleshooting and more time in the air. By following a simple pre-update checklist, you protect your investment and keep your gear running like new.
Next Steps: Power up your drone today and check the “About” section in your DJI app for any pending updates. Once you’re current, take a quick test flight in a controlled area to verify all systems are “go.” Safe flying!
💬 Quick Questions & Answers
How long does a DJI firmware update take?
Most updates take between 10 to 20 minutes depending on your internet speed and the size of the firmware package.
Can I update my DJI drone without Wi-Fi?
No, you must have an active internet connection to download the firmware files to your mobile device or computer.
Should I remove propellers before updating?
Yes, it is a critical safety precaution to remove propellers in case the motors pulse or spin during the reboot process.
Why is my DJI drone update stuck at 99%?
This is usually caused by a slow data write or connection glitch; wait five minutes before restarting the drone and the app.
Do I need to update my batteries separately?
If the firmware includes battery updates, you must insert each battery into the drone one by one to complete the process.
❓ Frequently Asked Questions
What happens if the drone loses power during an update?
A power loss during an update can lead to ‘bricked’ firmware, making the drone unresponsive. Always ensure your battery is above 50% and never turn off the device until the update is confirmed successful.
Why does my DJI remote controller need a separate update?
The remote controller runs its own communication protocols that must remain synchronized with the aircraft’s firmware. Keeping both updated prevents signal interference, lag, and potential connection drops during flight.
Is it possible to downgrade DJI firmware if I don’t like the update?
Generally, DJI restricts firmware downgrades to ensure users have the latest safety and security patches. In limited cases, the DJI Assistant 2 desktop software may allow a roll-back, but this is model-dependent.
What should I do if the ‘Update Failed’ message appears multiple times?
If the mobile app fails, switch to a computer and use the DJI Assistant 2 software. This method is more stable as it uses a wired USB connection and can often bypass mobile-specific connectivity issues.
Does updating firmware delete my drone’s flight logs or media?
No, firmware updates do not affect your stored flight logs or the media on your SD card. However, it is always recommended to back up important footage before performing any system-level updates.
How do I know if a new update is available for my specific model?
The DJI Fly or DJI GO 4 app will automatically display a notification banner on the home screen when a new version is detected. You can also manually check for updates in the ‘About’ section of the settings menu.