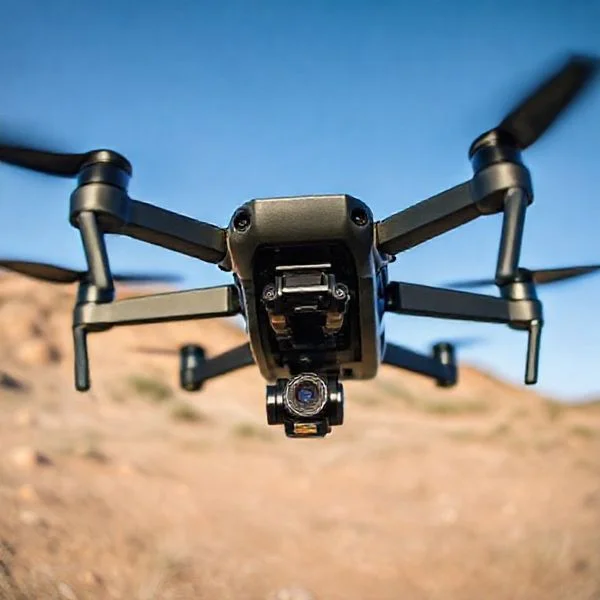
To factory reset a drone, you typically need to use the manufacturer’s mobile app or desktop assistant software since most modern models lack a physical reset button. This process is the most effective way to fix persistent firmware glitches and ensure all personal flight data is wiped before selling your device.
🎯 Key Takeaways
- Sync all flight logs to the cloud before initiating a factory reset.
- Ensure battery levels are above 50% to prevent firmware corruption.
- Use desktop software like DJI Assistant 2 for a deep system restore.
- Remove the microSD card to protect your footage during the reset.
- Always re-calibrate the compass and IMU after a full system wipe.
Performing a factory reset on your drone is the most effective way to clear persistent software bugs, fix transmission interference, or wipe your personal flight data before selling the aircraft. While a simple power cycle fixes minor glitches, a full system restore reverts the flight controller’s internal settings to their original out-of-the-box state. Depending on your model, this is usually achieved through a specific button sequence on the battery or via desktop software like DJI Assistant 2.
Prime for Young Adults — 6 Months Free
Exclusive Offer Amazon Prime for Young Adults, Students and 18–24s get six months of Prime free, then half price.
Start 6 Months Free As an Amazon Associate I earn from qualifying purchases.Understanding the difference between a basic reboot and a hard reset is critical for your drone’s health. A true factory reset will unbind your account, recalibrate the IMU (Inertial Measurement Unit), and delete customized button mappings. This process ensures that the next time you take off, the flight controller is running a clean version of the firmware, free from the cached errors that often accumulate during multiple wireless updates.
Common Scenarios Requiring a Drone Factory Reset
Recommended Best Deal Products


There are three primary situations where a standard restart isn’t enough, and you must perform a full system wipe to maintain flight safety and operational integrity.
Fixing Persistent Firmware and Connectivity Glitches
If your drone consistently fails to connect to the remote controller or experiences “gimbal IMU” errors despite repeated calibrations, the firmware may be corrupted. This often happens after a failed “Over-the-Air” (OTA) update via Wi-Fi. A factory reset forces the drone to reload its core operating parameters. Common signs you need a reset include:
- Compass Interference: Errors that persist even in wide-open, non-magnetic fields.
- Transmission Lag: Significant video latency that wasn’t present when the drone was new.
- App Crashes: When the DJI Fly or Autel Sky app fails to recognize the aircraft despite a solid cable connection.
Preparing Your Drone for Resale or Transfer
Selling your drone without a factory reset is a significant privacy risk and can prevent the new owner from actually flying it. Most modern drones, especially DJI models, are “Bound” to a specific user account for theft protection. You must perform a factory reset and account unbinding to ensure the new owner can register the aircraft under their own profile. This process wipes your flight logs, Home Point history, and saved Wi-Fi passwords stored on the internal hardware.
The Ultimate Drone Reset Walkthrough
Resetting a drone is a vital skill for every pilot, whether you are preparing to sell your aircraft, troubleshooting erratic flight behavior, or clearing out old flight logs after a series of firmware updates. A proper reset ensures that the flight controller, the Inertial Measurement Unit (IMU), and the gimbal are all restored to their factory-default states, eliminating software “ghosts” that can cause crashes. This guide provides a comprehensive roadmap to performing both soft and hard resets on modern consumer drones, ensuring your hardware remains responsive and safe for every takeoff.
Step 1: Pre-Reset Preparation and Safety Precautions
What you need: A fully charged drone battery (at least 75%), a mobile device with the manufacturer‘s app installed, and a stable, flat surface away from magnetic interference.
Instructions: Before initiating any reset protocol, safety is paramount. Start by removing the propellers from the motors. During a reset or firmware refresh, motors can occasionally spin up unexpectedly due to software glitches; removing the blades prevents accidental injury or damage. Ensure your battery is charged to at least 75%, as a power failure during a factory reset can “brick” the internal flight controller, making the drone unbootable. Finally, back up any media from your microSD card to your computer, then remove the card from the drone. This prevents the reset process from accidentally wiping your high-resolution footage or corrupting the storage file system during the reboot cycle.
Prime for Young Adults — 6 Months Free
Exclusive Offer Amazon Prime for Young Adults, Students and 18–24s get six months of Prime free, then half price.
Start 6 Months Free As an Amazon Associate I earn from qualifying purchases.Pro Tip: Always perform a reset indoors or in a controlled environment. Wind or uneven ground can interfere with the sensor calibrations that often follow a successful factory reset.
Step 2: Performing a Software-Level Factory Reset
What you need: Your drone, a remote controller, and a smartphone or tablet with the flight app (e.g., DJI Fly, Autel Sky, or Parrot FreeFlight).
Instructions: Power on your remote controller and then the drone. Once they are linked and the live camera feed appears on your screen, navigate to the “Settings” menu (usually represented by three dots in the top right corner). Go to the “Safety” or “General” tab. Scroll down until you see “Reset All Settings” or “Factory Reset.” Tap this option and confirm. This process will wipe your custom button mapping, RTH (Return to Home) altitude settings, and maximum flight distance limits. The drone will likely beep and restart itself. This is the most common method for resolving minor software bugs or preparing the unit for a new owner without touching the core firmware code.
Pro Tip: Take screenshots of your current custom gain and expo settings before doing this, as you will have to re-enter them manually to regain your preferred “feel” in the air.
Step 3: Hard Reset via Desktop Software
What you need: A PC or Mac, a high-quality USB-C or Micro-USB data cable, and the manufacturer’s desktop utility (e.g., DJI Assistant 2 or Autel Explorer for PC).
Instructions: If your drone is unresponsive to the mobile app, a desktop hard reset is necessary. Connect your drone to your computer using the USB cable. Launch the desktop utility and power on the drone. The software should recognize the device and display its serial number. Click on the device and navigate to the “Firmware Update” section. Even if you are on the latest version, look for an option labeled “Restore Factory Defaults” or “Refresh.” This process re-installs the entire operating system of the drone, overwriting any corrupted files. Stay connected until the progress bar reaches 100%; the drone will reboot several times during this process. This is the most effective way to fix “System Core” errors.
Pro Tip: Use the original cable that came with the drone. Many third-party “charging cables” do not have the data wires required for the computer to communicate with the flight controller.
Prime for Young Adults — 6 Months Free
Exclusive Offer Amazon Prime for Young Adults, Students and 18–24s get six months of Prime free, then half price.
Start 6 Months Free As an Amazon Associate I earn from qualifying purchases.Step 4: Calibrating the IMU (Inertial Measurement Unit)
What you need: A perfectly level surface (use a spirit level if possible) and a cool environment.
Instructions: After a factory reset, the drone often loses its sense of “level.” To fix this, you must recalibrate the IMU. In your flight app, go to Settings> Safety> Sensor Status> IMU Calibration. Follow the on-screen prompts precisely. You will be asked to place the drone in several different positions (on its belly, on its side, upside down, and on its nose). It is critical that the drone remains absolutely still during each phase. Do not touch the drone or the table while the progress bar is moving. This step ensures the internal gyroscopes and accelerometers are synced, preventing the drone from drifting or tilting unexpectedly during flight.
Pro Tip: If the IMU calibration fails, let the drone cool down for 20 minutes. Heat from the internal processors can sometimes interfere with the sensitive calibration of the accelerometers.
Step 5: Compass Recalibration (The “Drone Dance”)
What you need: An open outdoor space far away from large metal structures, reinforced concrete, or power lines.
Instructions: A reset usually clears the magnetic interference data stored in the compass. To recalibrate, enter the “Safety” menu in your app and select “Calibrate Compass.” Hold the drone horizontally and rotate it 360 degrees until the app light changes color (usually from yellow to green). Then, point the drone’s nose toward the ground and rotate it 360 degrees vertically. This informs the drone’s internal magnetometer where magnetic north is located. If the app displays a “Magnetic Interference” error, move at least 20 feet away from any cars or metal fences and try again. A correctly calibrated compass is the only thing preventing “toilet bowling,” where the drone circles uncontrollably.
Pro Tip: Remove your smartwatch or large metal rings before performing this step, as they can provide enough local interference to cause a false calibration.
Step 6: Gimbal and Camera Reset
What you need: The gimbal protector removed and the drone placed on a flat surface.
Instructions: If your horizon is tilted after the reset, you need to recalibrate the gimbal. In the camera settings of your flight app, find the “Gimbal” section and select “Auto Gimbal Calibration.” The drone will move the camera through its full range of motion—up, down, left, and right—to find its center points and level the horizon. Ensure there are no obstructions (like grass or carpet) touching the camera during this process. If the horizon is still slightly off after the auto-calibration, use the “Gimbal Roll Adjustment” tool to manually fine-tune the level by increments of 0.1 degrees until the picture is perfectly straight.
Pro Tip: If the gimbal vibrates during calibration, check for tiny grains of sand in the motors; a reset cannot fix mechanical obstructions, but it can help the motors “re-learn” their resistance levels.
Step 7: Re-linking the Remote Controller and Testing
What you need: The drone and the remote controller within 0.5 meters of each other.
Instructions: Sometimes a hard reset severs the “handshake” between the drone and the controller. To re-link them, enter the “Safety” or “Control” menu in the app and select “Pair Remote Controller” or “Linking.” The remote will begin to beep. On the drone, you will usually need to hold the power button for about 4 to 5 seconds until the LEDs blink and the drone enters pairing mode. Once the beeping stops and the LEDs turn solid, the link is restored. Finally, perform a “dry run” by starting the motors (without propellers) on the ground to ensure the throttle and stick inputs are responding correctly before heading to the field for a test flight.
Pro Tip: If the linking fails, check for firmware version mismatches between the remote and the drone; both must be updated to the same version after a reset to communicate effectively.
✅ Final Checklist
- Confirm that all IMU and Compass calibration status bars are “Normal” or “Good.”
- Verify that the Return to Home (RTH) altitude is set to a height that clears local obstacles (typically 60-100 meters).
- Check that the “Remote Identification” (Remote ID) is still broadcasting and correctly configured with your registration info.
- Ensure the video transmission channel is set to “Auto” and the feed is clear on your mobile device.
- Verify that the SD card is formatted and recognized by the drone’s camera system.
Important Notes:
- Safety Warning: Never attempt a reset while the drone is in the air or if the battery is below 30%. This can cause permanent hardware failure.
- Seek Professional Help: If the drone continues to show “ESC Error” or “Sensor Error” after a full desktop factory reset, you likely have a hardware failure that software cannot fix. Contact the manufacturer for service.
- Estimated Time: 20 to 45 minutes, depending on firmware download speeds.
- Estimated Cost: $0 (Free using manufacturer-provided software and apps).
Distinguishing Between Soft Reboots and System Restores
Recommended Best Deal Products

Before you wipe your settings, you should determine if you actually need a factory reset or if a simple soft reboot will solve the issue. Choosing the wrong method can result in unnecessary work, such as having to recalibrate your sensors and reconfigure your custom RC buttons.
When to Use a Power Cycle (Soft Reset)
A soft reboot is simply turning the drone and controller off, waiting ten seconds, and turning them back on. This clears the temporary RAM but does not change any settings. You should try this first if you experience a “No Signal” message or if the app feels sluggish. It is a non-destructive process that doesn’t delete your flight data or calibration history.
When a Full Factory Data Reset is Necessary
A factory reset is a “hard” process that formats the internal storage of the flight controller. Unlike a soft reboot, this process can take several minutes and often requires a connection to a PC or Mac. You should opt for a full system restore in these specific instances:
- After a Crash: To ensure the flight controller isn’t compensating for old sensor data that is no longer accurate.
- Rolling Back Firmware: If a new update has introduced bugs, a factory reset is often required before you can “refresh” or downgrade the software.
- Unexplained Flight Behavior: If the drone drifts or behaves erratically despite calm weather conditions.
How to Reset DJI Drones (Mini, Air, and Mavic Series)
As the most popular brand, DJI has a specific ecosystem for resets. Unlike smartphones, you cannot usually find a “Factory Reset” button hidden in the mobile app menus. Instead, DJI requires the use of their proprietary desktop software to perform a deep system wipe.
Using DJI Assistant 2 for a Hard Reset
To perform a true factory reset on a DJI Mini 3, Air 2S, or Mavic 3, you must use a computer. This is the only way to ensure the firmware is “refreshed” entirely. Follow these steps precisely:
- Download: Install the DJI Assistant 2 (Consumer Drones Series) on your PC or Mac from the official DJI website.
- Connect: Power on your drone and connect it to your computer using a high-quality USB-C cable.
- Select Device: Open the software and click on your drone’s name when it appears on the dashboard.
- Firmware Update Tab: Click on the “Firmware Update” side menu.
- Restore Factory Defaults: Look for the button labeled “Restore Factory Defaults” or “Refresh.”
- Confirm: Click confirm and wait. The drone will reboot several times. Do not unplug the cable or turn off the drone during this process.
Resetting the Smart Controller and DJI RC
If your issue is with the remote controller (like the DJI RC or RC Pro) rather than the aircraft, you can perform a reset directly through the Android-based menu system. Swipe down from the top of the screen to access Settings, go to System, and select Reset Options. Choose Erase All Data (Factory Reset) to wipe the controller’s cache and unbind it from your remote ID. This is essential if you are experiencing screen freezes or joystick calibration errors.
Essential Pre-Reset Checklist for Data Integrity
Before you commit to a factory reset, you need to treat your drone like a smartphone or a computer. A reset is a destructive process for your settings and stored data. If you skip the preparation phase, you might lose valuable flight history or leave your personal information vulnerable when selling the aircraft.
Backing Up Flight Logs and Media
Most modern drones sync flight logs to a cloud account, but it is never a guarantee. Before resetting, manually sync your flight records within the app (like DJI Fly or Autel Sky). This ensures your total flight time and safety records remain intact for warranty or insurance purposes. Don’t forget the physical storage—always remove the microSD card. Even if the reset primarily targets internal software, some systems may wipe partitions that include cached media or low-resolution proxy files.
- Sync your logs: Open your flight app and ensure all recent “flights” show a synced checkmark.
- Export “No Fly Zone” unlocks: If you have custom geofencing unlocks, verify if they are tied to your account or the hardware.
- Media check: Transfer 4K footage from internal storage (if applicable) to an external drive.
Unbinding Your Account and Remote
If you are resetting the drone because you are selling it, a software reset is only half the battle. You must “unbind” the aircraft from your manufacturer account. For example, DJI drones often have an “Account Binding” lock that prevents a new user from activating the drone even after a factory reset. This is a security feature, but it becomes a major headache for buyers if the seller forgets this step.
Post-Reset Calibration and Performance Optimization
Once the reset is complete, your drone is effectively a “blank slate.” It may have forgotten its orientation in space or its relationship with the controller. Flying immediately after a reset without proper re-configuration is a recipe for a flyaway or a crash. You need to treat the drone as if it just came out of the box for the first time.
Re-Calibrating Vital Flight Sensors
The internal sensors—the IMU (Inertial Measurement Unit), Compass, and Gimbal—often revert to default factory states that may not align with your current geographical location. A recalibration ensures the drone knows exactly where “level” is and which way is North. This is especially important if you noticed the drone drifting or “toilet-bowling” (circling) before you decided to reset it.
- IMU Calibration: Place the drone on a perfectly flat surface away from metallic objects.
- Compass Calibration: Perform this outdoors in an open field to avoid electromagnetic interference from buildings.
- Vision System: If your drone has obstacle avoidance, use the manufacturer’s desktop software (like DJI Assistant 2) to recalibrate the cameras.
Restoring Custom Flight Safety Limits
A factory reset usually wipes your custom safety parameters. Most drones revert to a very low “Return to Home” (RTH) altitude and a default maximum flight distance. If you live in an area with 50-foot trees but your reset RTH height is only 30 feet, your drone will hit an obstacle during an emergency return. Take five minutes to dive back into the “Safety” tab of your flight app to re-establish these boundaries based on your typical flying environment.
Conclusion
Resetting your drone is one of the most effective ways to clear out software bugs, prepare for a sale, or resolve persistent connectivity issues. By following a pre-reset checklist to save your flight data and performing a thorough post-reset calibration, you ensure that your aircraft remains both secure and airworthy. Remember that a reset is just the first step; the magic happens during the re-configuration where you tailor the drone’s safety limits to your specific needs.
Next Steps: Check for the latest firmware updates immediately after your reset to ensure all security patches are current. Once updated, perform a low-altitude test flight in a controlled environment to verify all systems are GO. Ready to get back in the air? Fly safe and enjoy your “like-new” drone performance!
❓ Frequently Asked Questions
What is the difference between a soft reboot and a factory reset?
A soft reboot is simply turning the drone off and back on to clear temporary cache, whereas a factory reset wipes all user configurations, flight logs, and calibration data to return the drone to its out-of-the-box state.
Can a factory reset fix a drone that won’t take off?
If the issue is caused by a software glitch or corrupted internal settings, a factory reset may help. However, it will not fix hardware sensor failures or physical motor damage.
Why is it important to sync flight data before a reset?
Factory resets erase the local storage on the drone’s internal flight controller. By syncing with the manufacturer’s cloud, you preserve your flight history, total hours, and achievement badges associated with your account.
What happens if the battery dies during the reset process?
A power failure during a system restore can ‘brick’ the drone, making it unresponsive. This usually requires a forced firmware refresh via a computer or a trip to a repair center.
Do I need to re-link my remote controller after a reset?
Yes, in most cases, a full factory reset will break the pairing between the drone and the remote. You will need to follow the standard linking procedure once the reset is complete.
How do I reset a drone that doesn’t use a mobile app?
For smaller toy drones or those without advanced apps, a reset is often achieved by holding the power button for a specific duration or using a specific sequence of joystick movements on the remote.