
Use an official drone map tool like B4UFLY or Air Control to verify your flight location before takeoff. These maps identify No-Fly Zones (NFZ) and controlled airspace, ensuring you comply with FAA requirements. Always check for Temporary Flight Restrictions (TFRs) that may change daily due to events or emergencies.
🎯 Key Takeaways
- Use FAA-approved apps like B4UFLY for real-time airspace restrictions.
- Red zones indicate No-Fly Zones where flight is strictly prohibited.
- Yellow zones require caution or authorization before launching your drone.
- LAANC provides near-instant authorization to fly in controlled airspaces.
- Check maps daily for Temporary Flight Restrictions near stadiums or events.
To find out exactly where you can fly your drone right now, you must consult a real-time digital airspace map. These interactive tools identify restricted zones, temporary flight restrictions (TFRs), and controlled airspace that require specific authorization. Before you power up your props, checking a map is the only way to ensure you are not interfering with manned aircraft or violating federal law.
Recommended Best Deal Products


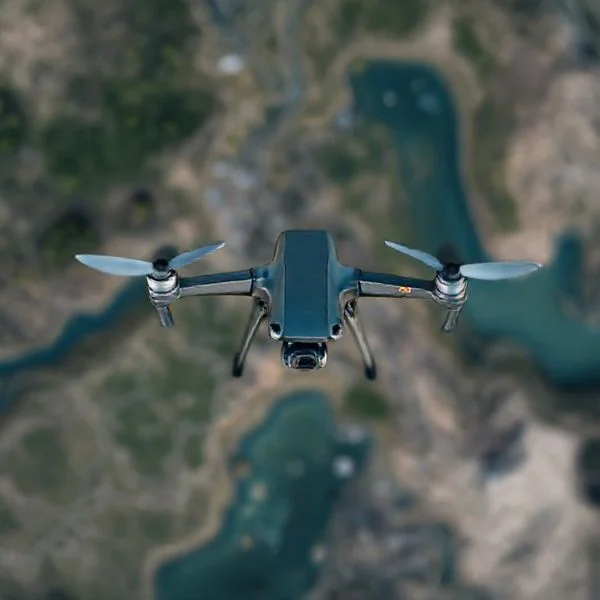
Operating a drone safely requires more than just clear weather; it requires legal clearance. Whether you are a hobbyist or a Part 107 professional, the sky is partitioned into distinct zones that dictate how high and where you can fly. Using the right map tool provides an instant visual guide to your local “No Fly Zones” and “Caution Areas,” keeping your equipment safe and your record clean.
Essential Airspace Classifications for Drone Pilots
Understanding the “alphabet soup” of airspace is critical for interpreting drone maps correctly. The Federal Aviation Administration (FAA) divides the sky into controlled and uncontrolled sections. As a drone pilot, your goal is to identify which class you are standing in, as this determines if you need to ask for permission before taking off.
Controlled vs. Uncontrolled Airspace
Most drone flights occur in Class G airspace. This is uncontrolled territory, meaning the FAA does not provide air traffic control services here. In Class G, you can generally fly up to 400 feet above ground level without prior authorization. However, as you move closer to cities and airports, you will encounter controlled airspace (Classes B, C, D, and E).
- Class B (Blue Circles): These surround the busiest airports in the country. They are shaped like an “upside-down wedding cake.” You must have specific LAANC authorization or a manual waiver to fly here.
- Class C (Magenta Circles): These protect medium-sized regional airports. They usually extend from the surface to 4,000 feet.
- Class D (Blue Dashed Lines): These surround smaller airports that still have an operational control tower. Authorization is strictly required.
- Class E (Magenta Dashed Lines): This is controlled airspace that often starts at the surface. It is frequently found around airports without towers but with instrument approach procedures.
- Class G: Uncontrolled airspace. This is where most recreational flying happens. No specific authorization is needed, but you must still follow standard safety rules.
When you look at a drone map, these classifications are often color-coded. A solid red zone usually indicates Prohibited or Restricted airspace, such as military bases or sensitive government sites, where drone flight is strictly forbidden regardless of your license type.
Master Drone Airspace Mapping in 8 Simple Steps
Navigating the complex world of drone regulations can feel like trying to solve a puzzle while blindfolded. However, understanding exactly where you can and cannot fly is the most critical skill any pilot can possess, far outweighing the ability to perform a perfect cinematic orbit. This guide provides a comprehensive walkthrough on how to use modern mapping tools, interpret aeronautical data, and ensure your flight remains within the bounds of the law. By following these steps, you will transition from a casual flyer to a responsible pilot who understands the digital and physical boundaries of the sky, protecting both your expensive equipment and the safety of the national airspace.
Step 1: Determine Your Regulatory Framework
What you need: A clear understanding of your flight’s purpose (recreational vs. commercial) and access to your local aviation authority’s website (e.g., FAA for the US, EASA for Europe).
Instructions: Before you even open a map, you must identify which set of rules you are following. In the United States, for example, you are either flying under the Exception for Limited Recreational Operations (Section 44809) or under Part 107 for commercial purposes. This distinction is vital because the maps you use will often have different “layers” or authorization requirements based on your pilot status. Recreational flyers may have strictly defined altitude ceilings in certain areas where commercial pilots, with the right waivers, might be allowed to fly. Visit the official civil aviation website to confirm your registration status and ensure your drone is marked with its unique ID number before proceeding to digital mapping tools.
Pro Tip: Even if you are not getting paid, if you are flying to help a friend sell a house or to promote a non-profit, the FAA considers this a “furtherance of a business,” and you must follow commercial Part 107 rules.
Step 2: Select and Install a Verified Airspace Intelligence App
What you need: A smartphone or tablet with GPS capabilities and one or more FAA-approved LAANC (Low Altitude Authorization and Notification Capability) service provider apps like AirAware (formerly Aloft), AutoPylot, or AirControl.
Instructions: Gone are the days of paper sectional charts for drone pilots. You need a dynamic, real-time map. Download at least two different apps to cross-reference data. These apps connect directly to the FAA’s UAS Data Exchange to show you controlled and uncontrolled airspace in real-time. Once installed, create a profile and input your drone’s make, model, and registration number. This allows the app to provide customized alerts if your specific drone is restricted in certain zones (such as Weight-based restrictions). Ensure your location services are enabled so the app can automatically center the map on your planned takeoff point.
Pro Tip: Don’t rely on the built-in “No-Fly Zone” maps provided by drone manufacturers like DJI or Autel; these are often outdated or reflect proprietary “geofencing” rather than actual legal airspace regulations.
Step 3: Interpret Map Color Coding and Boundaries
What you need: The legend or “Map Key” within your chosen airspace app and a basic understanding of airspace classes (Class B, C, D, E, and G).
Instructions: When you look at a drone map, you will see various colored shapes. Generally, “Clear” or “Grey” areas represent Class G (uncontrolled) airspace, where you can fly up to 400 feet without prior authorization. Blue, Magenta, or Shaded circles usually represent controlled airspace (Classes B, C, D, and E) associated with airports. If your map shows a red zone, this is typically a Prohibited or Restricted area (like a military base or Washington D.C.) where flight is strictly forbidden. Pay close attention to “puck” shapes around small private airfields or heliports, which may appear as yellow cautionary zones. You must tap on these shapes to read the specific requirements for that coordinate.
Pro Tip: Look for the “Facility Maps” layer; this shows a grid with numbers (0, 50, 100, etc.) indicating the maximum altitude the FAA will allow for instant authorization in that specific square.
Step 4: Scan for Temporary Flight Restrictions (TFRs) and NOTAMs
What you need: A live internet connection and the “TFR” layer toggled “ON” in your mapping software.
Instructions: Airspace is not static; it changes by the hour. Temporary Flight Restrictions (TFRs) are “pop-up” no-fly zones. These are often implemented for VIP travel (like a Presidential visit), major sporting events (stadiums with 30,000+ capacity), or emergency operations like wildfires or search-and-rescue. NOTAMs (Notices to Air Missions) provide text-based alerts about hazards like newly erected towers or parachute jumping activities. Open your app and check for bright red circles that weren’t there yesterday. These take precedence over all other rules, and flying in a TFR can result in federal criminal charges. Always refresh your map minutes before you power up your drone.
Pro Tip: Major league baseball, football, and NASCAR events automatically trigger a 3-nautical-mile TFR starting one hour before the event and ending one hour after.
Step 5: Apply for LAANC Authorization in Controlled Zones
What you need: An FAA-approved LAANC app and your drone’s registration information.
Instructions: If your map indicates you are in controlled airspace (Class B, C, D, or E) but shows a grid altitude greater than zero, you can request digital permission to fly. In the app, drop a pin at your exact location and draw a “flight area” polygon. Enter your start time, duration, and maximum altitude. If your requested altitude is at or below the “Facility Map” ceiling, the app will grant you a digital authorization code instantly. This code acts as your legal permit to operate in that airspace for the specified time. You will usually receive a text message or email confirmation; keep this open on your phone during the flight as proof of authorization for any law enforcement officer who may ask.
Pro Tip: If you need to fly in a “0-foot” grid or higher than the listed ceiling, you must apply for a manual waiver via the FAA DroneZone website, which can take up to 90 days for approval.
Step 6: Identify Local Ground-Based Restrictions
What you need: Google Maps, local municipal code websites, and physical signage observations.
Instructions: This is where mapping gets tricky. While the FAA controls the airspace, local municipalities control the ground. A city may not be able to tell you that you can’t fly 100 feet over a park, but they can legally prohibit you from “taking off or landing” on park property. Check your map for green shaded areas indicating National Parks, State Parks, or Wilderness Areas; these are almost universally “no-drone” zones for takeoff and landing. Use Google Maps to look for schools, power plants, or government buildings. Even if the airspace map says “Clear,” check the local city ordinances to ensure you aren’t violating a “nuisance” or “privacy” law by launching from a specific public sidewalk or pier.
Pro Tip: If you are unsure, the “B4UFLY” or “AirAware” apps now include a “Local Layers” feature that attempts to crowdsource these ground-level ordinances, though they are not always 100% exhaustive.
Step 7: Conduct a Geographic and Weather Risk Assessment
What you need: A weather app like UAV Forecast and a visual line-of-sight (VLOS) inspection of the terrain.
Instructions: A digital map won’t show you a new crane or a thin power line. Physically walk around your launch site and look upward. Identify the tallest obstacle within 500 feet and ensure your flight path avoids it. Next, check your weather map for “K-Index” (magnetic interference) and wind gusts at your flying altitude. Airspace mapping isn’t just about legality; it’s about safety. If the map shows you are near a shoreline, expect significantly higher winds at 200 feet than what you feel on the ground. Check for “Bird Sanctuaries” on your map as well, as nesting seasons can turn a legal flight into a high-risk encounter with aggressive raptors.
Pro Tip: Set your “Return to Home” (RTH) altitude in your drone’s settings to be 50 feet higher than the tallest obstacle on your map to prevent a crash during an automated emergency landing.
Step 8: Final Digital Pre-Flight Sweep
What you need: Your drone, controller, and the mapping app open for a final 60-second check.
Instructions: Right before you arm the motors, do one final sweep of the map. Check if any new TFRs have appeared in the last 15 minutes. Ensure your GPS has “locked” onto at least 10-12 satellites; the drone’s internal map needs this to stay within the boundaries you’ve identified. Verify that your “Remote ID” status is “Broadcast Only” (if required for your drone). If you are using a LAANC authorization, ensure the “active” status is showing in the app. This final check bridges the gap between your planning phase and the actual flight, ensuring that no last-minute changes in the airspace environment compromise your mission.
Pro Tip: Take a screenshot of your authorization and the current airspace map. If your phone loses signal mid-flight, you still have proof of your legal status should a bystander or official question your presence.
✅ Final Checklist
- Did you verify your flight category (Recreational vs. Part 107)?
- Is the flight area clear of Temporary Flight Restrictions (TFRs) and NOTAMs?
- Have you obtained LAANC authorization if flying in controlled airspace?
- Did you check local city or park ordinances for takeoff/landing restrictions?
- Is the weather (wind, K-index, visibility) safe for the specific geography?
Important Notes:
- Safety First: Never fly over people, moving vehicles, or near emergency response scenes (accidents, fires), regardless of what the map says.
- Seek Help: If you are planning a complex mission near a military installation or a major international airport, contact the local Flight Standards District Office (FSDO) for guidance.
- Penalties: Unauthorized flight in restricted airspace can lead to fines exceeding $20,000 and the revocation of pilot certificates.
- Estimated Time: Mapping and authorization usually take 10-20 minutes of pre-flight preparation.
- Cost: LAANC apps are generally free to use, though some advanced “enterprise” features may require a subscription.
Comparing Top Drone Airspace Map Tools and Apps
Not all drone maps are created equal. Some provide simple “Yes/No” indicators, while others allow you to apply for instant flight authorization in controlled areas. To fly legally, you should use an app that integrates with the Low Altitude Authorization and Notification Capability (LAANC) system.
The Gold Standard: B4UFLY and Air Control by Aloft
The FAA’s official recommendation for years was the B4UFLY app. Today, that technology is powered by Aloft (formerly Kittyhawk). The “Air Control” app is widely considered the most accurate tool for drone pilots in the United States. It provides a “Clear to Fly” status based on your GPS location and accounts for real-time TFRs, such as those issued for sporting events or VIP movements.
- Real-Time LAANC: You can request instant approval to fly in Class B, C, and D airspace directly through the app.
- Layered Data: The map allows you to toggle between different types of restrictions, including power plants, schools, and hospitals.
- Dynamic Updates: If a temporary restriction pops up (like a nearby wildfire or stadium event), the app updates instantly to show a red “No Fly” status.
DJI Geo Zone Maps: Hardware-Based Restrictions
If you fly a DJI drone, you are likely familiar with the DJI Geo Zone Map. This is a proprietary system built into the drone’s firmware. It is important to note that DJI’s maps are not an official substitute for FAA maps. DJI uses “Geofencing” to physically prevent the drone from taking off in certain areas, but their boundaries do not always align perfectly with legal FAA airspace.
DJI maps use three primary color indicators:
Red Zones (Restricted): The drone will not take off. You need a special unlocking certificate from DJI.
Yellow Zones (Authorization): The drone will be grounded until you “self-unlock” it using a verified DJI account and an internet connection.
Blue Zones (Warning): You will receive a notification on your screen about nearby hazards, but the flight will not be restricted.
Always cross-reference the DJI map with a LAANC-enabled app like Aloft or UAS Sidekick. Just because your DJI drone allows you to take off does not mean you are legally authorized to be in that airspace. Conversely, you may have legal FAA permission to fly, but still need to submit an unlocking request to DJI to bypass the software’s internal geofence.
Understanding NFZs, TFRs, and Controlled Airspace Markers
When you look at a drone map, it often looks like a chaotic puzzle of overlapping circles and shaded boxes. These markers are your primary guide to staying legal and avoiding heavy fines. The most critical icons to recognize are No-Fly Zones (NFZs). These are typically permanent areas where drone flight is strictly prohibited, such as near major airports, military bases, or sensitive government installations like the White House.
Decoding the Colors on Your Map
Most modern drone maps use a color-coded system to help you quickly assess the risk level of a specific location. While every app is slightly different, you will generally encounter these common markers:
- Red Zones: Strictly prohibited. These often cover airport runways and critical infrastructure.
- Yellow/Orange Zones: Caution areas. These might indicate a “Warning Zone” where you should exercise extreme vigilance or a “Restricted Area” that requires special authorization.
- Blue Circles: These usually represent controlled airspace where you can fly, but only with digital permission (LAANC).
The “Pop-Up” Danger: Temporary Flight Restrictions (TFRs)
Unlike permanent NFZs, Temporary Flight Restrictions (TFRs) are dynamic. They can appear on your map with very little notice. A TFR might be issued for a major sporting event, a presidential visit, or emergency response efforts like firefighting. If a wildfire is being fought by aircraft in your area, a TFR will immediately go into effect. Flying a drone in these zones isn’t just illegal; it can actively endanger lives by grounding emergency helicopters. Always refresh your map right before you take off to catch these “pop-up” restrictions.
The Role of LAANC in Unlocking Restricted Flight Zones
A few years ago, flying near a local airport required weeks of paperwork and phone calls. Today, we have LAANC (Low Altitude Authorization and Notification Capability). This system is a digital bridge between drone pilots and air traffic control. It has revolutionized how we use drone maps by turning many “no-go” areas into accessible flight paths. If your map shows you are in controlled airspace, LAANC is the key that unlocks the sky.
UAS Facility Maps and Grid Squares
When you zoom into a map near an airport, you will often see a grid of squares, each with a number like “0,” “100,” or “400.” These are part of the UAS Facility Maps. These numbers represent the maximum altitude (in feet) at which the FAA can provide automatic approval for your flight. For example, if you are in a “200” box, you can usually get instant permission to fly up to 200 feet. If the box says “0,” it means the area is too sensitive for automatic approval, and you may need to apply for a manual coordination, which takes longer.
Practical Tips for LAANC Success
To make the most of LAANC, keep these tips in mind while checking your map:
- Check the Ceiling: Just because a zone is blue doesn’t mean you can go to 400 feet. Always respect the altitude limit shown in the grid square.
- Plan Ahead: While many authorizations are instant, some complex locations require “Manual Coordination,” which can take several days. Check your map early in the week if you plan to fly on Saturday.
- Commercial vs. Recreational: Both types of pilots can use LAANC, but make sure your map profile is set correctly to ensure you are following the right set of rules for your flight.
Conclusion
Navigating the world of drone maps might feel overwhelming at first, but it is the most important skill you can develop as a pilot. Understanding the difference between a permanent No-Fly Zone and a temporary restriction ensures you stay on the right side of the law. Meanwhile, leveraging tools like LAANC allows you to explore controlled airspace safely and efficiently. By treating your drone map as a pre-flight ritual rather than an optional suggestion, you protect your gear, your reputation, and the safety of the skies.
Next Steps: Download a reputable airspace app today and check the “grid” around your favorite local park. You might be surprised at what you find! Always stay updated, fly within your limits, and keep your eyes on the horizon.
❓ Frequently Asked Questions
Why is my drone map showing a temporary restriction today?
Temporary Flight Restrictions (TFRs) are issued for short-term events like presidential movements, major sporting events, or active wildfire zones to ensure safety.
How do I know if I am in Class D controlled airspace?
Drone maps identify Class D airspace, usually around smaller airports with towers, with blue dashed circles or specific color overlays that indicate authorization is needed.
Is there a drone map that shows national park boundaries?
Yes, advanced apps like Air Control highlight National Parks, where drone takeoffs, landings, and operations are generally prohibited by federal law.
What is the difference between a Geo Zone and a No-Fly Zone?
A No-Fly Zone is a legal restriction from the FAA, while a Geo Zone is a manufacturer-enforced software lock that prevents the drone from starting.
Can I fly in a wilderness area if the map shows no controlled airspace?
No, drones are legally prohibited from flying in designated Wilderness Areas by the Forest Service, even if the airspace is technically ‘uncontrolled’ on an FAA map.
Are drone map apps updated in real-time?
Most FAA-approved providers update data continuously, but pilots are responsible for refreshing their apps before every flight to catch the latest TFRs.


