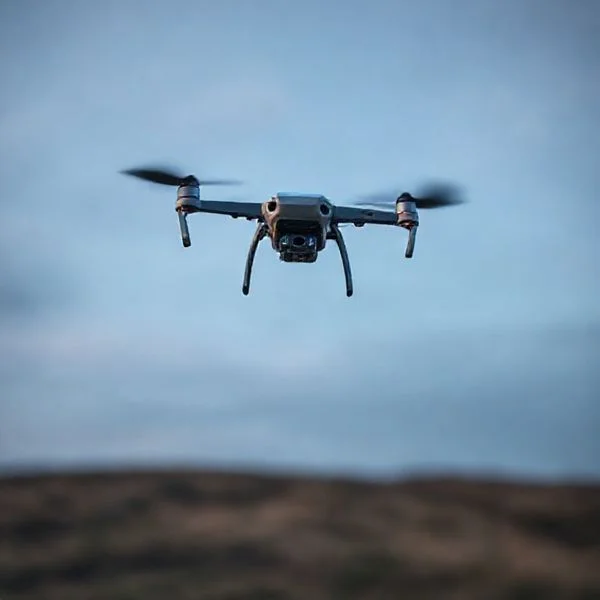
Mastering the 180-degree shutter rule is the single most important step toward achieving natural motion blur in your aerial videos. By combining manual camera settings with smooth, multi-axis flight movements, beginners can immediately transition from ‘toy’ footage to professional cinematic results.
🎯 Key Takeaways
- Set shutter speed to double your frame rate for natural-looking motion.
- Use ND filters to maintain correct exposure in bright daylight conditions.
- Fly in ‘Cine’ or ‘Tripod’ mode to ensure smooth, stable movements.
- Shoot in 4K resolution to allow for cropping and stabilization in post.
- Always check the B4UFLY app for local airspace restrictions before takeoff.
To capture cinematic drone video, you must stop flying like a hobbyist and start thinking like a cinematographer. Professional footage relies on two things: intentional, locked-in camera settings and smooth, multi-axis flight paths. If you leave your drone on Auto mode, the software will constantly adjust exposure, shutter speed, and white balance. This creates a jittery, “digital” look that screams amateur.
Mastering the technical foundations is your first step toward professional-grade B-roll. By taking manual control of your camera and utilizing specific hardware, you ensure your footage has the natural motion blur and color depth found in big-budget films. This guide breaks down the essential manual overrides and the specific accessories you need to bridge the gap between simple vacation clips and cinematic storytelling.
Technical Foundations of Cinematic Camera Settings
The most common mistake beginners make is ignoring the relationship between frame rate and shutter speed. To get “cinematic” movement, you need motion blur. Without it, your video looks unnaturally sharp and choppy. To achieve this, you must follow the 180-degree rule. This rule dictates that your shutter speed should be the reciprocal of double your frame rate.
The 180-Degree Rule and Frame Rates
If you are shooting at 24 frames per second (the standard for cinema), your shutter speed should be locked at 1/50th of a second. If you are shooting at 60fps for slow-motion, your shutter speed should be 1/120th. Keeping this ratio constant ensures that moving objects—and the ground rushing beneath your drone—have a realistic blur.
- 24fps / 1/50 Shutter: Best for standard cinematic storytelling and natural movement.
- 60fps / 1/120 Shutter: Best for high-action shots you plan to slow down in post-production.
- ISO 100: Always keep your ISO as low as possible to avoid digital “noise” or grain in your shadows.
Color Profiles and White Balance
Avoid shooting in the “Normal” color profile. Most mid-range drones (like the DJI Air or Mavic series) offer 10-bit color profiles like D-Cinelike or D-Log. These profiles look grey and desaturated on your screen, but they preserve significantly more detail in the highlights and shadows. This “flat” image gives you the flexibility to color grade your footage later. Additionally, you must set a Manual White Balance. If left on Auto, the color temperature will shift from blue to orange as the drone rotates toward or away from the sun, ruining your shot. For a sunny day, set your white balance to a fixed 5600K.
How to Film Like a Pro: A Practical Walkthrough
Welcome to the exhilarating world of aerial cinematography. Drone filming has revolutionized how we capture the world, moving from high-budget Hollywood equipment to devices that fit in a backpack. This guide is designed to take you from a nervous first-time pilot to a confident aerial filmmaker. We will cover everything from technical camera settings and legal compliance to the specific flight maneuvers that create that “cinematic” look. Following these steps systematically is crucial because drone filming involves managing expensive hardware, navigating complex regulations, and mastering creative techniques all at once.
Step 1: Selecting and Preparing Your Equipment
What you need: A 4K-capable drone (like a DJI Mini or Air series), at least three flight batteries, a high-speed microSD card (UHS-I Speed Class 3/V30), and a mobile device with the manufacturer’s flight app installed.
Instructions: Your journey begins with the right hardware. Ensure your microSD card has a write speed of at least 30MB/s; lower speeds will cause “frame dropping” or corrupted files when recording in 4K. Before leaving your house, charge all batteries and the remote controller to 100%. Update the firmware for both the drone and the controller while connected to Wi-Fi to avoid frustrating field updates. Calibrate the IMU (Inertial Measurement Unit) and the compass on a level surface. Finally, ensure you have a set of ND (Neutral Density) filters, which act like sunglasses for your camera, allowing you to control exposure in bright sunlight.
Pro Tip: Always carry a dedicated landing pad. It prevents dust and grass from getting into the gimbal motors and protects the downward sensors during takeoff and landing.
Step 2: Mastering Legal Compliance and Airspace Safety
What you need: FAA TRUST certificate (in the US) or local equivalent, drone registration number, and an airspace awareness app like B4UFLY or Aloft (Air Control).
Instructions: Before the propellers even spin, you must be legal. In most countries, you need to pass a basic safety test (like the TRUST test in the USA) and register any drone over 250g. Use your airspace app to check for Temporary Flight Restrictions (TFRs) or Controlled Airspace. If you are in controlled airspace, use the LAANC system within your app to get near-instant digital authorization to fly. Physically label your drone with your registration number. Understand the “Visual Line of Sight” (VLOS) rule: you must be able to see your drone with your own eyes at all times, not just through the screen.
Pro Tip: Never fly within five miles of an airport without checking the grid maps; even if the drone doesn’t “lock” you out, you are legally responsible for avoiding manned aircraft.
Step 3: Configuring Cinematic Camera Settings
What you need: The drone’s camera settings menu, ND filters (ND8, ND16, or ND32), and a basic understanding of the “180-degree shutter rule.”
Instructions: Switch your camera from “Auto” to “Manual” (or Pro) mode. Set your resolution to 4K and your frame rate to 24fps or 30fps for a cinematic look. To achieve natural motion blur, your shutter speed should be double your frame rate (e.g., if shooting at 24fps, set shutter to 1/50th). Since this often makes the image too bright, attach an ND filter to bring the exposure back down. Set your White Balance manually (e.g., 5600K for daylight) to prevent the colors from shifting mid-flight. If your drone supports it, shoot in a “Log” profile (like D-Log M) to capture more dynamic range for post-production color grading.
Pro Tip: Turn on “Overexposure Warning” (Zebra stripes). This shows you exactly which parts of your sky are “blown out” so you can adjust your ND filter or ISO accordingly.
Step 4: Executing the “Slow and Steady” Flight Technique
What you need: A wide-open practice field, a set of fully charged batteries, and “Cine” or “Tripod” mode enabled on your controller.
Instructions: Most beginners move the control sticks too aggressively, resulting in jerky, unwatchable footage. Switch your flight mode to “Cine” (DJI) or “Film” (Autel), which dulls the sensitivity of the sticks. Practice the “Slow Yaw”: slowly rotate the drone while moving forward. Focus on “diagonal” stick movements—pushing both sticks slightly inward or outward at the same time. This creates a multi-axis move that looks professional. Avoid sudden stops; when you finish a shot, slowly let go of the sticks rather than snapping them back to center, allowing the drone to drift to a soft halt.
Pro Tip: Adjust your “Gimbal Pitch Smoothness” in the app settings. Increasing this value ensures that when you tilt the camera up or down, it starts and stops with a soft “buffer” rather than a hard jolt.
Step 5: Planning Your Shots with Storytelling in Mind
What you need: A location scouting app (Google Earth), a weather app (UAV Forecast), and a shot list.
Instructions: Don’t just fly around aimlessly. Use Google Earth to find interesting textures, leading lines (like roads or rivers), and shadows. Use a weather app to check wind speeds at different altitudes; wind at 100 feet is often twice as strong as at ground level. Plan your shoot for “Golden Hour”—the hour after sunrise or before sunset—when the long shadows and warm light make landscapes pop. Create a simple shot list: 1. Wide establishing shot, 2. Top-down “Birds Eye” shot, 3. Low-altitude tracking shot. Having a plan ensures you don’t waste battery life “hunting” for a good angle while in the air.
Pro Tip: Check the “KP-Index” in your weather app. High solar activity (KP-index 5 or higher) can interfere with GPS signals and your drone’s internal compass.
Step 6: Mastering Essential Cinematic Maneuvers
What you need: A specific subject (a tree, a building, or a landmark) and clear airspace for maneuvering.
Instructions: Practice these three “hero” shots. First, the “Reveal”: Fly low and forward over an obstacle (like a hill or tree line) while slowly tilting the gimbal up to reveal the landscape. Second, the “Orbit”: Use the “Point of Interest” flight mode or manual sticks to circle a subject while keeping it centered. Third, the “Dronie”: Start close to yourself or your subject, then fly backward and upward simultaneously. For all these moves, ensure you have at least 5-10 seconds of “clean” footage before and after the move to give yourself room to transition in your video editor.
Pro Tip: For the most cinematic look, keep the drone low (between 10-30 feet). Flying at the maximum height of 400 feet often makes the world look flat and removes the sense of speed.
Step 7: Composition and Framing for the Sky
What you need: The “Grid Lines” and “Center Point” overlays enabled in your flight app.
Instructions: Use the Rule of Thirds by placing your subject at the intersection of the grid lines. In aerial photography, the horizon is your most important line; usually, you want it on the top third line or the bottom third line, never right in the middle unless you are capturing a perfect reflection in water. Look for “Leading Lines”—a road, a shoreline, or a row of trees that leads the viewer’s eye toward the subject. Use foreground elements, like flying close past a tree branch, to create a sense of depth (parallax) that makes the shot feel three-dimensional rather than a flat 2D image.
Pro Tip: Always keep your gimbal horizontal. If the horizon is tilted even slightly, it ruins the professional feel of the shot. Most drones have a “Gimbal Auto-Calibration” if it gets off-center.
Step 8: Basic Post-Production and Color Correction
What you need: Video editing software (DaVinci Resolve, Premiere Pro, or CapCut) and your raw flight footage.
Instructions: Import your footage and immediately look for the “steady” parts of your clips. Trim out any sections where the drone wobbled or the gimbal jerked. If you shot in a Log profile, your footage will look gray and flat; apply a “Rec.709 LUT” (Look Up Table) or manually increase the saturation and contrast to bring it to life. Match your cuts to the beat of your music—aerial footage is inherently “epic,” so a slow, melodic track usually works better than fast-paced audio. Finally, add a subtle “Sharpen” effect, but don’t overdo it, as drone sensors can sometimes produce digital noise in the shadows.
Pro Tip: Use “Speed Romping” or slow-motion (if you shot at 60fps) to add drama to your reveal shots, but ensure your final export matches the frame rate of your project timeline (usually 24 or 30 fps).
✅ Final Checklist
- Firmware is updated, batteries are 100% charged, and microSD card is formatted.
- Airspace is checked via app and LAANC authorization is secured if required.
- ND filter is attached and shutter speed is set to double the frame rate (180-degree rule).
- Home point is updated and recorded by the drone before moving more than 20 feet.
- Footage has been reviewed for “horizon tilt” and exposure clipping.
Important Notes:
- Safety: Never fly over crowds, moving vehicles, or near emergency response efforts (fires/accidents). Always maintain a “Return to Home” altitude higher than the tallest obstacle in the area.
- Professional Help: If you intend to use your footage for any commercial purpose (including a monetized YouTube channel), you must obtain a Part 107 Remote Pilot Certificate in the US.
- Estimated Investment: A beginner setup (Drone + Fly More Combo + ND Filters) typically ranges from $500 to $1,200. Learning the basics takes about 5-10 hours of flight time.
Essential Hardware and Accessories for Improved Footage
While your drone is a powerful tool out of the box, certain accessories are non-negotiable for cinematic work. You cannot achieve the 180-degree rule in bright daylight without physical hardware to block some of the light entering the lens.
ND Filters: The Essential “Sunglasses”
Neutral Density (ND) filters are the most important accessory in your kit. Because you are locking your shutter speed at 1/50th to get motion blur, your image will be completely blown out (pure white) on a sunny day. An ND filter acts like sunglasses for your drone’s camera, reducing the light without changing its color.
- ND8 or ND16: Use these for “golden hour” or overcast days.
- ND32 or ND64: Use these for bright, midday sun to maintain that 1/50th shutter speed.
- PL (Polarizing) Filters: These are excellent for filming over water or snow, as they cut through glare and reflections to show what is beneath the surface.
High-Performance Storage and Stability
Cinematic footage requires high bitrates, often exceeding 100Mbps. If your microSD card is too slow, the drone may drop frames or stop recording entirely. Look for cards with a V30 or V60 rating (Video Speed Class). These cards are designed to handle the massive data stream of 4K or 5.4K video.
Additionally, consider a tablet or a high-brightness monitor for your controller. Relying on a small smartphone screen makes it difficult to spot fine details like focus peaking or slight exposure blowouts. Seeing a larger, brighter image allows you to judge your framing and gimbal tilts with much higher precision. If you are using a standard controller, a simple sun hood is a low-cost accessory that prevents glare from obscuring your view during critical flight maneuvers.
Understanding Environmental Factors and Flight Safety
Capturing cinematic footage isn’t just about your drone’s camera settings; it is deeply influenced by the world around you. New pilots often underestimate how much the environment dictates the quality of their final edit. High winds, harsh shadows, and signal interference can turn a potentially beautiful shot into shaky, unusable footage or, worse, a safety hazard.
Mastering Lighting and Wind Resistance
The “Golden Hour”—the first hour after sunrise and the last hour before sunset—is your best friend. This soft, directional light adds depth to landscapes and prevents the “blown-out” highlights common in midday filming. However, lighting is often accompanied by wind. Even drones with advanced gimbals have limits. High-altitude gusts can cause “micro-jitters” in your video that are difficult to fix in post-production. Paying attention to local weather forecasts and wind speeds at different altitudes is essential for maintaining that butter-smooth look.
- Pro Tip: Use an app like UAV Forecast to check wind gusts and satellite visibility before leaving your house.
- Lighting Trick: If you must shoot at noon, utilize an ND (Neutral Density) filter to manage exposure and keep your motion blur natural.
- Wind Awareness: Flying against the wind on your way out and with the wind on your way back helps ensure you have enough battery to land safely.
Airspace Awareness and Safety Mindset
Safety is the foundation of cinematic filming. A pilot who is stressed about their surroundings will never capture great footage. Understanding your local airspace regulations is not just about following the law; it is about protecting your equipment and the people around you. This includes staying clear of airports, respecting privacy in residential areas, and keeping a visual line of sight. When you are confident in your flight safety, you can focus entirely on your composition and movement.
Comparative Analysis of Video Resolutions and Frame Rates
Choosing the right technical settings is a balancing act between visual quality and storage management. While it is tempting to always shoot at the highest possible settings, understanding the relationship between resolution and frame rate will help you achieve a specific “feel” for your video.
4K vs. 1080p: Future-Proofing Your Content
Most modern drones offer 4K resolution, which provides four times the detail of standard 1080p (HD). The primary advantage of 4K isn’t just the clarity; it is the flexibility it offers during editing. With a 4K file, you can “crop in” or zoom into your footage by up to 200% without losing significant quality when exporting to 1080p. This is incredibly useful for fixing a slightly off-center composition or creating a digital “push-in” effect that mimics a physical camera movement.
- Storage Impact: 4K files are massive. Ensure you have high-speed UHS-I U3 microSD cards to handle the data bitrate.
- Post-Processing: 4K requires more powerful computer hardware to edit smoothly. If your laptop struggles, consider using “proxies” (lower-resolution temporary files) during the edit.
- Detail: 4K is essential if you plan to display your work on large monitors or professional platforms.
Frame Rates: The Secret to Cinematic Motion
The frame rate you choose determines how motion is perceived by the viewer. For a traditional cinematic look, 24fps (frames per second) is the gold standard because it mimics the natural motion blur seen in movies. If you want to create dramatic slow-motion sequences, you should jump to 60fps or 120fps. This allows you to slow the footage down to 40% or 20% speed in your editing software, resulting in graceful, dream-like aerial shots.
- 24fps: Best for standard storytelling and realistic motion.
- 60fps+: Ideal for fast-moving subjects like cars, waves, or athletes where you want the option for slow motion.
- The 180-Degree Rule: To maintain natural motion blur, your shutter speed should generally be double your frame rate (e.g., 1/50th of a second for 24fps).
Final Thoughts on Your Aerial Journey
Stepping into the world of drone cinematography is an exciting blend of technology and artistry. By mastering environmental awareness and understanding the technical nuances of resolutions and frame rates, you are already ahead of most hobbyists. Remember that the best gear in the world cannot replace a thoughtful eye for composition and a commitment to safe flying. Every flight is a learning experience, so do not be afraid to experiment with different angles and lighting conditions.
To move forward, spend your next few sessions practicing simple, slow movements in various lighting conditions. Review your footage on a large screen to see how your settings impacted the final look. Now, grab your controller, check the weather, and start capturing the world from a new perspective!
❓ Frequently Asked Questions
How do I prevent my drone footage from looking shaky?
Ensure your gimbal is calibrated and avoid flying in high winds. Additionally, using ‘Cine’ mode slows down the drone’s sensitivity, resulting in much smoother, more professional-looking pans and tilts.
What are the most important accessories for a new drone pilot?
Beyond the drone itself, a high-quality set of ND filters, extra batteries, and a fast V30-rated microSD card are essential. These tools allow you to control light and store high-bitrate video without technical glitches.
Which white balance setting should I use for aerial video?
Always avoid ‘Auto’ white balance, as it can shift mid-shot and ruin your footage. Manually set your white balance to ‘Sunny’ or ‘Cloudy’ to ensure consistent color throughout your entire flight.
What legal requirements should a beginner know before filming?
In the US, you must pass the FAA’s TRUST test for recreational flying and register any drone over 250g. Always check local ‘No Fly Zones’ using official apps to avoid heavy fines or safety risks.
How does ISO affect drone video quality?
Keep your ISO as low as possible (ideally ISO 100) to minimize digital noise. Drone sensors are relatively small, so high ISO levels can quickly degrade image quality in the shadows.
What are the best weather conditions for filming?
The ‘Golden Hour’ (shortly after sunrise or before sunset) provides the softest, most cinematic light. Ideally, fly when wind speeds are under 15mph to maintain battery efficiency and gimbal stability.