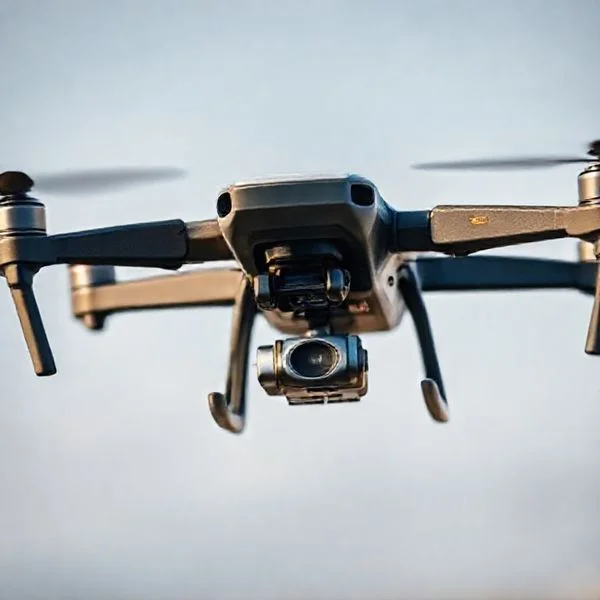
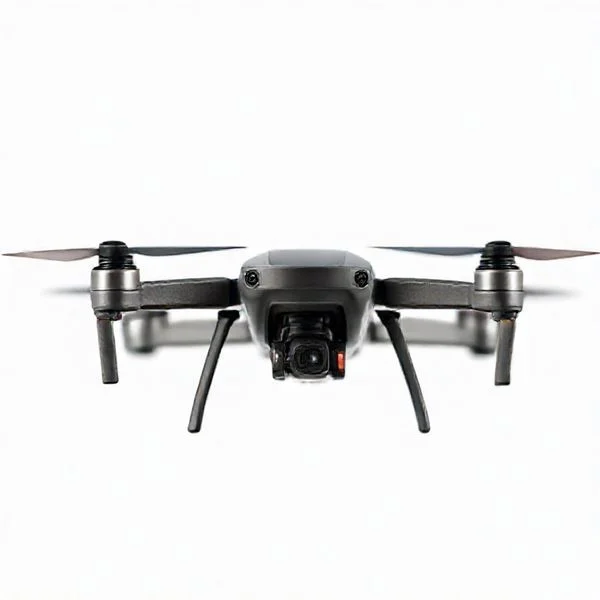
Drone roof inspections in Tampa utilize high-resolution 4K cameras and thermal sensors to identify storm damage and structural weaknesses without the risks of manual climbing. This technology provides precise data on Florida-specific issues like salt-air corrosion and hurricane-impacted shingles, ensuring comprehensive property assessments.
🎯 Key Takeaways
- Thermal sensors identify hidden moisture before leaks become visible inside the home.
- FAA Part 107 certified pilots ensure legal and safe operation over Tampa properties.
- High-resolution imagery captures minute cracks in barrel tiles and metal roof seams.
- Aerial data creates accurate 3D models for precise repair estimates and insurance claims.
- Remote inspections eliminate the risk of foot-traffic damage to fragile roofing materials.
A drone roof inspection in Tampa is a high-tech diagnostic process that uses autonomous flight paths and specialized sensors to create a comprehensive digital map of your roofing system. Instead of an inspector climbing a ladder and potentially damaging fragile tiles, a drone captures high-resolution 4K imagery and thermal data from every angle. This process provides a more accurate assessment of your roof’s health, identifying microscopic cracks, wind-lifted shingles, and hidden moisture pockets that are often missed during a traditional manual walk-through.

For Tampa property owners, this technology is practically essential due to our unique climate challenges. Whether you are documenting damage after a Gulf storm for an insurance claim or checking for salt-air corrosion on a coastal building, the data gathered by a drone is objective and verifiable. By using a “digital twin” of your roof, you can track degradation over time, prioritize repairs, and avoid the high costs of premature roof replacement. It is the fastest, safest, and most detailed way to understand exactly what is happening on top of your home or commercial facility.
Prime for Young Adults — 6 Months Free
Exclusive Offer Amazon Prime for Young Adults, Students and 18–24s get six months of Prime free, then half price.
Start 6 Months Free As an Amazon Associate I earn from qualifying purchases.Essential Drone Technology for Florida Roofing Challenges
Recommended Best Deal Products


The core of a modern drone inspection lies in the integration of hardware and flight software. Most inspections in the Tampa area utilize drones equipped with RTK (Real-Time Kinematic) positioning, which allows the aircraft to maintain centimeter-level accuracy even in the gusty conditions common near the coast. The drone follows a pre-programmed flight grid—often called a “lawnmower pattern”—ensuring that every square inch of the roof is photographed with a 70% to 80% overlap. This overlap is critical because it allows specialized software to stitch the images together into a high-detail 3D model.
High-Resolution Sensors and AI Damage Detection
Unlike a standard camera, drone sensors used for roof inspections are designed to capture “sub-millimeter” detail. This means you can see individual granule loss on asphalt shingles or hairline fractures in concrete tiles from thirty feet in the air. Once the flight is complete, the data is often processed through AI-driven software that automatically flags anomalies. This technology is particularly effective at identifying:
- Mechanical Damage: Deep gouges or punctures caused by flying debris during tropical storms.
- Granule Depletion: Patterns of wear caused by Florida’s intense UV exposure that lead to shingle brittleness.
- Sealant Failure: Cracks around vent pipes and flashings that are difficult to see from the ground.
- Fastener Back-out: Nails or screws that have begun to lift due to the constant expansion and contraction of the roof deck in the heat.
Thermal Imaging for Hidden Moisture Detection
In Tampa’s high-humidity environment, moisture can become trapped beneath the roofing membrane long before a leak appears on your ceiling. Professional inspection drones often carry radiometric thermal sensors. These cameras detect “thermal anomalies”—areas that hold heat longer than the surrounding dry material. After the sun sets, wet insulation stays warm while the rest of the roof cools down. By capturing this heat signature, a drone can pinpoint the exact location of a subsurface leak, allowing for targeted repairs instead of a full tear-off.
The Ultimate Tampa Drone Roof Inspection Walkthrough
This guide provides a comprehensive breakdown of how professional drone roof inspections are conducted within the specific geographical and regulatory landscape of Tampa, Florida. Whether you are a property manager looking to assess storm damage after a Gulf hurricane or a homeowner preparing for a solar installation, understanding these steps ensures a safe, legal, and highly accurate data collection process. Following this structured approach allows you to leverage modern technology to identify structural vulnerabilities without the risks associated with manual ladder climbs.
Step 1: Pre-Flight Planning and Regulatory Compliance
What you need: FAA Part 107 Remote Pilot Certificate, B4UFLY or Kittyhawk app, and local weather forecasts (specifically wind speed and humidity levels).
Instructions: Before the drone even leaves the case, you must verify the legalities of the airspace. Tampa features complex airspace due to the proximity of Tampa International Airport (TPA), MacDill Air Force Base, and Peter O. Knight Airport. Use a LAANC-enabled app to secure instant digital authorization if you are flying in controlled zones. Additionally, check the “Tampa 2:00 PM” weather phenomenon—afternoon thunderstorms are common. Ensure wind speeds are below 20 mph and there is no precipitation. Document your flight plan, notifying any neighbors if the drone will be hovering near property lines to maintain privacy standards and local community goodwill.
Pro Tip: Always check for Temporary Flight Restrictions (TFRs) which are common in Tampa during major sporting events at Raymond James Stadium or high-profile coastal gatherings.
Prime for Young Adults — 6 Months Free
Exclusive Offer Amazon Prime for Young Adults, Students and 18–24s get six months of Prime free, then half price.
Start 6 Months Free As an Amazon Associate I earn from qualifying purchases.Step 2: Equipment Calibration and Sensor Optimization
What you need: Enterprise-grade drone (e.g., DJI Mavic 3 Enterprise or Matrice series), high-speed UHS-II microSD cards, and a calibrated gimbal.
Instructions: Power on your controller and aircraft at least 15 minutes before the scheduled flight to allow for GPS satellite acquisition. In the humid Tampa climate, lens fogging can occur if the drone is moved quickly from a cold AC-controlled vehicle to the outdoor heat; let the equipment acclimate. Calibrate the Inertial Measurement Unit (IMU) and the compass away from large metal structures like HVAC units or steel fences. Set your camera to a 16:9 or 3:2 aspect ratio with a minimum resolution of 4K. If you are performing a moisture transition study, ensure your thermal sensor (FLIR) is set to the correct emissivity for asphalt shingles or TPO roofing materials.
Pro Tip: Use a neutral density (ND) filter (ND16 or ND32) to manage the intense Florida sun, preventing “blown out” highlights on reflective roof surfaces.
Step 3: Perimeter Scouting and Obstacle Identification
What you need: A visual observer (optional but recommended) and a handheld rangefinder.
Instructions: Conduct a physical walk-around of the Tampa property to identify “drone-killers.” In many Tampa neighborhoods like Seminole Heights or Hyde Park, large Oak trees with overhanging canopies pose significant risks. Identify power lines, communication towers, and satellite dishes that might interfere with a low-altitude flight path. Set your “Return to Home” (RTH) altitude to at least 30 feet higher than the tallest obstacle on the property. Establish a clear “Launch and Recovery Zone” on a flat, dry surface, preferably using a weighted landing pad to prevent dust and sand from being sucked into the drone’s motors during takeoff.
Pro Tip: Be wary of aggressive local birds; ospreys and hawks in the Tampa Bay area are known to dive-bomb drones defending their territory.
Step 4: Executing the Automated Mapping Grid
What you need: Flight planning software (e.g., DroneDeploy, Pix4D, or Litchi).
Prime for Young Adults — 6 Months Free
Exclusive Offer Amazon Prime for Young Adults, Students and 18–24s get six months of Prime free, then half price.
Start 6 Months Free As an Amazon Associate I earn from qualifying purchases.Instructions: For a comprehensive inspection, manual flight is insufficient. Program an automated “nadir” (top-down) grid mission. Set the “front lap” and “side lap” to 80% to ensure the photogrammetry software can stitch the images together into a high-resolution 3D model. The drone will fly a “lawnmower” pattern over the roof at a consistent altitude, typically between 50 and 80 feet above the roofline. This ensures every square inch of the shingles, tiles, or metal panels is captured from a perfectly vertical angle. This systematic approach eliminates human error and ensures that no portion of the roof, such as hard-to-reach valleys or behind chimneys, is missed during the data collection phase.
Pro Tip: Execute this grid flight between 10:00 AM and 2:00 PM when the sun is highest to minimize long shadows that can hide structural defects.
Step 5: High-Detail Manual Oblique Capture
What you need: Manual flight skills and a high-zoom optical lens.
Instructions: Once the automated grid is complete, switch to manual flight mode to capture “oblique” photos (45-degree angles). Fly around the perimeter of the roof, focusing specifically on critical “flashpoints” where leaks most commonly occur in Florida homes: chimneys, skylights, vent pipes, and the “valleys” where two roof planes meet. In Tampa’s hurricane-prone environment, pay close attention to the roof-to-wall attachments and the condition of the drip edge. Use the drone’s zoom capabilities to get clear shots of individual shingle granules or cracks in clay tiles without having to fly dangerously close to the structure. Capture at least 4-5 photos of each specific area of concern from different angles.
Pro Tip: Look for “scuppers” and “collector heads” on flat roofs; in Tampa, these are often clogged with pine needles or debris, leading to standing water issues.
Step 6: Thermal Imaging for Moisture Detection
What you need: Radiometric thermal camera and a clear understanding of “thermal capacitance.”
Instructions: This step is best performed at dusk or shortly after sunset when the roof surface begins to cool. In the Tampa heat, wet insulation under a roof membrane retains heat longer than dry insulation. Fly the drone over the roof using a thermal color palette (like “Ironbow” or “White Hot”). Areas that appear “bright” or “hot” long after the sun has gone down often indicate trapped moisture beneath the surface. This is a critical step for flat commercial roofs common in Downtown Tampa or the Westshore District. Record a video feed of the thermal sweep and take high-resolution radiometric stills of any anomalies discovered, as these can be analyzed later for exact temperature differentials.
Pro Tip: Ensure the roof is dry; performing thermal imaging on a roof that has active puddles from a recent Tampa rain shower will result in false readings due to evaporative cooling.
Step 7: Data Processing and Comprehensive Reporting
What you need: Photogrammetry software and an inspection reporting template.
Instructions: Upload all captured imagery to a processing engine. The software will align the thousands of GPS-tagged photos to create a 2D orthomosaic map and a 3D textured model. Use these digital assets to measure the roof’s pitch, area, and ridge lengths with sub-centimeter accuracy. Annotate the report by marking specific damage types: “H” for hail impact, “W” for wind-uplifted shingles, and “D” for debris. In Tampa, look specifically for signs of “mechanical damage” from fallen branches. Compile these findings into a PDF report that includes the high-resolution photos, thermal findings, and a summary of the roof’s overall health, which can be presented to insurance adjusters or roofing contractors for repair estimates.
Pro Tip: Provide a “digital twin” link to the client, allowing them to virtually “walk” their roof in 3D from their computer or smartphone.
✅ Final Checklist
- Verify that FAA LAANC authorization was obtained for the specific flight window and altitude.
- Confirm all images are clear, in focus, and have sufficient overlap (70-80%) for 3D reconstruction.
- Ensure all critical roof penetrations (chimneys, vents, skylights) were photographed from at least three angles.
- Check that thermal data was captured during the correct “delta-T” window for accurate moisture detection.
- Validate that the final report includes precise measurements and geotagged locations for all identified defects.
Important Notes:
- Safety First: Never fly directly over people or moving vehicles. If bystanders approach the launch site, hover the drone in a safe “holding” pattern until the area is clear.
- Professional Help: While DIY drone flight is possible, hiring a certified Tampa-based drone thermographer is recommended for insurance-grade moisture claims to ensure data validity.
- Estimated Time and Cost: A standard residential drone inspection in Tampa typically takes 30-60 minutes on-site. Professional services generally range from $250 to $600 depending on the detail of the report and thermal requirements.
Benefits of Aerial Inspections for Tampa Storm Damage Assessment
Recommended Best Deal Products


After a major weather event in the Tampa Bay area, the demand for roof inspections skyrockets, often leading to long wait times and rushed manual assessments. Drones solve this by providing a rapid-response solution that can document an entire commercial complex or a residential neighborhood in a fraction of the time. This speed is vital for filing “proof of loss” statements with insurance companies before the next storm system arrives.
Precision Mapping of Hurricane and Wind Impact
Florida hurricanes often cause “wind uplift,” where the pressure difference lifts shingles or metal panels without blowing them off entirely. To the naked eye, the roof might look fine, but the adhesive seal is broken, leaving the structure vulnerable to the next rainstorm. Drones utilize oblique imagery—photos taken at a 45-degree angle—to look under the edges of roofing materials. This perspective allows you to see:
- Lifted Shingle Tabs: Documenting where the sealant strip has failed due to high-velocity winds.
- Micro-Cracks in Barrel Tiles: Identifying structural compromises in heavy Spanish tiles that often occur when they vibrate during sustained winds.
- Gutter Stress: Checking for “pull-away” where the weight of heavy tropical downpours has strained the fastening system.
Protecting Fragile Roofing Materials
Tampa is home to many Mediterranean-style homes with clay or concrete barrel tiles. These materials are notoriously brittle; a single inspector walking across them can cause more damage than the storm itself. Drone inspections are “zero-contact,” meaning no weight is ever placed on your roof. This is especially beneficial for older metal roofs or aging asphalt shingles that are prone to “bruising” or cracking under the weight of a human. By staying in the air, you preserve the remaining lifespan of your roofing materials while still getting a more detailed report than a manual climb could provide.
Understanding FAA Regulations and Safety Compliance in Tampa Bay
Operating a drone in the Tampa Bay area isn’t as simple as just “taking off.” Because our city is home to Tampa International Airport (TPA), St. Pete-Clearwater International (PIE), and MacDill Air Force Base, much of the local airspace is strictly controlled. Professional drone roof inspections must adhere to federal guidelines to ensure the safety of both the aircraft and the public.
Navigating Restricted Airspace and LAANC
In many Tampa neighborhoods, such as Westshore or South Tampa, drone pilots must secure LAANC (Low Altitude Authorization and Notification Capability) approval before liftoff. This digital handshake with the FAA ensures that the drone won’t interfere with manned aircraft landing at TPA or MacDill. A professional inspection service will handle these clearances automatically, often securing permission in real-time via mobile apps.
- Part 107 Certification: Every commercial drone pilot in Florida must hold a valid Remote Pilot Certificate from the FAA.
- Visual Line of Sight (VLOS): Pilots must keep the drone within their vision at all times to prevent collisions with trees or power lines.
- Privacy Considerations: Respecting neighbor privacy is a key component of ethical drone operation in dense Tampa residential zones.
Insurance and Professional Liability
Safety compliance also extends to financial protection. Unlike a hobbyist, a professional drone inspector carries specialized liability insurance. This covers any accidental damage to the property or equipment during the flight. In a city prone to sudden gusty winds, having a pilot who understands local weather patterns and carries professional-grade coverage is a non-negotiable safety standard for homeowners.
Comparative Analysis: Drone vs. Manual Roof Inspections
Recommended Best Deal Products

The traditional method of inspection—walking the roof with a clipboard—is quickly becoming a secondary choice for Tampa residents. While manual inspections still have their place for minor repairs, drones offer a level of comprehensive data that a human on a ladder simply cannot match. This is especially true for the steep-pitched roofs common in luxury Florida homes.
Safety and Risk Mitigation
The most significant advantage of drone technology is the removal of physical risk. Thousands of ladder-related accidents occur annually; by keeping the inspector on the ground, the liability for the homeowner is drastically reduced. Furthermore, drones prevent accidental damage to the roof itself. Walking on clay tiles or old asphalt shingles in the blistering Tampa heat can cause them to crack or lose granules, potentially creating new problems while searching for old ones.
- Speed: A drone can map an entire 3,000-square-foot roof in under 20 minutes, whereas a manual inspection might take over an hour.
- Accessibility: Drones easily reach high-rise condos or steep gables that would require expensive scaffolding or lifts for a human.
- Thermal Capabilities: Drones can be equipped with thermal sensors to detect moisture trapped under the roof membrane—something invisible to the naked eye.
Data Accuracy and Digital Record Keeping
When an inspector walks a roof, they might take 10 to 15 photos. A drone, however, captures hundreds of high-resolution images and 4K video from every conceivable angle. This creates a “digital twin” of your roof. For Tampa homeowners dealing with insurance claims after a tropical storm, having a timestamped, high-definition digital record of the roof’s condition is invaluable. It provides indisputable evidence of damage that can be zoomed in on without losing clarity, ensuring a more accurate estimate from your insurance provider.
Conclusion
Transitioning to drone-based roof inspections represents a major leap forward for Tampa homeowners and property managers. By blending high-resolution imaging with advanced FAA-compliant safety protocols, this technology provides a faster, safer, and more accurate assessment of your home’s most critical defense. Whether you are prepping for hurricane season or simply performing routine maintenance, the depth of data provided by a drone is unmatched by traditional methods.
Next Steps: Before your next inspection, verify that your chosen provider is FAA Part 107 certified and ask to see a sample of their high-resolution reporting. If you are a DIY enthusiast looking to upgrade your own gear, ensure you have the right filters and high-speed SD cards to handle 4K roof imagery.
Embrace the future of home maintenance today—schedule a professional drone inspection and get a bird’s-eye view of your property’s health!
❓ Frequently Asked Questions
Why are drone inspections particularly useful for Tampa’s climate?
Tampa’s high humidity and intense storms cause specific types of wear, like salt-air corrosion and shingle uplift. Drones quickly scan large areas to find these patterns across the entire roof surface, which is safer and faster during the busy hurricane season.
What specific drone accessories improve roof inspection quality?
High-end thermal cameras and RTK (Real-Time Kinematic) modules are essential for pinpointing moisture and creating centimeter-accurate maps. These accessories allow inspectors to provide detailed reports that insurance adjusters trust.
How do drones handle the complex roof shapes common in Tampa suburbs?
Automated flight paths allow drones to maintain a consistent distance from steep gables and complex turrets. This ensures every angle is captured at the same resolution, something difficult to achieve with a ladder and handheld camera.
Can a drone inspection help with a Florida homeowners insurance claim?
Absolutely, the high-definition photos and date-stamped metadata serve as undeniable proof of damage for claims adjusters. Many Tampa insurance companies now prefer drone data because it is objective and comprehensive.
Is it safe to fly drones near power lines in Tampa neighborhoods?
Professional drone pilots use obstacle avoidance sensors and maintain a safe distance from utility lines. They also check local airspace restrictions near Tampa International or MacDill AFB before takeoff.
What should I look for in a Tampa-based drone inspection report?
A quality report should include high-resolution orthomosaic maps, thermal images showing heat signatures, and a detailed annotation of any identified defects. It should clearly highlight areas of concern like cracked tiles or rusted flashing.