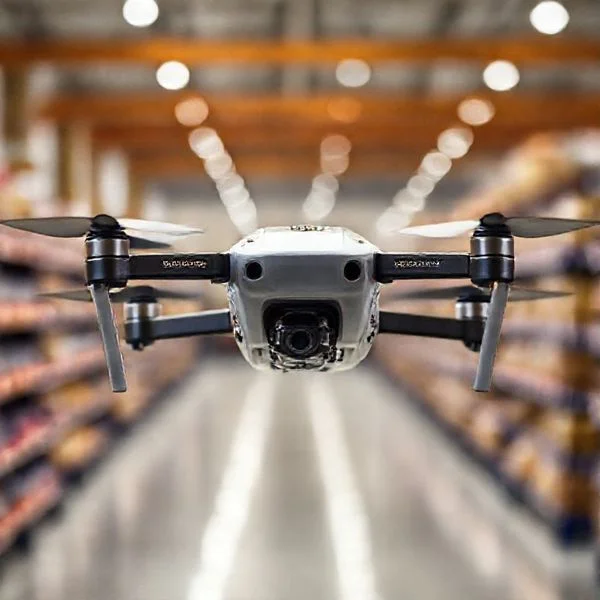
A complete FPV setup typically costs between $300 for budget analog kits and over $1,500 for professional digital systems. It is crucial to remember that the drone itself is only about 30-40% of the total entry cost, with goggles and controllers making up the rest.
🎯 Key Takeaways
- Expect a $300-$500 minimum for a reliable entry-level analog RTF kit.
- Premium digital setups require an initial investment of $1,000 to $2,000.
- The radio and goggles are long-term investments used across multiple drones.
- Budget at least 20% extra for spare propellers, batteries, and repair tools.
- Starting with a simulator and a radio is the most cost-effective path.
To start FPV flying in 2024, a complete setup will cost you between $300 and $1,800. This wide range covers everything from tiny indoor “Whoop” kits to professional-grade digital long-range rigs. Unlike standard camera drones, the aircraft is often the cheapest part of your gear bag. You are investing in a persistent ecosystem of peripherals that stay with you long after you crash your first drone.
Understanding these price tiers is vital because FPV has a steep “hidden cost” curve. Most beginners focus on the drone’s price tag while ignoring the goggles, radio transmitter, and charging station. Choosing the right tier today determines whether you can grow into the hobby or if you will be forced to rebuy your entire kit in six months when you want better image quality.
Tiered Pricing Breakdown: Analog vs. Digital FPV Setups
The biggest factor in your total budget is the video transmission system. This choice dictates the price of your goggles and the internal components of every drone you buy. You must decide between the budget-friendly, low-resolution world of Analog or the crisp, high-definition experience of Digital systems like DJI, Walksnail, or HDZero.
Entry-Level Analog RTF Kits ($250 – $450)
Ready-to-Fly (RTF) kits are the most cost-effective way to get in the air immediately. These bundles include a small drone, a basic radio controller, and budget box goggles. They are perfect for learning the ropes indoors without a massive financial risk.
- Starter Kit (e.g., Emax Tinyhawk III or BetaFPV Cetus): $250 – $300.
- Mid-Range Analog Build: $400 – $600 (Higher quality radio and goggles).
- Pros: Lowest entry price, extremely durable drones, lowest video latency.
- Cons: Grainy video quality (looks like an old TV), limited range, hardware is quickly outgrown.
Premium Digital Setups ($900 – $1,800+)
Digital setups represent the modern standard for FPV. The video is clear enough to see individual tree branches, making flying much safer and more immersive. However, the “entry fee” for the goggles alone is often higher than a full analog kit.
- Digital Goggles (DJI Goggles 3 or Walksnail Avatar): $450 – $650.
- Digital-Equipped Drone (5-inch Freestyle): $350 – $600.
- High-End Radio Transmitter (ELRS System): $150 – $200.
- Pros: Incredible HD video, better signal penetration, higher resale value.
- Cons: High initial investment, more expensive replacement parts after crashes.
The Ultimate FPV Drone Cost Walkthrough
Entering the world of FPV (First Person View) drones is an exhilarating journey, but it can be a financial minefield for the unprepared. Unlike consumer camera drones, FPV involves a complex ecosystem of interconnected components, each with its own price bracket and compatibility requirements. This guide provides a meticulous breakdown of every expense you will encounter, from your first hour in a simulator to your first high-speed flight. Following these steps ensures you don’t overspend on incompatible gear or underestimate the “hidden” costs of maintenance and safety, allowing you to build a realistic budget that fits your flying goals.
Step 1: Budgeting for the Radio Transmitter (The Remote)
What you need: Research on protocols (ELRS is recommended), a computer for price comparisons, and a budget of $60 to $200.
Instructions: Your radio transmitter is the most important long-term investment because it can be used with every drone you own. Do not cheap out here. For a budget-friendly but professional entry, look at controllers like the RadioMaster Pocket (approx. $65) or the RadioMaster Boxer (approx. $140). Ensure the radio uses the “ExpressLRS” (ELRS) protocol, which is currently the industry standard for range and reliability. If you prefer a “gamepad” style, you will spend less, while “box” style radios offer more switches and better battery life. You must also account for a set of 18650 or 21700 lithium-ion batteries to power the remote, which usually cost an additional $15 to $20.
Pro Tip: Buy a radio with a built-in USB-C port for simulator connectivity. This allows the remote to act as a joystick for your computer, saving you from buying separate dongles.
Step 2: Investing in Flight Simulation Software
What you need: A PC or Mac with basic gaming capabilities, your radio transmitter, and $20 to $40.
Instructions: Before you spend hundreds on a physical drone, you must spend dozens of hours in a simulator. Crashing in a simulator is free; crashing a real drone costs $5 to $50 per incident. Purchase a high-quality simulator like Liftoff, VelociDrone, or Uncrashed on Steam. These typically cost around $20. This step is a “cost-saving” measure because it develops the muscle memory required to fly in “Acro” (Manual) mode without risking your hardware. Factor in the cost of the software and perhaps a few expansion packs if you want specific environments like underground parking garages or racing tracks.
Pro Tip: Aim for at least 20-30 hours of simulator time before purchasing your first drone. This patience will save you the cost of a full drone replacement on your first day of real flight.
Step 3: Choosing Between Analog and Digital Goggles
What you need: Knowledge of video ecosystems (DJI, Walksnail, HDZero, or Analog) and a budget of $100 to $650.
Instructions: This is where the price variance is highest. Analog goggles are the traditional choice; “box goggles” like the Eachine EV800D cost about $100 and are great for beginners. High-end analog slim-line goggles can reach $400. However, most modern pilots prefer Digital systems (HD). A DJI Goggles 2 or Goggles Integra setup will cost between $350 and $500. Walksnail Avatar goggles or HDZero goggles range from $450 to $650. Digital offers a crystal-clear image but requires more expensive video transmitters inside the drone. Decide early: if you start with Analog, you may eventually spend more money later upgrading everything to Digital.
Pro Tip: If you wear glasses, check if the goggles have adjustable diopters or if you need to order custom prescription inserts, which can add $60 to your total.
Step 4: Selecting the Drone (The Aircraft)
What you need: A decision on drone size (Tiny Whoop vs. 5-inch) and a budget of $110 to $600.
Instructions: For beginners, a “Tiny Whoop” (65mm-75mm) like the Meteor65 or Mobula6 costs roughly $110 to $130. These are safe for indoor flight and very durable. If you want a full-sized 5-inch racing or freestyle drone, a “Bind-and-Fly” (BNF) model like the Nazgul5 or Roma F5 will cost between $250 (Analog) and $550 (Digital). Building a drone from scratch usually costs about the same as a BNF, but you gain the knowledge of how to fix it. Ensure the drone’s receiver matches your radio’s protocol (e.g., an ELRS drone for an ELRS radio). Don’t forget that “Plug and Play” (PNP) models require you to buy and solder your own receiver, which adds $15 to the cost.
Pro Tip: Start with a Tiny Whoop. They are significantly cheaper to maintain, and the spare frames only cost about $5, compared to $50+ for a carbon fiber 5-inch frame.
Step 5: Powering Up with Batteries and a Charger
What you need: A balance charger, a fire-proof LiPo bag, and 4-6 batteries ($100 to $250 total).
Instructions: FPV drones use Lithium Polymer (LiPo) batteries, which are volatile and require specialized care. A decent dual-port charger like the SkyRC B6neo or HOTA D6 Pro will cost between $60 and $120. Do not buy the cheapest “wall-wart” chargers; they can damage your batteries. Batteries themselves vary: Tiny Whoop batteries (1S) are about $5 each, while 5-inch drone batteries (6S) cost $30 to $45 each. You need at least four batteries to have a decent session, as each provides only 3-6 minutes of flight. Additionally, a “BatSafe” or fire-resistant bag for storage is a non-negotiable safety expense costing $20 to $60.
Pro Tip: Buy a charger that can also be powered by a large DC battery in the field, so you aren’t tethered to a wall outlet when you want to recharge between flights.
Step 6: Equipping a Maintenance and Repair Kit
What you need: Soldering iron, hex drivers, spare propellers, and a budget of $80 to $150.
Instructions: You will break things. This is a 100% certainty in FPV. To keep costs down in the long run, you must be able to repair your own gear. A portable soldering iron like the Pinecil V2 ($40) is essential. You also need a set of metric hex drivers (1.5mm, 2.0mm, and 2.5mm), which costs about $20. Spare propellers are a recurring cost; a set of four costs $3 to $5, and you should always have at least five sets on hand. Additionally, factor in $20 for miscellaneous items like zip ties, electrical tape, and spare M3 screws. Learning to solder yourself saves you the $50-$100 hourly rate a professional shop would charge for repairs.
Pro Tip: Use “63/37” leaded solder for easier repairs. It has a lower melting point than lead-free solder, making it much easier to work on tiny drone flight controllers.
Step 7: Factoring in Action Cameras (Optional but Popular)
What you need: A GoPro or specialized FPV action camera and a budget of $100 to $400.
Instructions: If you want to record high-quality 4K cinematic footage, the onboard FPV camera won’t cut it. You will need an “Action Cam.” A GoPro Hero 12 or 13 is the gold standard but costs $350+. For a lighter, cheaper option, many pilots use “Naked” GoPros or the Insta360 GO 3, which range from $200 to $400. There are also budget options like the Runcam Thumb Pro ($90) which records 4K but lacks some of the stabilization features of more expensive brands. You must also buy high-speed MicroSD cards (V30 rating or higher), which cost about $15 to $25 each.
Pro Tip: Look into “GoPro Subscription” plans or specialized electronics insurance. FPV is high-risk, and many pilots find that the insurance pays for itself after the first major crash into a brick wall.
Step 8: Accounting for Legal and Training Costs
What you need: FAA registration (for US pilots), TRUST certificate, and $5 to $175.
Instructions: Depending on your country, there are legal costs to fly. In the United States, if your drone weighs over 250g, you must register with the FAA ($5 for three years). Regardless of weight, all recreational flyers must take the TRUST test (currently free). If you plan to make money with your drone (YouTube, real estate, etc.), you must obtain a Part 107 Commercial License, which involves a proctored exam costing approximately $175. Additionally, if your drone is over 250g, you may need to purchase a Remote ID broadcast module ($40-$100) if your drone doesn’t have it built-in, to comply with current FAA regulations.
Pro Tip: Keep your digital copy of the TRUST certificate on your phone at all times. Law enforcement or park rangers can ask for it, and not having it can lead to fines far exceeding the cost of the drone.
✅ Final Checklist
- Compatibility Check: Does your radio transmitter protocol (e.g., ELRS) match the receiver on the drone?
- Video System Alignment: Are your goggles (Analog or Digital) compatible with the video transmitter (VTX) in the drone?
- Safety Gear: Do you have a LiPo-safe storage bag and a fire extinguisher nearby during charging?
- Simulator Milestone: Have you logged at least 15-20 hours of crash-free flight in a simulator?
- Legal Compliance: Is your drone registered (if>250g) and have you completed the mandatory safety test for your region?
Important Notes:
- Safety First: Never leave LiPo batteries charging unattended. They are the leading cause of fires in the hobby.
- Professional Help: If you are uncomfortable soldering high-voltage battery leads, seek help from a local hobby shop or a mentor to avoid short-circuiting your electronics.
- Estimated Time: 20 hours for simulator training; 5-10 hours for gear research; 2 hours for initial setup.
- Estimated Cost Range: $350 – $500 for a “Budget/Tiny Whoop” setup; $800 – $1,500 for a “High-End/5-inch Digital” setup.
The Total Ecosystem: Itemizing Essential Hardware and Accessories
The drone itself is only about 30% to 40% of your total startup cost. To fly successfully, you need a “ground station” of equipment. These items are one-time purchases that will work with dozens of different drones throughout your flying career. Cutting corners on these peripherals often leads to frustrated pilots and lost drones.
The Control Center: Radio and Goggles
Your radio and goggles are your primary interfaces. A quality radio transmitter using the ExpressLRS (ELRS) protocol is the current gold standard for reliability. You can find a solid radio like the Radiomaster Boxer for roughly $140. This controller will last years and can fly any drone from a $100 Whoop to a $1,000 cinema rig.
Goggles are the most subjective and expensive item. Budget “Box” goggles cost around $100 and are bulky but functional. Slim “OLED” goggles offer better screens and comfort but range from $400 to $600. If you choose a digital system, you are usually locked into that specific brand’s goggles, so choose your ecosystem wisely.
Power Management: Batteries and Chargers
You cannot simply plug an FPV drone into a USB wall outlet. You need specialized LiPo (Lithium Polymer) batteries and a balance charger. This is a significant part of the “Total Cost of Entry” that many guides overlook.
- Smart Balance Charger: $60 – $120. Look for dual-channel chargers to charge two batteries at once.
- Individual Batteries: $20 – $45 each. You will want at least 4 to 6 batteries to get a decent amount of flight time per session.
- Parallel Charging Board: $20 – $30. Essential for charging multiple batteries simultaneously to save time.
- LiPo Safety Bag/Ammo Can: $15 – $30. Necessary for fire-safe storage and transport.
For a standard 5-inch freestyle drone setup, expect to spend at least $250 just on the power ecosystem before you even buy the propellers. While this seems high, these batteries and chargers will serve your entire fleet for several seasons if maintained properly.
Hidden Costs of Ownership: Maintenance, Batteries, and Repairs
Budgeting for an FPV drone involves more than just the initial sticker price of the aircraft. Because of the high-speed nature of this hobby, you are essentially buying into a “subscription” of parts and power. Unlike photography drones that rarely touch the ground anywhere but a landing pad, FPV drones are designed to be pushed to their limits, which inevitably leads to wear and tear.
The Ongoing Battery and Power Cycle
Batteries are one of the most significant recurring expenses. High-performance Lithium Polymer (LiPo) batteries have a finite lifespan and are easily damaged in crashes or through improper care. For a standard 5-inch freestyle drone, a single 6S battery can cost between $25 and $45. To have a satisfying session at the field, most pilots carry at least 6 to 10 packs.
- Quality Charger: Expect to spend $60 to $150 on a reliable dual-channel charger that can safely balance your packs.
- Parallel Charging Boards: These cost around $20 to $30 and allow you to charge multiple batteries at once, saving hours of prep time.
- Fire Safety: LiPo bags or metal ammunition cans for safe storage are essential “hidden” costs for home safety.
The Repair Budget: Planning for the Crash
In FPV, it is not a matter of if you will crash, but when. You should ideally set aside an additional 20% of your drone’s value for immediate spare parts. Propellers are the most common consumable; a single set costs about $3 to $5, and you might go through three sets in a single afternoon of aggressive flying.
- Replacement Motors: These typically cost $15 to $25 each. Keeping one or two spares on hand prevents a single crash from ending your month of flying.
- Frame Components: Carbon fiber arms are designed to snap to protect the more expensive electronics. Spare arms usually retail for $5 to $12.
- Antennas: Video antennas are fragile. A high-quality replacement costs $15 to $20 and is a common point of failure.
Building vs. Buying: Which Approach Offers the Best Value?
One of the biggest debates for newcomers is whether to buy a Bind-and-Fly (BNF) drone or build one from scratch. While building used to be the only way to get a high-performance machine, the modern “pre-built” market has matured significantly, offering professional tuning right out of the box.
RTF and BNF: The Cost of Convenience
Ready-to-Fly (RTF) bundles and Bind-and-Fly (BNF) models offer incredible value for those who want to maximize their time in the air. When you buy a BNF drone, you are paying for the labor of assembly and the expertise of a professional tuner. For many, the $50 to $100 premium over the cost of raw parts is well worth it to avoid the frustration of troubleshooting a maiden flight that won’t take off.
- Pros: Guaranteed to fly, professionally tuned, and often includes a warranty.
- Cons: Harder to fix when things break because you didn’t see how it was put together.
- Best for: Beginners who want to ensure their first experience is positive and frustration-free.
DIY Customization and Long-Term Savings
Building your own drone might seem more expensive initially because you have to invest in tools like a soldering iron, hex drivers, and a multimeter. This initial “tool tax” can add $100 to $200 to your first build. However, the long-term value is unmatched. When you build the drone, you gain the technical knowledge required to diagnose and repair it in the field, which saves you from buying an entirely new drone after a major wreck.
- Personalization: You can choose specific components (like a higher-quality camera or more efficient motors) that fit your exact budget.
- Repairability: You will know exactly which wire goes where, making 10-minute field repairs possible.
- Example: A DIY build allows you to use a $40 flight controller instead of a proprietary $80 replacement board found in some brand-name pre-builts.
Conclusion
Navigating the costs of FPV drones in 2024 requires a balance between your initial excitement and your long-term budget. While you can get started for as little as $300 with an all-in-one kit, a high-quality digital setup can easily cross the $1,500 mark. Remember that the “hidden” costs—batteries, chargers, and spare parts—are just as important as the drone itself. Whether you choose the convenience of a pre-built model or the educational journey of a DIY build, the investment opens up a world of literal bird’s-eye perspectives.
Next Steps: Before spending hundreds on hardware, download an FPV simulator on your computer. It is the most cost-effective way to learn the ropes without breaking a single propeller. Once you have the muscle memory down, pick up a mid-range radio controller and start your journey into the skies!
❓ Frequently Asked Questions
What is the total ‘Ready-to-Fly’ budget for a beginner?
A beginner should budget approximately $400-$600 for a decent analog setup or $1,200+ for a digital setup. This includes the drone, goggles, radio transmitter, batteries, and a basic balance charger.
Why are digital FPV systems so much more expensive than analog?
Digital systems require proprietary chips and high-resolution screens to provide HD video with low latency. While analog video is grainy, digital provides a clear 720p or 1080p feed, justifying the $300-$500 price jump.
Do I need to buy a new controller for every drone?
No, your radio transmitter and goggles are universal investments. As long as the drone’s receiver matches your radio’s protocol (like ELRS or Crossfire), one controller can fly an unlimited number of drones.
How much should I spend on a charger?
Avoid ultra-cheap wall chargers; a safe, reliable balance charger costs between $50 and $100. Investing in a good charger prevents battery damage and reduces fire risks during the charging process.
What are the recurring costs of FPV flying?
The main recurring costs are propellers ($2-$5 per set) and replacement motors ($15-$25 each) after crashes. Most active pilots spend $100-$300 a year on various replacement parts and consumables.
Are DJI FPV drones cheaper than custom FPV drones?
The DJI Avata or FPV Combo are roughly $900-$1,300, which is comparable to custom digital setups. However, DJI repairs are often more expensive because you must send the unit back to the manufacturer rather than soldering it yourself.