Professional drone roof inspections rely on precise flight patterns and high image overlap to ensure total coverage and data accuracy. By utilizing autonomous grid missions and oblique imagery, operators can identify structural defects and moisture issues far safer and faster than traditional manual methods.
🎯 Key Takeaways
- Maintain 70-80% image overlap for accurate 3D modeling and orthomosaic mapping.
- Use both nadir and 45-degree oblique shots for comprehensive structural coverage.
- Conduct inspections during high sun periods to minimize shadows and glare.
- Thermal sensors are essential for detecting hidden moisture and insulation failures.
- Utilize CPL filters to reduce sun reflection on metallic or wet roof surfaces.
A professional-grade drone roof inspection hinges on two critical technical pillars: a systematic automated grid flight and a high-resolution sensor capable of sub-centimeter Ground Sampling Distance (GSD). Instead of manually hovering to snap photos, you must deploy mission-planning software to ensure 70% to 80% image overlap. This creates the data density required for photogrammetry, allowing you to generate a 3D model or high-definition orthomosaic map where every shingle, fastener, and flashing detail is measurable and geotagged for precise reporting.
Prime for Young Adults — 6 Months Free
Exclusive Offer Amazon Prime for Young Adults, Students and 18–24s get six months of Prime free, then half price.
Start 6 Months Free As an Amazon Associate I earn from qualifying purchases.
Mastering these technical flight patterns transforms a simple aerial view into a forensic tool. Whether you are identifying hail impact, assessing thermal anomalies, or calculating the slope for a solar installation, the quality of your output depends entirely on your flight execution. By maintaining a consistent altitude and using a structured “double-grid” or perimeter orbit, you ensure that every square inch of the roof is captured from multiple angles, eliminating blind spots that manual inspections often miss.
Essential Hardware and Sensor Specifications for Roof Analysis
Recommended Best Deal Products

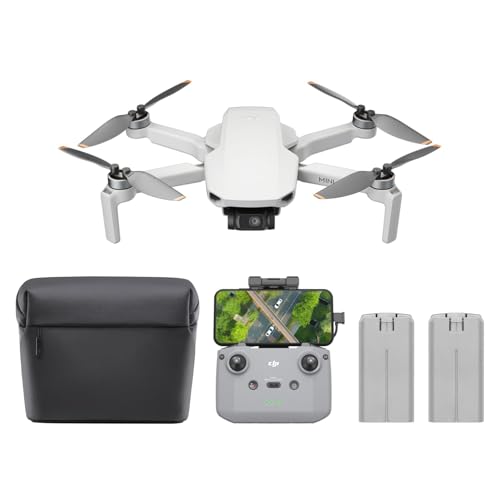

You cannot conduct a professional-grade inspection with a standard consumer-grade drone sensor. To identify hairline cracks in tiles or small punctures in a TPO membrane, your hardware must support high-resolution imagery without motion blur. The gold standard for this work is a drone equipped with a 1-inch CMOS sensor and a mechanical shutter. This combination allows you to fly faster while maintaining crisp, undistorted images, which is vital when stitching hundreds of photos into a single map.
The Impact of Sensor Size and Shutter Type
In the world of roofing, detail is everything. A 20-megapixel (MP) sensor or higher is necessary to achieve the clarity required for insurance-grade documentation. Using a mechanical shutter prevents “rolling shutter” distortion, where images appear tilted or warped because the drone moved faster than the sensor could record the data. If you are stuck with an electronic shutter, you must fly significantly slower to maintain the same level of geometric accuracy.
- Minimum Resolution: 20MP for detailed defect identification.
- Ground Sampling Distance (GSD): Aim for 1 cm/pixel or lower for high-accuracy models.
- Gimbal Control: Must allow for 0° (nadir) to 90° (horizontal) articulation.
- RTK Modules: Highly recommended for centimeter-level positioning accuracy on commercial roofs.
Thermal Sensors for Sub-Surface Moisture
If your goal is to find leaks that aren’t visible to the naked eye, you need a radiometric thermal sensor. These sensors don’t just show color variations; they record the specific temperature of every pixel. During the “evening cooldown,” wet insulation retains heat longer than dry areas. A drone equipped with a 640×512 thermal sensor can spot these heat signatures through the roof membrane, pinpointing trapped moisture that would otherwise require invasive testing to find.
How to Inspect a Roof Like a Pro: A Practical Walkthrough
Drone technology has revolutionized the roofing industry, offering a safer, faster, and more accurate way to assess the health of a structure without ever setting foot on a ladder. This guide will walk you through the entire process, from pre-flight legalities to post-flight data analysis. Following these steps ensures you capture high-quality imagery while maintaining the safety of the property, the equipment, and yourself. Whether you are a homeowner looking to check for storm damage or a professional contractor streamlining your workflow, this essential action plan provides the technical depth and practical tips needed for a successful aerial inspection.
Step 1: Pre-Flight Planning and Regulatory Compliance
What you need: A smartphone with an airspace awareness app (like B4UFLY or Aloft), a weather app (UAV Forecast), and your Part 107 license (if conducting commercial work).
Instructions: Before you even unpack your drone, you must verify the legality of your flight. Check the airspace for any Temporary Flight Restrictions (TFRs) or Controlled Airspace that requires LAANC authorization. Next, check the weather conditions. Ideally, you want wind speeds below 15 mph and high visibility. Avoid flying during the “Golden Hour” if you want the most accurate color representation, as long shadows can hide damage; mid-day sun is usually best for roof inspections. Finally, inform the property owner and neighbors if necessary to ensure privacy concerns are addressed before the propellers start spinning.
Prime for Young Adults — 6 Months Free
Exclusive Offer Amazon Prime for Young Adults, Students and 18–24s get six months of Prime free, then half price.
Start 6 Months Free As an Amazon Associate I earn from qualifying purchases.Pro Tip: Always check for “K-Index” levels in your weather app; high geomagnetic activity can interfere with your drone’s GPS and compass, leading to “toilet bowl” circling or flyaways.
Step 2: Equipment Calibration and Hardware Check
What you need: Drone, fully charged batteries (at least 3), high-speed microSD card (U3 or V30 rated), and a lens cleaning kit.
Instructions: Perform a “pre-flight walkaround” of your drone. Inspect the propellers for hairline cracks or chips, as even a small nick can cause vibrations that blur your images. Clean the camera lens with a microfiber cloth to ensure no smudges ruin your high-resolution shots. Once powered on, calibrate the IMU and Compass if the app prompts you, or if you have traveled more than 50 miles since your last flight. Ensure your “Return to Home” (RTH) altitude is set higher than the tallest point on the roof or any surrounding trees—typically 100-150 feet is a safe bet for residential areas.
Pro Tip: Format your SD card inside the drone’s software before every mission to prevent file system errors during high-bitrate 4K video recording.
Step 3: Establishing the Flight Pattern and Perimeter Context
What you need: A drone controller with a display and a clear line of sight to the roof.
Instructions: Launch the drone and hover at 10 feet to ensure stability. Once confirmed, ascend to approximately 30-50 feet above the roof peak. Your first goal is to capture “context shots.” Fly a full 360-degree circuit around the house at a 45-degree camera angle. This captures the eaves, fascia, gutters, and the general orientation of the house. Take photos at every corner and the center point of each side. This provides a baseline of the structure’s overall condition and helps you identify areas where gutters may be sagging or where flashing has pulled away from the exterior walls.
Pro Tip: Use “Tripod Mode” or “Cine Mode” on your controller to dampen stick sensitivity, allowing for much smoother, more precise movements when flying close to the structure.
Prime for Young Adults — 6 Months Free
Exclusive Offer Amazon Prime for Young Adults, Students and 18–24s get six months of Prime free, then half price.
Start 6 Months Free As an Amazon Associate I earn from qualifying purchases.Step 4: Executing a Systematic Top-Down Grid
What you need: Mental or digital map of the roof sections.
Instructions: To ensure you don’t miss a single shingle, use a lawnmower flight pattern. Position the camera at 90 degrees (top-down/nadir) and fly in straight lines across the roof. Overlap each photo by at least 70% to allow for the possibility of creating a 3D model later. Keep a consistent altitude—usually 15 to 20 feet above the roof surface is the “sweet spot” for balancing detail with safety. If the roof has multiple levels or complex gables, treat each section as a separate grid. Monitor your battery levels closely; top-down grids consume significant power due to constant repositioning and stopping for photos.
Pro Tip: If your drone supports “Waypoint” missions, save the flight path. This allows you to fly the exact same route months later to track the progression of wear or damage over time.
Step 5: Detail-Oriented Inspection of High-Risk Areas
What you need: Drone with a zoom lens (if available) or high-resolution sensor (20MP+).
Instructions: Once the general grid is complete, move in for the “detail work.” Navigate the drone toward critical failure points: chimney flashing, valley transitions, vent pipes, and skylights. These are the most common areas for leaks. Look for “bruising” on shingles (indicators of hail impact), cracked tiles, or missing granules. If you see a suspicious area, hover and use your zoom or fly slightly closer (maintaining at least 5-8 feet of clearance) to get a macro-style shot. Ensure your shutter speed is high (at least 1/500s) to eliminate motion blur during these close-ups, even if the drone is hovering.
Pro Tip: Look specifically for “mechanical damage”—scratches or gouges that look like a tool was dropped. This is often missed by the naked eye from the ground but is clear from a 20MP aerial photo.
Step 6: Gutter and Drainage Assessment
What you need: Visual confirmation through the live video feed.
Instructions: Fly the drone at a low altitude, level with the gutter line. Slowly traverse the length of the gutters on all sides of the building. You are looking for three things: debris buildup (leaves/twigs), standing water (indicating improper pitch), and “shingle grit.” A heavy accumulation of granules in the gutters is a primary sign that an asphalt roof is reaching the end of its life cycle. Take specific shots of the downspout entries to see if they are obstructed. This part of the inspection is often where drones provide the most immediate value, as it reveals clogs that aren’t visible from the ground.
Pro Tip: If you see standing water in a gutter that looks dry from the outside, it’s a sign of a “dead level” gutter that will eventually cause wood rot in the fascia boards.
Step 7: Data Review and Reporting
What you need: A computer with a high-resolution monitor and photo editing or inspection software.
Instructions: After landing, immediately backup your footage to a secondary drive. Review the images on a large screen rather than a tablet or phone. Use a “systematic review” method: start from the chimney and spiral outward. Use software to zoom in on 4K images to look for “spider-web” cracking in vents or rust on the flashing. If you find damage, mark the GPS coordinates or the specific roof facet in your report. Compile the best 10-15 images into a PDF report for the client or your records, highlighting the areas of concern with red circles or arrows to make the findings undeniable.
Pro Tip: Use specialized software like Adobe Lightroom to slightly increase the “Clarity” and “Contrast” of your photos; this often makes subtle hail dents or shingle cracks much easier to identify.
✅ Final Checklist
- Verify that all 360-degree perimeter context shots were captured at a 45-degree angle.
- Confirm that the top-down grid covers 100% of the roof surface with sufficient overlap.
- Ensure high-resolution close-ups were taken of all chimneys, vents, and valleys.
- Check that the SD card data has been backed up to a computer and verified for clarity.
- Cross-reference identified damage with the drone’s flight logs for precise location mapping.
Important Notes:
- Safety First: Never fly directly over people and always maintain a Visual Line of Sight (VLOS). Be extremely cautious of overhead power lines and thin wires that may not show up on your FPV feed.
- Professional Help: A drone can identify visual damage, but it cannot “feel” for soft spots in the decking or check the integrity of the underlayment. If significant damage is found, hire a licensed roofing contractor for a physical inspection.
- Estimated Time: 20–40 minutes for flight; 1 hour for data review.
- Estimated Cost: $0 (if you own the drone) to $150 (for basic professional flight software subscriptions).
Understanding Flight Patterns: Grid vs. Perimeter Mapping
Recommended Best Deal Products

The secret to a successful inspection isn’t how you fly, but how your software plans the mission. You should rarely fly manually during the data-capture phase. Instead, you use flight-planning apps to create a Nadir Grid or an Oblique Perimeter path. These patterns ensure that the camera captures the roof from every possible angle, providing the software with enough “tie points” to reconstruct the roof in three dimensions.
The Nadir Grid for Orthomosaic Mapping
A “Nadir” shot is taken with the camera pointed straight down at a 90-degree angle. This is the primary flight pattern used to create a 2D orthomosaic map. For a roof inspection, you should set your mission to a Double Grid pattern. This means the drone flies in one direction (North-South) and then perpendicular (East-West). This cross-hatch pattern ensures that no detail is hidden behind steep gables or HVAC units.
- Frontlap: Set to 80% (distance between consecutive photos in a row).
- Sidelap: Set to 75-80% (distance between parallel flight lines).
- Altitude: Keep it consistent, usually between 50 and 100 feet above the roof peak.
- Speed: Adjust based on lighting to avoid motion blur, typically 5-8 mph.
Oblique Orbits for 3D Modeling and Vertical Detail
Nadir shots are great for maps, but they fail to capture the condition of chimneys, flashings, and the vertical faces of dormers. To solve this, you must execute an Oblique flight pattern. Set the camera at a 45-degree angle and fly a perimeter orbit around the structure. This provides “depth” to your data. By circling the building while looking inward, you capture the underside of eaves and the integrity of the siding, which is essential for a comprehensive structural health report.
Combining these two patterns—the overhead grid and the angled orbit—is the only way to generate a “digital twin” that is accurate enough for remote measurement and defect tagging. Without the oblique data, your 3D models will likely look “melted” around the edges, making it impossible to perform precise volumetric or slope calculations.
Defect Identification: Analyzing Aerial Imagery for Damage
Capturing the data is only half the battle; the real value lies in your ability to translate high-resolution pixels into actionable insights. When reviewing your flight data, you aren’t just looking for “holes” in the roof. You are looking for subtle indicators of structural fatigue and environmental wear that the naked eye might miss from the ground.
Spotting Subtle Surface and Structural Anomalies
Modern drone sensors allow you to zoom in on specific components without compromising safety. When analyzing your imagery, pay close attention to the following common defects:
- Granule Loss and Pitting: On asphalt shingles, look for dark patches where the protective mineral coating has eroded, often caused by hail or age.
- Flashing and Sealant Failure: Inspect the areas around chimneys, vents, and valleys. Cracks in the sealant or warped metal flashing are primary entry points for water.
- Mechanical Damage: Look for “bruising” on the roof surface, which often indicates heavy foot traffic or debris impact.
- Rust and Corrosion: On commercial metal roofs, even small streaks of orange around fasteners can signal that the structural integrity is being compromised.
The Power of Thermal Analysis for Moisture Detection
If you are using a drone equipped with a radiometric thermal sensor, you can identify “invisible” problems. Thermal imagery excels at finding trapped moisture under membrane roofing. Because water has a higher thermal mass than insulation, it stays warm long after the sun goes down. During an evening inspection, these moisture pockets will glow brightly on your screen, pinpointing exactly where a leak is likely to occur before a single drop hits the building’s interior.
Data Processing and Software Integration for Professional Reports
To provide a professional service, you need to move beyond simple JPEG files. Professional drone roof inspections rely on sophisticated software that turns a folder of images into a comprehensive digital twin. This is where your investment in high-speed microSD cards and robust processing power pays off.
Leveraging Photogrammetry and 3D Modeling
By uploading your flight data into photogrammetry software like DroneDeploy or Pix4D, you can create a high-fidelity 3D model of the structure. These models allow you to take precise measurements of roof pitch, surface area, and ridge lengths directly from your computer. This is an invaluable tool for contractors who need to estimate material costs for a replacement. A 3D model also provides a historical baseline, allowing you to compare the roof’s condition year-over-year.
Automated AI-Assisted Reporting and Client Deliverables
The final step in a technical inspection is the report. Many modern platforms now offer AI-assisted defect detection. These algorithms can automatically flag cracked tiles or rusted bolts, significantly reducing the time you spend on manual review. Your final deliverable should be a professional PDF report that includes:
- High-resolution orthomosaic maps: A top-down, stitch-perfect view of the entire roof.
- Geotagged defect photos: Close-up shots with precise GPS coordinates.
- Annotated findings: Clear labels and severity ratings for every issue identified.
- Actionable recommendations: Guidance for the client on whether a repair or a full replacement is necessary.
Conclusion
Transitioning from manual ladder climbs to technical drone inspections is a game-changer for safety and accuracy. By mastering advanced flight patterns and utilizing sophisticated analysis software, you provide a level of detail that traditional methods simply cannot match. Remember that the quality of your inspection is heavily dependent on your hardware; using the right drone accessories, such as ND filters for glare reduction and high-capacity batteries for extended flight times, ensures your data is always crystal clear.
Ready to elevate your workflow? Start by performing a practice flight over a known structure to test your overlap settings, then experiment with a trial of a photogrammetry platform. The future of roof maintenance is aerial—make sure you have the technical skills to lead the charge!
❓ Frequently Asked Questions
How do drones detect hidden water damage under the roof surface?
Drones equipped with radiometric thermal sensors detect temperature differentials. Because water has a higher thermal mass, it stays warmer than surrounding dry materials at night, appearing as ‘hot spots’ in thermal imagery.
What is the difference between nadir and oblique imagery in inspections?
Nadir images are taken looking straight down (90 degrees) to create maps and measurements. Oblique images are taken at an angle (usually 45 degrees) to capture details of chimneys, flashing, and vertical shingles.
Which flight pattern is most efficient for a complex residential roof?
A ‘Double Grid’ pattern is most effective, as it captures the roof from multiple angles. This ensures that every facet of a multi-gabled roof is documented without blind spots.
What are the common visual defects to look for in the drone footage?
Key indicators of damage include missing or cracked shingles, rust on flashing, pooling water (ponding), clogged gutters, and hail impact marks that appear as dark circular spots.
How long does a typical drone roof inspection take to complete?
A standard residential roof can be thoroughly mapped in 10 to 20 minutes of flight time, though data processing and report generation may take several hours depending on software.
Can drones perform inspections on metal or tile roofs safely?
Yes, drones are actually preferred for these materials because they prevent the physical damage often caused by inspectors walking on fragile tiles or slipping on steep metal pitches.