
Keep your transmitter powered on immediately to maintain any remaining telemetry link for signal tracking. Utilize RSSI signal strength and recorded FPV footage to triangulate the crash site before starting a physical search.
🎯 Key Takeaways
- Maintain transmitter power to keep the telemetry link active.
- Use RSSI signal bars to triangulate the drone’s proximity.
- Review FPV DVR footage for landmarks at the crash point.
- Trigger ESC beepers or ‘lost model’ alarms via radio.
- Execute a systematic grid search from the last known point.
Finding a lost drone without the luxury of GPS coordinates requires a shift from digital mapping to physical tracking and signal geometry. When your drone failsafes or clips a branch, your primary tools for recovery are your last recorded visual data, radio signal strength (RSSI), and a systematic physical sweep of the terrain. You must rely on the physical footprint of the crash site and the telemetry remaining in your radio link rather than a pin on a map.
This manual recovery process is a critical skill for FPV pilots and owners of budget drones that lack expensive positioning modules. In dense brush or tall grass, a quadcopter can be invisible from just five feet away. Understanding how to triangulate a signal and estimate a flight path is the difference between bringing your gear home and leaving a total financial loss in the field. Mastering these non-GPS techniques ensures that a technical glitch doesn’t end your flight day permanently.
Prime for Young Adults — 6 Months Free
Exclusive Offer Amazon Prime for Young Adults, Students and 18–24s get six months of Prime free, then half price.
Start 6 Months Free As an Amazon Associate I earn from qualifying purchases.Essential Hardware for Non-GPS Recovery Missions
Recommended Best Deal Products
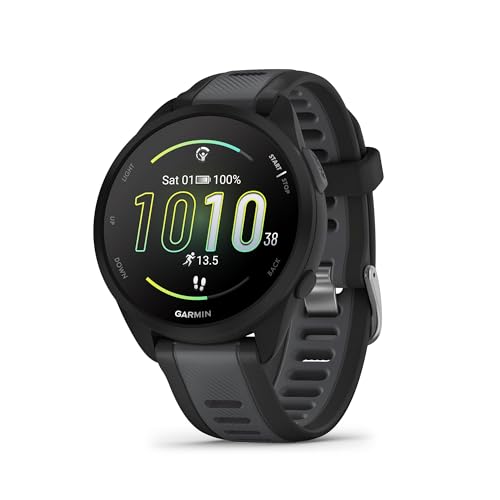
Before you go trekking into the woods, you need specific tools that turn a blind search into a calculated recovery mission. While your controller is your primary sensor, secondary hardware can significantly narrow your search radius. You are looking for items that enhance your senses and exploit the physical properties of the drone’s components, such as its camera lens and radio frequency emissions.
The “Search and Rescue” Tool Kit
- High-Lumen Tactical Flashlight: Even in broad daylight, a powerful flashlight is indispensable. You aren’t looking for the drone’s frame; you are looking for the “glint” of the glass camera lens or the reflection off the carbon fiber arms.
- Binoculars: These are vital for scanning tree canopies. Drones often snag in high branches, and from the ground, a black frame looks exactly like a shadowed leaf or a bird’s nest.
- Portable Handheld Receiver: If you have a spare FPV monitor or a handheld receiver with a screen, take it with you. It allows you to see what the drone sees if the battery is still connected, providing immediate visual landmarks like specific trees or rock formations.
Using Directional Patch Antennas
Most standard drone controllers use omnidirectional antennas that receive signals from all sides. For recovery, you should swap these for high-gain directional patch antennas. These antennas “focus” their sensitivity in one specific direction. If you point a patch antenna toward your drone, the signal strength will spike; if you point it away, the signal will drop. This allows you to use your receiver as a literal compass. A 14dBi patch antenna can often pick up a faint signal from a downed drone that a standard “rubber ducky” antenna would miss entirely.
How to Recover Your Non-GPS Drone Like a Pro: A Practical Walkthrough
Losing a drone that lacks GPS capabilities—such as a racing quadcopter, a toy-grade flyer, or a DIY build—can be a heart-wrenching experience. Without “Return to Home” functions or coordinates to guide you, the recovery process relies entirely on your observational skills, technical knowledge of radio signals, and systematic search patterns. This guide covers the essential techniques used by professional FPV pilots and hobbyists to track down downed aircraft in tall grass, dense forests, or urban environments. By following these steps immediately after a crash or flyaway, you significantly increase the chances of bringing your expensive hardware back home safely.
Step 1: Freeze and Fix Your Visual Reference
What you need: Your eyes, a stationary landmark, and a focused mind.
Instructions: The moment you realize your drone is going down or has lost power, do not move your body. Keep your eyes locked on the exact point where you last saw the aircraft. If it disappeared behind a treeline or a building, identify a specific landmark—like a uniquely shaped branch or a specific window—that aligns with that trajectory. Once you have a visual lock, use a physical object near you (like a backpack or a specific rock) to mark your exact standing position. This creates a “Line of Bearing” that serves as the foundation for your search. If you move too quickly without establishing this line, you will lose the angle of the flight path within seconds.
Pro Tip: Use your smartphone to take a photo from your perspective, keeping the last seen point in the center of the frame. This allows you to re-reference the landscape if you get disoriented during the walk.
Step 2: Maintain and Monitor Radio Connection
What you need: Your Remote Controller (RC) and an understanding of RSSI (Received Signal Strength Indicator).
Prime for Young Adults — 6 Months Free
Exclusive Offer Amazon Prime for Young Adults, Students and 18–24s get six months of Prime free, then half price.
Start 6 Months Free As an Amazon Associate I earn from qualifying purchases.Instructions: Do not turn off your remote controller. Even without GPS, most modern transmitters provide telemetry data via RSSI. Watch the signal strength bars or the dBm value on your screen. Start walking slowly in the direction of the crash. If the signal strength increases (e.g., moves from -80dBm to -70dBm), you are getting closer. If it drops, stop and change direction. You can use your body as a shield: hold the controller close to your chest and turn in a circle. The signal will likely be weakest when your body is between the controller and the drone, and strongest when you are facing it directly. This “body blocking” technique helps narrow the search to a specific wedge-shaped area.
Pro Tip: If your signal is very weak, hold the controller as high as possible above your head to clear ground-level interference like tall grass or bushes.
Step 3: Analyze the Last Cached Video Frame
What you need: Your FPV goggles, smartphone, or tablet connected to the controller.
Instructions: If you were flying with a camera feed, your flight app (like DJI Fly for some non-GPS models or an FPV DVR) often records a low-resolution “cache” of the video. Review the last five seconds before the screen went black. Look for distinct ground features: a specific patch of yellow flowers, a fallen log, a fence post, or a change in grass color. Note the orientation of shadows; if the sun is to the left in the video, you know which way the drone was facing when it landed. This visual “forensics” can shrink a massive search area down to a 20-foot radius. If you have no video cache, try to recall the last thing you saw through the goggles or on the screen.
Pro Tip: Take a screenshot of the final frame and zoom in. Often, tiny details like the type of tree bark or a discarded soda can become visible upon closer inspection.
Step 4: Execute a Systematic Grid Search
What you need: Comfortable walking shoes and a systematic mindset.
Instructions: Once you reach the general area of the crash, do not wander aimlessly. Wandering leads to “search fatigue” and causes you to miss areas. Instead, use the “Mowing the Lawn” technique. Walk in straight lines (transects) spaced about 5 to 10 feet apart, depending on the height of the vegetation. When you reach the end of your designated search area, take two steps to the side and walk back in the opposite direction. If you are in tall grass, use a stick to gently part the foliage. Drones are surprisingly good at hiding under a single layer of weeds. If searching with a friend, walk parallel to each other to cover more ground efficiently.
Prime for Young Adults — 6 Months Free
Exclusive Offer Amazon Prime for Young Adults, Students and 18–24s get six months of Prime free, then half price.
Start 6 Months Free As an Amazon Associate I earn from qualifying purchases.Pro Tip: Look for “unnatural” colors. Most drones are white, black, or bright colors (like orange or neon props). Look for straight lines and geometric shapes that don’t belong in nature.
Step 5: Trigger the Audible “Beeper” or Motor Escalate
What you need: Remote Controller and (optional) an assigned “Beeper” switch.
Instructions: If your drone is still powered on and connected to the remote, you can use the motors to help you find it. If you have a dedicated buzzer/beeper configured in your flight controller (common in Betaflight/FPV drones), flip the switch and listen for a high-pitched metallic beep. If you don’t have a buzzer, you can briefly and carefully flick the “Arm” switch or move the throttle up for a split second (only if you are sure it is safe). The sound of spinning propellers or “motor chirping” is often audible from 50-100 feet away. Stop moving every 30 seconds, hold your breath, and listen for any electronic whining or mechanical clicking sounds coming from the ground.
Pro Tip: If using motors to “chirp,” do it in very short bursts. If a prop is stuck against a branch, long bursts can burn out your Electronic Speed Controllers (ESCs) or motors.
Step 6: Check the “Vertical” Plane
What you need: Binoculars (if available) or a high-quality camera zoom.
Instructions: A common mistake is only looking at the ground. If your drone disappeared near trees, there is a high probability it is snagged in the canopy. Drones often clip a branch and tumble, but their lightweight frames can easily get caught in the “V” of a branch or tangled in leaves. Walk around each tree in your search radius and look up from multiple angles. Sometimes a drone is invisible from one side but clearly dangling from the other. Check the roofs of nearby sheds or houses if you are in a residential area. Use binoculars to scan the upper third of the treeline where the thinnest branches are located, as these are most likely to trap a falling quadcopter.
Pro Tip: Look for disturbed leaves or broken twigs on the ground; these are often “breadcrumbs” indicating that the drone hit the tree above you before settling or getting stuck.
Step 7: The Sunset/Low-Light Flashlight Method
What you need: A high-lumen LED flashlight or headlamp.
Instructions: If you haven’t found the drone by dusk, don’t give up. Searching in the dark can actually be easier if the battery is still connected. Most drones have status LEDs that blink red, green, or blue. In the dark, these LEDs can be seen from hundreds of feet away. Even if the LEDs are obscured, use a powerful flashlight to scan the ground and trees. Plastic propellers and carbon fiber frames have a different reflective property than organic matter. When the light hits a propeller, it often “glints” or reflects back in a way that grass and leaves do not. Shine the light at an angle to create long shadows, which can make the silhouette of the drone stand out.
Pro Tip: Hold the flashlight at eye level. This helps you catch the “retroreflection” from the drone’s camera lens or polished surfaces more effectively.
✅ Final Checklist
- Did you verify that the Remote Controller is still on to maintain the telemetry link?
- Have you searched the “Vertical Plane” (treetops and roofs) within the crash radius?
- Has the search grid been completed in both directions (North-South and East-West)?
- Did you review the last cached video frame for specific ground-level landmarks?
- Have you listened for ESC beeps or motor “chirps” in complete silence?
Important Notes:
- Safety First: Never climb a tree or enter dangerous terrain (like swamps or steep cliffs) to retrieve a drone without proper safety gear and training.
- Battery Safety: If the drone was submerged in water or the battery looks “puffed” or damaged upon recovery, disconnect it immediately and store it in a fireproof bag.
- Professional Help: If the drone is stuck high in a tree on public property, consider calling a professional tree climber or arborist rather than throwing weights at it, which can cause further damage.
- Estimated Time: 30 minutes to 4 hours. Cost: Free (DIY recovery).
Understanding RSSI and Telemetry Signal Tracking
If your drone still has battery power, your radio controller is the most powerful tracking device you own. The Received Signal Strength Indicator (RSSI) provides a real-time “hot or cold” meter for your recovery. By monitoring the dBm (decibels-milliwatts) or the percentage bars on your screen, you can determine if your physical movement is bringing you closer to the wreckage or further away.
The “Body Block” Triangulation Technique
When you are standing in a field and don’t know which way to walk, use the “Body Block” method. Your body is largely composed of water, which is highly effective at blocking 2.4GHz and 5.8GHz radio signals. Hold your controller close to your chest and slowly rotate 360 degrees. Watch your RSSI values carefully. When your body is between the controller and the drone, the signal will drop to its lowest point. The drone is likely located directly behind your back at that moment. Conversely, when the signal is strongest, the drone is in front of you.
Interpreting RSSI Fluctuations
Understanding the scale of RSSI is vital for a focused search. Signal strength does not drop linearly; it follows an inverse-square law.
- -30 to -50 dBm: You are very close, likely within 10 to 20 meters. At this point, stop walking and start using your eyes.
- -60 to -80 dBm: You are in the general vicinity, but the drone could be 50 to 100 meters away depending on the terrain and obstacles.
- -90 dBm and lower: You are at the edge of the connection. If the signal flickers or “telemetry lost” warnings occur, you are moving in the wrong direction or are too far away.
Practical Tip: As you walk, move the controller in a slow arc. If the signal increases as you raise the controller above your head, look up—the drone is likely stuck in a tree.
Visual Tracking: Estimating the Last Seen Point
The first 60 seconds after a crash are the most important. To find a drone without GPS, you must accurately reconstruct its final flight path. Most pilots make the mistake of running toward the general area of the crash without first establishing a “Line of Sight” (LOS) reference. This leads to “search drift,” where you end up searching hundreds of yards away from the actual impact site.
Establishing Your Vector
Before you move from your pilot’s seat, find a permanent landmark that was directly behind the drone when it went down. This could be a specific notched tree, a power pole, or a distant hill peak. Draw a mental line from your standing position to that landmark. This is your Search Vector. If you saw the drone drop, try to estimate the angle of the descent. A drone falling from 50 feet at a 45-degree angle will travel significant forward distance after the motors cut, especially if it had high forward momentum.
Accounting for Wind Drift and Momentum
A drone does not fall straight down like a stone. If you were flying in a 10 mph wind, a lightweight drone (especially a 5-inch FPV quad or a sub-250g model) will drift significantly as it tumbles.
- The “Tumble Zone”: Expect the drone to be 10% further along its travel path than where you saw the motors stop.
- Windage: If the wind is blowing from your left, shift your search grid 15-20 degrees to the right of your original vector.
- Propeller Ejection: If you see a bright object fly off during a crash, it is often a propeller or a battery. Note the direction it flew; the drone’s main frame will usually have continued in the opposite direction due to the force of the impact.
Visual Analysis Strategies for FPV DVR Footage
When GPS data is unavailable, your FPV (First Person View) goggles’ DVR recording becomes your most valuable asset. It acts as a flight recorder, capturing the final seconds before impact. Analyzing this footage requires a detective’s mindset, looking beyond the movement to identify static markers in the environment.
Analyzing Landmarks and Shadows
In the final moments of a flight, look for unique environmental features that stand out from the surrounding terrain. A strangely shaped tree, a patch of discolored grass, or a specific rock formation can serve as a visual anchor. Don’t just look at the ground; look at the horizon to see if you can spot distant structures like power lines or water towers that help triangulate your position.
- Shadow Orientation: If you know the time of day, use shadows as a natural compass. If the sun was behind your drone during the crash, the shadows point exactly toward its final resting place.
- Height Perception: Observe how long it takes for the ground to “rush up” in the video. This helps estimate whether the drone clipped a high branch or hit the ground with forward momentum.
- Audio Cues: If your DVR recorded audio, listen for the sound of branches snapping or the distinct “thud” of a ground impact, which can help determine the type of terrain you’re searching in.
Using Google Earth for Match-Ups
Once you have a screen capture of the last clear frame, cross-reference it with high-resolution satellite imagery like Google Earth. Satellite maps often reveal patterns that are invisible from the ground, such as hidden paths or clearings. By matching the perspective of your DVR footage to the 3D view in Google Earth, you can narrow your search radius from several acres down to a specific 20-foot circle.
Critical Factors Affecting Signal-Based Searches
Searching for a drone using radio signal strength (RSSI) or video static is a game of physics. Without a GPS coordinate, you are essentially playing a high-stakes game of “hot or cold.” Understanding how signals behave in the wild will prevent you from chasing “ghost” signals or walking right past your downed craft.
Radio Interference and Environmental Obstacles
Signals do not travel in a straight, clean line when a drone is on the ground. Radio waves at 2.4GHz and 5.8GHz are easily absorbed or reflected by the environment. Dense foliage, especially if the leaves are wet, acts like a physical shield, significantly cutting your signal range. This is known as signal attenuation, and it can make a drone that is only 50 feet away seem like it is much further.
- Multipathing: In rocky areas or near buildings, signals can bounce off surfaces, creating “false positives” where the signal seems strongest in a direction where the drone isn’t actually located.
- The “Ground Effect”: Once a drone is sitting on the soil, the earth itself absorbs much of the radio energy, drastically reducing the effective range compared to when the drone was in the air.
Battery Voltage and Signal Attenuation
The strength of the signal you are tracking is directly tied to the drone’s remaining battery life. As the LiPo battery voltage drops, the Video Transmitter (VTX) or radio receiver may lose power or drop into a low-power “pit mode.” This causes the signal to fluctuate wildly. If you are tracking a signal and it suddenly vanishes, it doesn’t always mean you’ve moved further away; it might mean the drone’s battery has finally hit its cutoff point.
Furthermore, the orientation of the antennas matters. If your drone landed upside down, the antenna might be buried in the dirt or shielded by the carbon fiber frame. Carbon fiber is conductive and blocks radio signals, creating a “dead zone” in certain directions. Always circle a suspected area 360 degrees to ensure you aren’t standing in a signal shadow.
Conclusion
Recovering a lost drone without the luxury of GPS coordinates is a challenging but rewarding skill. By combining visual “detective work” from your DVR footage with a technical understanding of radio signal behavior, you significantly increase your chances of bringing your gear home. The key is to remain calm, stay systematic in your search, and use every piece of data available to you, from the orientation of shadows to the fluctuations in your RSSI readings.
Moving forward, your best defense is a proactive offense. Consider these next steps for your next flight:
- Install a self-powered buzzer: These devices have their own battery and will beep for hours even if the main flight battery is ejected.
- Practice signal tracking: Have a friend hide your drone in a field and try to find it using only your goggles and signal strength.
Don’t let a crash end your flying season. Equip yourself with the right knowledge and accessories today so you can fly with confidence tomorrow!
💬 Quick Questions & Answers
Can I find a lost drone if the battery has died?
You must rely on visual landmarks from your last known FPV footage and a physical grid search.
What is RSSI in drone recovery?
RSSI is a signal strength indicator that helps you determine if you are getting closer to the drone.
How do ESC beepers help find drones?
They use the drone’s motors to emit a high-pitched sound that helps locate it in thick brush.
Will my controller still talk to the drone after a crash?
If the battery stayed connected, the radio link usually remains active for signal tracking.
Should I turn off my radio to save battery?
No, keep it on to maintain the telemetry link used for proximity tracking.
❓ Frequently Asked Questions
How do I use RSSI to triangulate a drone’s position?
Walk slowly in a specific direction while watching the signal strength on your screen. If the number increases (or dBm becomes less negative), you are moving toward the drone; if it drops, turn back and try a different angle.
What should I look for when reviewing FPV DVR footage?
Focus on the last three seconds of flight to identify unique landmarks like specific trees, fence lines, or rock formations. Use these visual cues to draw a straight line on a map from your takeoff point.
What happens if the drone battery is ejected during a crash?
Manual signal-based recovery becomes impossible once power is lost. In this case, you must rely entirely on visual tracking and a systematic search of the flight path’s last known heading.
How effective are directional antennas for finding lost drones?
Directional antennas are highly effective because they only pick up signals from the direction they are pointed. By rotating the antenna, you can find the specific ‘cone’ where the signal is strongest.
Are there specific accessories that help find drones without GPS?
Self-powered buzzers (like Vifly or Hellgate) are the best accessories because they have their own small battery and will beep for hours even if the main battery is disconnected.
How do I perform a systematic grid search effectively?
Mark the last known location and walk in 5-10 meter increments in a ‘lawnmower’ pattern. Wear bright clothing and bring a second drone if possible to get an aerial view of the search area.