
Assess the situation and safety risks immediately before attempting any retrieval. Use low-impact tools like telescoping poles or weighted lines to dislodge the drone while preventing a long fall that could damage sensitive gimbal components.
🎯 Key Takeaways
- Never climb a tree near active power lines or electrical equipment.
- Use a weighted fishing line to shake branches from the ground.
- Extendable fiberglass poles are ideal for drones under 20 feet high.
- Place a soft landing pad below the drone to prevent impact.
- Power down the controller to prevent motor damage or propeller rotation.
To get your drone out of a tree safely, you must match your retrieval method to the altitude and the density of the branches. For heights under 20 feet, a telescoping fiberglass pole is the most precise solution. If your drone is stuck higher, a weighted fishing line or an arborist’s throw bag allows you to shake the specific branch loose without causing a catastrophic freefall. For extreme heights or delicate snags, renting a bucket lift or hiring a professional climber is the only way to ensure neither you nor your equipment sustains permanent damage.

This process matters because the initial impact with the tree is rarely what destroys a drone. Most irreparable damage occurs during the recovery attempt when panicked pilots pull too hard on the gimbal or allow the drone to crash onto the hard ground. By using the right tools and a controlled approach, you can recover your investment with zero additional repair costs. Speed is important to prevent battery discharge, but precision is what prevents a total loss.
Prime for Young Adults — 6 Months Free
Exclusive Offer Amazon Prime for Young Adults, Students and 18–24s get six months of Prime free, then half price.
Start 6 Months Free As an Amazon Associate I earn from qualifying purchases.Essential Tools and Retrieval Equipment for Drone Recovery
Recommended Best Deal Products


Before you start shaking branches, you need a dedicated recovery kit. Having these tools ready prevents “improvisational” mistakes, like throwing rocks or shoes, which usually end up stuck alongside the drone. Your kit should focus on reach and controlled tension rather than brute force. Avoid using metal objects that could puncture the drone’s shell or create a short circuit if they strike the battery.
Weighted Fishing Lines and Arbourist Throw Bags
For drones trapped between 20 and 60 feet, a heavy-duty fishing rod with a 20lb to 30lb test braided line is the most effective tool. Attach a 2-ounce lead sinker or a specialized arborist throw bag to the end of the line. Your goal is not to hook the drone directly—which can snap delicate landing gear—but to drape the line over the specific branch holding the aircraft. Once the line is looped over the limb, you can gently oscillate the branch to let gravity do the work.
- Paracord: 550 cord is excellent for lower branches because it is easy to grip and won’t snap under the tension required to bend a thick limb.
- Throw Weights: Use a 10-ounce or 12-ounce arborist throw bag. These are soft, aerodynamic, and won’t damage the drone’s shell if you accidentally hit the chassis.
- High-Visibility Line: Use neon-colored line so you can see exactly where it is positioned relative to the drone’s propellers and gimbal.
Telescoping Poles and Specialized Hooks
If the drone is visible and within 25 feet, a telescoping fiberglass pole is the safest option. These poles provide the rigidity needed to lift the drone directly off a branch rather than shaking it. Look for poles designed for window cleaning, pool maintenance, or painting, as they often have threaded ends for custom attachments. Fiberglass is preferred over aluminum because it is lighter and non-conductive.
- Reach Extensions: Standard 24-foot poles are the industry favorite, but you can find 30-foot versions that remain stable when fully extended.
- Custom Hooks: Duct tape a “C” shaped heavy-duty wire hook to the end of the pole. This allows you to snag the landing gear or the motor arm specifically to lift it clear of the foliage.
- Friction Mounts: Adding a small piece of high-grip rubber to the hook can prevent the drone from sliding off as you lower the pole.
Drone Recovery Made Easy: Your Essential Action Plan
There is a specific, sinking feeling that every drone pilot experiences when they hear the tell-tale “crunch” of plastic hitting foliage, followed by the sight of their expensive aircraft dangling precariously thirty feet in the air. While your first instinct might be to start throwing rocks or climbing the nearest limb, these impulsive reactions often lead to shattered gimbals, punctured batteries, or—worse—personal injury. This guide covers a systematic, professional approach to retrieving your drone safely. Following these steps ensures you minimize further damage to your equipment while keeping your feet firmly and safely on the ground for as long as possible.
Step 1: Immediate Damage Control and Assessment
What you need: Binoculars (optional), your drone controller, and a calm disposition.
Instructions: The moment your drone becomes lodged, stop the motors immediately. If the drone is still powered on and the propellers are struggling against branches, you risk burning out the ESCs (Electronic Speed Controllers) or the motors themselves. Once the motors are off, use binoculars to perform a visual inspection. Determine exactly how the drone is stuck: Is it resting on a thick branch, or is a prop guard hooked around a twig? Observe the stability of the drone—is it vibrating in the wind or firmly wedged? Check the battery level on your controller; if it is low, you need to work quickly but carefully before the drone loses its “Find My Drone” beacon or GPS positioning.
Pro Tip: Do not try to fly the drone out unless it is clearly resting on top of a flat, unobstructed canopy. Attempting to “power out” of a tangle usually results in the drone flipping upside down and falling deeper into the interior of the tree.
Prime for Young Adults — 6 Months Free
Exclusive Offer Amazon Prime for Young Adults, Students and 18–24s get six months of Prime free, then half price.
Start 6 Months Free As an Amazon Associate I earn from qualifying purchases.Step 2: The Weighted Fishing Line Method
What you need: A fishing rod with at least 20lb test line, a heavy sinker or a tennis ball, and a second person to assist.
Instructions: This is the most effective DIY method for drones trapped at heights between 15 and 40 feet. Tie a heavy fishing sinker or a tennis ball filled with a few pennies to the end of the line. Your goal is not to hit the drone, but to cast the line over the specific branch the drone is resting on. Stand back at a distance to get a better angle. Once the line is over the branch, let the weight drop to the ground. You and your assistant should each grab one end of the line and gently shake the branch. The goal is to create enough vibration to nudge the drone loose so it falls. Make sure your assistant is ready with a large blanket or tarp to catch the aircraft as it descends.
Pro Tip: Never use a fishing hook. The goal is to use the line to shake the limb, and a hook will likely snag the drone’s wiring or the tree’s bark, creating a second stuck object.
Step 3: The Modular PVC Extension Pole
What you need: Three to four 10-foot sections of 3/4-inch PVC pipe, PVC couplers, duct tape, and a “V” shaped branch or a coat hanger.
Instructions: If the drone is lower than 30 feet, a DIY reacher pole is often more precise than the fishing line method. Connect the PVC sections using the couplers and reinforce every joint with several layers of duct tape to ensure the pole doesn’t pull apart under its own weight. At the very top, fashion a hook out of a wire coat hanger or duct-tape a “V” shaped stick to the end. Slowly raise the pole, keeping it as vertical as possible to prevent it from bending or snapping. Use the hook to gently lift the drone off the branch or to pull the branch downward until the drone slides into reach. This method requires a steady hand and patience, as the pole will become quite “floppy” at heights over 20 feet.
Pro Tip: If the pole begins to bend excessively, have a helper support the middle of the pole with a “Y” shaped stick or another piece of PVC to provide a secondary pivot point.
Step 4: The Ladder and Telescoping Pole Combo
What you need: A sturdy A-frame or extension ladder, a telescoping pool cleaning pole (15-20ft), and a spotter.
Prime for Young Adults — 6 Months Free
Exclusive Offer Amazon Prime for Young Adults, Students and 18–24s get six months of Prime free, then half price.
Start 6 Months Free As an Amazon Associate I earn from qualifying purchases.Instructions: If the drone is just out of reach of a ground-based pole, a ladder can provide the necessary height boost. Always place the ladder on firm, level ground. If using an extension ladder against the tree, ensure it is leaning against a primary, thick trunk—not a limb that could shift. Have your spotter hold the base of the ladder firmly. Climb to a safe height (never the top two rungs), and then use a telescoping pool pole or a specialized “fruit picker” pole to reach the drone. The advantage of a pool pole is its rigidity compared to PVC. Carefully maneuver the head of the pole to either snag a landing gear or push the drone toward a clear opening in the canopy.
Pro Tip: Do not attempt to grab the drone with your hands while on the ladder. Reaching out too far shifts your center of gravity and is the leading cause of ladder-related falls.
Step 5: The “Blanket Brigade” Rescue
What you need: A large, thick moving blanket, a tarp, or a bedsheet, and 3-4 volunteers.
Instructions: Regardless of which retrieval method you use (shaking the tree, using a pole, or fishing line), you must prepare for the “final descent.” Drones are surprisingly fragile; a 20-foot drop onto hard-packed dirt or roots can total the gimbal or crack the frame. Have your volunteers hold a thick blanket or tarp tautly beneath the drone’s location. They should follow the movement of the drone as it shifts. If the drone begins to fall, they should not try to “catch” it with their hands (which can lead to injury if the props are sharp), but rather let the blanket absorb the kinetic energy. This “fireman’s net” approach is the best way to ensure your drone survives the recovery process without additional damage.
Pro Tip: If you are alone, you can pile up couch cushions, bags of mulch, or even tall grass directly under the drone to create a makeshift landing zone.
Step 6: When to Call a Professional Arborist
What you need: A smartphone and a local directory of tree service companies.
Instructions: There comes a point where DIY methods become dangerous. If the drone is higher than 40 feet, near power lines, or located on a thin limb that cannot support a ladder, you must stop. Search for “local arborists” or “tree climbers.” Many arborists are willing to do a “drone rescue” for a flat fee (typically between $75 and $200), which is significantly cheaper than a new $1,000 drone or a trip to the emergency room. Professional climbers have the harnesses, ropes, and experience to navigate the canopy safely. When you call, be honest about the height and the type of tree; this helps them bring the right gear. Most will be happy to help, as it’s a quicker and easier job than their usual pruning or removal tasks.
Pro Tip: Check if the arborist is insured. Even though they are professionals, you want to ensure both they and your property are protected during the climb.
Step 7: Post-Recovery Inspection and Testing
What you need: A soft brush, compressed air, a new set of propellers, and a fresh battery.
Instructions: Once the drone is safely on the ground, do not immediately try to fly it. First, remove the battery and check it for punctures or swelling; if it looks damaged, dispose of it safely. Use compressed air to blow out any bark, leaves, or debris from the motors and the gimbal assembly. Inspect the propellers for even the smallest hairline cracks; if you find any, replace the entire set. Move the gimbal manually (while the power is off) to ensure it moves smoothly on all axes. Finally, perform a “hover test” at eye level in a wide-open area for at least three minutes. Watch for unusual vibrations or “toilet bowl” effect, which could indicate a bent motor shaft or a compromised internal compass.
Pro Tip: Always recalibrate the IMU (Inertial Measurement Unit) and the Compass in the drone’s software before your first real flight after a crash, as the impact can knock these sensors out of alignment.
✅ Final Checklist
- Confirm the drone battery is removed and inspected for physical damage or heat.
- Ensure all debris (twigs, leaves, sap) is cleaned from the motor bells and cooling vents.
- Verify that all propellers have been replaced or checked for structural integrity.
- Check the gimbal for full range of motion and ensure the camera lens is not scratched.
- Recalibrate the drone’s internal sensors (IMU and Compass) via the flight app.
Important Notes:
- Safety Warning: Never, under any circumstances, attempt to retrieve a drone that is within 10 feet of a power line. Contact your local utility company instead.
- Seeking Help: If the drone is on someone else’s property, always ask for permission before entering or attempting a rescue to avoid trespassing charges.
- Estimated Time: 30 minutes to 3 hours depending on height and complexity.
- Estimated Cost: $0 (DIY) to $200 (Professional Arborist).
Risk Assessment: Evaluating Tree Stability and Electrical Hazards
Recommended Best Deal Products
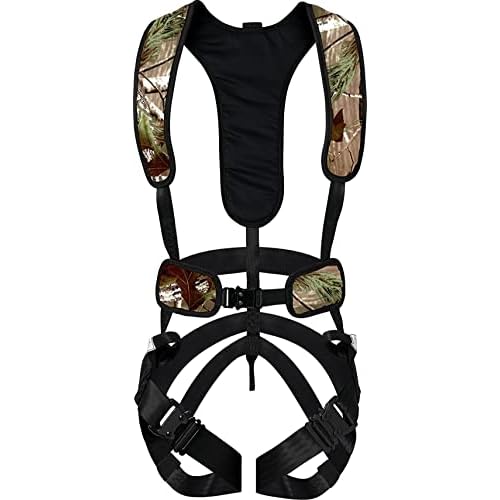


Before you begin the physical recovery, you must perform a 360-degree safety check of the area. Adrenaline often clouds judgment, leading pilots to climb unstable trees or reach near dangerous utility lines. If the environment is compromised, the hardware is not worth the risk to your life. Take two minutes to inspect the structural integrity of the tree and its surroundings.
Identifying Power Lines and High-Voltage Risks
Many urban trees grow around or through secondary power lines. If your drone is within 10 feet of a utility line, do not use a pole or a metal-weighted line. Even carbon fiber and damp ropes can carry a current under the right conditions. If the drone is touching a wire, stop immediately and call the local utility company. They have non-conductive “hot sticks” designed for this exact scenario and will often help to prevent a fire hazard.
Assessing Branch Integrity and Structural Weight Limits
Never attempt to climb a tree to retrieve a drone unless you are a trained professional with a safety harness. Most drones get stuck on the “outer” thin branches that cannot support human weight. Before shaking a branch from the ground, check for “widowmakers”—dead branches hung up in the canopy that could fall on you during the retrieval process. A 5-pound dead limb falling from 30 feet can be fatal.
- Check for Rot: Look for fungal growth, holes, or peeling bark on the limb holding your drone. If the wood is brittle, it may snap and drop the drone unexpectedly.
- Ground Clearance: Ensure the area below the drone is clear of rocks, fences, or water. You must establish a “Landing Zone” using a stretched tarp or a pile of blankets to catch the drone when it breaks free.
- Wind Factors: High winds can move the drone deeper into the tree or flip it over, causing the propellers to tangle further. If gusts exceed 15 mph, wait for calmer conditions to avoid losing the drone to a higher branch.
- The Pivot Point: When using a line, ensure your pull angle doesn’t drag the drone into the trunk, which can crush the camera sensor.
Impact Prevention: Protecting the Gimbal and Internal Components
The moment your drone becomes lodged in a canopy, the focus shifts from flight to salvage. While the primary goal is getting the aircraft down, the way it comes down determines whether it will ever fly again. Modern drones are essentially flying computers equipped with highly sensitive camera stabilization systems. These components are designed for aerodynamic efficiency, not for surviving a twenty-foot drop through jagged branches.
Cushioning the Landing Zone
The gimbal is arguably the most fragile part of any drone. Even a minor impact can snap the delicate ribbon cables or knock the brushless motors out of alignment. Before attempting any retrieval method that might dislodge the aircraft, you must prepare a “soft landing” zone. This isn’t just about saving the outer shell; it’s about protecting the internal IMU (Inertial Measurement Unit) and the camera lens from sudden deceleration. A controlled fall is always preferable to a freefall.
- Deploy a Safety Net: Use a large tarp or a heavy-duty blanket held by several people to create a trampoline effect that absorbs kinetic energy.
- Pad Hard Surfaces: If the drone is positioned over a driveway or sidewalk, move patio cushions or thick cardboard underneath the drop zone to prevent structural cracks.
- Clear Vertical Obstacles: If possible, use a long pole to move smaller, lower branches out of the projected fall path to prevent the drone from tumbling and gaining rotational speed.
Post-Retrieval Moisture and Grit Control
If your drone has spent significant time in a tree, especially overnight, environmental factors become a secondary threat. Morning dew, sap, and even small insects can migrate into the motor housings and vents. When you finally retrieve the unit, the instinct is to power it on immediately to check for damage. Resist this urge. Powering a damp drone can cause a short circuit in the Electronic Speed Controllers (ESCs), turning a minor recovery into a total loss. Instead, focus on a manual cleaning of the gimbal and sensors before introducing a battery.
Professional Assistance: When to Hire an Arborist or Aerial Lift
Recommended Best Deal Products


There is a definitive line where DIY retrieval becomes a liability. If you find yourself eyeing an unstable ladder or considering climbing a high-altitude branch without a harness, it is time to stop. The cost of a professional retrieval is always lower than the cost of a hospital visit. Recognizing the limits of your equipment—and your physical reach—is a mark of a responsible pilot.
The Arborist Advantage
Professional tree climbers, or arborists, are often the unsung heroes of the drone community. Unlike a standard handyman, an arborist has the specialized rigging, throw lines, and safety harnesses required to navigate a tree canopy without causing damage to the tree or the drone. They can often reach “unreachable” thin branches where a drone is most likely to snag. Their expertise allows them to physically grab the aircraft and hand it down, eliminating the risk of a fall altogether.
- Height Threshold: If the drone is located higher than 20 feet, standard extension poles and consumer ladders become dangerously unstable and should be avoided.
- Complex Snags: If the propellers are physically wrapped in vines or deep within a “V” notch in the trunk, shaking the tree will likely cause more damage than help.
- Public Safety Risks: If your drone is stuck in a tree overhanging a public road or power lines, professional intervention is usually a legal requirement to avoid local utility interference.
Utilizing Aerial Lifts and Cherry Pickers
In urban environments where trees are situated near flat pavement or parking lots, renting an aerial lift can be a highly effective solution. Many local equipment rental shops offer small, towable “cherry pickers” that provide a stable platform for retrieval. While this comes with a rental fee, it is an excellent option for high-end cinematic drones where the value of the camera gear far exceeds the daily rental rate of the machinery. This method provides the most controlled environment for a delicate rescue mission.
Conclusion
Getting a drone stuck in a tree is a rite of passage for many pilots, but it doesn’t have to result in a total loss. By prioritizing safety over speed and focusing on protecting the sensitive internal components—specifically the gimbal and sensors—you can significantly increase the chances of your aircraft flying again. Always remember that no piece of technology is worth a personal injury; know when to put down the pole and call for professional assistance.
Your immediate next steps should be a thorough visual inspection and a full recalibration of all sensors once the drone is dry and clean. To avoid future mishaps, consider practicing in wide-open spaces and investing in prop guards for tighter environments. Stay safe, fly smart, and keep your eyes on the horizon!
❓ Frequently Asked Questions
What is the most common tool used for high-altitude drone retrieval?
A weighted fishing line or an arborist’s ‘throw line’ is the most effective tool for heights above 30 feet. By throwing the weight over the branch and gently shaking it, you can often dislodge the drone without climbing.
Why is climbing the tree often considered a last resort?
Tree climbing is dangerous without professional harness gear, and your movement can cause the drone to fall unexpectedly. Additionally, branches thin enough to snag a lightweight drone often cannot support a human’s weight.
How can I prevent the battery from catching fire while the drone is stuck?
If the battery was punctured during the crash, it poses a thermal runaway risk; avoid poking it with sharp objects. If it’s intact, the main risk is deep discharge, so aim to retrieve it within 24 hours.
Can I use a long PVC pipe to reach my drone?
PVC pipes are effective for heights up to 15 feet, but they become extremely flimsy and difficult to control at greater lengths. Telescoping fiberglass ‘hot sticks’ are a much sturdier and safer alternative for height.
What should I do if my drone is stuck near a power line?
Do not touch the tree or attempt any retrieval yourself. Contact your local utility company immediately, as the tree or drone could be energized and cause a fatal electric shock.
Are there specific accessories that help with recovery?
While propeller guards can sometimes cause a drone to snag more easily, specialized ‘retrieval hooks’ can be mounted to a second, larger drone to snatch the stuck aircraft if it is visible and accessible.


