Achieving professional drone footage requires prioritizing vibration dampening and precise technical settings like the 180-degree shutter rule. Utilizing ND filters and post-production gyro stabilization is the industry standard for removing ‘jello’ and creating fluid motion blur.
🎯 Key Takeaways
- Use TPU mounts to absorb high-frequency motor vibrations and eliminate jello.
- Set shutter speed to double your frame rate for natural-looking motion blur.
- ND filters are essential for managing exposure while maintaining cinematic shutter angles.
- Disable internal camera stabilization to allow for superior post-processing via gyro data.
- Balance the camera weight centrally to maintain flight stability and motor efficiency.
Achieving professional cinematic footage with an external action camera requires a flawless mechanical interface and precise weight balancing. You must eliminate high-frequency motor vibrations—commonly known as “jello”—before the light hits the sensor. By isolating the camera from the drone’s frame and tuning your center of gravity, you transform a shaky flight into a stable, high-bitrate cinema platform. This process is about bridging the gap between a raw racing machine and a steady aerial tripod.
Prime for Young Adults — 6 Months Free
Exclusive Offer Amazon Prime for Young Adults, Students and 18–24s get six months of Prime free, then half price.
Start 6 Months Free As an Amazon Associate I earn from qualifying purchases.
Practical execution matters because post-production stabilization like ReelSteady or Gyroflow can only do so much. If your hardware setup is sloppy, software will crop your image significantly to compensate for the blur, destroying your resolution. Setting up your mount and camera correctly at the field ensures you maximize every pixel. You want the highest possible fidelity without the robotic, artificial look of over-stabilized footage.
Essential Mounting Hardware and Vibration Isolation Technology
Recommended Best Deal Products


The primary enemy of cinematic drone footage is motor resonance. When your motors spin at high RPMs, they create microscopic vibrations that the camera sensor perceives as wavy lines or “jello.” To fix this, you cannot simply bolt a camera directly to a carbon fiber frame. You need a dedicated isolation system that acts as a buffer between the power plant and the lens.
Advanced TPU Mounts and Material Choice
Most professional pilots use 3D-printed mounts made from Thermoplastic Polyurethane (TPU). Unlike rigid plastic, TPU has natural dampening properties. For the best results, look for a “Shore Hardness” of 95A. This provides enough rigidity to keep the camera pointed forward during high-speed maneuvers while absorbing high-frequency oscillations. When installing your mount, ensure you are using a full-enclosure sleeve rather than just a strap. A sleeve provides 360-degree protection and a larger surface area to dissipate vibration energy.
- Integrated ND Slot: Choose a mount with a built-in slot for ND filters to keep them secure during high-G turns.
- Specific Tilt Angle: Set your mount to a fixed angle (usually 25 to 35 degrees) to match your typical cruising speed.
- Screw Torque: Do not over-tighten the mounting screws; over-compressing the TPU can actually transfer more vibration to the camera.
Achieving Perfect Center of Gravity (CoG)
Weight distribution is the difference between a drone that “drifts” and one that feels locked in. When you add a 150g action camera to the front of a drone, you shift the Center of Gravity forward. This forces your front motors to work harder, creating heat and more vibration. To optimize your setup, you must counter-balance the camera with your flight battery. Move your battery toward the rear of the top plate until the drone balances perfectly on a single finger placed directly in the center of the frame. A balanced drone requires less “P-term” correction from the flight controller, resulting in smoother, more fluid movement.
The Ultimate Action Camera Drone Filming Walkthrough
Capturing cinematic aerial footage requires more than just strapping a camera to a quadcopter and hitting record. This guide covers the end-to-end process of configuring your action camera and drone setup to achieve professional-grade results, minimizing vibrations, optimizing exposure, and ensuring flight stability. Whether you are using a custom FPV build or a stabilized platform, following these technical steps will help you produce buttery-smooth video while protecting your expensive equipment from the rigors of high-speed flight.
Step 1: Selecting the Right Mounting Hardware
What you need: A compatible TPU (Thermoplastic Polyurethane) 3D-printed mount, M3 bolts, and a heavy-duty velcro strap.
Instructions: Start by selecting a mount specifically designed for your camera model (e.g., GoPro Hero 12 or DJI Action 4) and your drone’s frame dimensions. Rigid plastic mounts transmit motor vibrations directly to the sensor, causing “jello” in your footage. Instead, use a TPU mount, which acts as a natural dampener. Align the mount holes with the front standoffs of your drone frame and secure them tightly using M3 bolts. Ensure the mount provides a tilt angle between 20 and 30 degrees for general filming, or up to 45 degrees for high-speed chasing. Once the mount is fixed, slide the camera in and use a secondary velcro strap around the body of the camera to ensure it doesn’t eject during a hard landing or high-G maneuver.
Prime for Young Adults — 6 Months Free
Exclusive Offer Amazon Prime for Young Adults, Students and 18–24s get six months of Prime free, then half price.
Start 6 Months Free As an Amazon Associate I earn from qualifying purchases.Pro Tip: Always use a “glass saver” or a sacrificial lens protector. High-speed flights often kick up pebbles or debris from the propellers, which can easily crack your camera’s primary lens element.
Step 2: Balancing the Center of Gravity (COG)
What you need: Your fully assembled drone, the action camera, a flight battery, and a flat surface or a balancing jig.
Instructions: Adding an action camera significantly shifts the weight distribution of your aircraft, which can force your motors to work unevenly and decrease flight time. To fix this, place your camera in its mount and then place the flight battery on the top or bottom plate. Lift the drone from the center of its frame (the geometric center between the four motors). If the nose dips, slide the battery toward the rear. If the tail dips, move the battery forward. Ideally, the drone should remain perfectly level when suspended. This balance ensures the Flight Controller (FC) doesn’t have to over-compensate, leading to smoother footage and cooler-running motors.
Pro Tip: Mark your “sweet spot” on the frame with a silver permanent marker or a piece of tape so you can quickly place the battery in the exact same position for every flight.
Step 3: Optimizing Camera Video Settings
What you need: Your action camera, a high-speed U3/V30 rated microSD card, and the camera’s mobile app (optional).
Instructions: For cinematic motion, set your resolution to 4K or 5.3K to allow for cropping in post-production. Set your frame rate to 24fps or 30fps for a traditional film look, or 60fps if you plan to slow the footage down. Crucially, turn off “Auto” shutter speed. Use the 180-degree rule: your shutter speed should be double your frame rate (e.g., 1/60s for 30fps). Set your ISO to a fixed range, ideally 100–400, to prevent “grain jump” when flying between shadows and sunlight. Finally, select a “Flat” or “Log” color profile. This preserves the most dynamic range, allowing you to color grade the footage later to match a professional aesthetic.
Pro Tip: Disable internal electronic image stabilization (like HyperSmooth or RockSteady) if you plan to use professional stabilization software like ReelSteady or Gyroflow in post-processing. This provides a much cleaner, more organic result.
Prime for Young Adults — 6 Months Free
Exclusive Offer Amazon Prime for Young Adults, Students and 18–24s get six months of Prime free, then half price.
Start 6 Months Free As an Amazon Associate I earn from qualifying purchases.Step 4: Applying ND Filters for Motion Blur
What you need: A set of Neutral Density (ND) filters (ND8, ND16, ND32), and a lens cleaning cloth.
Instructions: Because you have locked your shutter speed to 1/60s or 1/120s (to follow the 180-degree rule), your footage will likely be overexposed in daylight. ND filters act like sunglasses for your camera, reducing the light hitting the sensor without changing colors. On a cloudy day, use an ND8. On a bright, sunny day, use an ND16 or ND32. Attach the filter and check your exposure on the camera screen; you want the image to look slightly dark rather than blown out. Ensure the filter is clicked into place securely, as the wind resistance at 60mph can easily rip a loose filter off the lens.
Pro Tip: Use a circular polarizer (CPL) filter if you are filming over water or snow. It eliminates harsh reflections and allows the camera to see “through” the surface of the water for more dramatic shots.
Step 5: Reducing Electrical Noise and Interference
What you need: Low-ESR Capacitor (already soldered to the ESC), and shielded wiring.
Instructions: High-performance drones generate significant electrical noise that can interfere with the camera’s internal electronics or your video transmission. Ensure your drone has a high-quality capacitor (at least 1000uF 35V for 4S-6S builds) soldered to the main battery leads. If you are using a camera that draws power from the drone’s flight controller, use a dedicated 5V or 12V BEC (Battery Eliminator Circuit) rather than the shared power rail. This prevents “lines” or “static” from appearing in your footage when you punch the throttle. Additionally, ensure your camera is not physically touching any of the active electronics or antennas, which can cause EMI (Electromagnetic Interference).
Pro Tip: If your camera has Wi-Fi and Bluetooth capabilities, turn them OFF before flight. These signals can interfere with your 2.4GHz radio link, potentially causing a failsafe or a loss of control.
Step 6: Executing Cinematic Flight Maneuvers
What you need: A fully charged drone, a spotter (for safety), and a clear flight path.
Instructions: To get the most out of your setup, avoid “jerky” stick movements. Focus on long, smooth arcs. Try the “Parallax Effect” by flying sideways while slowly rotating the drone in the opposite direction to keep a central subject in frame. Another effective shot is the “Proximity Low-Pass,” where you fly inches above the ground or through narrow gaps; the high-speed motion blur from your ND filters will make the footage feel much faster than it actually is. Always fly through the line of the shot—meaning, start your movement 5 seconds before the “hero” moment and continue for 5 seconds after. This provides the handles needed for smooth transitions during editing.
Pro Tip: Use “Thumbies” or “Pinch” grip on your controller sticks rather than just using the tips of your thumbs. This style offers much finer resolution and control for the subtle movements required in cinematic filming.
✅ Final Checklist
- Camera is securely strapped into the TPU mount and the lens protector is clean.
- The ND filter is appropriate for the current lighting and is locked in place.
- The battery is positioned to achieve a perfect center of gravity.
- Internal stabilization is turned OFF (if using post-stabilization software).
- SD card has been formatted and has sufficient space for the flight duration.
Important Notes:
- Safety First: Never fly directly over people, moving vehicles, or private property without permission. Always maintain a line of sight.
- Heat Warning: High-resolution recording generates massive heat. Avoid leaving the camera on while the drone is stationary on the ground; the airflow from the propellers is often required to keep the camera from overheating.
- Estimated Time: 30–45 minutes for initial hardware setup; 5 minutes for pre-flight checks per session.
- Cost Range: $300–$500 for the action camera, plus $20–$100 for mounting accessories and ND filters.
Technical Camera Configurations for Cinematic Motion Blur
Recommended Best Deal Products

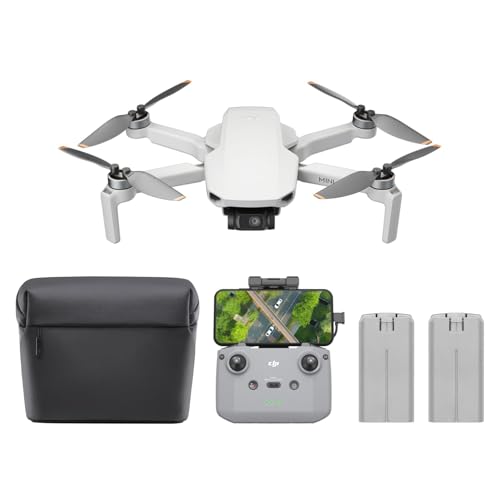

Once the camera is physically secure, you must configure the internal settings to mimic the look of traditional cinema. Most action cameras default to high shutter speeds to keep images sharp, but this results in “stuttery” footage that looks amateur. Pro-level drone cinematography relies on intentional motion blur to give the viewer a sense of speed and fluidity.
The 180-Degree Rule and Shutter Control
To achieve natural motion blur, your shutter speed should always be double your frame rate. This is the 180-degree rule. If you are shooting at 30 frames per second (fps), your shutter speed must be locked at 1/60th of a second. If you are shooting at 60fps for slow motion, lock it at 1/120th. On a bright day, a 1/60th shutter speed will result in a completely blown-out, white image. This is why Neutral Density (ND) filters are mandatory accessories for drone filming.
- ND8/ND16: Use these for golden hour or overcast days to reduce light by 3-4 stops.
- ND32/ND64: Use these for direct midday sun to maintain a slow shutter speed.
- Fixed ISO: Always lock your ISO at 100. Never use “Auto ISO,” as the drone’s constant movement between light and shadow will cause distracting exposure jumps.
Maximizing Dynamic Range with Color Profiles
Professional drone footage is rarely used straight out of the camera. To get the most detail out of the sky and shadows, set your camera to a Flat or Log color profile (such as GoPro’s Protune with “Flat” color or DJI’s D-Log). This captures a desaturated, low-contrast image that preserves the maximum amount of data. In your settings, ensure your Bitrate is set to “High” (usually 100Mbps or more) and set your Sharpness to “Low.” Modern action cameras over-sharpen images digitally; it is much better to add a controlled amount of sharpening during your final edit than to bake in digital artifacts during the flight.
The Role of ND Filters in Aerial Cinematography
If you have ever wondered why professional drone footage looks so smooth while amateur clips feel “jittery” or “strobe-like,” the secret is often a small piece of glass called an ND (Neutral Density) filter. These “sunglasses for your camera” are essential for controlling the amount of light hitting the sensor, allowing you to manipulate shutter speed for a more cinematic aesthetic.
Achieving the 180-Degree Shutter Rule
To get that natural motion blur we see in traditional cinema, you should ideally set your shutter speed to double your frame rate. For example, if you are filming at 30fps, your shutter speed should be 1/60th of a second. On a bright, sunny day, achieving this without an ND filter is nearly impossible—your image would be completely “blown out” or overexposed. Using an ND filter helps you maintain this ratio, which softens the movement of objects passing the lens and hides micro-vibrations from the drone’s motors.
- ND8/ND16: These are the “daily drivers,” perfect for golden hour, sunset, or slightly overcast days.
- ND32/ND64: These heavy-duty filters are necessary for filming in direct, midday sunlight or over highly reflective surfaces like snow or water.
- Practical Tip: Always check your histogram after landing; you want to bring the exposure down until the highlights are preserved without losing detail in the shadows.
Reducing the “Jello” Effect
High-frequency vibrations from drone propellers can cause a rolling shutter distortion known as the “jello effect,” where the image appears to ripple or shake. By using a stronger ND filter and slowing down the shutter speed, you effectively blur those tiny vibrations away. This results in a much cleaner image that looks “locked-in” rather than distorted, even if your drone’s tuning isn’t 100% perfect.
Comparing Post-Production Stabilization: ReelSteady vs. Gyroflow
Recommended Best Deal Products

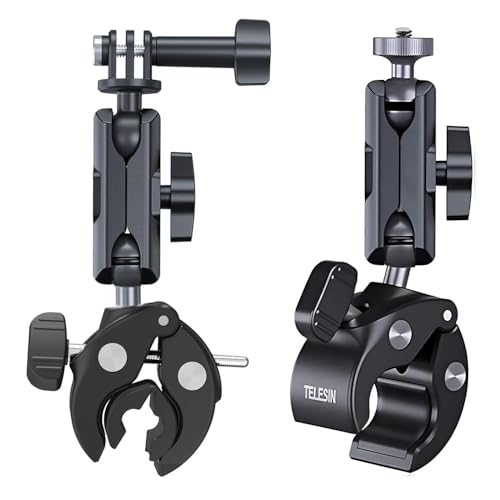

Raw action camera footage from a drone is rarely usable on its own, especially when flying an FPV (First Person View) rig. While internal stabilization like GoPro’s Hypersmooth is impressive for walking, it often struggles with the aggressive banking and high-speed maneuvers of aerial flight. This is where post-production stabilization software comes into play, using the camera’s internal gyroscope data to smooth out the flight path after you land.
ReelSteady: The Industry Standard for GoPro
Now integrated into the GoPro Player, ReelSteady is widely considered the gold standard for cinematic drone work. It is specifically optimized for GoPro hardware, offering an incredibly intuitive “set it and forget it” workflow. Because the software has access to the exact lens geometry and sensor specifications of your camera, the results are remarkably fluid with very little warping or artifacting.
- Pros: Extremely easy to use, excellent lens correction, and natively supports GoPro metadata with no manual syncing required.
- Cons: Limited exclusively to GoPro cameras and requires a paid license for the full version.
- Example: Use ReelSteady when you need a fast turnaround for a professional client who demands a flawless, organic-looking motion without the “robotic” feel of electronic stabilization.
Gyroflow: The Versatile Open-Source Rival
Gyroflow has quickly become the favorite for pilots using various camera brands like Sony, Insta360, or even custom “naked” cameras. It is a powerful, free, open-source tool that offers granular control over how the stabilization is applied. It allows you to tweak the “smoothness” on a timeline, which is vital for maintaining some of the drone’s natural tilt during aggressive turns while still removing the unwanted shakes.
- Pros: Supports almost any camera that records gyro data, is free to use, and offers advanced features like horizon leveling and lens profile calibration.
- Cons: Steeper learning curve and sometimes requires manual syncing between the video file and the gyro data.
- Example: Choose Gyroflow if you are mixing different camera brands in one project or if you want to stabilize older footage that doesn’t work with proprietary apps.
Conclusion: Elevating Your Aerial Vision
Mastering the art of drone cinematography with an action camera is a journey of balancing hardware settings and software finesse. From choosing the right mounting angle to utilizing the transformative power of ND filters and stabilization software, every small adjustment contributes to a more professional final product. The goal isn’t just to record a flight, but to tell a story through smooth, intentional motion that captures the viewer’s imagination.
To take your next step, pick up a basic set of ND filters and experiment with the 180-degree shutter rule on your next flight. Once you have the raw footage, try running it through both ReelSteady and Gyroflow to see which workflow fits your creative style. Now, get out there, fly safe, and start capturing the world from a brand-new perspective!
❓ Frequently Asked Questions
How do ND filters improve drone footage quality?
ND filters reduce the amount of light hitting the sensor, allowing you to use a slower shutter speed. This creates natural motion blur, which makes the footage look much more cinematic and professional than high-shutter, choppy video.
What causes the ‘jello effect’ in drone videos?
Jello is caused by high-frequency motor vibrations that interfere with the camera’s rolling shutter. It can be fixed by balancing propellers, using soft TPU mounts, or adding vibration dampening balls to the camera plate.
Why is post-production stabilization better than in-camera stabilization?
Software like ReelSteady or Gyroflow uses raw gyro data to stabilize the image with more precision. This allows for a wider field of view and smoother results than the real-time processing done inside the camera.
How does adding an action camera affect drone flight performance?
The extra weight increases the load on the motors and shifts the center of gravity. You may need to adjust your PID tuning and expect slightly shorter flight times due to the increased power draw.
What is the 180-degree rule in aerial cinematography?
The 180-degree rule dictates that the shutter speed should be the reciprocal of double the frame rate. This creates a blur that mimics how the human eye perceives motion, making high-speed drone flight look smoother.
Is a ‘Naked GoPro’ worth it for drone filming?
A Naked GoPro is a stripped-down camera used to save weight on small drones like cinewhoops. It is worth it for micro-drones where every gram counts, but it offers less physical protection for the camera hardware.