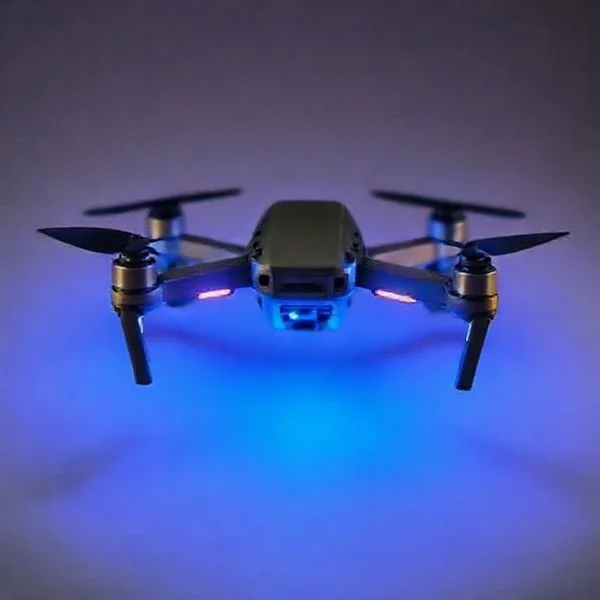
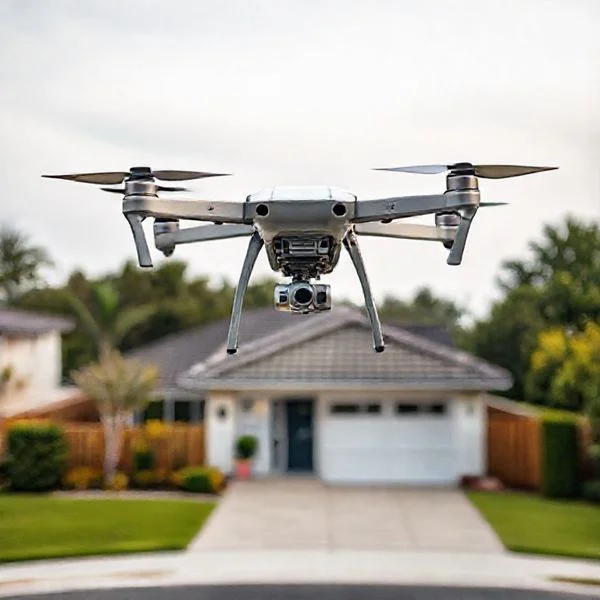
Remote ID compliance is achieved either through a manufacturer firmware update or the addition of an external broadcast module. Pilots must ensure their unique Remote ID serial number is registered within the FAA DroneZone portal to fly legally in regulated airspace.
🎯 Key Takeaways
- Check manufacturer lists for built-in Remote ID firmware updates.
- Purchase an FAA-approved broadcast module for older drone models.
- Locate the Remote ID serial number in your flight app.
- Update your FAA DroneZone profile with the specific ID number.
- Verify your broadcast signal using a mobile scanner app.
To make your drone Remote ID compliant, you have two primary paths: updating your existing drone’s software or attaching a dedicated broadcast module. If you fly a drone weighing over 250 grams or use any drone for commercial purposes under Part 107, compliance is now a legal requirement. Think of Remote ID as a digital license plate that broadcasts your drone’s location and serial number to nearby receivers, ensuring you remain visible to authorities and other aircraft.

Achieving compliance doesn’t always mean buying a new drone. Most newer models from manufacturers like DJI, Autel, and Skydio only require a firmware update to activate their internal “Standard Remote ID” capabilities. However, if you own an older “legacy” drone, you will need to purchase and register an external module. This guide breaks down exactly how to identify which path you need and the specific steps to register your equipment with the FAA to stay legal in the national airspace.
Prime for Young Adults — 6 Months Free
Exclusive Offer Amazon Prime for Young Adults, Students and 18–24s get six months of Prime free, then half price.
Start 6 Months Free As an Amazon Associate I earn from qualifying purchases.Standard Remote ID vs. External Broadcast Modules
Recommended Best Deal Products


The first step in getting Remote ID is determining if your drone already has the hardware built in. The FAA recognizes two distinct ways to comply with the broadcast requirements. Standard Remote ID is integrated into the drone’s flight controller, while a Broadcast Module is a standalone device you strap onto the airframe. Knowing which one you need depends entirely on the age and model of your aircraft.
Standard Remote ID: The Built-in Solution
Most drones manufactured after September 2022 are equipped with Standard Remote ID. This system is the most streamlined because it uses the drone’s existing GPS and transmission antennas. You don’t have to worry about extra batteries or mounting hardware. To activate it, you usually just need to download the latest firmware through your manufacturer’s app (like DJI Fly or Autel Sky). Once updated, the drone automatically broadcasts its position, altitude, and serial number as soon as it gains a GPS lock.
- Pros: No extra weight, no extra charging, and automatic activation upon takeoff.
- Cons: Limited to newer models; requires the drone to have a functional GPS lock before the motors will even arm in some cases.
- How to check: Visit the FAA’s Declaration of Compliance (DOC) website. Search for your specific drone model. If it appears on the list, you have Standard Remote ID and only need to perform a software update.
Remote ID Broadcast Modules: The Legacy Fix
If your drone is older or a custom-built FPV quad, it likely doesn’t have the internal hardware to broadcast the required data. In this case, you must use a Broadcast Module. These are small, battery-powered boxes that contain their own GPS chips and Bluetooth or Wi-Fi transmitters. You physically attach them to your drone using Velcro, adhesive, or 3D-printed mounts. This is the only way to make “legacy” drones like the original DJI Mavic Pro or the Phantom 3 series compliant with current laws.
- Pros: A single module can be moved between multiple drones in your fleet; it makes any aircraft legal instantly without needing manufacturer support.
- Cons: Adds weight (which may affect flight time and center of gravity), requires a separate battery to be charged, and adds $80 to $200 to your equipment costs.
- Common use cases: DJI Mavic Air (Original), Mavic 2 Pro/Zoom, Mini 2, and all custom-built racing or cinematic FPV drones.
The Ultimate Remote ID Compliance Walkthrough
Navigating the federal regulations for unmanned aircraft can feel like a daunting task, but securing your Remote ID is a non-negotiable step for any modern pilot. Remote ID serves as a “digital license plate” for your drone, broadcasting identification and location information to help the FAA, law enforcement, and other agencies ensure the safety of the National Airspace System. Whether you are a recreational flyer or a Part 107 professional, following this guide will ensure you stay legal, avoid hefty fines, and contribute to a safer sky for everyone. This walkthrough covers everything from identifying your hardware capabilities to the final verification of your digital broadcast signal.
Step 1: Determine Your Drone’s Built-In Capabilities
What you need: Your drone’s manufacturer name, model number, and access to the FAA Declaration of Compliance (DOC) website.
Instructions: Your first step is to determine if your drone is already equipped with “Standard Remote ID” capabilities. Most drones manufactured after September 2022 have this built-in. Visit the FAA’s online DOC database and search for your specific model. If your drone appears on this list as “Standard Remote ID,” you do not need to purchase external hardware; you simply need to activate it via a firmware update. If your drone is an older model (like a DJI Phantom 3 or an early custom FPV build) and does not appear on the list, you will need to purchase a separate broadcast module to remain compliant.
Pro Tip: Don’t just rely on the marketing materials from the box; manufacturers often release firmware updates that enable Remote ID months after a product launch, so the official FAA DOC database is the only 100% reliable source of truth.
Prime for Young Adults — 6 Months Free
Exclusive Offer Amazon Prime for Young Adults, Students and 18–24s get six months of Prime free, then half price.
Start 6 Months Free As an Amazon Associate I earn from qualifying purchases.Step 2: Locate the Unique Remote ID Serial Number
What you need: Your drone, the manufacturer’s flight app (e.g., DJI Fly, Autel Explorer), and a fully charged battery.
Instructions: The Remote ID serial number is often different from the physical serial number printed on the drone’s battery compartment or box. To find it, power on your drone and controller, and connect them to your mobile device. Navigate to the “About” or “System Info” section within the flight app settings. Look specifically for a section labeled “Remote ID Serial Number” or “RID SN.” This is typically a 20-character alphanumeric string. If you are using an external broadcast module, the serial number will be printed on the module’s casing or found in the module’s dedicated configuration app. Write this number down exactly as it appears, as even a single character error will invalidate your FAA registration.
Pro Tip: Take a clear smartphone photo of the screen displaying the RID serial number. This prevents transcription errors and gives you a digital record you can refer to while sitting at your computer during the registration phase.
Step 3: Select and Purchase a Broadcast Module (If Necessary)
What you need: A budget of $80–$250 and research on module weights and battery life.
Instructions: If Step 1 revealed that your drone lacks internal Remote ID, you must buy a broadcast module. These small devices (like the Dronetag Beacon, PingRID, or Holy Stone Module) attach to the exterior of your drone and broadcast the required telemetry via Bluetooth or Wi-Fi. When choosing a module, consider the weight; if you are flying a “sub-250g” drone for recreational use, adding a heavy module might push you over the 250g limit, requiring you to register the drone when you otherwise wouldn’t have to. Check the battery life of the module as well; most last between 2 and 4 hours, which should cover a full day of flight sessions.
Pro Tip: Look for modules that offer an integrated GPS. While some modules can pull GPS data from your flight controller, standalone modules with their own GPS are much easier to swap between multiple drones in your fleet.
Step 4: Update Your Registration on FAA DroneZone
What you need: An FAA DroneZone account, $5 USD, a credit card, and your 20-character RID serial number.
Prime for Young Adults — 6 Months Free
Exclusive Offer Amazon Prime for Young Adults, Students and 18–24s get six months of Prime free, then half price.
Start 6 Months Free As an Amazon Associate I earn from qualifying purchases.Instructions: Log in to the FAA DroneZone website. If you are a recreational flyer, you will register under “The Exception for Limited Recreational Operations.” If you are a pro, use “Part 107.” Navigate to your “Dashboard” and find the “Manage Manual Aircraft” section. If you are adding a new drone, click “Add Aircraft.” If you are updating an existing one, click the “Edit” icon next to the drone’s entry. Under “Remote ID,” select “Yes.” You will then be prompted to enter the “Remote ID Serial Number” you found in Step 2. Choose the device type (Standard Remote ID or Broadcast Module) and submit the update. You will be required to pay a $5 fee for the registration or renewal, which is valid for three years.
Pro Tip: Ensure you select the correct “Type” of Remote ID. Selecting “Standard” for an external module or vice-versa can lead to compliance issues during a field inspection by authorities.
Step 5: Install Firmware Updates and Sync Hardware
What you need: High-speed internet connection, drone, controller, and at least 50% battery on all devices.
Instructions: For drones with built-in Remote ID, you must ensure you are running the latest firmware version. Manufacturers like DJI and Skydio have released specific “Compliance Updates” that trigger the Remote ID broadcast. Connect your drone to the flight app and check for firmware prompts. Download and install the updates—this process can take 10 to 20 minutes depending on your connection. Once updated, the drone’s software will automatically begin the broadcast whenever it has a GPS lock. If you are using a module, use the manufacturer’s app to ensure the module’s firmware is current and that it is correctly paired with your smartphone or flight controller if required.
Pro Tip: Never perform a firmware update at your flight location. Do this at home over a stable Wi-Fi connection to avoid “bricking” your drone or draining your batteries before you even get into the air.
Step 6: Verify the Signal Broadcast with a Scanner App
What you need: A smartphone and a third-party signal scanning app (e.g., Drone Scanner by Dronetag or OpenDroneID).
Instructions: This is the most critical step for self-verification. Take your drone outside to a location with a clear view of the sky to ensure it achieves a GPS lock (Remote ID will not broadcast without GPS). Power on the drone and wait for the “Ready to Fly” status. On your smartphone, open a third-party scanner app like “Drone Scanner.” These apps use your phone’s Wi-Fi and Bluetooth antennas to “listen” for Remote ID signals. Your drone should appear on the map or list within 30–60 seconds. Verify that the serial number displayed in the app matches the one you registered with the FAA. If you see your drone’s position and ID, you are officially compliant and ready to fly.
Pro Tip: If your drone doesn’t show up immediately, try toggling your phone’s Bluetooth and Wi-Fi off and back on. Some phones have difficulty “seeing” the specific broadcast frequency used by certain Remote ID modules on the first try.
✅ Final Checklist
- Model verified on the FAA Declaration of Compliance database or external module purchased.
- Remote ID Serial Number (20 characters) correctly identified from the app or module casing.
- FAA DroneZone registration updated with the RID serial number and $5 fee paid.
- Latest firmware installed on both the drone and the broadcast module.
- Signal broadcast successfully verified using a third-party scanning app under an open sky.
Important Notes:
- Safety & Law: Failure to comply with Remote ID regulations can result in fines exceeding $27,500 and the suspension or revocation of your pilot certificate.
- Exceptions: You do not need Remote ID if you are flying in an FAA-Recognized Identification Area (FRIA), typically managed by AMA clubs, or if your drone weighs less than 250g and is flown strictly for recreational purposes.
- Estimated Cost: $5 for FAA registration; $0 for built-in RID hardware or $80–$250 for an external broadcast module.
- Estimated Time: 30 minutes for registration and firmware updates; 2-5 days for shipping if a module is required.
Top-Rated Remote ID Hardware for Legacy Drones
Choosing a module can be overwhelming because they range significantly in price and form factor. When selecting hardware, you should focus on weight and battery life. Since the module must remain powered throughout the entire flight, a device that dies mid-air technically puts you out of compliance. Furthermore, if you are flying a small drone, adding a 50-gram module could significantly degrade your flight performance or even push a sub-250g drone into the regulated weight category.
Compact and Lightweight Modules
For smaller drones or FPV pilots who care about aerodynamics, every gram matters. Heavy modules can strain the motors or block cooling vents. Look for “Mini” or “Nano” versions of popular modules that weigh under 20 grams. These typically use internal antennas and offer a clean profile that won’t catch the wind during high-speed maneuvers.
- DroneTag Beacon: One of the smallest and most popular modules on the market. It weighs only 16 grams and has a battery life of up to 16 hours. It is an ideal choice for FPV pilots and those with small professional rigs who need a “set it and forget it” solution.
- Holy Stone Remote ID Module: A budget-friendly option often found under $100. It is slightly bulkier than the Beacon but provides a straightforward, FAA-approved solution for hobbyists who want to stay compliant without doubling the value of their drone in accessory costs.
- BlueMark DB120: Known for its robust signal strength and ease of use. This module is often used by commercial pilots who need a reliable broadcast over longer distances in congested urban areas where signal interference is a concern.
Long-Battery and Professional Options
If you are flying long commercial missions or operating a heavy-lift enterprise drone, you need a module that won’t require a recharge every two flights. Some professional-grade modules offer “direct-to-power” options. This allows you to wire the module directly into your drone’s power distribution board or battery leads, which ensures the Remote ID is always on when the drone is powered up.
- DroneTag Mini: This is a feature-rich device that offers both Bluetooth and cellular connectivity. While it is larger than the Beacon, it offers much more data for fleet management and real-time tracking via a mobile app.
- uAvionix PingRID: A ruggedized option designed for harsh environments. It is incredibly simple to use—just turn it on and wait for the green light before taking off. It is widely respected in the professional industry for its durability and high-quality GPS acquisition speeds.
- Zing Z-RID: A middle-of-the-road option that balances price and performance. It features a simple one-button interface and a secure mounting system that is less likely to vibrate loose on high-performance aircraft.
Technical Requirements for FAA Digital Identification
Understanding the “how” of Remote ID requires a look at what your drone is actually broadcasting. It is not just a random signal; it is a specific set of data points designed to provide transparency in the national airspace. The FAA requires that this information be transmitted via radio frequency, typically using Bluetooth or Wi-Fi broadcast standards, so that it can be picked up by standard smartphones within range.
Broadcast Data Elements
Whether you are using a built-in system or a standalone module, your drone must transmit specific telemetry data. This “digital license plate” allows authorities to identify the aircraft without requiring a physical search. The technical broadcast must include:
- Unique Session ID: A serial number tied to your drone or the broadcast module.
- Geographic Position: The precise latitude, longitude, and altitude of the drone.
- Operator Location: The real-time coordinates of the ground control station (the pilot).
- Emergency Status: An indicator if the drone is experiencing a system failure or low battery.
Module vs. Standard Remote ID
From a technical standpoint, a “Standard” Remote ID drone has the technology integrated into its flight controller. In contrast, a broadcast module is an external accessory that contains its own GPS chip and power source. If you are retrofitting an older drone with a module, ensure the device is FAA-approved. Pro Tip: Always mount your external module on a flat, unobstructed surface on top of the drone to ensure the GPS antenna has a clear view of the sky.
Legal Implications of Operating Without Remote ID
The FAA transition to Remote ID is not a suggestion—it is a mandatory requirement for almost all drones flying in the United States. Failing to comply can lead to serious friction with both federal authorities and local law enforcement, who now have the tools to monitor drone activity more closely than ever before.
FAA Penalties and License Suspension
The most immediate risk for non-compliance is financial. The FAA has the authority to levy significant civil penalties against pilots who knowingly ignore Remote ID regulations. For commercial pilots operating under Part 107, the stakes are even higher. A single violation could result in the suspension or permanent revocation of your remote pilot certificate, effectively ending your professional drone career.
- Civil Fines: Fines for airspace violations can reach thousands of dollars per occurrence.
- Equipment Seizure: In extreme cases, unauthorized aircraft may be confiscated during investigations.
- Criminal Charges: Intentionally interfering with the identification system or providing false information can lead to criminal prosecution.
Insurance and Liability Risks
Beyond government fines, flying without Remote ID creates a massive liability gap. Most drone insurance policies require the pilot to be in full compliance with federal regulations to remain covered. If you are involved in a mid-air collision or property damage incident while flying a non-compliant drone, your insurance provider may deny your claim. This leaves you personally responsible for all damages and legal fees, which can easily exceed the cost of the most expensive Remote ID module on the market.
Conclusion
Remote ID is a fundamental shift in how we share the sky. While it adds an extra layer of equipment management, it is a necessary step toward the safe integration of advanced drone operations, like package delivery and long-distance inspections. By ensuring your drone is broadcasting the correct technical data and staying on the right side of FAA regulations, you protect your investment and your right to fly.
To stay compliant, your next steps are simple: double-check your drone’s firmware for internal support or invest in a certified broadcast module if you fly an older model. Once you have your ID source, make sure your registration is updated in the FAA DroneZone. Stay informed, keep your gear updated, and enjoy the peace of mind that comes with flying a fully compliant aircraft!
❓ Frequently Asked Questions
Is the drone’s serial number the same as the Remote ID serial?
Usually no. The Remote ID serial follows the ANSI/CTA-2063-A format and is a specific code generated for the broadcast system, distinct from the manufacturer’s aircraft serial.
What should I do if my drone cannot be updated for Remote ID?
If no firmware update is available, you must purchase a third-party broadcast module that is FAA-compliant and attach it to your drone for every flight.
Can I fly without Remote ID in specific locations?
Yes, you can fly without Remote ID at FAA-Recognized Identification Areas (FRIAs), which are typically community-based organization flying sites.
How do I confirm my Remote ID is active and broadcasting?
Download a third-party app like Drone Scanner or OpenSky on your smartphone to see if your drone’s signal appears while it is powered on.
What specific information is transmitted by Remote ID?
The broadcast includes the drone’s ID, current GPS position, altitude, velocity, and the location of the ground control station or take-off point.
Does the FAA require Remote ID for indoor drone flights?
No, Remote ID regulations only apply to drones operating in the National Airspace System (NAS), which does not include indoor environments.