How to Charge DJI Drone Battery: LED Guide & Safety Tips
Commercial UAV Pilot & Aerial Cinematography Specialist at Drone Nestle · FAA Part 107 Remote Pilot Certification, Commercial UAS Operations · 10+ Years in Commercial UAV Operations, Flight Hardware Benchmarking & 4K Aerial Cinematography
To charge a DJI battery effectively, connect it to an official DJI power adapter or charging hub until the LED indicators turn off, signaling a full charge. Understanding the blinking LED patterns is crucial for identifying charging progress or potential battery errors. Always ensure the battery is within the optimal temperature range (5°C to 40°C) to prevent damage and ensure longevity.
🎯 Key Takeaways
- Use original DJI chargers to prevent voltage issues and battery degradation.
- Wait for batteries to cool down before charging after a flight.
- Identify errors via the LED status indicator sequence on the battery.
- Charge to 100% before every flight for maximum safety and performance.
- Firmware updates often include critical battery management system improvements.
To charge your DJI Intelligent Flight Battery correctly, you must connect it to a compatible power source using either the DJI Two-Way Charging Hub, a direct USB-C cable to the aircraft, or a dedicated power adapter. The process is complete when the LED status indicators stop flashing and turn off entirely. Monitoring these lights is the only way to ensure your battery has successfully exited “hibernation mode” and is chemically stable enough for high-altitude flight.


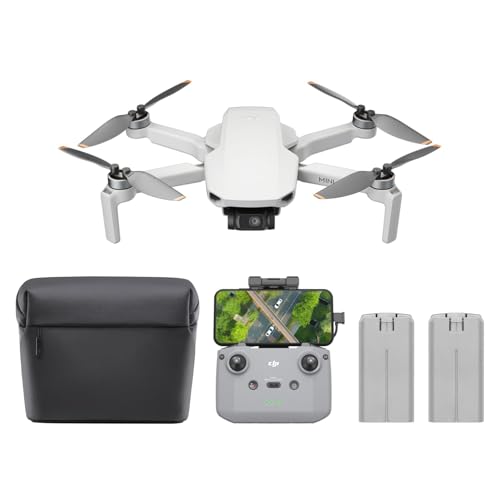
Mastering this setup is critical because DJI batteries are not “dumb” power cells; they contain internal firmware that manages voltage balancing and heat. If you use the wrong wattage or fail to seat the battery correctly in the hub, you risk a partial charge that could lead to an unexpected Return to Home (RTH) or a power failure mid-air. Understanding the specific blink patterns allows you to diagnose health issues before you ever leave the ground.
Understanding DJI Intelligent Flight Battery LED Status Indicators
Every DJI Intelligent Flight Battery features four main LEDs that communicate everything from current capacity to hardware errors. When you connect your battery to a charger, these lights will begin a cycling sequence. This animation indicates that the battery is actively accepting a charge. As the battery fills, the LEDs will transition from blinking to solid one by one.


How to Read the Charge Level During the Cycle
During the charging process, the number of LEDs glowing or blinking tells you exactly how much “juice” is currently stored. DJI uses a simple 25% increment system for its visual feedback. Understanding this at a glance helps you decide if you have enough power for a quick flight or if you need to wait for a full cycle.
- LED 1 blinking: The battery is between 0% and 25% charged.
- LED 1 solid, LED 2 blinking: The battery is between 25% and 50% charged.
- LED 1 and 2 solid, LED 3 blinking: The battery is between 50% and 75% charged.
- LED 1, 2, and 3 solid, LED 4 blinking: The battery is between 75% and 99% charged.
- All LEDs off: The battery is 100% charged and the charging circuit has automatically cut power to prevent overcharging.
Identifying Charging Errors and Warnings
If your LEDs are not cycling in a smooth sequence, the battery is trying to tell you something is wrong. DJI batteries are programmed to protect themselves from damage caused by extreme temperatures or unstable power sources. If you see specific patterns like LED 2 blinking twice per second, it usually indicates an over-current protection trigger. If LED 3 blinks twice per second, the battery has detected a short circuit. Always disconnect the battery immediately if the LEDs flash in a non-sequential, erratic pattern, as this often signifies a hardware fault that requires a firmware refresh or replacement.
How to Charge Your DJI Drone Like a Pro: A Practical Walkthrough
Charging a DJI Intelligent Flight Battery might seem like a simple task, but doing it correctly is the difference between a long-lasting power source and a paperweight that could fail mid-flight. DJI batteries use complex Lithium Polymer (LiPo) chemistry paired with an integrated battery management system (BMS) that requires specific handling to maintain health, safety, and flight endurance. This guide covers everything from physical inspection to interpreting LED signals and managing storage cycles, ensuring your drone stays in the air longer and your equipment remains safe from common electrical hazards.


Step 1: Conduct a Thorough Physical Inspection
What you need: Your DJI Intelligent Flight Battery and a clean, well-lit workspace.
Instructions: Before you even think about plugging your battery into a power source, you must perform a visual safety check. Examine the battery casing for any signs of “swelling” or bloating; if the plastic shell looks warped or the battery feels rounded rather than flat, do not attempt to charge it, as this indicates internal cell degradation. Inspect the gold-plated terminal pins for any black carbon buildup, oxidation, or debris. Use a dry cloth or a burst of compressed air to clear the ports. Ensure there are no cracks in the housing from previous hard landings, as even a small hairline fracture can allow moisture to enter the internal circuitry during the charging process, leading to a short circuit.
Pro Tip: Never charge a battery that feels soft or “squishy” to the touch. This is a sign of gas buildup inside the LiPo pouch and represents a significant fire risk during the high-current charging phase.
Step 2: Allow the Battery to Reach Optimal Temperature
What you need: A thermometer (optional) or simply your sense of touch, and a room-temperature environment (22°C/72°F).
Instructions: DJI batteries generate significant internal heat during flight. A common mistake is plugging the battery into a charger immediately after landing while it is still hot. The Intelligent Flight Battery has a built-in safety mechanism that will actually prevent charging if the internal temperature is above 40°C (104°F) or below 5°C (41°F). For the best chemical longevity, wait at least 20 to 30 minutes after a flight for the cells to stabilize. Similarly, if you have been storing your drone in a cold car, bring the battery inside and let it warm up to room temperature naturally. Do not use a heater or hair dryer to speed up this process, as rapid temperature fluctuations can damage the cell chemistry.
Pro Tip: If you are in the field and need to charge, place the battery in a shaded, ventilated area. Charging a battery that is right at the upper edge of its temperature limit will significantly shorten its overall life cycle count.
Step 3: Select the Correct Charging Hardware
What you need: An official DJI Power Adapter, a DJI Charging Hub (if available), and the appropriate USB-C or proprietary cable.
Instructions: While many modern DJI drones (like the Mini 3/4 or Air 3) use USB-C ports, not all USB chargers are created equal. For the fastest and safest results, use a charger that supports USB Power Delivery (USB-PD). For example, the DJI 30W or 65W GaN chargers are optimized for the specific voltage curves of DJI batteries. If you are using a Charging Hub, remember that most DJI hubs charge batteries sequentially, not simultaneously. This means it will identify the battery with the highest charge level and finish it first before moving to the next. Ensure the cables are pushed firmly into the ports; a loose connection can cause arcing, which generates heat and can melt the plastic surrounding the charging terminals.
Pro Tip: Avoid using “no-name” third-party chargers found on discount sites. They often lack the sophisticated overcurrent and overvoltage protection required to communicate with the DJI Battery Management System, potentially voiding your warranty.
Step 4: Establish the Connection and Power Sequence
What you need: Prepared battery, charging hub or drone body, and a stable AC wall outlet.
Instructions: If your drone supports in-body charging, ensure the drone is powered off before connecting the cable. If using a Charging Hub, slide the battery into the slot until you hear a distinct “click,” indicating the latches are engaged. Plug the adapter into the wall outlet first, then connect the cable to the hub or drone. This sequence protects the battery’s internal BMS from potential initial surges. Once connected, the battery’s LED lights will begin to pulse. DJI batteries typically have four LEDs: one blinking light indicates the current charging level, while the number of solid lights indicates the capacity already reached. For a 0% to 100% charge, expect the process to take anywhere from 60 to 90 minutes depending on the specific model and charger wattage.
Pro Tip: If you see the LEDs flashing in a specific pattern (like the first and second LEDs blinking rapidly), refer to your manual. This usually indicates a charging error, such as a voltage mismatch or a detected cell issue.
Step 5: Monitor the Charging Progress and LED Signals
What you need: Periodic observation of the battery’s LED status indicators.
Instructions: You should never leave a charging LiPo battery completely unattended for hours. Periodically check the LED status. When all four LEDs turn off (on most models) or stay solid (on older models), the battery is fully charged. Modern DJI “Intelligent” batteries are designed to stop drawing current once they reach 100%, but it is still best practice to disconnect them once the cycle is complete. If the LEDs flash twice per second, the charger is providing too much current. If they flash three times per second, the battery has detected a short circuit. Observing these signals early can prevent damage to the battery’s internal processor. Note that during the final 10% of charging, the speed will slow down significantly; this is the “balancing” phase where the BMS ensures every individual cell has the exact same voltage.
Pro Tip: Use a LiPo-safe charging bag while the battery is on the charger. While DJI batteries are very safe, a fire-resistant bag provides an extra layer of protection for your home in the extremely rare event of a thermal runaway.
Step 6: Update Battery Firmware if Required
What you need: The battery inserted into the drone, a smartphone with the DJI Fly app, and an internet connection.
Instructions: DJI often releases firmware updates that aren’t just for the drone’s flight controller, but specifically for the battery’s logic board. These updates can improve battery efficiency, fix “hibernation” bugs, or adjust the auto-discharge settings. To update, insert the fully charged battery into the drone and power it on. Open the DJI Fly or DJI GO 4 app on your mobile device. If a “Battery Firmware Consistency” error or update prompt appears, follow the on-screen instructions. The drone may restart several times during this process. This is crucial if you have multiple batteries; you must check each one individually by inserting it into the drone to ensure the software version matches the aircraft’s current firmware.
Pro Tip: Never turn off the drone or pull the battery out during a firmware update. This can “brick” the battery’s BMS, making it unable to communicate with the charger or the drone ever again.
Step 7: Prepare for Storage After the Charge
What you need: Knowledge of your upcoming flight schedule and a cool, dry storage location.
Instructions: LiPo batteries hate being stored at 100% charge for more than a few days; it causes internal stress and leads to permanent capacity loss. If you aren’t planning to fly within the next 48 hours, do not charge the battery to 100%. Instead, charge it to approximately 60% (two solid LEDs and a third blinking). Most DJI batteries have an “Auto-Discharge” feature that will automatically lower the charge to a safe storage level after a set number of days (usually 1 to 10 days, configurable in the app). You will notice the battery feels warm during this auto-discharge process—this is normal. Always store your batteries in a temperature-controlled environment, ideally between 22°C and 28°C. Avoid damp basements or hot garages.
Pro Tip: If storing batteries for more than three months, DJI recommends discharging them to 40-60% and then recharging them to that same level every three months to keep the cells “active” and prevent the voltage from dropping too low for the BMS to recover.
✅ Final Checklist
- Verify that the battery casing is perfectly flat with no signs of swelling or “puffiness.”
- Ensure the battery was allowed to cool for 20+ minutes before connecting to the power source.
- Confirm that you are using a high-quality USB-PD or official DJI charger to ensure correct voltage.
- Check that all four LEDs have finished their cycle and the battery is at the desired capacity (100% for immediate flight, 60% for storage).
- Verify that the battery terminals are clean and the battery “clicks” securely into the drone for your next flight.
Important Notes:
- Safety Warning: Never charge your drone batteries near flammable materials like curtains, carpets, or paper. Always charge on a non-flammable surface like tile or stone.
- When to Seek Help: If your battery displays a solid red light (on models with a status LED) or refuses to wake up from “hibernation mode” after being plugged in for 2 hours, the cells may have dropped below a recoverable voltage. Do not attempt to jump-start the battery; contact DJI Support for a replacement.
- Estimated Time and Cost: Charging a single battery takes 60-90 minutes. Official DJI chargers range from $15 to $80 depending on wattage, while replacement batteries typically cost between $65 and $200.
Essential Charging Equipment: Hubs vs. Direct USB-C Connections
The physical setup for charging depends largely on which DJI model you own and whether you are using a Fly More Combo. Most modern DJI drones, such as the Mini 4 Pro, Air 3, and Mavic 3 series, utilize USB-C Power Delivery (PD) standards. This means you aren’t just limited to a wall outlet; you can charge via high-output power banks or car adapters, provided they meet the minimum wattage requirements for your specific battery type.
Using the DJI Two-Way Charging Hub
The Two-Way Charging Hub is the most efficient way to manage multiple batteries. It is important to note that the hub does not charge all batteries simultaneously; it charges them sequentially. It identifies the battery with the highest remaining power and finishes that one first so you can get back in the air as quickly as possible.
- Step 1: Insert up to three batteries into the hub slots until you hear a clear “click.”
- Step 2: Connect the hub to a DJI 30W (for Mini series) or 65W/100W (for Air/Mavic series) USB-C power adapter.
- Step 3: Observe the hub’s status LED. A solid yellow light means it is waiting to charge, while a pulsing green light indicates active charging.
- Step 4: Once the first battery is full, the hub will automatically switch to the next most-charged battery.
Direct Aircraft and USB-C Charging
If you do not have a hub, many DJI models allow for in-drone charging. This is often the slowest method but is convenient for travel. For the DJI Mini series, you can simply plug a USB-C cable directly into the port on the back of the drone with the battery inserted. For larger drones like the Mavic 3, the battery must be firmly seated in the aircraft’s internal compartment.
When charging directly, ensure the drone is powered off. If the drone is powered on, the incoming current may only be enough to maintain the current power level rather than actually increasing the battery percentage. Always use a high-quality “Category 2” or higher USB-C cable. Thin, low-quality cables often lack the internal gauge necessary to carry the high amperage required by DJI’s fast-charging protocols, which can result in “slow charging” warnings or the battery failing to charge at all.
Charging Times and Performance Across Popular DJI Models
One of the most frequent questions pilots ask is: “How long will this take?” The answer depends heavily on the specific DJI model you own and the wattage of the power brick you are using. Because DJI Intelligent Flight Batteries use high-density Lithium Polymer (LiPo) cells, they require sophisticated power management to balance speed with cell safety.
Understanding Charging Variation
Modern DJI drones, like the Mavic 3 Pro or the Air 3, support USB-C Power Delivery (PD) protocols. If you use a standard 5W phone charger, you might be waiting all day. However, using a DJI 65W or 100W GaN charger can cut your wait time down to about 60 to 90 minutes. It is important to remember that charging speed isn’t linear; the battery charges rapidly up to 80%, then slows down significantly for the “trickle charge” phase to protect the chemistry of the cells.
Performance Expectations for Popular Models
While every environment is different, here are some general performance benchmarks you can expect when using recommended hardware:
- DJI Mini Series (Mini 3/4 Pro): Typically takes about 60 minutes with a 30W USB-C charger. If using the Two-Way Charging Hub, remember it charges batteries sequentially, not simultaneously, starting with the one that has the highest remaining power.
- DJI Air Series: With the 65W portable charger, expect a full charge in roughly 80 minutes. The Air 3 hub features a unique “power accumulation” function that can transfer remaining power from multiple low batteries to the one with the highest charge.
- DJI Mavic Series: These larger batteries often require 90+ minutes. Using the 100W desktop charger is highly recommended to maintain peak performance and minimize downtime between flights.
Battery Health Management and Safe Storage Practices
A DJI battery is a significant investment, often costing over $100. To get the most “cycles” out of your investment, you need to look beyond the charging cable. Proper health management ensures your drone doesn’t experience a sudden power drop while mid-air, which is a leading cause of avoidable crashes.
Maximizing the Life of Your Intelligent Flight Battery
The “Intelligent” part of the DJI battery name refers to the built-in Battery Management System (BMS). This system automatically monitors cell voltage and temperature. To help the BMS do its job, you should avoid “deep cycling”—which means try not to let your battery drop below 15% during flight. Constantly pushing a battery to 0% creates chemical stress that permanently reduces its capacity.
Pro-Tip: Always allow your battery to cool down for at least 15-20 minutes after a flight before plugging it into a charger. Charging a “hot” battery can lead to cell swelling and significantly shortened lifespan.
Safe Storage and Transportation Tips
How you store your batteries when you aren’t flying is just as important as how you charge them. LiPo batteries do not like to be stored at 100% or 0% for long periods.
- The Storage Sweet Spot: If you aren’t flying for more than three days, DJI batteries are programmed to auto-discharge to a “storage level” (usually around 60%). You may notice the batteries feeling slightly warm during this process; this is normal.
- Temperature Control: Store your batteries in a cool, dry environment (between 22°C and 28°C). Avoid leaving them in a hot car, as extreme heat is the number one enemy of battery health.
- Travel Safety: When traveling by air, always carry your batteries in your carry-on luggage. Many seasoned pilots use fireproof LiPo safety bags for an extra layer of protection and peace of mind during transport.
Conclusion
Mastering the art of charging your DJI drone battery is about more than just finding a wall outlet. By understanding what those blinking LEDs are telling you and respecting the chemical limits of your LiPo cells, you ensure that every flight is as safe as possible. Remember that the charging hub and the DJI Fly app are your best tools for monitoring health and ensuring your gear is ready for the next adventure.
For your next steps, take a moment to check your battery cycle counts in the “Safety” section of your DJI Fly app. If any battery shows signs of swelling or has over 200 cycles, it might be time to retire it. Keep your firmware updated, store your gear at room temperature, and get back out there to capture the perfect shot!
💬 Quick Questions & Answers
Can I use a phone charger for my DJI battery?
Yes, if it provides enough wattage via USB-C, but a DJI-branded PD charger is recommended for optimal speed.
How long does a DJI battery take to charge?
Depending on the model and charger wattage, it typically takes between 60 to 90 minutes.
Why is my DJI battery blinking red?
This usually indicates a firmware error or a temperature abnormality requiring immediate attention.
Can I leave DJI batteries in the charging hub overnight?
Yes, the Intelligent Flight Battery system automatically stops charging once the cells reach 100% capacity.
What is the best temperature for charging?
Aim for an ambient temperature between 22°C and 28°C (72°F to 82°F) for peak efficiency.
❓ Frequently Asked Questions
Why won’t my battery charge even when plugged in?
The battery may be in Hibernation Mode if it hasn’t been used for a long time; connect it to a charger for a few minutes to wake it up. Alternatively, it might be too hot from a recent flight, requiring a cooling period.
What is the difference between the Two-Way Charging Hub and direct charging?
A Two-Way Charging Hub charges batteries in sequence, focusing on the one with the most power first to get you flying sooner. It can also act as a power bank to charge your mobile device.
How do I interpret the LED lights for current battery level?
Short-press the power button once; four solid LEDs indicate 75-100%, while fewer LEDs indicate lower levels. During charging, the LEDs blink in succession to show progress.
Do DJI batteries discharge themselves automatically?
Yes, DJI Intelligent Flight Batteries feature an auto-discharge function that lowers the charge to roughly 60% after inactivity to prevent cell swelling and damage.
Is it safe to use third-party charging hubs?
While some work, third-party chargers may lack precise voltage regulation, potentially shortening battery lifespan or voiding your warranty. Official DJI hardware is highly recommended.
How do I update the firmware on my DJI battery?
Battery firmware is updated automatically when the battery is inside the drone during an aircraft update via the DJI Fly app. Each battery must be updated individually.

Similar Posts