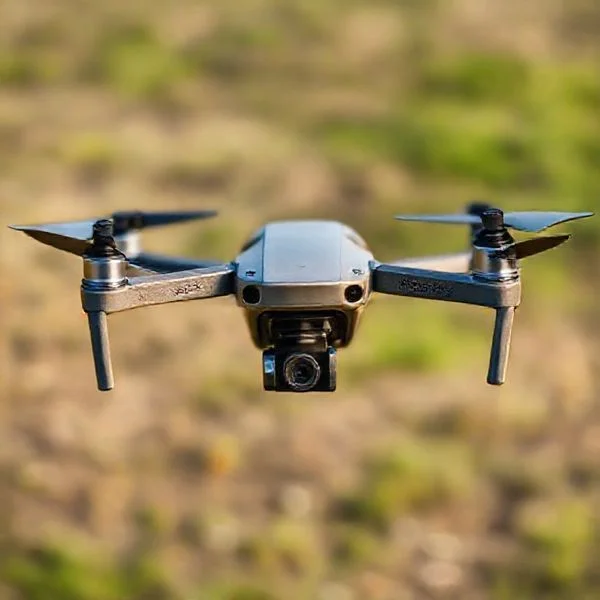
Connecting your DJI hardware to Wi-Fi is essential for installing critical firmware updates and downloading offline maps. Most modern DJI drones utilize QuickTransfer mode or the built-in Android settings on the RC to establish a high-speed wireless link for media management.
🎯 Key Takeaways
- Enable Wi-Fi on DJI RC/RC2 via the pull-down Android settings menu.
- Use QuickTransfer mode for high-speed wireless media downloads to mobile devices.
- Firmware updates require a stable internet connection via the DJI Fly app.
- Switch to 5.8GHz frequency for faster transfer speeds in low-interference areas.
- Ensure battery is above 50% before initiating Wi-Fi-based system updates.
Connecting your DJI drone to Wi-Fi is essential for keeping your flight systems operational and your media accessible. Depending on your setup, you are either connecting the DJI RC/RC 2 controller to a local network for system data or linking your smartphone directly to the drone via QuickTransfer to offload 4K footage. For most firmware updates and map downloads, you will use the built-in Android settings within the controller interface to bridge the gap between your hardware and DJI’s servers.
Prime for Young Adults — 6 Months Free
Exclusive Offer Amazon Prime for Young Adults, Students and 18–24s get six months of Prime free, then half price.
Start 6 Months Free As an Amazon Associate I earn from qualifying purchases.
Mastering these connections ensures you aren’t stuck at the launch site waiting for a 500MB update to download over a weak cellular hotspot. By configuring your Wi-Fi settings correctly, you enable high-speed data transfers and ensure that your Return to Home (RTH) maps are cached for safety. This guide focuses on the specific menu paths and button sequences needed to get your DJI gear online quickly and efficiently.
Understanding DJI Wi-Fi Connectivity: RC vs. QuickTransfer Modes
Recommended Best Deal Products


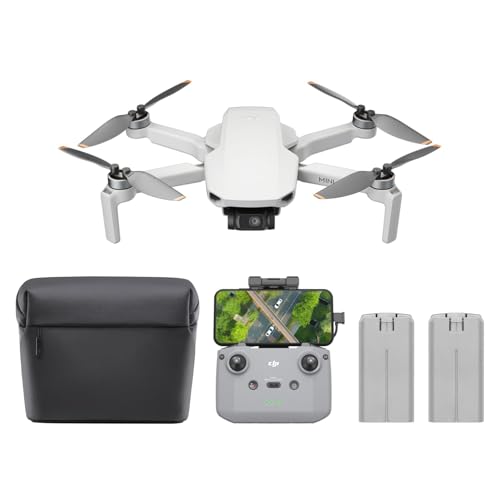
Before diving into the settings, it is vital to distinguish between the two ways your DJI hardware utilizes Wi-Fi. Many pilots confuse the remote controller’s internet connection with the drone’s own internal Wi-Fi broadcast. They serve two entirely different purposes in your workflow.
Connecting Your DJI RC or RC 2 to Local Wi-Fi
If you use a DJI RC, RC 2, or RC Pro, your controller is essentially a dedicated Android device. It needs its own Wi-Fi connection to download firmware, sync flight logs, and update FlySafe databases. To connect, follow these steps:
- Swipe Down Twice: From the main DJI Fly home screen, swipe down from the top of the screen to open the Android notification shade and quick settings.
- Access Wi-Fi Settings: Tap and hold the Wi-Fi icon to open the network list.
- Select Your Network: Choose your local 2.4GHz or 5GHz SSID and enter the password.
- Verify Connection: Look for the “Connected” status under the network name.
Using a 5GHz connection is recommended for faster firmware downloads. If you are in the field, you can use your phone’s mobile hotspot, but ensure your data plan allows for large file transfers, as DJI updates can be substantial.
QuickTransfer Mode: Bypassing the Remote
QuickTransfer is a specialized Wi-Fi mode that allows your drone to talk directly to your smartphone, bypassing the remote controller entirely. This is the fastest way to download photos and videos. To enable this, you usually hold the drone’s Power Button for two seconds until the LEDs blink blue (on models like the Mini 3 or Air 3) or switch via the DJI Fly app prompts. Your phone then connects to the drone’s internal Wi-Fi signal, which typically appears as “DJI-XXXX” in your phone’s Wi-Fi settings. This mode is strictly for media management and cannot be used for flight.
How to Connect Your DJI Drone to WiFi Like a Pro: A Practical Walkthrough
Connecting your DJI drone to a WiFi network is a fundamental skill that unlocks the full potential of your aerial device. Whether you are performing critical firmware updates to ensure flight safety, downloading high-resolution offline maps for remote navigation, or utilizing the high-speed QuickTransfer mode to move 4K footage to your mobile device, a stable internet connection is vital. This guide provides a comprehensive walkthrough for various DJI models, including the Mini, Air, and Mavic series, ensuring you can establish a reliable link between your drone, controller, and the internet without the frustration of connectivity drops or authentication errors.
Step 1: Preliminary Equipment Preparation
What you need: Your DJI drone, a fully charged Intelligent Flight Battery, your remote controller (RC-N1, DJI RC, or DJI RC 2), and a stable WiFi router or mobile hotspot.
Prime for Young Adults — 6 Months Free
Exclusive Offer Amazon Prime for Young Adults, Students and 18–24s get six months of Prime free, then half price.
Start 6 Months Free As an Amazon Associate I earn from qualifying purchases.Instructions: Before attempting any wireless connection, ensure your drone’s battery and the remote controller are charged to at least 50%. Firmware updates, which often occur immediately after connecting to WiFi, can be power-intensive and may fail if the battery level is too low. Place the drone on a flat, stable surface. Crucially, remove the gimbal protector before powering on the device; the gimbal performs a self-diagnostic rotation upon startup, and leaving the cover on can strain the motors. Press the power button once, then press and hold for two seconds until the LEDs cycle and the startup chime sounds. Repeat this process for your remote controller to ensure both units are synchronized.
Pro Tip: Avoid performing WiFi setup on a thick carpet, as the downward-facing vision sensors and the internal fan need clear airflow to prevent the drone from overheating while stationary.
Step 2: Launching the DJI Fly Application
What you need: A smartphone or tablet with the DJI Fly app installed, or a DJI RC with a built-in screen.
Instructions: If you are using a standard remote (like the RC-N1), connect your smartphone via the appropriate USB-C or Lightning cable and launch the DJI Fly app. If you are using a DJI RC with an integrated screen, the app will launch automatically upon startup. Ensure the drone is successfully linked to the controller, which is indicated by a “Go Fly” prompt on the screen. Once in the camera view, look for the three horizontal dots (system menu) in the top-right corner of the interface. This menu is the gateway to all internal settings, including transmission, safety, and the network configurations required for WiFi access.
Pro Tip: Ensure your smartphone’s Bluetooth is also turned on, as many modern DJI drones use Bluetooth to facilitate the initial “handshake” before switching to a faster WiFi connection.
Step 3: Accessing the Network Settings Menu
What you need: Access to the DJI Fly app’s “Settings” interface.
Instructions: Within the camera view, tap the three dots in the top-right corner to open the settings tray. Navigate to the “About” tab or the “Transmission” tab, depending on your specific hardware version. For DJI RC users (controllers with screens), you can often swipe down from the top of the screen to access the Android-style quick settings menu, similar to a smartphone. Here, you will find the WiFi icon. Tap and hold the WiFi icon to bring up a list of available local networks. The drone itself does not usually connect to the internet directly; rather, the controller connects to the internet to provide data to the drone, or the drone creates its own hotspot for direct phone connection.
Prime for Young Adults — 6 Months Free
Exclusive Offer Amazon Prime for Young Adults, Students and 18–24s get six months of Prime free, then half price.
Start 6 Months Free As an Amazon Associate I earn from qualifying purchases.Pro Tip: If you do not see your network listed, try toggling the WiFi switch off and back on to refresh the local SSID broadcast list.
Step 4: Selecting the Optimal Frequency Band
What you need: Knowledge of your router’s 2.4GHz and 5GHz capabilities.
Instructions: Modern DJI drones and controllers support dual-band WiFi. When the list of available networks appears, you may see two versions of your home network. Select the 5GHz band if you are close to your router, as this offers significantly faster data transfer speeds for downloading firmware or map data. However, if you are working in a different room or outdoors, the 2.4GHz band is preferable due to its superior range and ability to penetrate walls. Tap on your preferred network name. A standard keyboard interface will appear, allowing you to enter your network password. Ensure there are no special characters that might be misinterpreted by the DJI Fly operating system, which occasionally struggles with non-standard ASCII symbols.
Pro Tip: For the fastest “QuickTransfer” speeds (up to 30MB/s), ensure your mobile device is within 2 meters of the drone and using the 5.8GHz frequency range.
Step 5: Establishing the Connection and Authenticating
What you need: Your WiFi network password and a steady signal (at least 2 bars).
Instructions: Carefully type in your password. Be mindful that DJI’s integrated keyboards can be sensitive; double-check for typos before hitting “Connect.” Once you submit the credentials, the controller will display “Obtaining IP Address” followed by “Connected.” If the connection fails, it is often due to a “Captive Portal” (common in hotels or coffee shops) where a secondary login page is required. DJI controllers often have difficulty rendering these web-based login screens. If you encounter this, it is best to use a mobile hotspot from your phone instead, as this provides a direct, non-proxied connection that the drone software can easily verify.
Pro Tip: If “Authentication Failed” occurs despite the correct password, “Forget” the network in the settings and restart the controller to clear the DNS cache.
Step 6: Configuring the DJI QuickTransfer Mode
What you need: The DJI Fly app and a drone in “QuickTransfer” state.
Instructions: QuickTransfer is a specific type of WiFi connection where the drone acts as a hotspot to send files directly to your phone without using the remote controller. To activate this, press and hold the power button on the drone for two seconds (on models like the Mini 3) or toggle the switch if using an older model. On your smartphone, a prompt will appear within the DJI Fly app asking to “Switch to QuickTransfer Mode.” Tap “Switch.” Your phone will then prompt you to join the drone’s private WiFi network (usually named “DJI_Mini_…” or similar). Accept the connection. This bypasses the remote and uses a high-bandwidth link for rapid media offloading.
Pro Tip: Keep the drone away from other active electronics like microwave ovens or high-power routers while using QuickTransfer to prevent signal interference from slowing down your file transfers.
Step 7: Finalizing Firmware Updates and Map Caching
What you need: An active WiFi connection confirmed in the previous steps.
Instructions: Once connected to the internet, return to the main DJI Fly home screen. If a firmware update is available, a blue icon or a pop-up notification will appear on the left side of the screen. Tap “Update” and allow the system to download the package. This is the primary reason for connecting to WiFi. Additionally, navigate to the map view while still on WiFi and scroll around the area where you plan to fly. This “caches” the map data into the controller’s internal memory, allowing you to see satellite imagery even when you are in the field without an internet connection. Wait for the progress bar to reach 100% and for the drone to restart if necessary.
Pro Tip: Never turn off the drone or the controller during a firmware update, as this can “brick” the device, requiring a factory reset via the DJI Assistant 2 software on a PC.
✅ Final Checklist
- Confirm the WiFi icon in the status bar shows a solid connection with at least two signal bars.
- Verify that the DJI Fly app home screen no longer shows “Network Unavailable” prompts.
- Check the “Firmware” section in settings to ensure it says “Your firmware is up to date.”
- Test the connection by attempting to download a single photo or video from the drone’s album to your device.
- Ensure you have “forgotten” any public networks that might try to auto-connect and interrupt your flight signal later.
Important Notes:
- Safety Warning: Always disable the drone’s WiFi or disconnect from your home router before taking off. Active WiFi signals can interfere with the OcuSync transmission link between the controller and the drone, potentially leading to a “Signal Lost” scenario during flight.
- Seek Professional Help: If your drone’s WiFi SSID does not appear on any device after multiple resets, there may be a hardware failure in the internal wireless module. Contact DJI Support for a diagnostic.
- Estimated Time: 5 to 10 minutes for connection; up to 30 minutes if large firmware updates are required.
- Cost: Free (requires existing internet service or mobile data).
The Role of Wi-Fi in Firmware Management and Safety Features
Recommended Best Deal Products


Wi-Fi connectivity is not just for convenience; it is a prerequisite for the safety and legality of your flight. DJI frequently pushes “mandatory” updates that calibrate the Internal Measurement Unit (IMU) or update Remote ID parameters. Without a consistent Wi-Fi link, your drone may eventually restrict its flight altitude or distance.
Downloading Firmware Updates for Flight Stability
The DJI Fly app automatically checks for updates the moment the controller connects to the internet. If you see a red or orange notification on the top left of the home screen, an update is required. Stable Wi-Fi is critical here because a dropped connection during a firmware “refresh” can occasionally brick the hardware, requiring a factory reset via the DJI Assistant 2 desktop software. Always ensure your controller and drone have at least 50% battery before starting a Wi-Fi-based update.
Caching Offline Maps for Remote Flying
Most drone pilots fly in areas with poor cellular reception. To see your position on the map, you must use Wi-Fi to “cache” the area data before you leave your house. While connected to your home Wi-Fi:
- Open the Camera View in the DJI Fly app.
- Tap the Map in the bottom left corner to expand it.
- Scroll to your intended flight location.
- Zoom in and out across the area to ensure the map tiles load into the controller’s internal memory.
By doing this over Wi-Fi, you ensure that even without an active internet connection at the park or beach, your controller will display the terrain, obstacles, and restricted zones accurately. This simple use of Wi-Fi can be the difference between a successful mission and a lost aircraft.
Comparing 2.4GHz and 5.8GHz Bands for Drone Data Transfer
When you are managing the Wi-Fi settings on your DJI drone, you will typically encounter two primary frequency bands: 2.4GHz and 5.8GHz. Understanding the difference between these is essential for optimizing your media downloads and maintaining a stable connection during QuickTransfer sessions. Most modern DJI drones use dual-band technology to switch between these frequencies based on the environment.
2.4GHz: Range and Penetration
The 2.4GHz band is the veteran of wireless communication. It excels at traveling longer distances and passing through physical obstacles like walls or thick foliage. However, because so many household devices—from microwaves to old baby monitors—use this frequency, it is often crowded. If you are trying to sync data in a residential area, you might experience “signal noise” that slows down your transfer speeds and causes the connection to stutter.
5.8GHz: The High-Speed Expressway
If you want to move those heavy 4K video files quickly, the 5.8GHz band is your best friend. This frequency offers much higher data transfer rates and is generally less congested than 2.4GHz. The trade-off is its limited range; 5.8GHz signals struggle to pass through solid objects. For the best DJI QuickTransfer experience, keep your mobile device as close to the drone as possible and ensure you are on the 5.8GHz band to slash your waiting times significantly.
- Use 5.8GHz when you are in an open field or very close to the drone for maximum throughput.
- Stick to 2.4GHz if you are in an area with lots of physical barriers or need a more resilient link at a distance.
- Auto-switching: Allow the DJI Fly app to manage bands automatically if you aren’t sure which channel is cleanest in your current location.
Common Wireless Interference Factors and Connection Stability
Recommended Best Deal Products

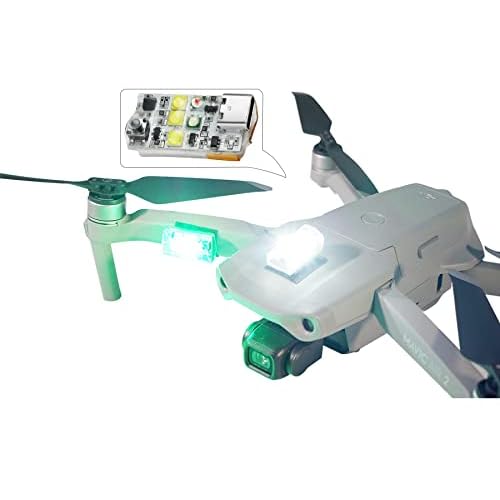

Even with the most advanced DJI transmission systems, external interference can wreak havoc on your Wi-Fi connection. Knowing what to avoid can save you from the frustration of a dropped signal right when you are trying to share a highlight reel or update your home point coordinates.
Urban Signal Density and Crowded Channels
In high-density urban environments, the air is thick with invisible signals. Hundreds of home Wi-Fi routers, Bluetooth devices, and cellular towers all compete for the same airspace. This “electronic smog” can lead to intermittent connection drops. To mitigate this, try to disable Bluetooth on your smartphone while using the DJI Fly app’s Wi-Fi features, as Bluetooth also operates on the 2.4GHz frequency and can cause direct interference during the handshake process.
Physical Barriers and Material Interference
The material composition of your surroundings plays a massive role in signal quality. Metal is the ultimate enemy of Wi-Fi; if you are standing near a large metal structure, a vehicle, or a chain-link fence, your signal may bounce or be completely absorbed. Similarly, reinforced concrete and even the high water content in dense forests can dampen the signal significantly, leading to “Connection Timed Out” errors on your screen.
- Maintain Line of Sight: Always ensure there are no physical objects between your phone and the drone for the cleanest Wi-Fi connection.
- Avoid High-Voltage Areas: Power lines and substations generate electromagnetic interference that can disrupt the drone’s internal Wi-Fi module and even its compass.
- Update Firmware: DJI frequently releases updates that improve signal processing and interference rejection, so keeping your software current is a proactive way to ensure stability.
Conclusion
Connecting your DJI drone to Wi-Fi is about more than just a simple handshake between devices; it is about understanding how to optimize that link for speed and reliability. By choosing the right frequency band and being mindful of your physical environment, you can ensure that your high-resolution footage moves seamlessly from the sky to your social feed without technical hiccups. A stable connection is the backbone of a smooth post-flight workflow.
Before your next flight, take a moment to check for firmware updates and clear any background apps on your phone that might interfere with the wireless link. Ready to capture some stunning footage? Focus on your environment first, and the technology will take care of the rest. Happy flying!
❓ Frequently Asked Questions
What is DJI QuickTransfer and how does it utilize Wi-Fi?
QuickTransfer is a protocol allowing DJI drones to connect directly to mobile devices via Wi-Fi 6 technology. It bypasses the remote controller to provide speeds up to 80MB/s for downloading photos and videos.
Why does my DJI drone disconnect from Wi-Fi during firmware updates?
Disconnections often occur due to signal interference or the drone switching between frequency bands. Ensure the drone is near the router and has sufficient battery to prevent the system from shutting down.
How do I update maps for offline use using a Wi-Fi connection?
Open the DJI Fly app while connected to Wi-Fi, navigate to the Profile section, and select Offline Maps to download specific regions. This ensures you have navigation data available when flying in areas without cellular service.
Can I use a mobile hotspot to connect my DJI RC controller?
Yes, a mobile hotspot works perfectly for field updates or downloading maps, provided your cellular signal is strong. Be aware that firmware updates are large and can consume significant mobile data.
What should I do if the drone’s Wi-Fi signal doesn’t appear in my settings?
Ensure the drone is in QuickTransfer mode by holding the power button for two seconds until the LEDs blink blue. If it still doesn’t appear, restart both your phone and the drone to refresh the wireless broadcast.
Does connecting to Wi-Fi affect the drone’s flight range?
No, the Wi-Fi connection used for data transfer is separate from the OcuSync transmission system used for flight. However, it is recommended to turn off phone Wi-Fi during flight to minimize potential signal interference.