How to Program a Drone: Top Languages, SDKs, and Tools
Commercial UAV Pilot & Aerial Cinematography Specialist at Drone Nestle · FAA Part 107 Remote Pilot Certification, Commercial UAS Operations · 10+ Years in Commercial UAV Operations, Flight Hardware Benchmarking & 4K Aerial Cinematography
Programming a drone requires a combination of high-level languages like Python and specialized frameworks such as DroneKit or ROS. Developers must utilize Software-in-the-Loop (SITL) simulations to test flight logic safely before deploying code to hardware. Choosing the right communication protocol, such as MAVLink, is critical for stable telemetry and autonomous command execution.
🎯 Key Takeaways
- Python is the most accessible language for beginners using DroneKit or DJI Tello SDK.
- ROS (Robot Operating System) is essential for complex, multi-sensor autonomous drone systems.
- Always test code in a Software-in-the-Loop (SITL) simulator to prevent physical crashes.
- MAVLink is the industry-standard protocol for communicating between computers and flight controllers.
- Ensure hardware supports API access; not all consumer drones are programmable out of the box.
To program a drone, you must bridge the gap between high-level logic and low-level flight stabilization. This typically requires a combination of Python or C++, the MAVLink communication protocol, and an open-source flight stack like ArduPilot or PX4. By leveraging these tools, you can bypass manual joystick inputs and send programmatic commands directly to the flight controller’s processor.


Mastering this software stack allows you to automate complex behaviors that are impossible with a standard remote. You can script autonomous waypoint missions, integrate computer vision for object tracking, or coordinate multi-drone swarms. This guide focuses on the specific frameworks and hardware configurations you need to turn a standard unmanned aerial vehicle (UAV) into a programmable robot.
Core Programming Languages and Development Frameworks


Choosing the right programming language depends on your performance requirements and the complexity of your mission. Most drone developers start with Python for its ease of use, while professionals often move to C++ for real-time processing and resource management.

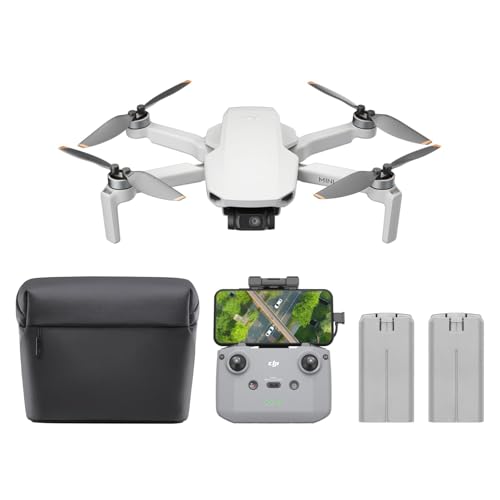

Python and DroneKit-Python
Python is the most accessible entry point for drone programming. The primary framework used is DroneKit-Python. It provides an API that allows you to communicate with the flight controller over MAVLink. You can write scripts that run on a ground station or an onboard companion computer.
- Abstraction: DroneKit simplifies complex MAVLink commands into readable functions like vehicle.simple_takeoff().
- Compatibility: It works seamlessly with ArduPilot and PX4 flight stacks.
- Use Case: Best for GPS-based autonomous missions and simple data collection scripts.
- Example: You can command a drone to change its altitude or head to a specific coordinate with just three lines of code.
C++, ROS, and MAVSDK


For high-performance applications, C++ combined with the Robot Operating System (ROS) is the industry standard. ROS is not an operating system but a middleware framework that handles communication between different software components (nodes). If your drone needs to process LIDAR data or perform SLAM (Simultaneous Localization and Mapping), ROS is essential.


- MAVSDK: This is the modern replacement for DroneKit. It is written in C++ but offers wrappers for Python, Swift, and Java. It is highly optimized and resilient.
- Node-Based Architecture: In ROS, you can have one node for navigation and another for obstacle avoidance, allowing them to communicate asynchronously.
- Real-Time Control: C++ offers the low latency required for high-speed maneuvering and complex sensor fusion.
Master Drone Programming in 8 Simple Steps
Programming a drone transforms a remote-controlled toy into a sophisticated autonomous robot capable of complex missions, data collection, and intelligent navigation. This guide covers the essential bridge between hardware and software, focusing on the industry-standard MAVLink protocol and the Python-based DroneKit library. Whether you are aiming to build an autonomous delivery system or a localized mapping tool, following these steps ensures you build a foundation that is safe, scalable, and technically sound. By mastering these phases, you avoid the common pitfalls of “fly-away” incidents and hardware damage while gaining a deep understanding of flight controllers and autonomous logic.
Step 1: Choose Your Hardware and Software Stack
What you need: A flight controller (Pixhawk, Orange Cube, or DJI with SDK support), a companion computer (Raspberry Pi 4 or Jetson Nano), and a choice of programming language (Python is highly recommended).
Instructions: Before writing a single line of code, you must ensure your hardware can communicate with your software. For most DIY and professional applications, the ArduPilot or PX4 firmware is the gold standard. These firmware sets run on the flight controller and handle the low-level stabilization. You will likely use Python due to its extensive libraries and the DroneKit-Python framework, which simplifies MAVLink communication. If you are using a DJI drone, you will instead need to register for a DJI Developer Account and use the DJI Mobile or Payload SDK. Research which ecosystem fits your goals: ArduPilot for open-source flexibility, or DJI for high-end consumer hardware stability.
Pro Tip: Always opt for a companion computer like a Raspberry Pi if you plan on doing onboard processing (like computer vision) rather than sending commands over a long-range telemetry radio from a ground laptop.
Step 2: Set Up the Development Environment
What you need: A computer with Python 3.x installed, a code editor (VS Code or PyCharm), and a terminal/command prompt.
Instructions: You need a clean environment to manage dependencies. Start by installing Python and setting up a virtual environment to prevent library conflicts. Use the command python -m venv drone_env and activate it. Once inside, install the essential libraries: DroneKit, Pymavlink, and MAVProxy. Use the command pip install dronekit pymavlink mavproxy. These libraries allow your Python scripts to send commands like “arm,” “takeoff,” and “set_position” to the drone’s flight controller. Additionally, install a Ground Control Station (GCS) software like Mission Planner or QGroundControl, which will act as your visual interface for monitoring the drone’s status while your code is running.
Pro Tip: Use an older version of Python (3.7 or 3.8) if you encounter installation errors with DroneKit, as it is more stable with those specific versions compared to the very latest releases.
Step 3: Configure the SITL (Software In The Loop) Simulator
What you need: ArduPilot SITL or Gazebo simulator software.
Instructions: Never test new code on a physical drone first. SITL (Software In The Loop) allows you to run a virtual version of the ArduPilot or PX4 firmware on your PC. It mimics the physics of a drone without the risk of a crash. Setup SITL by downloading the ArduPilot tools and running the sim_vehicle.py script. This will open a virtual drone at a specific latitude and longitude (usually a field in Australia by default). Your Python script will connect to this simulated drone via a local TCP or UDP port (usually 127.0.0.1:14550). This environment is where you will spend 90% of your development time, perfecting your logic before moving to the field.
Pro Tip: Map a custom location in SITL that matches your actual local flying field so you can test GPS-based missions with realistic coordinate data.
Step 4: Establish a Connection and Basic Commands
What you need: A basic Python script and the SITL simulator running.
Instructions: Create a file named basic_flight.py. Start by importing the connect and VehicleMode modules from the DroneKit library. Use the connect() function to link to your drone’s address. The first milestone is successfully reading the drone’s “heartbeat”—its status updates. Write a script that prints the drone’s current battery level, GPS location, and system status to the console. Once you can read data, attempt to change the vehicle mode to “GUIDED” and then back to “STABILIZE.” This confirms two-way communication. If the script hangs, check your baud rate settings (standard is 57600 or 115200) and ensure no other software is hogging the serial/UDP port.
Pro Tip: Always include a timeout parameter in your connect function to ensure your script doesn’t hang indefinitely if the drone is disconnected.
Step 5: Program the Arming and Takeoff Sequence
What you need: Python script and a firm understanding of drone safety states.
Instructions: Drones have safety checks (pre-arm checks) that prevent flight if the GPS isn’t locked or the compass isn’t calibrated. Your script must include a loop that waits for the vehicle.is_armable attribute to become True. Once ready, set the vehicle.mode to “GUIDED” and call vehicle.armed = True. After arming, use the simple_takeoff(altitude) function. You must write a “wait” loop that monitors the drone’s current altitude. The script should only proceed to the next command once the drone is within 95% of the target altitude. This logic is critical; sending movement commands before the drone is airborne can cause erratic behavior or ground crashes.
Pro Tip: Add a “safety switch” in your code that requires a manual keyboard press (like ‘Enter’) before the arming sequence initiates to prevent accidental startups.
Step 6: Implement Waypoint Navigation and Logic
What you need: GPS coordinates (latitude, longitude, altitude) for your test area.
Instructions: Now that the drone is airborne, you can direct its movement. Use the LocationGlobalRelative object to define a destination. The command vehicle.simple_goto(location) tells the drone to move to a specific coordinate. To create a complex mission, define a list of coordinates and iterate through them. You will need to write a monitoring function that calculates the distance between the drone and the target waypoint. When the distance is less than 1 or 2 meters, the script should trigger the next waypoint. This is how you program a drone to perform autonomous surveys or follow a specific flight path for cinematography.
Pro Tip: When testing navigation, keep the altitude high enough to avoid trees (30+ meters) but low enough to maintain visual contact for safety.
Step 7: Connect to Physical Hardware and Telemetry
What you need: A physical drone, telemetry radios (SiK radios), and a USB/Serial cable.
Instructions: Once your code works perfectly in the SITL simulator, it is time to transition to hardware. Connect a telemetry radio to your laptop and the other to the flight controller’s TELEM1 port. In your Python script, change the connection string from the local IP (127.0.0.1) to the serial port address (e.g., /dev/ttyUSB0 on Linux or COM3 on Windows). Ensure the baud rate matches your radio settings. Power on the drone without propellers for the first hardware test. Run your script and verify that the drone arms and the motors spin up as commanded. If the hardware doesn’t respond, verify that the “Ground” and “Transmit/Receive” pins on your telemetry cables are correctly cross-connected.
Pro Tip: Use a powered USB hub for your telemetry radio to ensure it receives consistent voltage, preventing dropped connections during long-range flights.
Step 8: Implement Failsafes and Emergency Landing
What you need: RC Controller (Transmitter) and a Python script with error handling.
Instructions: Programming a drone is not just about moving it; it’s about stopping it. You must program a “Return to Launch” (RTL) command that can be triggered by your code if the battery is low or the connection is lost. Use a try-except block in Python so that if the script crashes, the code sends one final vehicle.mode = VehicleMode("RTL") command before exiting. Additionally, ensure your RC transmitter is always on and bound to the drone. Even when running autonomous code, the physical “Flight Mode” switch on your remote should be configured to override the script and give you manual control in an emergency.
Pro Tip: Program a “Geo-fence” in your Flight Controller’s parameters (via Mission Planner) as a hard-coded backup that prevents the drone from flying outside a specific radius regardless of what your code says.
✅ Final Checklist
- Simulation Success: The code runs flawlessly in SITL without errors or virtual crashes.
- Safety Checks: Pre-arm checks (GPS, Compass, Battery) are passing and monitored by the script.
- Manual Override: The RC Transmitter can successfully take control away from the script at any time.
- Connection Stability: Telemetry signal is consistent and baud rates are synchronized.
- Propeller Safety: Physical tests are performed without propellers first, or in an open, legal flight zone.
Important Notes:
- Safety Warning: Never program or test a drone with propellers attached while indoors or near people. One line of buggy code can trigger full-throttle motor activation.
- Legal Compliance: Ensure you are following FAA (or your local authority’s) regulations regarding autonomous flight and Remote ID requirements.
- Professional Help: If you are unfamiliar with soldering or lithium-polymer (LiPo) battery safety, consult a hardware expert before building the physical drone.
- Estimated Time: 10-15 hours for environment setup and simulation; 5-10 hours for hardware integration.
- Cost Range: $300 – $1,500 depending on the drone hardware and companion computer choice.
Essential Hardware Compatibility and Flight Controller Protocols


Your code does not talk directly to the drone’s motors. Instead, it communicates with a Flight Controller (FC). To program a drone successfully, your hardware must support open communication protocols that allow external overrides.

The MAVLink Protocol: The Language of the Skies


MAVLink (Micro Air Vehicle Link) is the most widely used communication protocol in the drone world. It is a header-only message library that enables the exchange of data between the flight controller and your code. Every command you send—whether it is “arm motors” or “go to location”—is packed into a MAVLink message.


- Heartbeats: The drone sends constant “heartbeat” packets to let your code know it is alive and functioning.
- Telemetry Data: MAVLink streams real-time data back to your program, including battery voltage, GPS coordinates, and IMU orientation.
- Packet Structure: It is designed to be extremely lightweight, making it reliable even over low-bandwidth radio links.
Compatible Flight Controllers and Onboard Computers


Not every drone can be programmed. You need a controller that runs open-source firmware like ArduPilot or PX4. The Pixhawk series is the gold standard for programmable hardware. These controllers have dedicated telemetry ports (UART) that allow you to connect an external computer.
- Onboard Companion Computers: To run heavy code (like ROS or OpenCV) on the drone itself, you must mount a companion computer. Common choices include the Raspberry Pi 4, Nvidia Jetson Nano, or Intel NUC.
- Physical Connection: The companion computer connects to the Pixhawk via a serial cable. Your code runs on the Linux-based companion computer and sends MAVLink commands to the Pixhawk.
- Ground Control Station (GCS): If you are not using an onboard computer, you can send commands from a laptop via a Telemetry Radio (915MHz or 433MHz). This is called “offboard control.”
Before writing code, you must ensure your flight controller is flashed with the correct firmware and that the MAV_STREAM rates are configured. This ensures the controller sends enough data back to your program to maintain a stable loop. Without a proper hardware-to-software handshake, even the most perfect code will fail to execute.
The Role of Simulation and SITL in Development


Before you ever arm the motors on a physical quadcopter, you need a safe environment to fail. Programming a drone involves high stakes—one logic error in your script can result in a total hardware loss or a dangerous “flyaway” situation. This is where simulation and Software In The Loop (SITL) become your most valuable assets.
Testing Without the Crash Risk
SITL allows you to run your flight code on your computer while it “talks” to a simulated drone. The code believes it is controlling a real flight controller like a Pixhawk, but the physics and environment are handled by software. This setup is crucial for debugging complex maneuvers or long-distance autonomous missions without leaving your desk.
- Risk Mitigation: Test “return to home” logic and emergency kill switches without fearing a physical wreck.
- Environmental Control: Simulate high winds, sensor failures, or GPS glitches to see how your code responds to adversity.
- Rapid Iteration: You can tweak a line of code and restart the simulation in seconds, whereas a real-world test requires swapping batteries and recalibrating sensors.
Popular Simulation Tools
Different simulators offer varying levels of realism and complexity. If you are focusing on AI and computer vision, Microsoft AirSim (built on Unreal Engine) provides stunningly realistic environments. For those working heavily with the Robot Operating System (ROS), Gazebo is the industry standard for physics-based simulation. If you want something lightweight and fast to test ArduPilot or PX4 scripts, jMAVSim is a fantastic entry point that doesn’t require a high-end graphics card.


Security and Safety Frameworks for Autonomous Navigation


Programming a drone isn’t just about making it move; it’s about making it move responsibly. As drones become more autonomous, the complexity of keeping them safe from both physical obstacles and digital threats grows exponentially. A robust codebase must prioritize safety protocols as much as flight performance.
Obstacle Avoidance and Path Planning
Autonomous navigation relies on a framework that can perceive and react to the world in real-time. Most modern drone programming utilizes “Avoidance” libraries that process data from LiDAR, ultrasonic sensors, or stereo vision cameras. For example, when using ROS, developers often implement MoveIt or OctoMap. These tools allow the drone to build a 3D “occupancy map” of its surroundings, enabling it to calculate paths that steer clear of power lines, trees, or people.
- Failsafe Integration: Always hard-code triggers for signal loss (RC link loss) or low voltage levels to ensure the drone lands safely.
- Geo-fencing: Use your SDK to define “no-go” zones. This prevents the drone from accidentally drifting into restricted airspace or over busy roads during a test.
- Sensor Fusion: Implement algorithms that combine GPS, IMU, and barometer data. This ensures that if one sensor provides “noisy” data, the drone maintains its position using the others.
Cybersecurity in Drone Communication
Security is often overlooked in DIY drone projects, but it is critical for professional applications. Because drones communicate over radio frequencies or Wi-Fi, they can be susceptible to “man-in-the-middle” attacks or command injection. Utilizing MAVLink with Message Signing ensures that only authorized commands from your GCS (Ground Control Station) are executed. Furthermore, developers should prioritize encrypted telemetry links to prevent sensitive flight data or video feeds from being intercepted by unauthorized parties.
Conclusion: Taking Your First Flight into Code
Programming a drone is a rewarding blend of software engineering and high-stakes robotics. By choosing a versatile language like Python or C++, leveraging powerful SDKs like DJI’s or DroneKit, and rigorously testing your logic in simulated environments, you can unlock capabilities that far exceed manual flight. The transition from a hobbyist pilot to a drone developer opens doors to industries ranging from precision agriculture to autonomous search and rescue.
To get started, your first step should be to install an SITL environment and run a simple “Hello World” script that commands a virtual drone to takeoff and land. Once you are comfortable with the virtual workflow, move to a small, indoor-safe drone to test your code in the real world. The sky is no longer the limit—it is your playground. Get your IDE ready, stay safe, and happy coding!
❓ Frequently Asked Questions
How does MAVLink facilitate drone programming?
MAVLink is a lightweight messaging protocol used to communicate between the Ground Control Station (GCS) and the drone’s flight controller. It allows developers to send waypoints, read telemetry data, and override manual controls via external code scripts.
Which SDK should I choose for a DJI drone?
For educational purposes, the Tello SDK is the most accessible; for professional industrial platforms, use the DJI Mobile or Payload SDKs. These tools provide high-level APIs to control camera movements and autonomous flight paths without needing to write low-level firmware.
Why is Python preferred over C++ for drone scripting?
Python offers rapid prototyping and extensive libraries for AI and data analysis, making it ideal for high-level mission planning and automation. C++ is generally reserved for the firmware level or real-time execution where memory efficiency is critical.
What hardware is required for autonomous drone programming?
You typically need a flight controller running ArduPilot or PX4, a telemetry radio or Wi-Fi link for communication, and often a companion computer like a Raspberry Pi for onboard processing of complex algorithms.
How do I prevent my drone from flying away during code testing?
Always implement hard-coded geofencing and failsafes within your script, and keep a manual override switch active on your remote controller. Furthermore, conducting rigorous testing in Gazebo or AirSim environments can catch logic errors before actual takeoff.
Can I use JavaScript for drone programming?
Yes, frameworks like Cylon.js or Node-RED allow for JavaScript-based control, which is primarily used for web-based interfaces and IoT integration. However, it is less common than Python for handling complex flight dynamics and sensor fusion.

Similar Posts