How to Make a Drone from Scratch: DIY Components & Setup
Commercial UAV Pilot & Aerial Cinematography Specialist at Drone Nestle · FAA Part 107 Remote Pilot Certification, Commercial UAS Operations · 10+ Years in Commercial UAV Operations, Flight Hardware Benchmarking & 4K Aerial Cinematography
Building a functional drone requires selecting compatible components like the flight controller, ESCs, motors, and frame to ensure system harmony. Success depends on mastering precise soldering techniques and understanding software configuration to achieve a stable and safe flight.
🎯 Key Takeaways
- Component compatibility is the foundation of a stable DIY drone build.
- Invest in a high-quality soldering iron for secure electronic connections.
- Prioritize flight controller firmware like Betaflight for maximum customization options.
- Match motor KV ratings to your propeller size and battery voltage.
- Perform a smoke test using a current limiter before the first power-up.
Building a functional multi-rotor drone from scratch requires five core electronic components: a carbon fiber frame, four brushless motors, four Electronic Speed Controllers (ESCs), a flight controller (FC), and a radio receiver. You create a flyable machine by mounting these parts to the frame and soldering them into a unified electrical loop. The flight controller acts as the brain, processing your stick inputs and adjusting motor speeds hundreds of times per second to maintain stability.


This DIY approach is vital for anyone serious about the hobby because it removes the “black box” mystery of pre-built units. When you understand the wiring and component compatibility, you gain the ability to troubleshoot mid-field failures and tune your drone for specific tasks. Whether you want a high-speed racing machine or a stable cinematic platform, the assembly logic remains the same: match your power output to your total weight and ensure your firmware can talk to your hardware.
Essential Components for a Custom Multi-Rotor Build


Selecting the right parts is the most technical hurdle in a scratch build. Every component must be electrically compatible to prevent hardware failure. Your choice of frame size dictates the size of every other part you buy. A standard 5-inch “freestyle” frame is the best starting point for beginners because it offers plenty of space for soldering and fits the most common industry-standard parts.

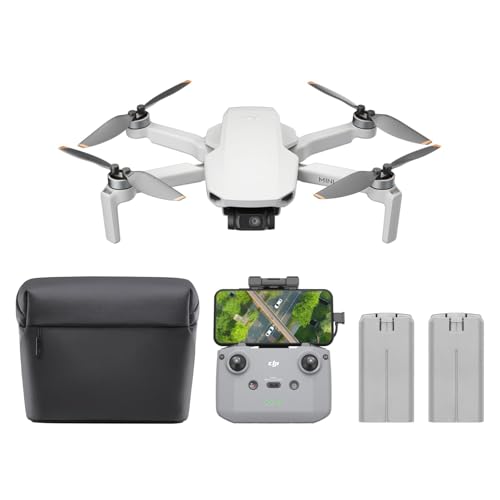


The Core Electronics Stack
The “stack” is the heart of your drone, usually consisting of the Flight Controller and the ESCs. In modern builds, these are often sold as a “stack” that plugs together with a wire harness, though individual components offer more flexibility for custom layouts.
- Flight Controller (FC): Look for an F4 or F7 processor. The FC uses an onboard gyroscope to detect movement and runs firmware like Betaflight to keep the drone level.
- Electronic Speed Controllers (ESCs): These translate the FC’s signals into three-phase power for the motors. Ensure your ESCs are rated for at least 35A to 50A to handle high-throttle bursts without burning out.
- Power Distribution Board (PDB): While many modern FCs or 4-in-1 ESCs have this built-in, a standalone PDB regulates the raw battery voltage down to 5V or 12V to safely power your peripherals.
Propulsion and Radio Link


The propulsion system must be matched to your battery voltage. If you use a 6S LiPo battery (22.2V), you need motors with a lower KV rating to prevent the motors from spinning too fast and overheating the coils. For a 4S build (14.8V), higher KV motors are necessary to achieve the same thrust.

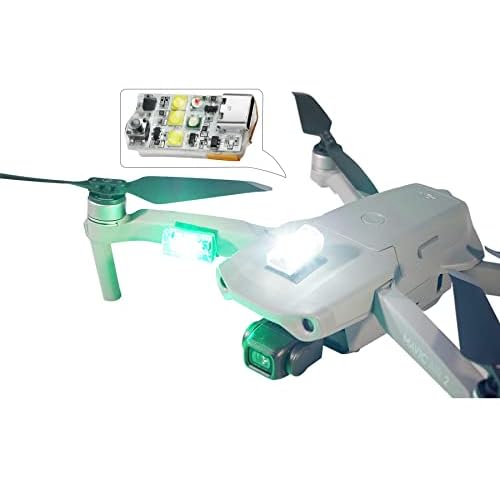
- Brushless Motors: For a 5-inch build, 2207 or 2306 sized motors are the standard. They provide the necessary torque to spin 5-inch propellers rapidly.
- Radio Receiver (Rx): This part receives signals from your handheld controller. Protocols like ExpressLRS (ELRS) are recommended for their incredible range and low latency.
- Propellers: These are categorized by diameter and pitch. A “5×4.3×3” prop is 5 inches long, has a 4.3-inch pitch, and features 3 blades.
The Ultimate DIY Drone Construction Walkthrough
Building a custom drone from scratch is one of the most rewarding projects for any electronics enthusiast or aspiring pilot. Unlike off-the-shelf consumer models, a DIY drone—specifically a First-Person View (FPV) quadcopter—offers unparalleled repairability, performance tuning, and a deep understanding of aerodynamics. This guide covers everything from component selection and soldering to software configuration and your first maiden flight. Following these steps systematically is crucial to ensure that your drone is not only functional but safe to operate and durable enough to withstand the inevitable bumps of learning to fly.
Step 1: Component Selection and Planning
What you need: A 5-inch carbon fiber frame, four brushless motors (2207 or 2306 size, 1700-2500KV), a 4-in-1 Electronic Speed Controller (ESC), a Flight Controller (FC), a radio receiver (ELRS or Crossfire recommended), an FPV camera and Video Transmitter (VTX), propellers (5×4.3×3), and a 4S or 6S LiPo battery.
Instructions: Start by defining your drone’s purpose. For a standard freestyle drone, a 5-inch frame is the gold standard for balance and power. Ensure your motors match your battery voltage; for example, 2400KV-2700KV motors are ideal for 4S batteries, while 1700KV-1900KV motors are better suited for 6S power systems. Verify that your Flight Controller and ESC have matching mounting holes (usually 30.5×30.5mm or 20x20mm). Create a wiring diagram or download the manual for your specific FC/ESC stack, as this will be your primary map during the assembly process. Ordering all parts at once ensures compatibility and prevents delays.
Pro Tip: Always buy a few extra sets of propellers and at least one spare motor. In the DIY world, propellers are considered “consumables” and will break frequently during your first few flights.
Step 2: Preparing the Frame and Motor Mounting
What you need: Hex driver set (1.5mm, 2.0mm, 2.5mm), blue threadlocker (Loctite 242), and your carbon fiber frame kit.
Instructions: Assemble the baseplate and arms of your frame according to the manufacturer’s instructions. Use a small drop of blue threadlocker on every screw that enters metal (like motor screws) to prevent vibrations from loosening them over time. Mount your four motors to the ends of the arms. Ensure the motor wires are facing inward toward the center of the frame. When tightening motor screws, be extremely careful that the screw length is not so long that it touches the internal copper windings of the motor, as this will cause a catastrophic short circuit and fry your electronics the moment you plug in the battery.
Pro Tip: Sand the sharp edges of the carbon fiber arms with a fine-grit sandpaper under running water. This prevents the sharp carbon from cutting through your motor wires in a crash.
Step 3: Soldering the ESC and Motors
What you need: A temperature-controlled soldering iron, 60/40 leaded solder, flux pen, wire strippers, and 14AWG or 16AWG power leads.
Instructions: Tin the three solder pads on each corner of the 4-in-1 ESC. “Tinning” means applying a small amount of solder to the pad beforehand. Next, cut your motor wires to the appropriate length so they reach the ESC pads with a tiny bit of slack, strip the ends, and tin the wire tips. Solder the three wires from each motor to the three pads on the ESC. The order doesn’t strictly matter for now, as motor direction can be reversed in software later. Finally, solder your main XT60 battery lead to the large positive (+) and negative (-) pads on the ESC, ensuring you have the polarity correct. Use plenty of heat for these large pads but don’t linger more than 5 seconds to avoid damaging components.
Pro Tip: Use a “Smoke Stopper” (a current-limiting device) the first time you plug in your battery. If there is a short circuit, the Smoke Stopper will trip, saving your expensive electronics from burning up.
Step 4: Installing the Flight Controller and Receiver
What you need: Nylon or metal M3 standoffs, the Flight Controller (FC), and your radio receiver (Rx).
Instructions: Mount the FC on top of the ESC using the provided rubber gummies for vibration isolation. Connect the ESC to the FC using the multi-pin wiring harness. Next, solder your radio receiver to the FC. Most modern receivers use a protocol called CRSF or ELRS, which requires four wires: 5V (Power), GND (Ground), TX (to an RX pad on the FC), and RX (to a TX pad on the FC). Ensure the antenna for the receiver is mounted away from the carbon fiber frame and propellers, ideally using a 3D-printed TPU mount or zip ties with heat shrink to keep it upright and secure.
Pro Tip: Double-check the arrow printed on the Flight Controller. It should be pointing toward the front of the drone. If it isn’t, you must tell the software the orientation later, or the drone will flip and crash instantly on takeoff.
Step 5: Wiring the FPV Video System
What you need: FPV camera, Video Transmitter (VTX), FPV antenna, and silicone wiring.
Instructions: Mount the FPV camera between the front plates of the frame. Connect the camera’s Video Out wire to the “Video In” or “VIN” pad on the Flight Controller. Then, connect the VTX’s “Video In” wire to the “Video Out” or “VOUT” pad on the FC. This routing allows the Flight Controller to overlay an On-Screen Display (OSD) with your battery voltage and flight time onto your video feed. Solder the power (7-26V or 5V depending on the VTX) and ground wires to the appropriate pads on the FC or ESC. Secure the VTX antenna firmly; running a VTX without an antenna attached will cause it to overheat and burn out within seconds.
Pro Tip: Use a small dab of clear electronics-grade silicone or “Conformal Coating” over your solder joints. This waterproofs the connections and prevents debris from causing shorts.
Step 6: Software Configuration in Betaflight
What you need: A USB data cable, a computer with Betaflight Configurator installed, and your radio transmitter.
Instructions: Connect your drone to the computer and open Betaflight. Calibrate the accelerometer while the drone is on a perfectly level surface. Navigate to the “Ports” tab and enable “Serial RX” for the UART port where you soldered your receiver. In the “Configuration” tab, select your receiver protocol (e.g., CSRF). Go to the “Motors” tab (with props OFF) and use the sliders to ensure all four motors spin. If a motor spins the wrong way, reverse it in the “Motors” tab or via BLHeli_32 Suite. Finally, set up your “Modes” to assign a switch on your radio for “Arming” and another for “Angle/Acro” flight modes.
Pro Tip: Set up a “Pre-arm” switch. This requires you to flip two switches to spin the motors, providing an extra layer of safety so you don’t accidentally activate the drone while carrying it.
Step 7: Final Assembly and Propeller Orientation
What you need: Top plate of the frame, remaining screws, battery strap, and propellers.
Instructions: Tuck all loose wires neatly inside the frame using zip ties or electrical tape to ensure no wires can get caught in the spinning motors. Screw on the top plate. Apply the battery pad (to prevent the battery from sliding) and thread the battery strap through the frame. Now, install the propellers. Look closely at the blades: two props are “Clockwise” (CW) and two are “Counter-Clockwise” (CCW). On a standard setup, the front-left and back-right motors spin CW, while the front-right and back-left spin CCW. Tighten the prop nuts until they are snug; the nylon insert in the nut will prevent them from flying off during high-speed maneuvers.
Pro Tip: Always double-check prop direction. If the leading edge (the higher side of the blade) is not biting into the air in the direction the motor spins, the drone will stay on the ground and likely flip over.
Step 8: Pre-flight Safety Check and Maiden Flight
What you need: Fully charged LiPo batteries, FPV goggles, radio transmitter, and a wide-open field.
Instructions: Before heading out, perform a “Bench Test.” Power on your radio first, then the drone. Check that you have a clear video feed in your goggles and that your radio sticks move the corresponding bars in the Betaflight Receiver tab. At the field, place the drone on the ground, walk back at least 15 feet, and arm the motors. Gently hover the drone at chest height for 30 seconds to check for unusual vibrations or heat in the motors. If everything looks good, fly a simple figure-eight pattern to get a feel for the controls. Keep your first flight under 3 minutes to avoid over-discharging your battery.
Pro Tip: Never fly near people, power lines, or airports. Check local regulations (like FAA TRUST or Remote ID in the US) to ensure you are flying legally and responsibly.
✅ Final Checklist
- All motor screws are tight and not touching the internal motor windings.
- The flight controller orientation (arrow direction) matches the software configuration.
- Propellers are installed in the correct orientation and nuts are tightened securely.
- The FPV antenna is securely connected to the VTX to prevent overheating.
- The “Fail-safe” is tested: the motors must stop immediately if the radio is turned off.
Important Notes:
- Safety Warning: LiPo batteries are high-energy devices and can be fire hazards if punctured or over-discharged. Always charge them in a fireproof bag and never leave them unattended.
- Professional Help: If you are struggling with soldering small pads, watch several video tutorials or practice on a “practice solder board” before touching your flight controller.
- Estimated Time: 4 to 8 hours for assembly and configuration.
- Cost Range: $250 – $500 for the drone components alone (not including radio, goggles, or batteries).
Technical Factors Influencing Drone Performance and Stability


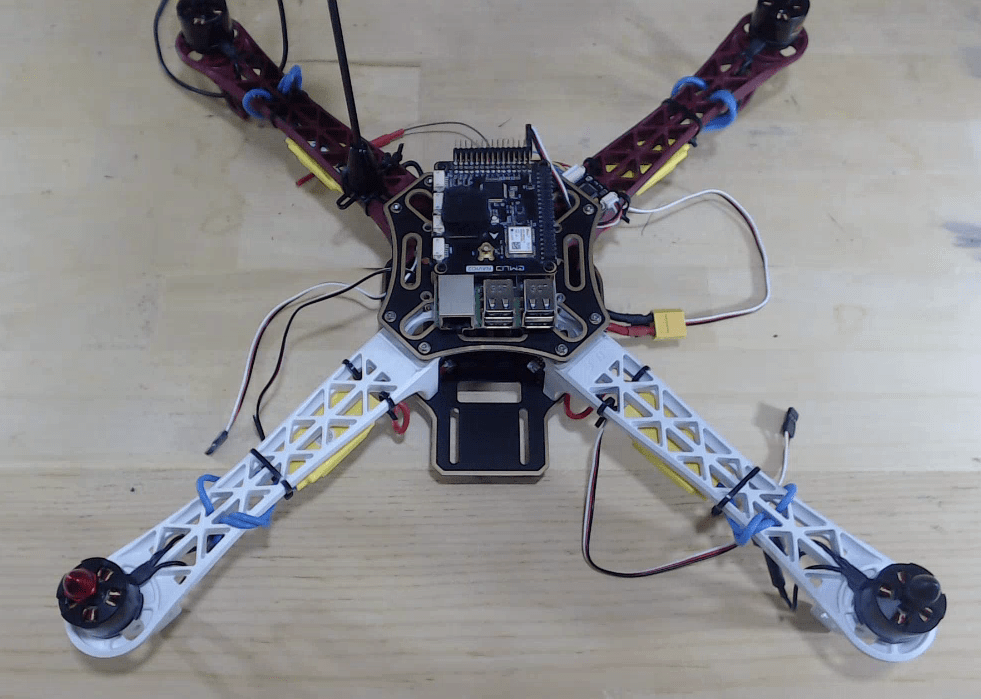
A drone is a balance of physics and electrical engineering. If the components aren’t balanced, the flight controller will struggle to stabilize the craft, resulting in “oscillations” or mid-air “washouts.” You must calculate your power-to-weight ratio before you start the physical assembly to ensure the drone can actually lift itself and its battery effectively.
Calculating the Power-to-Weight Ratio


For a drone to be flyable, it needs a minimum thrust-to-weight ratio of 2:1. This means the motors must produce twice as much thrust as the total weight of the drone, including the battery. For hobbyist builds, a 5:1 ratio is preferred for a “snappy” feel. If your drone weighs 600 grams, your four motors combined should produce at least 3,000 grams of thrust at 100% throttle.


- Lightweight Frames: Reducing frame weight allows for smaller, more efficient motors but may sacrifice durability during crashes.
- Battery Weight: A larger battery provides more flight time but adds mass, which requires more throttle to hover, creating a point of diminishing returns.
- Disk Area: Larger propellers are more efficient but respond slower to throttle changes compared to smaller, lighter props.
Matching Motor KV with Battery Voltage


The KV rating of a motor represents how many Revolutions Per Minute (RPM) the motor will spin for every 1 volt applied. This is a critical compatibility factor. If you pair high KV motors (e.g., 2500KV) with a high-voltage 6S battery, the motors will attempt to spin at an RPM that the bearings and magnets cannot handle, leading to instant failure.
Standard combinations include:
- 4S Battery (14.8V): Pair with 2300KV to 2700KV motors. This setup is easier for beginners to control.
- 6S Battery (22.2V): Pair with 1700KV to 1950KV motors. This setup is more efficient and offers more consistent power throughout the battery’s discharge cycle.
- Propeller Pitch: High-pitch props (4.5+) provide more top-end speed but draw more current, while low-pitch props (3.0 to 4.0) offer better grip and control in corners.
Understanding these technical specs ensures that when you move to the physical assembly, your drone won’t just look the part—it will have the mechanical harmony required for stable, predictable flight. In the next phase, we will cover the actual physical layout and the specific soldering techniques required to join these parts into a flight-ready machine.
Cost-Benefit Analysis: DIY Builds vs. Pre-Built Drones



When you decide to build a drone from scratch, you aren’t just buying parts; you are investing in a specialized skill set. While the allure of a “ready-to-fly” (RTF) drone is strong, the DIY approach offers a unique financial and functional landscape that every enthusiast should understand before clicking “purchase” on a dozen different components.
The Financial Reality of Custom Builds
In many cases, building a high-performance drone can actually cost more than buying a mass-produced model. This is because consumer giants like DJI benefit from economies of scale. However, the value of a DIY build isn’t found in the initial receipt, but in the long-term maintenance. Consider these factors:
- Component Quality: You choose the specific ESC (Electronic Speed Controller) and motors, ensuring high-grade materials rather than the “lowest bidder” parts found in some budget RTF kits.
- No Proprietary Lock-in: If a motor fails on a custom build, you can replace it with any brand that fits. With pre-built drones, you are often forced to buy expensive, brand-specific replacement parts.
- Tooling Costs: Your first build includes the “hidden” cost of a soldering iron, hex drivers, and a multimeter. These are one-time investments that pay for themselves by the second or third build.
The Knowledge Dividend
The greatest benefit of DIY is the Knowledge Dividend. When you build it, you know exactly how to fix it. When a pre-built drone crashes, it usually goes back to the factory for a weeks-long repair. When a DIY drone crashes, you simply swap a 15-dollar arm or a 20-dollar motor and you are back in the air the same afternoon. This independence is the ultimate “accessory” for any serious pilot.


Expert Tips for Troubleshooting Common DIY Drone Failures


Even the most meticulously planned builds can encounter hiccups during the “bench test” phase. Troubleshooting is a core part of the DIY experience, and knowing where to look when things don’t go as planned will save you hours of frustration and potentially prevent a “flyaway” or a localized fire.
Electrical and Configuration Gremlins
Most issues arise from the complex communication between your flight controller and your peripherals. If your drone isn’t responding correctly, it is rarely a “broken” part and usually a configuration error. Keep these professional tips in mind:
- The “Smoke Stopper” Rule: Always use a current-limiter (smoke stopper) the first time you plug in your battery. If there is a short circuit in your soldering, this device will trip before your expensive components fry.
- Motor Direction Check: A common reason drones flip immediately on takeoff is incorrect motor orientation. Use your configuration software to verify that each motor is spinning in the direction intended by your specific frame layout.
- Firmware Mismatches: Ensure your Radio Transmitter and Receiver are on compatible firmware versions. “Binding” issues are almost always caused by version mismatches rather than faulty hardware.
Managing Physical Interference
Physical layout impacts electronic performance. Expert builders prioritize “clean” builds to avoid signal noise. For example, keeping your high-current power leads away from your sensitive FPV camera wires can prevent “static lines” in your video feed. Additionally, ensuring your antennas are mounted away from the carbon fiber frame is essential, as carbon fiber is conductive and will shield your signal, leading to premature failsafes.
Conclusion
Building a drone from scratch is a rewarding challenge that bridges the gap between hobbyist and engineer. By understanding the components, weighing the long-term cost benefits of DIY over pre-built models, and mastering the art of troubleshooting, you gain a level of control that “off-the-shelf” pilots never experience. You aren’t just flying a machine; you are flying your machine.
Next Steps: Start by selecting a frame that matches your goals—whether that is cinematic photography or high-speed racing—and begin sourcing your components one by one. Join a local or online community to share your progress and get feedback on your wiring. Now, grab your soldering iron and start your build!
❓ Frequently Asked Questions
How do I choose the right motor KV for my build?
Motor KV represents RPM per volt. Choose a lower KV (1700-1900) for 6S battery builds and higher KV (2400-2700) for 4S builds to maintain optimal efficiency and power.
What is the purpose of the Power Distribution Board (PDB)?
The PDB takes the high voltage from your battery and distributes it to the ESCs while providing regulated 5V or 12V power to the flight controller and camera.
Which firmware is best for a first-time DIY drone?
Betaflight is the most popular choice due to its massive community support, easy-to-use interface, and compatibility with almost all modern flight controllers.
Why is a ‘smoke stopper’ recommended for the first power-up?
A smoke stopper is a current limiter that prevents your electronics from frying if there is a short circuit in your soldering or wiring during the initial test.
Can I mix and match different brands of components?
Generally yes, as long as the protocols (like DShot for ESCs) and voltage ratings are compatible across the flight controller, ESCs, and motors.
What is the role of the Electronic Speed Controller (ESC)?
The ESC takes signals from the flight controller and tells the motors how fast to spin by converting DC power from the battery into 3-phase AC power.

Similar Posts