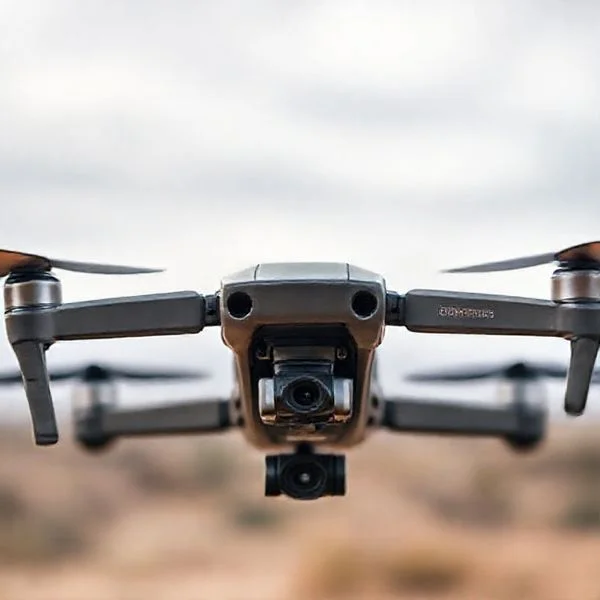
Building a custom drone requires precise component synchronization between the flight controller, ESCs, and motors to ensure stability. Success depends on high-quality soldering techniques and proper firmware configuration using platforms like Betaflight for optimal flight dynamics.
🎯 Key Takeaways
- Match motor KV ratings with propeller size and battery voltage for efficiency.
- Invest in a temperature-controlled soldering iron for reliable electrical connections.
- Use a smoke stopper during the first power-up to prevent short circuits.
- Flash the latest firmware to your flight controller before mounting components.
- Verify motor directions and propeller orientations before your maiden flight.
Building a high-performance DIY drone requires precise matching of your power system to your frame size to ensure flight stability and component longevity. You need a compatible stack consisting of a flight controller (FC), electronic speed controllers (ESC), and brushless motors that can handle the specific voltage of your battery. Mastering these physical connections through proper soldering and smart component layout is the difference between a successful maiden flight and a costly electrical short on the workbench.
Prime for Young Adults — 6 Months Free
Exclusive Offer Amazon Prime for Young Adults, Students and 18–24s get six months of Prime free, then half price.
Start 6 Months Free As an Amazon Associate I earn from qualifying purchases.
This practical guide cuts through the fluff to focus on the technical execution of your build. Whether you are aiming for a nimble 5-inch FPV racer or a stable long-range cruiser, the physics of weight-to-thrust ratios and signal protocols remain the same. By building your own rig, you gain the ability to repair crashes instantly and tune your flight software for a truly customized experience that off-the-shelf models cannot replicate.
Core Components: Understanding Compatibility and Performance Ratings
Recommended Best Deal Products


Matching Motors and Propellers to Your Frame
The frame size dictates your maximum propeller diameter, which in turn determines your motor’s KV rating. For a standard 5-inch FPV build, you typically look for 2207 or 2306 motor sizes. If you are running a 6S LiPo battery (22.2V), you should aim for 1700KV to 1950KV motors to prevent overheating. Conversely, a 4S build (14.8V) requires higher KV motors, usually between 2400KV and 2700KV, to achieve the necessary RPM for lift.
- Propeller Pitch: Higher pitch (e.g., 5×4.5×3) provides more “grip” and speed but draws significantly more current from your ESCs.
- Mounting Patterns: Ensure your frame’s motor arm holes match your motor’s base. Most 5-inch frames use a 16x16mm or 19x19mm bolt pattern.
- Stator Size: The first two digits (e.g., “22”) are the width, and the second two (e.g., “07”) are the height. Taller stators often provide more top-end power, while wider stators offer better low-end torque.
The Power Stack: FC and ESC Synergy
Modern builds often use a “stack” where the Flight Controller sits directly on top of a 4-in-1 ESC. You must ensure the ESC’s continuous current rating exceeds the maximum draw of your motors at full throttle. For most modern racing or freestyle builds, a 45A to 60A ESC is the industry standard to provide a safe overhead margin.
- Protocol Compatibility: Ensure your ESC supports DShot600 or DShot1200 for the lowest latency communication with the Flight Controller.
- Mounting Dimensions: Check if your frame supports 30.5×30.5mm stacks or the smaller 20x20mm “mini” stacks.
- Receiver Protocols: Match your Radio Receiver (Rx) to your transmitter. ExpressLRS (ELRS) is currently the gold standard for range and refresh rates, requiring a dedicated UART port on your FC.
From Start to Finish: Custom FPV Drone Building Explained
Building your own drone from scratch is one of the most rewarding experiences in the world of hobbyist electronics and aviation. Rather than buying a pre-assembled “toy,” building a custom FPV (First Person View) quadcopter allows you to understand every solder joint and signal wire, making repairs and upgrades significantly easier. This guide focuses on building a standard 5-inch freestyle drone, a versatile platform known for its durability and performance. Following these steps carefully is crucial because a single loose wire or a reversed motor can result in an expensive “flyaway” or a literal fire during your first power-up. By the end of this walkthrough, you will have moved from a pile of components to a fully functional high-performance aircraft.
Step 1: Component Selection and Planning
What you need: A 5-inch carbon fiber frame, four brushless motors (2306 or 2207 size, 2400KV for 4S or 1700KV for 6S), a “Stack” (Flight Controller + 4-in-1 ESC), FPV camera, Video Transmitter (VTX), Radio Receiver (RX), 5-inch propellers, and a LiPo battery.
Instructions: Before touching a screwdriver, you must ensure your parts are compatible. Choose your battery voltage first; 4S (14.8V) is beginner-friendly, while 6S (22.2V) offers more power with less voltage sag. Match your motor KV to this voltage—higher KV for lower voltage. Ensure your Flight Controller (FC) mounting pattern (usually 30.5×30.5mm or 20x20mm) matches the holes in your frame. Lay out your components on a clean workspace and plan the “stack” height. You need enough clearance between the Electronic Speed Controller (ESC) and the FC to prevent electrical interference. Verify that your radio receiver uses the same protocol as your transmitter (e.g., ELRS, Crossfire, or FrSky). Mapping out your build on paper before soldering will prevent the common mistake of running wires that are too short to reach their destination.
Pro Tip: Stick to the “ExpressLRS” (ELRS) protocol for your radio link. It is open-source, offers incredible range, and is currently the industry standard for reliability and latency.
Prime for Young Adults — 6 Months Free
Exclusive Offer Amazon Prime for Young Adults, Students and 18–24s get six months of Prime free, then half price.
Start 6 Months Free As an Amazon Associate I earn from qualifying purchases.Step 2: Frame Assembly and Motor Mounting
What you need: Hex driver set (1.5mm, 2.0mm, 2.5mm), blue threadlocker (Loctite 242), and the carbon fiber frame kit.
Instructions: Start by assembling the base plate and arms of the frame. Modern “X” or “Deadcat” frames usually have individual arms bolted to a main chassis. Apply a tiny drop of blue threadlocker to every metal-to-metal screw; the high-frequency vibrations of drone motors will eventually loosen any screw not secured with adhesive. Once the base is rigid, mount your four brushless motors to the ends of the arms. When choosing your screws, ensure they are long enough to grip the motor base but short enough that they do not touch the copper windings inside the motor. If a screw touches the windings, it will cause a short circuit and likely destroy your ESC the moment you plug in a battery. Tighten them in a star pattern to ensure even pressure across the carbon fiber.
Pro Tip: Use “motor wire shields” or even strips of old broken propellers taped over the motor wires on the arms. This prevents the spinning propellers from cutting your wires during a crash.
Step 3: Preparing the ESC and Tinning Pads
What you need: Soldering iron (set to 350-400°C), 60/40 leaded solder, flux pen, and a “third hand” soldering tool.
Instructions: The 4-in-1 ESC is the heart of your power system. Mount it in the center of the frame using the provided rubber gummies to reduce vibration. Before connecting wires, “tin” every pad on the ESC. Tinning involves applying a small amount of solder to the flat copper pads to create a shiny bead. Apply flux to the pad first, touch the iron to the copper for 2 seconds, and then feed the solder. Repeat this for the motor pads (three per motor) and the main battery leads. Cut your motor wires to length, leaving about 5mm of slack for arm flex, strip 2mm of insulation, and tin the wire tips as well. Soldering a pre-tinned wire to a pre-tinned pad creates a much stronger bond with less heat exposure to the sensitive chips on the board.
Pro Tip: When soldering the large XT60 battery leads, you need more heat. If your iron is struggling, use a larger chisel tip to increase the surface area contact and prevent “cold solder joints” that look dull and grainy.
Step 4: Flight Controller Installation and Wiring
What you need: The 8-pin wiring harness (included with the stack), tweezers, and the Flight Controller (FC).
Prime for Young Adults — 6 Months Free
Exclusive Offer Amazon Prime for Young Adults, Students and 18–24s get six months of Prime free, then half price.
Start 6 Months Free As an Amazon Associate I earn from qualifying purchases.Instructions: Most modern stacks use a plug-and-play wiring harness between the ESC and FC. Connect this firmly, ensuring the pins are aligned. Note the orientation arrow printed on the FC; it must point toward the front of the drone. If you must mount it sideways due to space constraints, you will need to adjust the “Board Alignment” in software later. Now, solder your peripheral components to the FC. The FPV camera requires 5V, Ground, and Video-In. The VTX requires Power (often 9V or Battery Voltage), Ground, Video-Out, and a SmartAudio or Tramp wire for remote control. The Receiver (RX) needs 5V, Ground, and a TX/RX pair on a spare UART port. Keep your wiring neat and use zip ties to secure wires away from the stack to ensure clean airflow for cooling.
Pro Tip: Always double-check the “pinout” diagram provided by the manufacturer. Even if the plugs fit, the wire order for 5V and Ground can differ between brands, which can instantly fry your electronics.
Step 5: The FPV System and Video Setup
What you need: FPV Camera, Video Transmitter (VTX), and a compatible antenna.
Instructions: Mount the FPV camera in the front of the frame using the provided brackets. Most pilots prefer a 25-30 degree upward tilt so they can see the horizon while flying forward. Connect the camera’s signal wire to the “Video In” (VIN) pad on the FC and the VTX’s signal wire to the “Video Out” (VOUT) pad. This allows the Flight Controller to overlay flight data (like battery voltage and timer) onto your video feed using the On-Screen Display (OSD) chip. Secure the VTX antenna at the rear of the drone, ensuring it is away from the carbon fiber arms, as carbon blocks radio signals. Never power on the drone without the VTX antenna attached; the energy that should be transmitted will reflect back into the VTX, causing it to overheat and burn out within seconds.
Pro Tip: If you are using an analog system, use a low-ESR capacitor (usually 35V 1000uF) soldered directly to the main battery pads. This filters out electrical noise from the motors, resulting in a much cleaner video feed.
Step 6: Software Configuration in Betaflight
What you need: A Micro-USB or USB-C data cable and a computer with Betaflight Configurator installed.
Instructions: Remove your propellers (safety first!) and connect the drone to your computer. In Betaflight, start with the “Setup” tab and calibrate the accelerometer while the drone is on a level surface. Move to the “Ports” tab and enable “Serial RX” for the UART port where you soldered your receiver. In the “Configuration” tab, select your receiver protocol (e.g., CRSF for ELRS). Go to the “Motors” tab, plug in your battery, and spin the motors one by one to ensure they are spinning in the correct direction (props-in or props-out). If a motor is spinning the wrong way, you can reverse it in the ESC bitwriter or simply swap any two of the three motor wires. Finally, set up your “Modes” tab to assign a switch on your radio for “Arming” and another for “Beeper” or “Flight Mode.”
Pro Tip: Use the “Presets” tab in Betaflight 4.3 or newer. There are community-tuned presets for specific builds that can make your drone fly smoothly without you needing to understand complex PID tuning.
Step 7: Final Assembly and Bench Test
What you need: Multimeter, smoke stopper, and the top plate of the frame.
Instructions: Once the software is configured, perform a “continuity test” with a multimeter. Set it to the beep setting and touch the positive and negative XT60 leads. If it beeps, you have a short circuit that must be fixed. If it stays silent, plug in a “Smoke Stopper” (a current-limiting device) before your first battery connection. This device will trip if there is a fault, saving your components. If the LEDs light up and the ESCs beep their startup chime, you are ready for final assembly. Bolt on the top plate, secure the battery strap, and ensure no wires are touching the top plate screws. Give the drone a “shake test” to ensure nothing is loose. Finally, attach your propellers with the nylon-insert lock nuts, ensuring the “leading edge” of the prop faces the direction of motor rotation.
Pro Tip: Check your prop nuts after the first three minutes of flight. New props can sometimes compress slightly, leading to a loose nut that can fly off mid-air.
✅ Final Checklist
- Visual inspection: No stray solder balls or exposed wire strands touching the frame.
- Continuity check: Multimeter confirms no short between the positive and negative battery leads.
- Propeller direction: All four propellers are installed in the correct orientation matching the software.
- Failsafe check: With the drone connected to Betaflight (no props!), turning off the radio makes the “Arm” indicator turn off.
- Antenna security: Both the RX and VTX antennas are securely fastened and away from prop paths.
Important Notes:
- Safety Warning: Always remove propellers when working on the drone while the battery is plugged in. A motor spinning at full speed can cause severe injury.
- Legal Compliance: Check your local aviation authority (FAA in the US, CAA in the UK) for registration and Remote ID requirements before flying outdoors.
- Seek Help: If you cannot get a video signal or the motors stutter, visit online communities like “Into theFPV” or “Discord” servers dedicated to FPV for troubleshooting.
- Estimated Time: 4 to 8 hours for a first-time builder.
- Cost Range: $300 – $600 USD (excluding radio, goggles, and batteries).
Essential Tooling and Workshop Setup for Drone Assembly
The Soldering Station: Your Most Important Investment
You cannot build a reliable drone with a cheap, non-adjustable soldering iron. You need a station that can maintain a consistent 350°C to 400°C (660°F to 750°F) to flow solder onto thick battery pads quickly without damaging delicate chips. A “chisel” tip is best for large power leads, while a fine “conical” tip is required for small signal wires like those for your receiver or camera.
- Solder Selection: Use 63/37 leaded solder with a rosin core. It has a lower melting point and transitions from liquid to solid instantly, preventing “cold” joints.
- Flux is Mandatory: Always apply extra flux paste to your pads before soldering. Flux removes oxidation and ensures the solder “wicks” into the wire strands for a vibration-resistant bond.
- Helping Hands: Use a weighted base with adjustable clips to hold your flight controller in place while you navigate tight soldering angles.
Precision Hand Tools and Safety Bench Gear
Drone hardware uses metric hex screws, typically 1.5mm, 2.0mm, and 2.5mm. Invest in high-quality drivers with hardened steel tips; cheap L-wrenches will quickly strip the shallow heads of titanium or aluminum screws used in lightweight frames. You will also need a digital multimeter to check for continuity between the positive and negative terminals before applying power.
- The Smoke Stopper: This is a current-limiting device you plug in between your battery and drone for the first power-up. If there is a short circuit, the stopper trips, saving your $100 stack from instant combustion.
- Wire Strippers: Use 20-30 AWG precision strippers. Standard hardware store strippers often nick the delicate silicone-coated copper strands, leading to wire fatigue and mid-air failures.
- Heat Shrink and Zip Ties: Essential for cable management. Loose wires can be sucked into propellers, causing an immediate crash. Always secure your motor wires to the arms with electrical tape or zip ties.
Comparing FPV vs. Cinematic Build Configurations
Choosing your build configuration is the most critical decision you’ll make after selecting your core components. The design path you take dictates how the drone handles, how long it stays in the air, and what kind of footage you can capture. While both styles use similar electronics, the specific hardware choices differ significantly based on your ultimate flight goals.
Agility and Speed: The FPV Freestyle Build
FPV (First Person View) builds are designed for raw performance, acrobatic maneuvers, and durability. Since these drones are intended for high-speed flight and potential impacts, the focus is on a rigid, minimalist carbon fiber frame. You aren’t just building a drone; you are building a racing machine that prioritizes low latency and high power-to-weight ratios. These builds often use smaller, lighter batteries to keep the craft nimble.
- Motors: Typically high KV motors (e.g., 2400KV for 4S or 1750KV for 6S) for explosive bursts of speed.
- Frame Style: Compact “X” frames or “Stretched X” layouts are popular for their balanced center of gravity and predictable flight characteristics.
- Video System: Low-latency digital systems like DJI O3 or analog setups are preferred to allow the pilot to react to obstacles in real-time.
Stability and Quality: The Cinematic Build
Cinematic builds, often referred to as “Cinewhoops” or long-range cruisers, prioritize “smoothness” over “snappiness.” These drones are designed to carry heavy payloads, such as a full-sized GoPro or even a professional mirrorless camera. The goal here is to achieve stable flight paths that look like they were filmed on a mechanical gimbal or a dolly track. Stability is more important than the ability to do a triple-backflip.
- Flight Controllers: These usually include GPS modules for “Position Hold” and “Return to Home” (RTH) safety features.
- Propellers: Larger, lower-pitch props are often used to provide a more efficient lift, resulting in longer flight times and a quieter sound profile.
- Ducts and Guards: Many cinematic builds (Cinewhoops) use integrated ducts around the propellers, allowing the drone to fly safely near people or indoors.
Safety Protocols and Pre-Flight Calibration Requirements
Before you ever arm your motors for the first time, you must ensure the drone is “digitally sane.” A custom-built drone does not come with the pre-programmed safety net of a consumer-grade retail drone. If your sensors aren’t calibrated correctly, the drone might fly away, spin out of control, or flip instantly upon takeoff. Proper preparation is the difference between a successful maiden flight and a pile of broken parts.
The Essential Software Calibration Checklist
Calibration is the process of teaching your drone’s flight controller (the “brain”) how to interpret its environment. Skipping these steps is the number one cause of maiden-flight crashes. Most modern builders use open-source software like Betaflight or INAV to handle these configurations via a USB connection to a computer.
- Accelerometer Calibration: This tells the drone what “perfectly level” looks like. If this is off by even a few degrees, the drone will constantly drift in one direction.
- Compass/Magnetometer: Crucial for GPS-enabled builds. Without a calibrated compass, the drone won’t know which way it is facing, which can lead to a dangerous “toilet bowl” effect where it spirals out of control.
- ESC Calibration: This ensures all four motors start spinning at exactly the same voltage and speed, preventing the drone from tipping over during takeoff.
Hardware Safety and Bench Testing
Custom drones use Lithium Polymer (LiPo) batteries, which are incredibly powerful but can be hazardous if mishandled. Safety starts on the workbench long before you reach the flying field. Always perform a “smoke test” using a current-limiting device when first plugging in your battery to prevent frying your electronics if there is a short circuit in your soldering.
- Propeller Direction: Double-check that your propellers are installed in the correct orientation (Inward vs. Outward) as defined in your software.
- Fail-safe Configuration: Always test that your drone is set to “Drop” or “Land” immediately if the radio signal is lost.
- Radio Range Test: Perform a low-power range test to ensure your receiver and transmitter are communicating clearly without interference.
Conclusion
Building a drone is a deeply rewarding blend of engineering, electronics, and pilot skill. By choosing the right configuration—whether it’s a nimble FPV racer or a steady cinematic platform—and prioritizing safety through meticulous calibration, you set yourself up for a successful flying experience. While the learning curve can be steep, the ability to repair and customize your own aircraft is a superpower that most hobbyists cherish.
Your next step is to head to your workbench, verify your components, and begin the assembly process. Don’t be afraid to consult community forums or local flight clubs if you hit a snag. Grab your soldering iron, take your time, and start building today—the sky is waiting!
❓ Frequently Asked Questions
How do I choose the right frame size for my build?
Frame size is measured diagonally from motor to motor and dictates the maximum propeller size you can use. For a standard freestyle or racing build, a 5-inch frame is the most versatile and common choice for beginners and pros alike.
What is the difference between an AIO board and a Stack?
An All-in-One (AIO) board combines the flight controller and ESCs into one PCB to save space and weight. A stack uses separate boards connected by pins or wires, allowing you to replace just the FC or ESC if one component fails.
Why is soldering skill so critical in drone building?
Drones experience extreme vibrations and high-impact crashes, meaning weak solder joints will eventually fail. Learning to create smooth, shiny, and concave joints ensures the electrical path remains secure under the physical stress of flight.
How do I ensure my radio transmitter is compatible with my drone?
You must match the communication protocol of your receiver (like ELRS or Crossfire) with the internal or external module of your radio transmitter. ExpressLRS is currently the most popular choice for its long-range and low-latency performance.
What is the purpose of an electrolytic capacitor in a drone build?
Capacitors are soldered to the main power leads to filter out electrical noise generated by the motors. This results in cleaner video signals and protects sensitive electronics from voltage spikes during rapid motor braking.
Is it cheaper to build a drone or buy a pre-built model?
While DIY might have a higher upfront cost due to tool purchases, it is cheaper in the long run. Building your own allows you to repair individual components after a crash rather than replacing an entire proprietary unit.