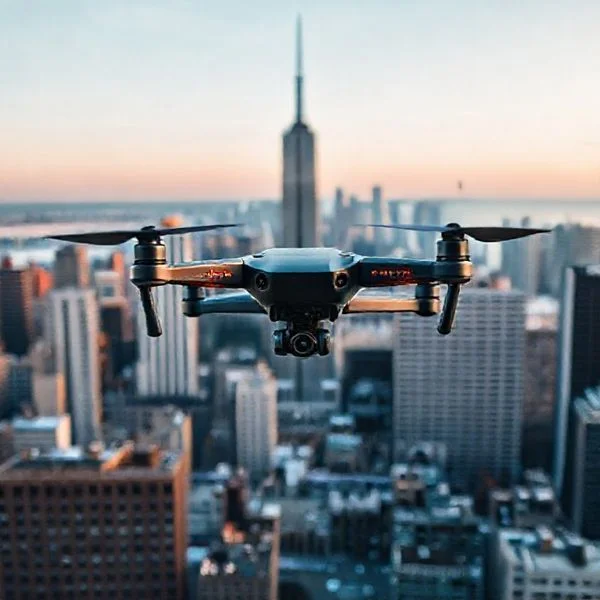
To fly a drone effectively, you must master the Mode 2 transmitter configuration, which uses the left stick for altitude and rotation and the right stick for directional movement. Understanding the relationship between joystick input and drone response is the foundation of safe flight. Always perform a pre-flight calibration to ensure the flight controller accurately interprets your remote commands.
🎯 Key Takeaways
- Mode 2 is the industry standard for most consumer drone remote controls.
- The left joystick controls altitude (throttle) and horizontal rotation (yaw).
- The right joystick manages forward/backward tilt (pitch) and side-to-side movement (roll).
- Small, gradual stick movements prevent overcorrection and maintain flight stability.
- Calibrate the compass and gyro before every flight to ensure control accuracy.
Flying a drone effectively requires mastering the four primary axes of movement: throttle, yaw, pitch, and roll. These inputs are sent via two gimbals on your remote controller, allowing you to position the aircraft anywhere in a 3D space. By understanding exactly how these sticks interact with the internal flight controller, you gain the precision needed for steady hovering and safe navigation.
Prime for Young Adults — 6 Months Free
Exclusive Offer Amazon Prime for Young Adults, Students and 18–24s get six months of Prime free, then half price.
Start 6 Months Free As an Amazon Associate I earn from qualifying purchases.
Practical mastery of these controls matters because it transforms your flying from reactive to proactive. Instead of panic-correcting when the drone drifts, you develop the muscle memory to compensate instantly. This guide breaks down the physical mechanics of the transmitter, ensuring you understand exactly what happens to the drone the moment you move your thumbs.
Decoding the Mode 2 Transmitter Standard
Recommended Best Deal Products


Before you arm your motors, you must understand the layout of your remote. Most modern drones utilize the Mode 2 configuration as the global standard. In this setup, the vertical and horizontal movements are split across two joysticks to mimic the controls of a real helicopter. Understanding this layout is essential because it dictates which hand manages your altitude and which hand manages your direction.
The Left Stick: Altitude and Rotation
The left stick is responsible for your vertical movement and your heading. Unlike the right stick, the vertical axis on many drone controllers does not “spring” back to the center; it stays where you leave it to maintain a specific power level. This stick controls:
- Throttle (Up/Down): Moving the stick forward increases the RPM of all motors, causing the drone to climb. Pulling it back decreases RPM, causing the drone to descend.
- Yaw (Left/Right): Moving the stick to the left or right rotates the drone on its center axis. This changes the direction the “nose” or camera is pointing without moving the drone’s physical location.
The Right Stick: Directional Translation
The right stick manages the “translation” of the drone through the air. This stick is spring-loaded to return to the center, which tells the drone to level out and stop moving horizontally. It controls:
- Pitch (Up/Down): Pushing the stick forward tilts the drone down in the front, moving it forward. Pulling back tilts the drone backward, moving it toward you.
- Roll (Left/Right): Moving the stick sideways tilts the drone to the left or right, causing it to “strafe” or slide sideways through the air.
The Ultimate Drone Flight Walkthrough
Learning to fly a drone is a thrilling gateway into aerial photography and high-tech exploration. However, the excitement of takeoff is often met with the anxiety of a potential crash. This guide is designed to transform a beginner into a confident pilot by breaking down the complexities of remote control operation, flight physics, and safety protocols. Following these steps systematically is essential because a single missed calibration or a misunderstood joystick movement can lead to equipment damage or safety hazards. By the end of this walkthrough, you will have the practical knowledge to navigate the skies with precision and poise.
Step 1: Scouting the Perfect Flight Zone
What you need: A smartphone with a situational awareness app (like B4UFLY or DJI Fly), clear skies, and a wide-open outdoor space.
Instructions: Before you even power on your drone, you must select an appropriate environment. Locate a flat, open area at least the size of a football field, away from trees, power lines, and buildings. Use an airspace app to ensure you are not in a No-Fly Zone (NFZ) or near a restricted airport. Check the weather forecast specifically for “wind gusts”; while the surface wind might feel calm, it is often much stronger 100 feet in the air. For beginners, winds should be below 10 mph. Finally, ensure your chosen spot has no large metal structures nearby, as these can interfere with your drone’s internal compass.
Prime for Young Adults — 6 Months Free
Exclusive Offer Amazon Prime for Young Adults, Students and 18–24s get six months of Prime free, then half price.
Start 6 Months Free As an Amazon Associate I earn from qualifying purchases.Pro Tip: Early morning or “Golden Hour” shortly before sunset usually offers the calmest air and best lighting for your first flight.
Step 2: Pre-Flight Hardware Inspection
What you need: Fully charged drone batteries, remote control, and a set of propellers.
Instructions: Safety begins on the ground. Carefully inspect each propeller for hairline cracks, chips, or warping; a damaged prop can fail mid-air due to centrifugal force. Ensure the battery is pushed into the drone until you hear a “click,” confirming it is locked in place. Remove the plastic gimbal protector from the camera—forgetting this can cause the gimbal motors to overheat and burn out. Check that your micro-SD card is inserted and has enough space for recording. Finally, verify that your mobile device is securely clamped into the remote control and that the connecting cable is firmly seated.
Pro Tip: Always carry a microfiber cloth to wipe the camera lens and sensors before takeoff to ensure clear footage and accurate obstacle avoidance.
Step 3: Establishing the Digital Connection
What you need: Drone, remote control, and a smartphone or tablet with the manufacturer’s flight app installed.
Instructions: Follow a strict power-on sequence: turn on the remote control first, then the drone. This ensures the drone has a signal to latch onto the moment it wakes up. Open the flight app on your mobile device and wait for the “linked” status. Look for the GPS icon on your screen; do not take off until you have at least 10 to 12 satellites locked. This “GPS Lock” is what allows the drone to hover in place and return home if the signal is lost. Check the battery voltage levels in the app to ensure all cells are balanced and healthy.
Pro Tip: Turn your phone to “Do Not Disturb” or “Airplane Mode” (with Wi-Fi/Bluetooth on) to prevent incoming calls from interrupting your flight video feed.
Prime for Young Adults — 6 Months Free
Exclusive Offer Amazon Prime for Young Adults, Students and 18–24s get six months of Prime free, then half price.
Start 6 Months Free As an Amazon Associate I earn from qualifying purchases.Step 4: Compass and IMU Calibration
What you need: The drone and the flight app interface.
Instructions: If the app prompts you, or if you are in a new location more than 20 miles from your last flight, you must calibrate the compass. This usually involves holding the drone flat and rotating it 360 degrees, then holding it vertically and rotating it again. This process helps the drone understand its orientation relative to the Earth’s magnetic field. Similarly, ensure the Inertial Measurement Unit (IMU) is calibrated, which monitors the drone’s tilt and acceleration. Ensure the drone is on a perfectly level surface during this process to avoid “drifting” during flight. Calibration prevents “toilet bowl effect,” where the drone circles uncontrollably.
Pro Tip: Move at least 10 feet away from your car or any reinforced concrete (which contains rebar) when calibrating, as the metal will distort the compass reading.
Step 5: Mastering the Joystick Logic
What you need: Remote control (Mode 2 configuration).
Instructions: Most drones use “Mode 2” as the default. The Left Stick controls Throttle (up moves the drone higher, down moves it lower) and Yaw (rotating the drone left or right on its axis). The Right Stick controls Pitch (pushing forward moves the drone away from you, pulling back brings it toward you) and Roll (tilting the drone to fly sideways left or right). Before taking off, visualize these movements. Remember: the controls are relative to the “nose” or camera of the drone. If the drone is facing you, the right and left directions on the stick will appear reversed from your perspective.
Pro Tip: Think of the sticks as sensitive instruments; use small, “pinching” movements with your thumb and index finger rather than pushing with just your thumbs for better precision.
Step 6: The First Takeoff and Hover Test
What you need: A flat, dry surface or a dedicated landing pad.
Instructions: Place the drone on the ground with the camera facing away from you. This ensures your control inputs match the drone’s movement. Use the “Auto-Takeoff” button in the app or push both joysticks to the bottom inner corners to start the motors. Gently push the left stick up until the drone rises to about 6-10 feet (eye level). Let go of the sticks and watch the drone for 30 seconds. It should stay perfectly still in the air. This “hover test” confirms that the GPS and sensors are working correctly. If the drone wobbles or drifts, land immediately and re-calibrate.
Pro Tip: If the drone starts to behave erratically, simply let go of both sticks; the drone is designed to automatically stabilize and hover when no input is detected.
Step 7: Basic Flight Maneuvers and Safety Settings
What you need: Remote control and a clear line of sight.
Instructions: While hovering at eye level, practice “square” patterns. Fly forward 20 feet, roll right 20 feet, pull back 20 feet, and roll left 20 feet. Next, practice “Yawing” (rotating) while moving to get a feel for how the perspective changes. While in the air, go into your app settings and set the “Return to Home (RTH) Altitude.” Set this to roughly 150 feet or high enough to clear the tallest obstacle in your area. This ensures that if the drone loses connection, it will rise to that safe height before flying back to its takeoff point.
Pro Tip: Always keep the drone within your visual line of sight. Looking only at your phone screen (FPV) can lead to depth perception errors and collisions.
Step 8: Landing and Post-Flight Care
What you need: Landing pad and the remote control.
Instructions: When your battery hits 30%, it is time to land. Bring the drone back over your landing pad. Slowly pull the left stick down to descend. Once the drone is about 2 feet above the ground, the downward sensors will kick in. Keep holding the left stick down firmly until the drone touches the ground and the motors stop spinning completely. Power off the drone first, then the remote control. Remove the battery and check it for excessive heat. Replace the gimbal guard immediately and pack the drone back into its case to protect the delicate sensors.
Pro Tip: If landing on tall grass or sand, use a portable landing pad to prevent debris from being sucked into the motors or scratching the camera lens.
✅ Final Checklist
- Verified that the Home Point was updated on the map before moving more than 50 feet away.
- Confirmed that the “Return to Home” altitude is set higher than any nearby trees or structures.
- Checked that all propeller blades are securely tightened and free of debris.
- Ensured the gimbal guard was removed before powering on the drone.
- Monitored the battery level and started the landing process at or before 25-30% remaining power.
Important Notes:
- Safety First: Never fly over people, moving vehicles, or near emergency response efforts (like wildfires or accidents). This is illegal in many jurisdictions.
- Seek Professional Help: If your drone experiences a “Flyaway” (uncontrolled flight) or a hard crash, contact the manufacturer for a log analysis before attempting to fly again.
- Estimated Time and Cost: Learning basic flight takes about 1-2 hours of practice. Initial costs for a beginner GPS drone range from $300 to $800, plus $50-$100 for extra batteries and a landing pad.
Physics of Flight: How Joysticks Manipulate Propeller Speed
Recommended Best Deal Products


Every movement you make on the transmitter is a command for the drone’s flight controller to change the speed of specific motors. Drones do not have rudders or flaps; they rely entirely on variable RPM (Revolutions Per Minute). When you move a stick, you are essentially telling the drone to create an imbalance of lift or torque to force the craft into a specific direction.
Translating Input to Motor RPM
To move forward (Pitch), the flight controller receives your signal and increases the speed of the two rear motors. This extra lift at the back tilts the drone forward. Because the thrust is now angled, some of that upward force pushes the drone across the ground. Similarly, to “Roll” to the right, the two motors on the left side of the craft spin faster than the motors on the right, pushing the drone sideways.
The Mechanics of Yaw and Throttle
Throttle is the simplest mechanic to understand: it is the uniform increase of power to all four motors. However, Yaw (rotation) is more complex. Drones have two propellers spinning clockwise and two spinning counter-clockwise to cancel out torque. When you move the left stick to rotate left, the drone slows down the clockwise-spinning motors and speeds up the counter-clockwise ones. This creates a rotational force that spins the body of the drone without changing its altitude or horizontal position.
- Hovering: All four motors produce thrust equal to the weight of the drone.
- Climbing: All four motors produce thrust greater than the weight of the drone.
- Banking: One side of the drone produces more lift than the other, creating a lateral slide.
Mastering these physics is the difference between “driving” a drone and “flying” it. When you understand that every directional move is a result of motor speed imbalances, you can better predict how wind or momentum will affect your flight path.
Headless Mode vs. Standard Orientation Dynamics
One of the biggest hurdles for any pilot using a remote control is maintaining a sense of direction. In standard orientation, the drone has a “nose” or a front end. If the drone is facing away from you, pushing the right stick forward moves it away. However, if the drone rotates 180 degrees to face you, those controls feel inverted; pushing the stick forward brings the drone closer. This spatial disorientation is the leading cause of crashes for novice pilots.
The Psychology of “Pilot-First” Control
Headless Mode is a software-assisted feature designed to solve this orientation puzzle. When activated, the drone ignores which way its “nose” is pointing. Instead, it uses the remote control’s initial positioning as a reference point. If you push the stick left, the drone moves left relative to your position on the ground, regardless of its own rotation. While this is incredibly helpful for beginners, it can become a crutch that hinders your development of advanced maneuvers.
- Visual Indicators: Always look for LED light colors on your drone. Typically, red lights indicate the rear, while white or green lights indicate the front.
- Standard Practice: Use standard orientation for long-term skill building. It is essential for First Person View (FPV) flying where you see what the drone sees.
- Emergency Recovery: If you lose track of which way the drone is facing at a distance, toggling Headless Mode can help you pull the craft back toward your location safely.
When to Switch Between Modes
Standard mode is superior for cinematography and precise pathing because it allows for “banking” turns. Headless mode is best reserved for situations with low visibility or when you are focused entirely on the remote sticks rather than the craft’s physical heading. For example, if you are flying a small toy drone in a backyard, headless mode allows for a much more casual “pick up and play” experience.
Critical Factors Affecting Signal Strength and Control Latency
Recommended Best Deal Products


The relationship between your remote control and the drone is bridged by radio frequencies, usually 2.4GHz or 5.8GHz. Control latency is the split-second delay between you moving a gimbal on the remote and the drone’s motors responding. Even a delay of a few milliseconds can be the difference between a narrow miss and a collision with a tree branch.
The Invisible Battle of Radio Frequencies
In urban environments, signal strength is constantly under siege. Wi-Fi routers, cell towers, and even large metal structures can cause Electromagnetic Interference (EMI). When the signal weakens, the remote’s commands may become “mushy” or unresponsive. High-end remotes use frequency-hopping technology to find the cleanest channel, but pilots must still remain vigilant about their surroundings.
- Line of Sight: Physical obstacles like thick concrete walls or dense foliage are signal killers. Always maintain a clear “visual line of sight” to ensure the strongest connection.
- Antenna Positioning: Never point the tips of your remote’s antennas directly at the drone. Radio waves radiate from the sides of the antenna; for the best signal, the flat side of the antenna should face the craft.
- Refresh Rates: Ensure your remote and drone firmware are updated. Manufacturers often release patches that optimize signal processing and reduce input lag.
Understanding Control Latency Risks
Latency isn’t just about signal distance; it’s also about processing power. If your remote is tethered to a smartphone or tablet running a heavy app, you might experience “app lag.” This makes the video feed stutter, which often leads pilots to over-correct their stick movements. To maintain tight control, keep your mobile device dedicated to the flight app and close all background processes.
Conclusion
Mastering drone maneuvers is about more than just moving sticks; it is about understanding the invisible dynamics of orientation and signal health. By distinguishing between standard and headless modes, you gain the flexibility to fly in various environments with confidence. Simultaneously, staying mindful of signal interference and latency ensures that your drone responds precisely when it matters most. These core concepts form the foundation of a safe and rewarding piloting experience.
Your next steps: Head to a wide-open field and practice rotating the drone while maintaining a steady hover in standard mode. Once you feel comfortable, experiment with the limits of your remote’s signal range in a low-interference area.
Ready to take flight? Grab your remote, check your surroundings, and start honing those pilot reflexes today!
❓ Frequently Asked Questions
Why is Mode 2 preferred over Mode 1 or Mode 3?
Mode 2 is the industry standard because it mimics the control layout of real aircraft, making it more intuitive for most pilots to learn. By separating the primary directional controls to the right hand, it allows for more precise maneuvering during complex flights.
How does ‘Headless Mode’ simplify remote control for beginners?
Headless Mode removes the need to track the drone’s physical nose orientation relative to the pilot. When active, moving the right stick forward will always move the drone away from you, regardless of which way it is actually facing.
What are the primary functions of the left joystick?
The left stick handles ‘Throttle’ and ‘Yaw.’ Pushing it up or down changes the propeller speed to control altitude, while moving it left or right rotates the drone on its vertical axis without changing its position.
What are the primary functions of the right joystick?
Known as the directional stick, it controls ‘Pitch’ (tilting the drone forward or backward to move) and ‘Roll’ (tilting the drone left or right). These movements are essential for navigating through three-dimensional space.
Why is stick sensitivity or ‘Expo’ important for new pilots?
Sensitivity settings determine how much the drone reacts to stick movement. Beginners should use lower sensitivity to prevent ‘over-correcting,’ which often leads to crashes during the first few flights.
How do trim buttons assist in manual remote operation?
If a drone drifts in one direction despite no stick input, trim buttons allow you to apply counter-adjustments. This fine-tunes the motor output to achieve a stable hover when the joysticks are centered.