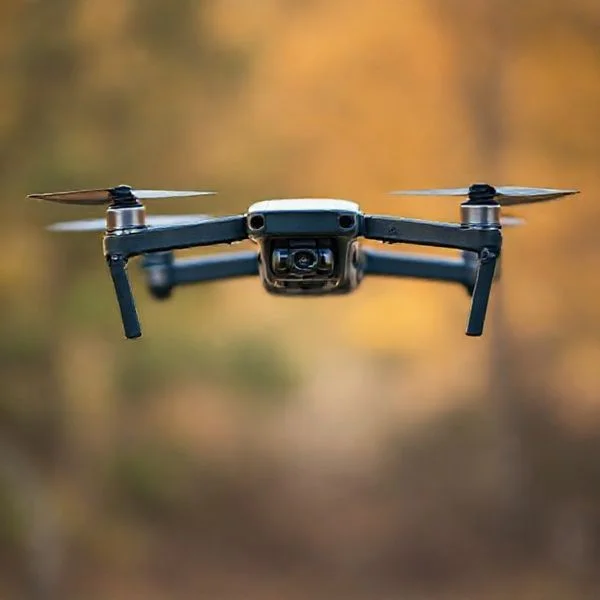
To fly a drone in Rust, you must pair a unique Drone ID with a powered Computer Station. Successful operation depends on mastering the WASD and mouse-look flight scheme while remaining within the drone’s maximum signal radius.
🎯 Key Takeaways
- Takeaway 1:Assign a unique ID before deployment to prevent hijacking.
- Takeaway 2:Use Shift for ascent and Ctrl for descent controls.
- Takeaway 3:Mouse movements dictate pitch and yaw for camera precision.
- Takeaway 4:Stay within the 250-meter range to avoid signal loss.
- Takeaway 5:Ensure the Computer Station has at least 5 units of power.
Flying a drone in Rust is the ultimate way to scout enemy compounds or defend your perimeter without risking your gear. To get airborne, you must pair a Small Drone to a Computer Station using a specific Identifier (ID). Once the ID is saved into the station’s directory, you simply select it and click “Mount” to transition into the drone’s camera view. Unlike other vehicles, drones offer a unique physics-based flight model that requires a steady hand and a clear understanding of how pitch and roll interact with altitude.
Recommended Best Deal Products


Mastering these controls allows you to hover silently over high-tier monuments or spot raiders before they reach your walls. Because the drone is fragile and easily destroyed by small arms fire, your ability to maneuver through tight spaces is your best defense. This guide breaks down the technical setup and the specific keybinds you need to master to go from a crashed hobbyist to an expert aerial surveillance operator.
Essential Hardware for Remote Aerial Surveillance
Before you can touch the controls, you must establish a secure link between your hardware. The drone and the Computer Station operate on a frequency-based system defined by a custom naming convention. Without a correctly paired ID, the Computer Station will simply show a “No Signal” screen, leaving your drone grounded and vulnerable to anyone passing by.
Naming and Pairing Your Drone
The first step in the setup process is assigning a unique Identifier to your drone. When you have a Small Drone in your inventory, you must deploy it on a flat surface. Once placed, look at the drone and press your Interact Key (Default: E) to bring up the ID menu. This ID is a case-sensitive string of text that acts as your private frequency. If you choose a common name like “DRONE1,” other players with Computer Stations can potentially guess your ID and hijack your feed. Use a complex, unique string to ensure your connection remains private.
- Step 1: Place the drone on the ground or a rooftop.
- Step 2: Hold E and select Set ID.
- Step 3: Enter a unique name (e.g., Scout_77_Alpha) and save it.
- Step 4: Head to your Computer Station and sit down.
- Step 5: Type the exact ID into the search bar on the right side of the screen and click Add.
The Computer Station Interface
The Computer Station is your hub for all remote operations. Once your drone’s ID is added to the list on the right, it will appear with a status indicator. If the drone is deployed and within range, the entry will be selectable. Clicking the drone’s name will provide a low-resolution preview. To take full control of the flight systems, you must click the Mount button at the bottom of the list. At this point, your character becomes stationary and vulnerable, so ensure your Computer Station is housed within a secure, armored room.
Everything You Need to Know About Mastering the Skies: Flying Drones in Rust
Drones in Rust are more than just toys; they are essential reconnaissance tools that can change the outcome of a raid or provide critical intelligence on a rival clan’s compound. Whether you are scouting the landscape for potential base locations or tracking an enemy’s movement during a firefight, knowing how to pilot these agile machines is a game-changing skill. This guide covers every aspect of drone flight, from the initial acquisition and technical setup to advanced aerial maneuvering and recovery tactics, ensuring you remain the “eye in the sky” without losing your expensive equipment to gravity or gunfire.
Step 1: Acquiring Your Drone and Essentials
What you need: 75 Scrap (if buying) or a Tier 2 Workbench, 1 Tech Trash, 2 High Quality Metal (if crafting).
Instructions: Before you can take to the skies, you need to obtain the drone itself. The most reliable way to get a Small Drone is by visiting the Outpost monument and purchasing one from the vending machines for 75 scrap. Alternatively, if you have found one and researched it, you can craft it at a Tier 2 Workbench. Along with the drone, you must have a Computer Station, which is the “cockpit” from which you will control the device. Ensure you have a stable base with a power source, such as a Large Battery connected to Solar Panels or a Wind Turbine, as the Computer Station requires constant electricity to operate.
Pro Tip: Always buy two drones if you have the scrap. They are fragile, and having a backup ready in your base ensures that if your first one is shot down during a raid, you can immediately get back into the air to provide Intel for your team.
Step 2: Setting Up the Computer Station
What you need: Computer Station, Wire Tool, a Power Source (minimum 5 units of power).
Instructions: Place your Computer Station in a secure, armored room within your base. It is vital that this room is protected, as you will be completely stationary and vulnerable while piloting. Use your Wire Tool to connect your power source to the “Power In” slot on the back of the Computer Station. Once powered, the screen will glow, indicating it is ready for use. It is highly recommended to place the station near a locker or chest containing your combat gear so you can quickly exit the pilot seat and defend your base if you hear someone approaching while you are distracted by the drone view.
Pro Tip: Place your Computer Station in a room without windows. If a raider sees you sitting at a station through a window, they can easily headshot you, leaving your base vulnerable and your drone useless.
Step 3: Registering Your Drone ID
What you need: The Drone, a unique alphanumeric name (ID).
Instructions: This is a crucial step that many players overlook. Before deploying the drone, you must give it a “Frequency” or “ID.” Hold the drone in your inventory and deploy it on the ground. Walk up to it and hold the “E” key to open the interaction menu. Select “Set ID” and type in a unique name, such as “BaseAlpha_01.” After setting the ID, pick the drone back up. Now, go to your Computer Station, sit down, and type that exact ID into the search bar on the right side of the screen. Click “Add.” This links that specific drone to your station. Without a unique ID, anyone who finds your drone can potentially take control of it.
Pro Tip: Never use simple IDs like “1234” or “drone.” Other players can guess these IDs at their own Computer Stations and “hijack” your camera feed to spy on you or see your base layout.
Step 4: Launching and Initial Takeoff
What you need: The registered Drone, an open outdoor area.
Instructions: To launch, you must place the drone on a flat, unobstructed surface outside your base. Roofs are the best location as they provide an immediate altitude advantage and keep the drone safe from ground-based melee attackers. Once the drone is placed, return to your Computer Station and mount it. Select your drone’s ID from the list and click “Control.” You will see the world through the drone’s camera. Press and hold the “Spacebar” to apply upward thrust. Do not hold it too long; a light tap is often enough to hover. Ensure you are clear of any nearby trees, power lines, or roof decor like windmills that could snag the propellers.
Pro Tip: Always check the durability of your drone before launch. A drone with 10% health will crash and break after the slightest bump against a wall, wasting your time and resources.
Step 5: Mastering Flight Controls and Tilt
What you need: WASD keys, Spacebar, Left Ctrl, and Mouse.
Instructions: Flying a drone in Rust uses a “tilt-to-move” mechanic. “W” tilts the drone forward to move ahead, “S” tilts it back to reverse, and “A” and “D” tilt it left and right for strafing. To gain altitude, hold “Spacebar”; to descend, hold “Left Ctrl.” The most important thing to remember is that the mouse controls the camera gimbal. As you move the mouse to look around, the drone will naturally follow the camera’s orientation. Smooth, incremental taps of the keys are better than holding them down, as the drone has significant momentum and can easily spiral out of control if you over-correct your movements.
Pro Tip: If you lose orientation, let go of all keys except for the Spacebar. The drone will naturally level its tilt, allowing you to regain your bearings and stop a potential crash-dive.
Step 6: Surveillance and Combat Maneuvers
What you need: High altitude and distance management.
Instructions: When using the drone for scouting, maintain a high altitude (roughly 40-50 meters above the target). This makes the drone much harder to hear and see from the ground. If you are tracking a player, try to stay behind them or directly above their head, as the “blind spot” in the Rust player’s field of view is directly upward. When approaching a compound, use the camera’s zoom feature (if available on specialized drones) or simply hover still to identify turret locations and weak points in the base’s stability. If you take fire, immediately “zig-zag” by alternating “A” and “D” while holding “W” to make yourself a difficult target for bolt-action rifles.
Pro Tip: Use the drone to “bait” out SAM sites. If you aren’t sure if a base has air defense, fly a drone near it first. It’s much cheaper to lose a drone than a full-loaded Scrap Transport Helicopter.
Step 7: Managing Signal Range and Battery
What you need: Visual awareness of the “Static” effect on screen.
Instructions: Drones do not have infinite range. As you fly further away from your Computer Station, you will notice static and visual interference appearing on your screen. This is a warning that you are reaching the edge of your signal. If you continue, the screen will turn to complete static, and the drone will hover in place or slowly descend until it crashes. In Rust, the effective range is typically around 250 to 500 meters depending on the server’s map size and settings. Always keep an eye on the clarity of your video feed. If the picture starts to flicker, turn back immediately to regain a solid connection.
Pro Tip: If you plan on long-distance scouting, build small “Relay Bases” with a Computer Station and a small battery further out. You can land the drone at the relay, run over to it, and continue your flight from there.
Step 8: Landing and Recovery
What you need: A flat landing pad and a Hammer for repairs.
Instructions: Ending your flight is the most dangerous part of the process. Approach your landing zone—ideally a walled-off section of your roof—and slowly decrease altitude using “Left Ctrl.” Level the drone so it is perfectly flat. Once you are a few inches off the ground, tap “Left Ctrl” one last time to touch down. Press the “Esc” key to exit the Computer Station. Physically go to the drone and pick it up by holding “E.” If you bumped into anything during the flight, use a Hammer and some Metal Fragments to repair it while it is on the ground. Never leave a drone sitting out on your roof when not in use, as it can be easily shot and destroyed by passing players.
Pro Tip: Practice landing on a Small Wood Sign or a specific tile in a creative server. Mastering precision landings allows you to recover drones in tight spots during high-pressure situations.
✅ Final Checklist
- Computer Station is powered with at least 5W and placed in a secure room.
- The drone has a unique ID name that is not easily guessable.
- The drone ID has been correctly entered and “Added” to the Computer Station list.
- The launch area is clear of overhead obstacles like trees or wires.
- The drone is at 100% durability before takeoff.
Important Notes:
- Safety First: SAM sites will target and destroy your drone instantly. Always scout for SAM launchers before flying near a large compound.
- Loss Prevention: If the drone is destroyed, you lose the Tech Trash and HQM used to make it. It cannot be “looted” if it explodes in mid-air; it simply disappears.
- Estimated Cost: 75-125 Scrap for the initial setup.
- Time Investment: Setup takes about 5 minutes; mastering flight controls usually takes 30-60 minutes of practice.
Understanding Drone Flight Mechanics and Control Schemes
Rust drones do not fly like a standard “point-and-click” camera. They use a Newtonian physics model where momentum and tilt dictate your direction of travel. To fly effectively, you must balance your throttle with your pitch. If you tilt too far forward without increasing altitude, the drone will lose lift and hit the ground. Learning to “feather” the controls is the difference between a smooth recon flight and a costly crash.
The Core Movement Keybinds
The primary movement for the drone is handled via the WASD keys, but their functions are strictly related to the tilt (pitch and roll) of the craft rather than direct directional movement. You are essentially leaning the drone in the direction you want to go, and the rotors do the rest of the work. You must combine these tilts with the altitude modifiers to maintain a consistent height during maneuvers.
- W (Pitch Forward): Tilts the nose of the drone down. This moves the drone forward but causes it to lose altitude rapidly unless you compensate with throttle.
- S (Pitch Backward): Tilts the nose up. This slows your forward momentum and can be used to perform quick stops or reverse maneuvers.
- A (Roll Left): Tilts the entire drone to the left. Used for strafing or banking into turns.
- D (Roll Right): Tilts the drone to the right. Essential for navigating around corners or avoiding trees.
- Left Shift (Ascend): Increases rotor RPM to gain altitude. You will hold this almost constantly during forward flight.
- Left Ctrl (Descend): Decreases rotor RPM. Use this for landing or dropping behind cover quickly.
Yaw and Mouse-Look Integration
While the keyboard handles the lean of the drone, your mouse controls the Yaw and the camera’s orientation. Moving your mouse left or right rotates the drone on its vertical axis. This is how you change the direction the nose is pointing. Unlike the Minicopter, the drone’s yaw is quite sensitive; large mouse swipes will send the drone into a dizzying spin. Small, incremental movements are required for stable flight.
The mouse also controls the camera’s pitch. Because the camera is fixed to the front of the drone, looking up or down with the mouse will actually tilt the entire craft. For example, if you pull the mouse back to look up at a high base tower, the drone will naturally tilt backward and begin to drift in reverse. To hover perfectly still while looking at a specific target, you must constantly micro-adjust your WASD keys to counter the tilt of your camera angle. This “active hovering” is the most difficult skill to master but is essential for high-level scouting.
Using the Altitude Buffer
A common mistake for new pilots is failing to manage the Shift (Ascend) key correctly. In Rust, drones have a maximum flight ceiling. If you hit this ceiling, the rotors will cut out momentarily, causing a terrifying freefall. To fly fast, you should hold W and Shift simultaneously. This creates a diagonal force that propels you forward while maintaining enough lift to stay level. If you need to peek over a wall quickly, tap Shift in short bursts to “hop” the drone upward rather than holding it down and overshooting your target.
Signal Strength and Operational Range Constraints
Flying a drone in Rust isn’t just about manual dexterity; it is a game of managing invisible boundaries. Unlike the limitless range of some high-end military tech, the small drones you pilot are tethered to your Computer Station by a specific operational radius. Understanding these limits is the difference between a successful mission and a pile of wasted high-quality metal.
The “Leash” Effect and Signal Degradation
In most standard server configurations, drones have a maximum range of roughly 250 to 500 meters. As you approach the edge of this radius, your screen will begin to flicker with static and “snow.” This is your final warning. If you push beyond the limit, the video feed will cut entirely, and the drone will hover in place or slowly descend, leaving it vulnerable to being shot down or looted by a passing player. Keeping a mental map of your station’s location is vital for a safe return journey.
Physical Obstructions and Signal Loss
Distance isn’t the only factor that kills your signal. Environmental density plays a significant role in how far you can effectively scout. Thick forests, steep mountain ridges, and heavy metal structures can interfere with the clarity of your feed. If you fly behind a massive rock formation, you might notice a sudden drop in signal quality even if you are well within the distance limit.
- Keep a Clear Line of Sight: Try to maintain a direct path between your base and the drone for the cleanest video feed.
- Monitor the Static: Slight flickering is manageable, but heavy screen tearing means you need to turn back immediately.
- Avoid Low-Altitude Maneuvers: Flying too low behind hills will block your signal much faster than staying at a high altitude.
Strategic Applications for Scouting and Base Defense
Drones are much more than just a fun gadget; they are one of the most cost-effective tactical assets in a player’s arsenal. By utilizing a drone, you remove the risk of “face-checking” dangerous situations. Whether you are a solo player trying to survive or part of a large clan coordinating a raid, the overhead view provides a massive information advantage that can shift the tide of any encounter.
Pre-Raid Intelligence and Site Mapping
Before you commit your hard-earned explosives to a raid, a drone can act as your “eye in the sky.” You can use it to peek over high compound walls to spot the location of Auto Turrets, Large Furnaces, or secondary Tool Cupboards. Mapping out the roof layout allows you to identify weak points in the honeycomb or find the most direct path to the loot room. This prevents “blind raiding” where you might otherwise waste rockets on empty rooms or high-strength armored walls.
Countering Door Campers and Base Sieges
There is nothing more frustrating than being trapped inside your own base by door campers. Instead of opening your airlock and hoping for the best, you can use a drone to safely scout the perimeter. This allows you to identify exactly how many players are outside, what gear they are carrying, and where they are hiding. In a defensive scenario, having a teammate stay on the drone while others fight provides real-time callouts that can pinpoint enemy flanking maneuvers.
- Identify Hidden Turrets: Fly close to suspicious bushes or corners to trigger turret sensors without risking your life.
- Track High-Value Targets: Follow fleeing enemies back to their own bases to discover where your rivals live.
- Safe Loot Checking: Use the drone to check if a nearby “decayed” base is actually empty before you run over with tools.
Conclusion
Mastering the drone in Rust transforms the way you interact with the world around you. By understanding the nuances of signal range and the impact of physical obstructions, you can navigate the map with confidence and precision. Whether you are using these agile crafts to scout out a potential raid target or to protect your compound from pesky door campers, the tactical edge they provide is undeniable. Information is the most valuable resource in Rust, and a well-piloted drone is the best way to get it.
To take the next step, spend some time practicing your low-altitude maneuvers in a safe zone or on a creative server. Once you feel comfortable with the controls, try integrating a “recon phase” into your next base defense strategy. Don’t let your enemies have the element of surprise—get up in the air and start scouting today!
❓ Frequently Asked Questions
Why is my drone losing signal during flight?
Signal loss occurs when you fly beyond the 250-meter radius of your Computer Station. Always keep an eye on the signal bar on your HUD to prevent the drone from falling out of the sky.
How do I set the ID for my drone?
Before you deploy the drone on the ground, click it in your inventory to set a unique Identifier. You must enter this exact name into your Computer Station to gain control.
What happens if someone destroys my drone while I’m flying?
You will be instantly disconnected from the Computer Station and returned to your character’s perspective. The drone will drop as debris and can be harvested for resources.
Can multiple people fly the same drone?
Only one player can control a drone at a time via a Computer Station, but anyone who knows the Drone ID can attempt to take control if the station is unoccupied.
Does the drone require fuel like a Minicopter?
No, drones in Rust do not require Low Grade Fuel; they operate entirely on the power supplied to the Computer Station and internal battery logic.
Can I use a drone to carry loot?
Standard drones cannot carry physical loot in their own inventory, but they are invaluable for spotting open loot rooms or checking for door campers safely.