How to Take Down a Drone with Lasers: Tech & Feasibility
Commercial UAV Pilot & Aerial Cinematography Specialist at Drone Nestle · FAA Part 107 Remote Pilot Certification, Commercial UAS Operations · 10+ Years in Commercial UAV Operations, Flight Hardware Benchmarking & 4K Aerial Cinematography
Successfully taking down a drone with lasers requires high-precision optics and specific power levels to either blind CMOS sensors or melt structural components. While military-grade Directed Energy Weapons (DEW) use kilowatt-class beams for destruction, civilian-scale attempts face massive technical hurdles and severe federal legal restrictions.
🎯 Key Takeaways
- Dazzling uses low-power lasers to temporarily blind a drone’s optical sensors.
- Thermal destruction requires high-wattage beams to melt plastic or overheat electronics.
- Precision tracking is the biggest hurdle for moving targets at a distance.
- Commercial handheld lasers generally lack the power for immediate physical drone destruction.
- Using lasers against any aircraft is a serious federal offense with heavy penalties.
To effectively take down a drone using laser technology, you must either overload its optical sensors or physically compromise its structural integrity through intense heat. For a “soft kill,” you only need a few watts of power to blind the camera. However, for a “hard kill”—meaning the drone physically falls out of the sky—you typically need a laser outputting between 2 and 10 kilowatts (kW) of power. This energy must be focused into a tight spot, usually no larger than a coin, to melt through plastic or carbon fiber airframes in a matter of seconds.


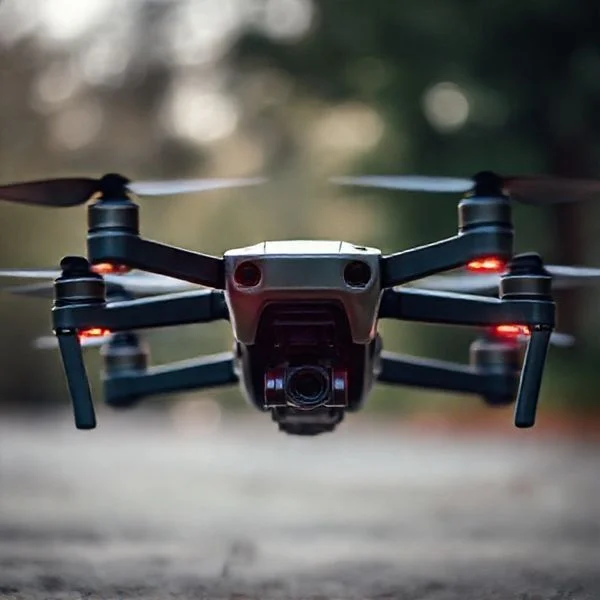
This technical approach is becoming essential as modern drones move toward autonomous flight paths that ignore traditional radio-frequency jamming. If you cannot block the signal, you have to break the hardware. Understanding the physics of energy transfer and the specific hardware requirements is the only way to determine if a laser solution is actually feasible for your specific security needs. This guide breaks down the precise energy levels and targeting logic required to turn a beam of light into a functional counter-drone tool.
The Physics of Laser Countermeasures: Dazzling vs. Thermal Damage
Optical Dazzling: Blinding the CMOS Sensor
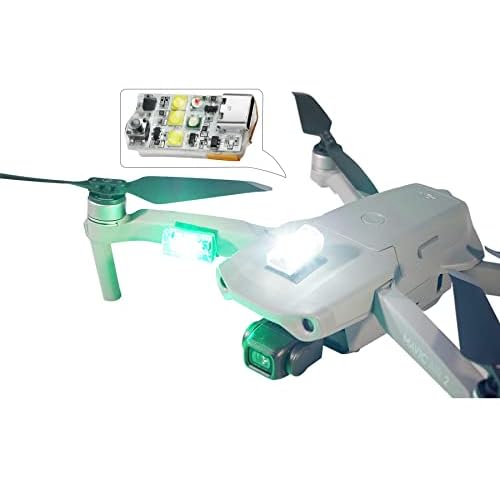
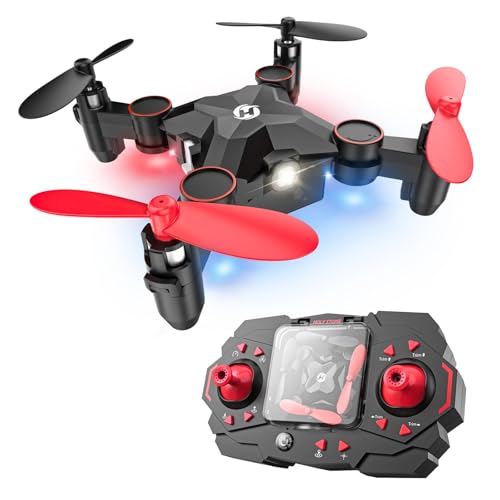
The easiest way to neutralize a drone’s utility is “dazzling.” This doesn’t destroy the drone but renders it “blind” and often triggers an automatic “return to home” or emergency landing sequence. Drone cameras use CMOS sensors which are incredibly sensitive to concentrated light. A laser beam in the visible or near-infrared spectrum can saturate these sensors, creating a “white-out” effect that prevents the pilot or the onboard AI from seeing its surroundings.


- Power Requirement: 1 to 5 Watts is often sufficient for short-range dazzling.
- Wavelength: Green (532nm) or Near-Infrared (808nm-1064nm) are most effective against standard sensors.
- Effect: Temporary sensor saturation or permanent “pixel burning” if the beam is held steady.
- Practicality: High. Low power requirements make these systems portable and easier to power via standard batteries.
Thermal Destruction: The “Hard Kill” Method
If you want to physically destroy the craft, you are looking at a thermal challenge. You must deliver enough Joules of energy to a specific point to raise the temperature of the material beyond its failure point. Most consumer drones use polycarbonate (plastic) or carbon fiber composites. Plastic melts at relatively low temperatures (around 200-300°C), but it also dissipates heat poorly, which actually works in your favor. The heat stays localized, allowing the beam to “drill” through the shell.
Carbon fiber is tougher and requires significantly more energy to delaminate and fail. To achieve a hard kill, the laser must maintain a “dwell time” on a critical component—like a motor mount, a propeller, or the internal lithium-polymer (LiPo) battery—long enough to cause structural failure while the drone is moving at high speeds.
The Ultimate Drone Laser Countermeasure Walkthrough
As unmanned aerial systems (UAS) become increasingly prevalent in both commercial and private sectors, the need for effective countermeasures has grown exponentially. While there are many ways to deter unauthorized drones, directed energy systems—specifically lasers—represent the cutting edge of precision security. This guide covers the technical nuances of using laser technology to neutralize drone threats, focusing on the physics of thermal energy, optical disruption, and the critical tracking systems required for success. Understanding these steps is vital for security professionals and enthusiasts to appreciate the complexity of modern anti-drone protocols and the precision required to mitigate aerial risks safely.


Step 1: Identifying the Drone Type and Optical Vulnerabilities
What you need: High-resolution binoculars or a spotting scope, RF (Radio Frequency) scanner, and a database of common drone specifications.
Instructions: Before engaging any countermeasure, you must identify the specific model of the drone. Different drones have different vulnerabilities. For instance, a commercial photography drone is highly susceptible to “dazzling” (blinding the camera sensor), whereas a fixed-wing surveillance drone might require physical structural damage. Use your RF scanner to detect the control frequencies, which can help confirm the drone’s make. Observe the drone’s flight pattern to identify the location of its primary sensors and battery housing. These are your “aim points.” If the goal is a soft-kill (non-destructive), you will target the gimbal-mounted camera. If the goal is a hard-kill (destructive), you must focus on the thin plastic rotors or the lithium-polymer battery casing, which is highly reactive to heat.
Pro Tip: Look for the “FPV” (First Person View) camera. In many racing or custom drones, this is a separate, smaller lens from the main payload camera. Blind this, and the pilot loses all ability to navigate manually.
Step 2: Selecting the Appropriate Laser Wavelength
What you need: Technical specifications of laser diodes, atmospheric absorption charts, and specialized protective eyewear.
Instructions: Laser effectiveness is heavily dependent on wavelength. For anti-drone applications, you typically choose between Near-Infrared (NIR) around 1064nm or high-visibility Green lasers (532nm). NIR lasers are preferred for security applications because they are invisible to the naked eye, allowing for a covert take-down, and they are absorbed well by many polymers. However, if your goal is simply to “dazzle” the operator through their camera, a 532nm green laser is far more effective because digital sensors are extremely sensitive to that part of the visible spectrum. You must ensure your laser’s wavelength matches the absorption characteristics of the target’s material; for example, dark-colored plastics absorb thermal energy much faster than white or reflective surfaces.
Pro Tip: Always check the “Beam Divergence” rating. A laser with high divergence will spread its energy too wide over a distance, losing the “power density” required to melt plastic or saturate a sensor.
Step 3: Calculating Power Requirements and Dwell Time
What you need: A power meter, a calculator for Joules/cm², and data on the target’s distance.
Instructions: To take down a drone, you must deliver enough energy to cause material failure. This is measured in power density. For a “hard kill” involving melting a rotor blade, you generally need a high-power fiber laser in the kilowatt (kW) range. However, for smaller DIY applications or sensor disruption, a laser between 5W and 15W can be sufficient if the beam is tightly focused. You must calculate the “dwell time”—the amount of time the laser must remain stationary on a single point to achieve the desired effect. At a distance of 100 meters, a 10W laser may need 5-10 seconds of continuous contact to melt through a thin propeller, whereas a 1kW industrial system can do it in milliseconds. Factors like wind speed (which cools the target) must also be considered in your calculations.
Pro Tip: Atmospheric turbulence can “bloom” the beam, causing it to jitter. Always aim for at least 1.5x the calculated minimum power to account for environmental energy loss.
Step 4: Integrating a Precision Gimbal and Tracking System
What you need: A dual-axis motorized gimbal, a PID (Proportional-Integral-Derivative) controller, and a high-speed computer for image processing.
Instructions: Manually aiming a laser at a moving drone is nearly impossible due to the distance and the drone’s erratic flight paths. You must mount your laser on a high-speed motorized gimbal. The system requires a “closed-loop” tracking mechanism where a secondary camera (the tracker) identifies the drone using computer vision algorithms (like OpenCV). The software calculates the drone’s vector and moves the gimbal to keep the laser bore-sighted on the target. Because drones can move at speeds exceeding 60 mph, your gimbal must have high torque and low latency. The software must also include “lead-target” logic, aiming slightly ahead of the drone’s flight path to compensate for the mechanical movement time of the gimbal motors.
Pro Tip: Use a “Co-Axial” setup where the tracking camera looks through the same optical path as the laser. This eliminates parallax error, ensuring the laser hits exactly where the crosshairs are on your screen.
Step 5: Calibrating the Targeting Sensor and Beam Focus
What you need: A variable-focus lens assembly (beam expander) and a calibration target at a known distance.
Instructions: Focus is the difference between a harmless light and a functional countermeasure. A laser beam naturally diverges over distance. To maintain a lethal power density, you must use a beam expander to focus the “waist” of the laser beam directly onto the drone’s surface. This step involves calibrating your automated focusing lens to the distance data provided by a LiDAR sensor or a stereoscopic camera setup. Before engagement, test the focus on a stationary object at a similar range. If the spot size is larger than a few millimeters at the target distance, the energy will dissipate as harmless heat rather than concentrating enough to cut through structural components or overwhelm optical sensors.
Pro Tip: If the drone is moving toward or away from you, your system must dynamically adjust the focus lens in real-time. This is known as “active focal tracking.”
Step 6: Executing the Thermal Engagement and Monitoring
What you need: An engagement switch (trigger), a thermal imaging camera for BDA (Battle Damage Assessment).
Instructions: Once the tracking system has a “solid lock” and the focus is calibrated, initiate the engagement. If using a high-power system, monitor the target through a thermal camera. You will see a “hot spot” appear on the drone. For a soft kill, you will see the drone’s flight become erratic as the internal flight controller tries to compensate for the “blind” sensors. For a hard kill, you are looking for structural failure, such as a rotor snapping or the frame melting. Continue the dwell time until the drone’s telemetry shows a loss of altitude or a total flight failure. Be prepared to cease fire immediately if the drone enters a crowded area to avoid collateral damage from a falling object.
Pro Tip: Don’t just aim for the center of the drone. Aim for the “motor mounts.” Melting the arm that holds the motor is often faster and more effective than trying to hit the tiny, fast-spinning blades.
✅ Final Checklist
- Target identified and classified as a legitimate threat or test subject.
- Laser wavelength selected based on target material and atmospheric conditions.
- Power density and dwell time calculated for the specific engagement range.
- Gimbal tracking system calibrated with zero parallax error.
- Active focal tracking confirmed and synchronized with distance sensors.
- Safety perimeter established and legal compliance verified for the specific jurisdiction.
Important Notes:
- Safety Considerations: Lasers capable of taking down drones are extremely dangerous to human eyesight. High-power lasers can cause permanent blindness instantly, even from reflections (specular reflections). Always use appropriate NOHD (Nominal Ocular Hazard Distance) calculations and wear rated safety goggles.
- Legal Warnings: In the United States and many other countries, it is a federal crime to point a laser at an aircraft (including drones). Furthermore, the FAA considers drones to be aircraft; interfering with their flight can lead to imprisonment and massive fines. This guide is for educational, research, and authorized security professional use only.
- Professional Help: For enterprise-grade drone protection, seek out established aerospace defense contractors who provide certified C-UAS (Counter-Unmanned Aerial Systems) that comply with military and federal standards.
- Estimated Time and Cost: Building a basic tracking and dazzling system can take 40-100 hours of labor and cost between $2,000 and $10,000. Industrial-grade “hard kill” systems cost upwards of $100,000.
Technical Requirements: Power Output, Wavelength, and Beam Divergence
The Kilowatt Threshold for Drone Neutralization
To move from a laboratory experiment to a functional counter-drone tool, power is your primary metric. For a laser to be effective at a distance of 500 meters to 1 kilometer, you generally need a fiber laser system with an output of at least 2kW. At this level, the beam can burn through a plastic housing in under two seconds. If the drone is made of aerospace-grade aluminum or reinforced composites, that requirement jumps toward 10kW or higher to ensure a quick takedown.
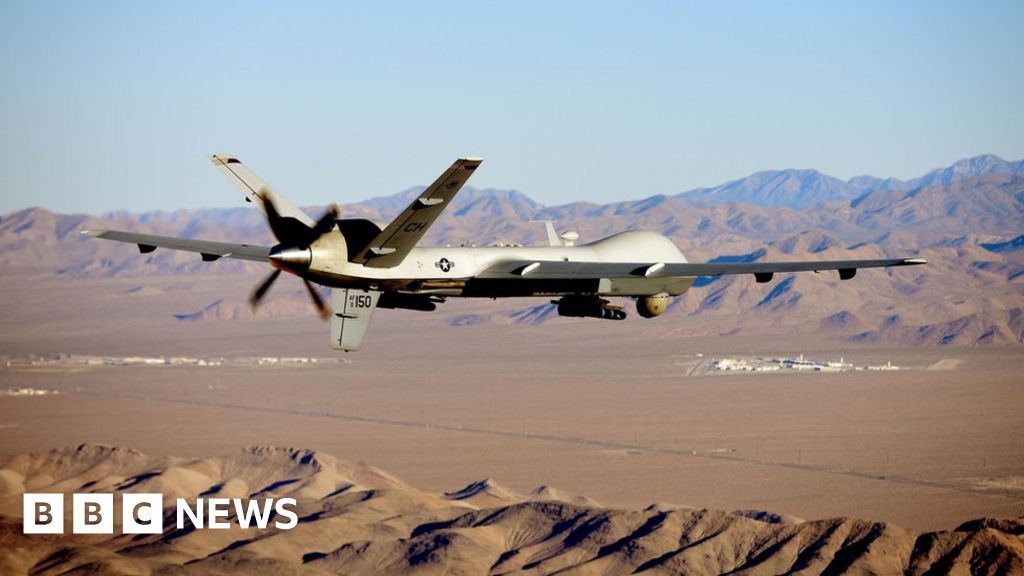
- 2kW – 5kW: Ideal for small “Group 1” drones (under 20 lbs). Can melt propellers and thin plastic shells effectively.
- 10kW+: Necessary for larger, faster drones or for neutralizing targets at ranges exceeding 1.5 kilometers.
- Energy Source: These systems require massive power draws, often necessitating dedicated generators or high-capacity capacitor banks that can discharge rapidly.
Wavelength and Atmospheric Interaction
Not all light travels through the air equally. For anti-drone applications, the wavelength must sit within an “atmospheric window” where the air does not absorb the energy before it hits the target. Most effective systems use a wavelength of approximately 1.06 micrometers (near-infrared). This wavelength is produced efficiently by ytterbium-doped fiber lasers and passes through moisture and dust with minimal scattering compared to visible light.
Beam divergence is the final technical hurdle. Even a powerful laser is useless if the beam spreads out too much. A laser with a high “beam quality” (M2 factor close to 1) ensures the energy stays concentrated in a tiny spot. If your beam diverges to the size of a basketball by the time it reaches the drone, the energy density will be too low to melt anything. You need precision optics—often including a beam expander and a focusing telescope—to keep that beam concentrated on a 10mm to 20mm spot size at the target distance. This concentration of energy is what creates the “incineration effect” required for a successful takedown.
The Engineering Challenge of Precision Tracking and Dwell Time
One of the biggest misconceptions about using lasers to disable a drone is that it happens instantly. In reality, taking down a drone requires more than just a quick flash of light. It requires dwell time—the duration the laser beam must remain focused on a specific point to generate enough heat to cause structural failure or electronic fry-out.
The “Fly in a Windstorm” Problem
Drones are incredibly agile. They tilt, pitch, and yaw constantly to maintain stability, especially in gusty conditions. For a laser system to be effective, it must lock onto a moving target that might be hundreds of feet away and traveling at 40 mph. If the beam wanders even a fraction of an inch, the heat dissipates, and the drone continues its flight unscathed.
Environmental Interference and Beam Quality
The atmosphere isn’t a vacuum; it’s filled with dust, moisture, and thermal layers that can scatter or “bloom” a laser beam. This reduces the energy density reaching the target. Engineers face several uphill battles when designing these systems:
- Atmospheric Distortion: Heat shimmer can bend the light, making the drone look like it is in a slightly different position than it actually is.
- Gimbal Precision: The mechanical motors moving the laser must have sub-millimeter accuracy while compensating for their own vibrations.
- Material Reflectivity: Many high-end drone hulls are made of materials that reflect light or dissipate heat quickly, requiring even higher power outputs to be effective.
Legal Classifications and Safety Hazards of Directed Energy Systems
While the technology is fascinating, the legal landscape is a minefield. In the eyes of the law, a drone is technically an aircraft. Interfering with an aircraft in flight is a serious offense, and using high-powered lasers adds layers of federal oversight that most hobbyists aren’t prepared for.
FAA Regulations and Federal Felony Risks
In many jurisdictions, including the United States, it is a federal crime to aim a laser at an aircraft. Because the FAA classifies drones as aircraft, the same rules apply. Even if you are trying to protect your privacy, “lasing” a drone could lead to significant fines or prison time. Furthermore, the 18 U.S.C. § 32 statute makes it a felony to damage or destroy any aircraft, which includes using directed energy to force a crash.
The Danger of “Stray Light” and Eye Safety
High-power lasers—specifically those in the Class 4 category required to melt plastic or metal—pose a massive safety risk to the operator and the surrounding public. The dangers are not limited to the drone itself:
- Ocular Hazards: A stray reflection off a drone’s camera lens or carbon fiber frame can cause permanent blindness in milliseconds, even from a great distance.
- Fire Hazards: If the laser misses the drone and hits a dry tree, a roof, or a neighbor’s window, it can ignite a fire instantly.
- Beyond-Line-of-Sight Risks: A laser beam doesn’t stop just because it missed its target; it can travel miles into the sky, potentially blinding pilots in manned aircraft.
Conclusion
The technology behind using lasers to take down drones is a marvel of modern engineering, combining high-speed tracking with concentrated thermal energy. However, for the average person, the feasibility is extremely low due to the immense power requirements and the precision tracking needed. Beyond the tech, the legal and safety risks are simply too high to ignore. Using directed energy systems outside of a controlled military or high-security environment is both dangerous and illegal in most parts of the world.
If you are looking to protect your property, consider more practical and legal next steps:
- Research Geofencing: Learn how to request “No Fly Zone” status for your property through drone manufacturer databases.
- Explore Signal Detection: Invest in legal drone detection systems that alert you when a drone is nearby without interfering with its flight.
Stay informed and always prioritize safety over high-tech solutions. If you enjoyed this deep dive into drone technology, subscribe to our newsletter for more updates on the future of drone security!
❓ Frequently Asked Questions
How do military-grade Directed Energy Weapons (DEW) differ from hobbyist lasers?
Military DEW systems utilize fiber lasers in the kilowatt (kW) range, which provide enough energy to vaporize metal and ignite fuel in milliseconds. These systems are integrated with sophisticated radar and AI-driven gimbal systems for perfect target tracking over several kilometers.
Can a drone’s camera be permanently damaged by a laser?
Yes, even relatively low-power lasers can permanently burn out pixels on a CMOS or CCD sensor if the beam hit is direct. This renders the drone’s primary navigation and filming tools useless without necessarily causing the drone to fall from the sky.
What role does wavelength play in drone neutralization?
Specific wavelengths, such as Infrared (IR), are often preferred for stealth and because they can bypass certain optical filters. The choice of wavelength determines how effectively the energy is absorbed by the target material versus being reflected away.
What are the primary safety risks to the person firing the laser?
The biggest risk is ‘specular reflection,’ where the laser hits a reflective surface on the drone and bounces back into the operator’s eyes. This can cause instant and permanent blindness, even with lasers that don’t seem powerful enough to melt plastic.
Can drones be protected against laser attacks?
Drones can be outfitted with reflective coatings, specialized heat-resistant paints, or optical filters known as ‘laser notch filters’ that block specific wavelengths. However, these add weight and can reduce the quality of the drone’s own camera footage.
What are the federal consequences of using a laser against a drone in the US?
The FAA and FBI treat drones as aircraft; pointing a laser at one can result in felony charges, decades of prison time, and fines exceeding $250,000. It is considered a threat to the National Airspace System and is strictly prohibited for civilians.

Similar Posts