How to Eliminate Exhaust Drone: Helmholtz & J-Pipe Guide
Commercial UAV Pilot & Aerial Cinematography Specialist at Drone Nestle · FAA Part 107 Remote Pilot Certification, Commercial UAS Operations · 10+ Years in Commercial UAV Operations, Flight Hardware Benchmarking & 4K Aerial Cinematography
The most effective way to eliminate exhaust drone is by installing a Helmholtz resonator or J-pipe tuned to the specific problem frequency. Unlike simple mufflers, these mechanical solutions use sound wave cancellation to target the resonance without affecting the overall exhaust performance.
🎯 Key Takeaways
- Identify the specific RPM and Hz where the drone occurs first.
- Helmholtz resonators cancel specific frequencies through out-of-phase sound waves.
- J-pipe length is critical and determined by the target frequency’s wavelength.
- Distinguish between overall exhaust volume and specific resonant frequencies.
- Check exhaust hangers for vibrations that mimic acoustic drone.
Eliminating exhaust drone requires a surgical approach to sound waves rather than just muffling the noise. To stop that relentless cabin hum, you must introduce a physical modification—most commonly a Helmholtz resonator or a “J-pipe”—that creates an out-of-phase sound wave to cancel the specific frequency of the drone. This process doesn’t require a whole new exhaust system; it requires calculating the exact length of a side-branch pipe to target the RPM range where your car resonates most painfully.


The goal is destructive interference. When the exhaust gas pulses hit the opening of a calculated resonator, a portion of the sound wave travels into the branch, hits the capped end, and bounces back toward the main pipe. By the time it re-enters the main exhaust stream, it is 180 degrees out of phase with the original pulse, effectively “deleting” the noise. This guide provides the formulas and hardware comparisons needed to achieve a drone-free cabin without sacrificing your preferred exhaust volume or tone.
The Physics of Exhaust Drone and Frequency Identification


Exhaust drone is not a broad noise issue; it is a resonance event. Every engine and exhaust combination has a specific frequency where the sound waves match the natural resonant frequency of the vehicle’s cabin or chassis. Usually, this happens within a narrow 500-RPM window, typically between 2,000 and 3,000 RPM. To fix it, you first need to identify the “Peak Hertz” of your drone.


Identifying the Victim Frequency
You cannot guess the frequency of a drone by ear. To get the measurement required for a mechanical fix, you need data. Follow these steps to find your target:
- Download a spectrum analyzer app on your smartphone (such as Spectroid for Android or any RTA tool for iOS).
- Drive the vehicle and hold the engine at the exact RPM where the drone is most unbearable.
- Observe the real-time graph on the app. You will see a distinct “peak” or spike in the low-end decibel range, usually between 60Hz and 150Hz.
- Record this exact frequency in Hertz (Hz). This is the number you will use to calculate your pipe length.
Calculating Frequency via Engine Data
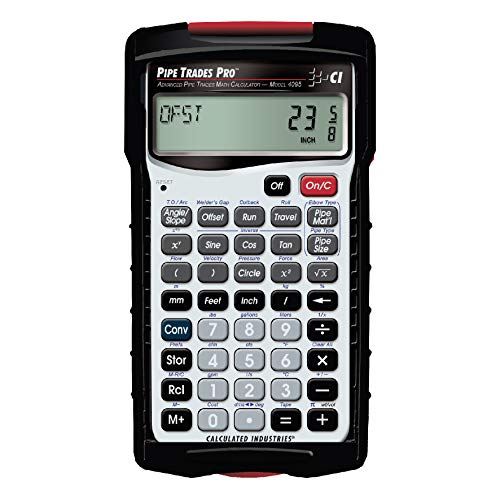


If you prefer the mathematical approach to verify your findings, you can calculate the theoretical frequency based on engine pulses. The formula is: (RPM * Cylinders) / 120 = Frequency (Hz). For example, a V8 engine cruising at 2,200 RPM creates a drone frequency of approximately 146 Hz. If your phone app confirms a spike near 146 Hz, you have identified the exact wave you need to cancel. Using this data allows you to build a resonator that acts as a “noise trap” specifically for that vibration.


From Start to Finish: Exhaust Drone Elimination Explained
Exhaust drone is the result of resonant frequencies—standing waves that vibrate through the chassis and into the cabin, often occurring at specific RPM ranges. This guide will walk you through the technical process of identifying, calculating, and physically neutralizing these frequencies. By following these steps, you can maintain the performance and aggressive tone of your aftermarket exhaust while removing the soul-crushing hum that makes long highway drives unbearable. Understanding the physics of sound is the key to a quiet cabin without sacrificing engine power.
Step 1: Identifying the Drone Frequency
What you need: A smartphone, a Real-Time Analyzer (RTA) app (like Spectroid or any frequency analyzer), and a safe stretch of road or a chassis dynamometer.
Instructions: To fix the drone, you must first know its “name”—specifically its frequency in Hertz (Hz). Secure your phone in the cabin and drive until you reach the “drone zone,” which is usually between 2,000 and 3,000 RPM. Hold that RPM steady until the RTA app shows a clear, consistent peak on the graph. This peak represents the frequency of the drone, typically falling between 80Hz and 130Hz for most four and eight-cylinder engines. Note this number precisely, as your entire solution depends on this measurement. Repeat the test several times to ensure the peak frequency remains consistent regardless of gear choice, as drone is RPM-dependent, not speed-dependent.
Pro Tip: Ensure all windows are rolled up and the radio is off during testing to prevent ambient noise from skewing the frequency data on your analyzer app.
Step 2: Inspecting for Mechanical Vibrations
What you need: A vehicle lift or jack stands, a flashlight, and basic hand tools.
Instructions: Before performing complex modifications, rule out “false drone.” False drone occurs when the exhaust pipe physically touches the frame, heat shields, or body panels, transmitting vibrations directly into the cabin. Raise the vehicle safely and inspect every inch of the exhaust system. Look for shiny spots on the pipe or the chassis that indicate contact. Check the rubber hangers; if they are cracked, stretched, or too stiff (common with some polyurethane upgrades), they may be failing to isolate the exhaust’s natural movement. Shake the exhaust vigorously by hand; it should move freely without hitting any part of the vehicle’s undercarriage. If you find contact points, realign the pipe or replace the hangers before proceeding to acoustic fixes.
Pro Tip: Use high-quality EPDM rubber hangers rather than cheap universal ones, as they have better vibration-damping properties specifically designed for automotive heat cycles.
Step 3: Calculating the Helmholtz Resonator (J-Pipe) Length
What you need: A calculator and the frequency (Hz) recorded in Step 1.
Instructions: The most effective way to eliminate drone is a Helmholtz resonator, commonly known as a “J-pipe.” This is a dead-end branch off the main exhaust that creates a sound wave 180 degrees out of phase with the drone, effectively canceling it out. To find the required length, use the formula: Length = (Speed of Sound / Frequency) / 4. Since the speed of sound in hot exhaust gas is approximately 1,125 to 1,200 feet per second, a 100Hz drone usually requires a pipe roughly 30 to 33 inches long. Convert your result into inches to determine how much stainless steel tubing you need to source. This calculation is critical; being off by just two inches can result in the resonator missing the target frequency entirely.
Pro Tip: Exhaust gas temperature affects the speed of sound. If your drone happens only when the car is fully warmed up, use 1,200 ft/s in your calculation to account for the increased heat.
Step 4: Sourcing and Preparing Fabrication Materials
What you need: Stainless steel or aluminized steel tubing (matching your current exhaust diameter), a U-bend pipe, and a pipe cutter or saw.
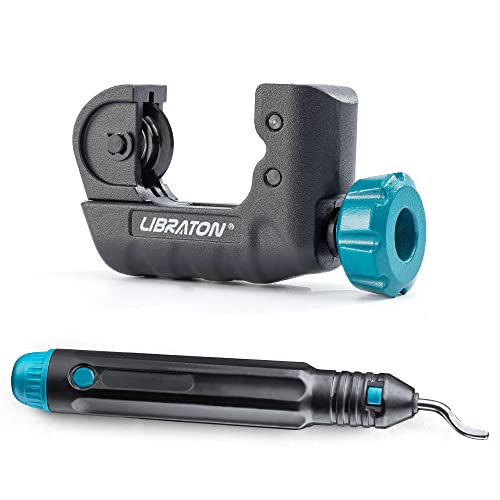
Instructions: Purchase tubing that matches the material of your existing exhaust to prevent galvanic corrosion and ensure clean welds. If your exhaust is 2.5 inches in diameter, use 2.5-inch tubing for the J-pipe. You will likely need a 180-degree “U-bend” to tuck the resonator alongside the main exhaust pipe, as a straight 30-inch pipe rarely fits under a car. Cut the tubing based on your calculation from Step 3, but leave an extra 2-3 inches of length for a “slip-joint” adjustment. Ensure all cuts are deburred and cleaned of any oils or debris. The “dead end” of this pipe must be capped and welded completely airtight; even a pinhole leak will turn your resonator into a whistling pipe.
Pro Tip: Using a slightly smaller diameter pipe for the J-pipe (e.g., 2.25″ for a 2.5″ system) can still be effective and is often easier to package in tight spaces.
Step 5: Determining the Optimal Junction Point
What you need: Measuring tape, marking chalk, and an angle grinder with a flap disc.
Instructions: The J-pipe should ideally be welded into the exhaust system as close to the source of the standing wave as possible—usually just before or after the muffler, or in the mid-pipe section. Look for a straight section of the existing exhaust where you can cut a hole for the branch. Mark the location with chalk. Ensure that when the J-pipe is installed, it won’t interfere with the driveshaft, suspension travel, or ground clearance. Use the flap disc to clean the area around the marked spot down to bare, shiny metal. A clean surface is mandatory for a structural weld that can withstand the constant heat and vibration of an exhaust system.
Pro Tip: Try to position the J-pipe so it runs parallel to the main exhaust pipe. This “side-branch” configuration is the most space-efficient and minimizes the risk of snagging on road debris.
Step 6: Fitting and Tacking the Resonator
What you need: A MIG or TIG welder, welding helmet, gloves, and clamps.
Instructions: Cut a hole in the main exhaust pipe using a hole saw that matches the diameter of your J-pipe branch. Position the J-pipe over the hole. Use clamps or a helper to hold the resonator in the desired orientation. Before fully welding, apply 3 to 4 strong “tack welds” around the circumference of the joint. This allows you to double-check the fitment and ensure the pipe hasn’t shifted. Once tacked, verify that the J-pipe has at least half an inch of clearance from all chassis components. The exhaust system expands when hot, so this clearance is vital to prevent new rattles from developing once the car reaches operating temperature.
Pro Tip: When welding, move in small sections to avoid overheating the pipe, which can lead to warping or “burn-through” on thinner-walled stainless steel.
Step 7: Final Welding and Sealing
What you need: Welding equipment and exhaust sealant (optional).
Instructions: Complete a full 360-degree bead around the junction where the J-pipe meets the main exhaust. This must be 100% airtight. After the junction is finished, weld the end cap onto the far end of the J-pipe if you haven’t done so already. If you used a slip-joint for adjustability, use a heavy-duty exhaust clamp to secure the adjustable section. This allows you to slide the end of the pipe in or out to “fine-tune” the frequency. Inspect the entire weld for porosity or gaps. If any gaps exist, the resonator will not function correctly, as it relies on internal air pressure pulses to create the cancellation wave. Allow the welds to cool naturally; do not quench them with water, as this can make the metal brittle.
Pro Tip: Apply a high-temp zinc or silicone-based spray paint to the welds after they cool to prevent rust, especially if you are using aluminized steel instead of stainless.
Step 8: Testing and Fine-Tuning
What you need: The same RTA app used in Step 1 and a test drive.
Instructions: Take the vehicle for a test drive under the same conditions as your initial test. Reach the target RPM and observe the noise levels. If the drone is significantly reduced but still present at a slightly different RPM, you may need to adjust the length of your J-pipe via the slip-joint. Shortening the pipe will target a higher frequency (higher RPM), while lengthening it will target a lower frequency (lower RPM). Move the pipe in half-inch increments until the cabin is quiet. Once the “sweet spot” is found, tighten the clamp permanently or add a final weld to lock the length in place. You have now successfully engineered a frequency-specific acoustic filter for your engine.
Pro Tip: Even if the drone is gone, check the slip-joint clamp after 100 miles of driving to ensure it hasn’t vibrated loose during the initial heat cycles.
✅ Final Checklist
- Verify that the J-pipe length matches the calculated frequency requirement for your specific engine RPM.
- Ensure all welds are airtight and the end of the resonator is perfectly capped.
- Confirm there is at least a 1/2-inch gap between the new resonator and any chassis components or fuel lines.
- Check that the exhaust hangers are in good condition and not under excessive tension from the added weight.
- Re-run the RTA app test to confirm the frequency peak has been flattened or eliminated.
Important Notes:
- Safety: Always use jack stands when working under a vehicle; never rely solely on a floor jack. Use proper eye protection and a welding mask when fabricating.
- Professional Help: If you are not confident in your welding skills, perform the calculations and mocking-up yourself, then take the vehicle to a local exhaust shop to have the final welds performed.
- Estimated Time and Cost: This project typically takes 4–6 hours. Costs range from $50 for DIY materials to $300 if you require professional welding and premium stainless steel components.
Helmholtz Resonators vs. Quarter-Wave Branch Pipes


While often used interchangeably in car forums, Helmholtz resonators and quarter-wave branch pipes (J-pipes) use slightly different physics to achieve the same goal. Choosing the right one depends on your available under-car space and your fabrication skills.

The Science of the Quarter-Wave J-Pipe


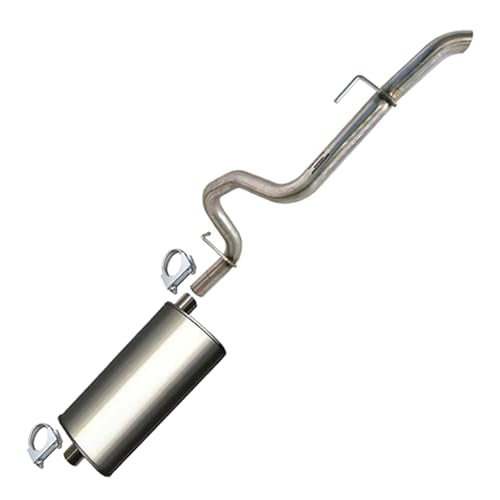
A “J-pipe” is the most common DIY fix for drone. It is a length of tubing capped at one end and welded into the side of the main exhaust pipe, usually shaped like a “J” to fit around the muffler or axle. It works on the principle that a sound wave traveling down a pipe and back will be delayed. Because the wave travels the length of the branch pipe twice (down to the cap and back to the start), a pipe that is exactly 1/4th the length of the target sound wave will return that wave to the main stream at a 1/2 wavelength shift. This 180-degree phase shift is what cancels the drone.


Helmholtz Chambers vs. Branch Pipes


The distinction between these two comes down to volume versus length:
- Quarter-Wave Pipes: These rely strictly on length. They are narrow tubes that are easy to package alongside the existing exhaust. They are highly effective at targeting one specific frequency peak.
- Helmholtz Chambers: These look like small canisters or “bottles” with a specific internal volume and a narrow neck. They act like blowing across the top of a glass bottle. They are often more effective at broad, very low-end frequencies but are much harder to calculate and weld in tight spaces because they require a specific internal air volume rather than just a pipe length.
- Vibration Dampers: Unlike resonators, these are heavy weights bolted to the exhaust to change its mass. These are “last resort” fixes and rarely work as effectively as air-path resonators for heavy drone.
The Calculation for J-Pipe Length
To determine how long your J-pipe needs to be to kill your specific drone frequency, use the following formula: Length = (V / f) / 4. In this equation, V is the speed of sound (approximately 1,125 feet per second, though it increases with exhaust heat) and f is the drone frequency you identified earlier.
For a common 130Hz drone at operating temperature, the math looks like this: (1200 / 130) / 4 = 2.3 feet (or roughly 27.6 inches). Many enthusiasts build these with a slip-joint at the end, allowing them to slide the capped end in or out to “tune” the pipe perfectly by ear after it is installed.
Evaluating Hardware Solutions: Mufflers, Resonators, and Dampers


When you are looking to kill drone without sacrificing that aggressive exhaust note, your choice of hardware is critical. It is a common misconception that a louder muffler automatically creates more drone. In reality, drone is caused by specific frequencies that aren’t being properly managed. To fix this, you need to understand how different components interact with those sound waves.
Chambered vs. Straight-Through Designs
The internal architecture of your muffler plays a massive role in acoustic comfort. Chambered mufflers use internal baffles to bounce sound waves into one another, naturally canceling out many mid-range frequencies where drone typically lives. Conversely, straight-through resonators use packing material (like fiberglass or stainless steel wool) to absorb high-frequency “rasp,” but they may struggle to catch the low-frequency “boom” of a drone.
- Glasspacks: Excellent for smoothing out the tone, but rarely effective at eliminating a specific drone frequency.
- Reflective Resonators: These work by reflecting sound waves back at the source to create destructive interference.
- Vibration Dampers: Sometimes the “drone” isn’t air—it is the exhaust pipe itself vibrating. Adding a heavy mass damper to the pipe can shift the resonant frequency out of the audible range.
The Role of Flex Pipes and Hangers
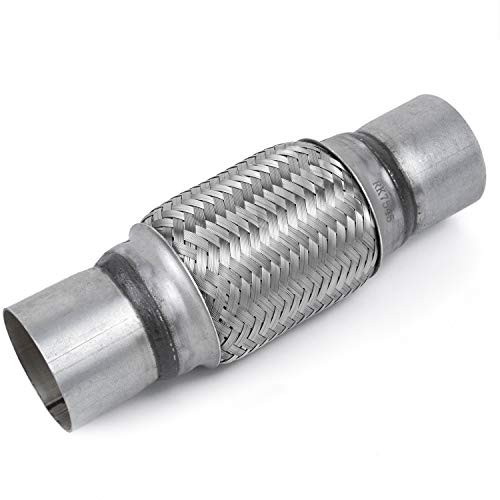
Don’t overlook the physical connection to your vehicle’s chassis. If your exhaust system is too rigid, engine vibrations can transfer directly into the cabin, mimicking the sound of drone. High-quality flex pipes allow the system to move independently of the engine, while upgraded rubber or silicone hangers can isolate vibrations that would otherwise resonate through the floorboards.


Calculating Optimal Resonator Placement and Pipe Length


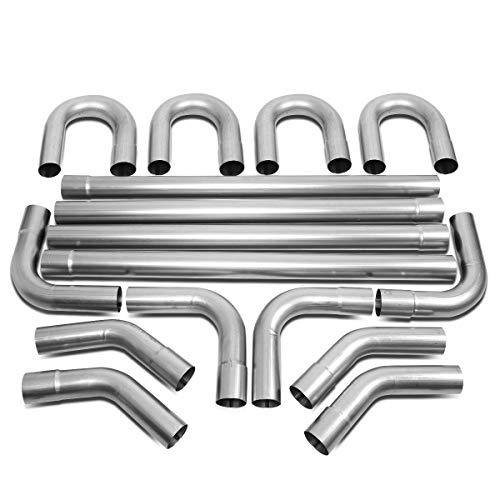
If off-the-shelf mufflers aren’t doing the trick, it is time to look at the “J-Pipe” or Helmholtz Resonator. This is essentially a “dead-end” side branch tuned to a specific length. When the sound waves travel down this branch, they hit the end, bounce back, and re-enter the main exhaust stream exactly out of phase with the drone frequency, effectively silencing it.
Finding Your Target Frequency
To get the math right, you first need to identify the “problem” frequency. Most exhaust drones occur in a specific RPM window—usually between 2,000 and 3,000 RPM. You can use a simple smartphone frequency analyzer app to record the sound inside the cabin while maintaining the drone-heavy RPM. The highest peak on the graph (usually measured in Hertz, or Hz) is your target.
- Typical Drone Range: Most V8 engines drone between 90Hz and 120Hz.
- RPM Correlation: If the drone gets higher in pitch as RPM increases, you are dealing with a flow-based resonance.
- The “Sweet Spot”: Aim to tune your J-pipe for the exact center of your most common cruising RPM.
The Quarter-Wave Calculation
The science behind a J-pipe relies on the “quarter-wave” formula. Because the sound wave has to travel to the end of the J-pipe and back (covering the distance twice), the pipe itself only needs to be one-quarter the length of the actual sound wave you want to cancel. The basic formula is: Speed of Sound / (4 x Frequency). Since the speed of sound changes with the temperature of the exhaust gas, most enthusiasts find that a pipe between 26 and 32 inches is the “goldilocks” zone for most modern performance cars.
Pro Tip: Using an adjustable slip-joint on your J-pipe allows you to “telescope” the length. This lets you fine-tune the acoustics by hand until the cabin is perfectly quiet at highway speeds.
Conclusion
Eliminating exhaust drone doesn’t mean you have to settle for a quiet, boring car. By understanding the relationship between sound frequencies and hardware design, you can build a system that screams at wide-open throttle but remains whisper-quiet during your morning commute. Whether you choose a high-quality chambered muffler or dive into the physics of a custom Helmholtz J-pipe, the goal is the same: destructive interference of those annoying cabin vibrations.
Ready to reclaim your driving experience? Start by downloading a frequency analyzer app to pinpoint your drone’s “fingerprint.” Once you have that number, you can accurately choose the right resonator or calculate the perfect J-pipe length to solve the problem once and for all. Happy tuning!
💬 Quick Questions & Answers
What is the primary cause of exhaust drone?
It is caused by sound waves reaching the natural resonant frequency of the exhaust tubing at specific RPMs.
Will a larger muffler stop drone?
It may reduce overall volume, but it won’t necessarily eliminate specific resonant frequencies like a tuned resonator will.
Does a J-pipe restrict exhaust flow?
No, because a J-pipe is a dead-end branch that does not sit directly in the flow path of the exhaust gas.
Can I use a phone app to find drone frequency?
Yes, frequency analyzer apps can help you identify the exact Hz of the drone while driving.
Is drone the same as a loud exhaust?
No, drone is an internal cabin resonance, whereas loudness refers to the external decibel level of the system.
❓ Frequently Asked Questions
How do I calculate the correct length for a J-pipe resonator?
The length is typically one-quarter of the wavelength of the target frequency. Use the formula: (Speed of Sound / Frequency) / 4, adjusted for the temperature of the exhaust gas.
What is the difference between a branch resonator and a Helmholtz resonator?
A branch resonator (J-pipe) is a simple dead-end tube of a specific length, while a Helmholtz resonator uses a dedicated chamber volume and a neck to create a spring-mass air system for cancellation.
Why does my exhaust only drone between 2,000 and 3,000 RPM?
This range typically coincides with the engine’s firing frequency matching the acoustic resonance of the exhaust pipe length, creating a standing wave of sound.
Can vibration dampening hangers help reduce drone?
If the ‘drone’ is actually mechanical vibration being transferred to the chassis, heavy-duty rubber hangers or adding mass-dampers to the pipe can effectively reduce it.
Will adding a resonator change the horsepower of my vehicle?
Adding a side-branch resonator or J-pipe has zero impact on horsepower because it does not create backpressure or change the primary flow of exhaust gases.
Are there specific mufflers designed to eliminate drone?
Yes, some ‘chambered’ mufflers use internal baffles to create cancellation waves, though they are often less precise than a custom-calculated J-pipe for a specific setup.