How to Start a Drone Washing Business: Equipment & Guide
Commercial UAV Pilot & Aerial Cinematography Specialist at Drone Nestle · FAA Part 107 Remote Pilot Certification, Commercial UAS Operations · 10+ Years in Commercial UAV Operations, Flight Hardware Benchmarking & 4K Aerial Cinematography
Starting a drone washing business requires specialized tethered UAV systems and FAA Part 107 certification with specific heavy-lift waivers. Success in this niche depends on mastering low-pressure soft wash techniques and targeting high-value commercial contracts such as solar farms and multi-story facades.
🎯 Key Takeaways
- Invest in a tethered drone system for continuous power and chemical supply.
- Obtain FAA Part 107 certification and research Section 44807 heavy-lift exemptions.
- Utilize soft washing chemistry to clean surfaces safely without high-pressure damage.
- Focus on high-rise commercial buildings and solar arrays for maximum profit margins.
- Secure comprehensive aviation insurance including chemical drift and property damage coverage.
To start a commercial drone washing business, you must move beyond consumer-grade hardware and invest in a tethered, heavy-lift UAV system capable of carrying pressurized liquid lines. This venture replaces traditional scaffolding and lift rentals by using a drone to apply cleaning agents to high-rise windows, roofs, and industrial facades. Success depends on mastering the technical integration of ground-based pumps and aerial delivery nozzles while navigating strict FAA heavy-lift regulations.


This model is highly profitable because it significantly reduces labor costs and site liability. Instead of a three-person crew spending days on a lift, a single pilot and a ground technician can clean a multi-story building in hours. By focusing on specialized soft-wash chemistry and precision flight, you provide a safer, faster alternative to traditional exterior maintenance services.
Essential Hardware for Commercial Drone Washing Systems
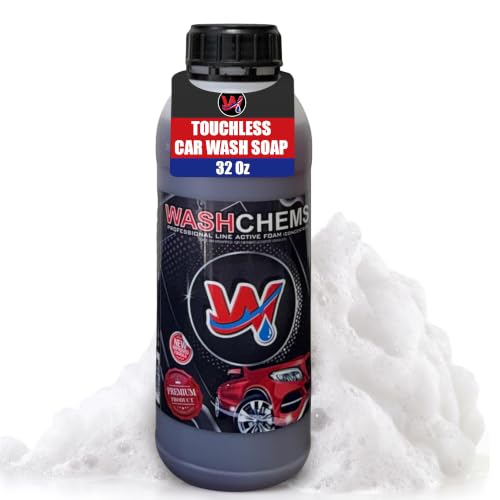


A drone washing setup is an integrated system, not just a standalone aircraft. Unlike photography drones, these units are designed for weight and stability under pressure. Your primary investment will be a heavy-lift hexacopter or octocopter designed to handle the “recoil” of a pressurized water stream. The system must remain stable while fighting the physical pull of a tethered hose filled with water.


The Anatomy of a High-Pressure Tethered UAV
Your drone acts as a flying nozzle. It is connected to a ground-based trailer via a high-strength, lightweight hose. This hose delivers the cleaning solution directly to the drone’s spray bar. High-end systems utilize a “power-over-tether” setup, where a ground cable provides constant electricity to the drone. This allows for unlimited flight time, which is essential for large-scale commercial contracts. Key hardware components include:
- Heavy-Lift Airframe: Systems like the Lucid C1 or DJI Agras platforms modified for cleaning.
- Carbon Fiber Spray Booms: Lightweight extensions that keep the nozzle at the correct distance from the surface.
- Ground-Based Pump Station: A high-volume pump capable of pushing 5 to 10 gallons per minute (GPM) up to heights of 100+ feet.
- Real-Time Video Link: An FPV (First Person View) camera with a high-definition monitor so you can see exactly where the solution is hitting.
- Precision GPS/Lidar: Sensors that maintain a fixed distance from the wall to prevent collisions and ensure even application.
Soft Washing Chemistry and Nozzle Integration

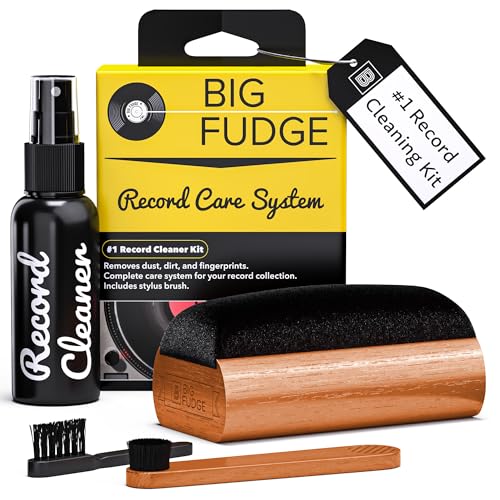

Drone washing primarily utilizes “soft washing” rather than high-pressure blasting. You rely on chemistry to break down organic growth, mold, and salt. Your hardware must be compatible with corrosive chemicals like sodium hypochlorite (bleach) or surfactant blends. Using the wrong pump seals or hose materials will lead to equipment failure within weeks. You should choose low-pressure, high-flow nozzles that create a “fan” pattern. This ensures maximum coverage without the risk of shattering window seals or stripping paint from the facade.


Master Drone Washing in 8 Simple Steps
Drones are significant investments that often operate in harsh environments, collecting dust, pollen, salt spray, and insect debris. Maintaining a clean aircraft is not just about aesthetics; it is a critical safety measure that ensures sensor accuracy, motor longevity, and structural integrity. This comprehensive guide provides a professional-grade walkthrough for cleaning your drone without damaging sensitive electronics or calibrated hardware. Following these steps systematically will help prevent hardware failure and extend the operational life of your equipment significantly.
Step 1: Establishing a Controlled Workspace
What you need: An Anti-Static (ESD) mat, nitrile gloves, a bright LED desk lamp, and a clear tabletop free of clutter.
Instructions: Before you begin the “washing” process, you must create a safe environment. Place your drone on an anti-static mat to prevent discharge from damaging internal circuit boards. Put on your nitrile gloves; the oils from your skin can actually attract more dust and degrade certain plastic finishes over time. Ensure the drone is powered off and the battery is completely removed. If the drone was recently flown, wait at least 20 minutes for the motors and internal components to cool down to room temperature. This prevents thermal shock if you apply cleaning agents to warm surfaces.
Pro Tip: Always remove the microSD card before cleaning. Cleaning fluids or accidental pressure on the card slot can lead to data corruption or physical damage to the card.
Step 2: Initial Dry Debris Removal
What you need: A canister of compressed air (or an electric air blower), a set of soft-bristled detailing brushes, and a vacuum with a small nozzle attachment.
Instructions: Start by removing loose dirt and sand. Use the detailing brushes to gently agitate dust in the crevices of the arms, landing gear, and battery compartment. While brushing, use the compressed air in short, controlled bursts to blow the debris away from the drone. Be extremely careful when using air near the gimbal or motor cooling vents; you should aim the air so it blows out of the vents rather than pushing dust deeper into the internal housing. Hold the vacuum nozzle nearby to capture the airborne dust as you dislodge it.
Pro Tip: When using compressed air near the motors, hold the motor bell still with your finger. Allowing the air to spin the motor at high speeds can generate back-EMF (electromotive force) which may damage the ESC (Electronic Speed Controller).
Step 3: Propeller Sanitization and Inspection
What you need: Distilled water, mild dish soap, a lint-free microfiber cloth, and a magnifying glass.
Instructions: Remove all propellers from the motors. In a small bowl, mix distilled water with a single drop of mild dish soap. Dip the microfiber cloth into the solution, wring it out until it is barely damp, and wipe down each blade from the hub to the tip. This removes “bug guts” and grass stains that can affect the aerodynamics and balance of the prop. Once cleaned, use the magnifying glass to inspect the leading edges for nicks or hairline cracks. If a propeller is chipped or deeply scratched, discard it immediately; a clean but structurally compromised propeller is a flight risk.
Pro Tip: Never soak propellers in water. Some composite materials can absorb moisture over time, changing the weight and balance of the blade, leading to unwanted vibrations during flight.
Step 4: Cleaning the Optical Sensors and Camera Lens
What you need: 99% Isopropyl alcohol, specialized lens cleaning tissues or a LensPen, and a fresh microfiber cloth.
Instructions: This is the most delicate part of the “washing” process. Use a LensPen or a fresh, dry microfiber cloth to remove loose particles from the glass. If smudges persist, apply a tiny drop of lens cleaner or 99% Isopropyl alcohol to a lens tissue—never apply liquid directly to the lens. Gently wipe in a circular motion, starting from the center and moving outward. Repeat this process for the obstacle avoidance sensors located on the front, back, and bottom of the drone. Clear sensors are vital for the drone’s “vision” and safety features.
Pro Tip: Avoid using 70% rubbing alcohol for lenses; the remaining 30% often contains oils or fragrances that leave a permanent film on the specialized coatings of the camera glass.
Step 5: Detailing the Outer Shell and Chassis
What you need: Non-abrasive cleaning wipes (electronic safe) or a cloth dampened with a 50/50 mix of distilled water and Isopropyl alcohol.
Instructions: Wipe down the plastic or carbon fiber arms and the main body of the drone. Focus on areas where “prop wash” pushes dirt into the shell. For stubborn stains or scuffs from small collisions, you can use a slightly dampened melamine sponge (Magic Eraser), but use extremely light pressure as these are mildly abrasive and can strip the finish off the plastic. Ensure that no liquid drips into the ventilation holes or the power button. If your drone has “Vision” stickers or registration decals, wipe around them carefully to avoid peeling the edges.
Pro Tip: If you fly near the ocean, use a cloth dampened with distilled water first to neutralize salt crystals, which are highly corrosive to metal components and wiring.
Step 6: Gimbal and Motor Maintenance
What you need: A soft toothbrush, a high-quality contact cleaner (non-lubricating), and a precision tweezers.
Instructions: The gimbal and motors are the mechanical heart of the drone. Use the soft toothbrush to gently clean the gaps in the gimbal motors, ensuring no sand grains are trapped in the joints. For the flight motors, look through the top of the motor bell and use tweezers to remove any hair, carpet fibers, or dried grass wrapped around the shaft. If you notice any oxidation on the metal surfaces, a tiny amount of electronic contact cleaner on a swab can be used to clean the area, but ensure it evaporates completely before moving to the next step.
Pro Tip: Do not use WD-40 or any oil-based lubricants on drone motors. These drones use brushless motors that do not require external lubrication; oils will only attract more grit and eventually seize the motor.
Step 7: Battery Terminal and Port Cleaning
What you need: Isopropyl alcohol (99%), cotton swabs, and a dry can of air.
Instructions: Inspect the gold-plated pins on the drone where the battery connects, as well as the contacts on the battery itself. Over time, carbon buildup or dust can create resistance, leading to power fluctuations or “inconsistent voltage” errors. Dip a cotton swab in alcohol and firmly rub the contact points until they shine. Use a dry swab to buff them dry. Check the USB-C or micro-USB ports for lint; use a toothpick or plastic prying tool to gently remove any debris, then finish with a quick blast of air.
Pro Tip: Check for any swelling (puffiness) of the battery while cleaning. If the battery casing is no longer flat or feels “squishy,” it is a fire hazard and should be recycled, not cleaned or used.
Step 8: Final Reassembly and Pre-Flight Check
What you need: All cleaned components and your drone’s controller.
Instructions: Once the drone is completely dry (wait at least 15 minutes after using any liquids), reattach the propellers, ensuring they are locked in the correct orientation (CW vs CCW). Insert a fully charged battery. Power on the drone and the controller while the aircraft is still on your workbench. Check the camera feed for any remaining spots on the lens. Calibrate the IMU and Compass via the drone’s app, as the cleaning process and movement can sometimes shift the sensitive internal calibrations. Listen for any unusual grinding sounds from the gimbal or motors during their initial self-test.
Pro Tip: Perform a low-altitude hover (3-5 feet) for two minutes after cleaning. This ensures that the heat from the electronics dries any microscopic moisture and confirms the drone is stable before you fly it long-distance.
✅ Final Checklist
- Are all propellers free of cracks and securely tightened to the motors?
- Is the camera lens and every obstacle avoidance sensor crystal clear with no streaks?
- Have all battery contacts been de-oxidized and checked for debris?
- Did the gimbal pass its automatic calibration sequence without obstruction?
- Are the motor vents clear of dust and the bells spinning freely by hand?
Important Notes:
- Safety: Never clean a drone while the battery is connected or the unit is powered on. Lithium-polymer batteries are sensitive to moisture and short circuits.
- Professional Help: If you find sand inside the main body housing or if a motor feels “crunchy” when spun by hand, do not attempt to force it clean. Seek a professional drone technician to avoid voiding your warranty.
- Estimated Time: 45 to 60 minutes.
- Cost Range: $20–$50 for a complete cleaning kit (Alcohol, brushes, cloths, and air).
Navigating Regulatory Compliance and FAA Heavy-Lift Waivers


Operating a cleaning drone is legally distinct from flying a camera drone. Because your aircraft, tether, and water weight often exceed 55 pounds, you are no longer flying under standard Part 107 rules. You must understand the legal framework to avoid massive fines and to secure high-value commercial contracts. Professional clients will demand proof of specific exemptions and high-limit insurance before you can set foot on their property.
Securing the Section 44807 Heavy-Lift Exemption


If your drone and the water in the tether weigh more than 55 pounds at any point during flight, you must obtain an FAA Section 44807 exemption. This is a grant of exemption for “Large Unmanned Aircraft Systems.” The process is more rigorous than a standard Part 107 exam. You must submit a detailed “Concept of Operations” (CONOPS) that explains your safety protocols. This includes how you manage the tether, how you handle battery emergencies, and your “lost link” procedures. Expect this process to take 90 to 120 days, so start your filing well before you buy your equipment.



Insurance and Environmental Liability


Traditional drone insurance rarely covers industrial washing. You need a policy that includes “Aviation General Liability” (AGL) with specific riders for chemical application. Most commercial property managers will require at least $2 million to $5 million in coverage. Additionally, you must comply with the Clean Water Act regarding chemical runoff. You are often required to use “wash-water recovery” systems or “drain blocking” kits to prevent cleaning chemicals from entering the local storm drain system. Failing to secure these permits can result in EPA fines that could bankrupt a new business.
- Part 107 Certificate: The baseline requirement for any commercial pilot.
- Section 44807 Exemption: Mandatory for drones over 55lbs.
- Aviation Liability Insurance: Critical for protecting against property damage or third-party injury.
- NPDES Permits: National Pollutant Discharge Elimination System permits for handling chemical runoff.
Economic Analysis: Pricing Models and ROI for UAV Cleaning


Turning a drone washing hobby into a profitable venture requires a sharp eye on your margins. Since high-pressure cleaning drones represent a significant upfront investment—often ranging from $15,000 to $50,000 for professional setups—your pricing strategy must account for maintenance, battery cycles, and insurance premiums. Most successful operators move away from hourly rates and focus on value-based pricing.
Common Pricing Structures
In the drone cleaning industry, how you bill determines your long-term viability. Here are the three most common models used by professionals today:
- Square Footage Model: Best for large-scale projects like warehouses or solar farms. Rates typically range from $0.05 to $0.20 per square foot depending on the complexity and debris level.
- Flat-Fee Project Rates: Ideal for specialized tasks like cleaning a church steeple or a specific monument where the risk and setup time are high.
- Retainer Agreements: Perfect for commercial clients who need quarterly cleanings to maintain energy efficiency or aesthetic standards.
Estimating Your Return on Investment (ROI)
While the initial cost is high, the ROI in drone washing is often faster than traditional pressure washing due to reduced labor and equipment costs (like scaffolding or cranes). A solo operator can often recoup their equipment costs within 10 to 15 major commercial projects. Pro tip: Always factor in “soft costs” like transportation to remote sites and the time required for pre-flight safety checks and site assessments.
Specialized Applications: From Solar Arrays to High-Rise Facades


The beauty of drone washing lies in its versatility. You aren’t just limited to residential siding; in fact, the real money is often found in specialized niches where traditional methods are either too dangerous or too expensive. By targeting these specific sectors, you can position your business as a high-tech solution provider rather than just a “cleaner.”


Maximizing Solar Farm Efficiency
Solar panels are a goldmine for drone operators. Even a thin layer of dust or bird droppings can reduce a panel’s energy output by 25% or more. Drones equipped with specialized soft-wash nozzles can clean thousands of panels in a fraction of the time it takes a ground crew. Real-world example: A 5MW solar farm that would take a manual crew a week to clean can often be completed by a single drone pilot in just two days.
The High-Rise Advantage
Window washing for skyscrapers is notoriously dangerous and insurance-heavy. Drones eliminate the need for “rope access” technicians or expensive cradles. This niche offers the highest profit margins because you are selling safety as much as you are selling cleanliness. Key benefits for high-rise clients include:
- Reduced Liability: No human lives are suspended hundreds of feet in the air.
- Speed of Execution: Drones can move vertically and horizontally across a facade with far more agility than manual rigs.
- Minimal Site Disruption: No need to cordone off massive sections of the sidewalk for heavy machinery.
Conclusion: Your Path to a High-Flying Business
Starting a drone washing business is a unique opportunity to sit at the intersection of technology and essential maintenance services. We have covered the necessity of choosing the right heavy-lift hardware, the importance of choosing a profitable niche like solar or high-rise cleaning, and how to structure your pricing to ensure a healthy ROI. While the barrier to entry involves significant equipment costs and licensing, the ability to offer a safer, faster, and more efficient cleaning solution sets you miles apart from traditional competitors.
Next Steps: Start by researching your local FAA (or regional equivalent) requirements for commercial drone operation and reach out to local solar farm managers for a pilot demonstration. The sky isn’t the limit—it’s your workplace. Get your business off the ground today!
💬 Quick Questions & Answers
Can you use a standard consumer drone for washing?
No, professional washing requires specialized heavy-lift drones equipped with tethered power systems and high-pressure fluid lines.
Is a special pilot license required for drone washing?
Yes, you must have an FAA Part 107 remote pilot certificate and often a weight-specific waiver if the drone exceeds 55 lbs.
What is the main advantage of drone washing over manual labor?
Drones significantly increase safety by removing the need for ladders or scaffolding and can clean surfaces up to 5x faster.
What kind of water is used for window cleaning drones?
Most operators use deionized or pure water systems to ensure a spot-free finish without manual scrubbing.
How much does a professional washing drone cost?
Entry-level commercial systems typically start around $20,000, while fully integrated tethered setups can exceed $50,000.
❓ Frequently Asked Questions
What specific chemicals are used in drone washing operations?
Most operators utilize a ‘soft wash’ approach using a mixture of sodium hypochlorite, surfactants, and water. These chemicals are designed to kill organic growth like mold and algae at low pressure, ensuring the building surface isn’t damaged by mechanical force.
How do tethered systems improve drone washing efficiency?
Tethered systems provide a constant power supply from a ground station and a continuous flow of cleaning solution through a hose. This allows the drone to stay airborne indefinitely, removing the need for frequent battery changes and liquid refills.
What are the legal requirements for drones weighing over 55 pounds?
In the United States, drones over 55 lbs require a Section 44807 Grant of Exemption from the FAA. This is a complex legal process that proves your heavy-lift drone can operate as safely as a smaller aircraft in a commercial environment.
Can drones effectively clean windows on high-rise buildings?
Yes, drones are highly effective for high-rise windows when used with a deionized water system. While they may not provide the ‘white-glove’ detail of a hand-squeegee, they are significantly safer and more cost-effective for large-scale maintenance.
What kind of insurance is necessary for a drone washing startup?
You need a specialized aviation insurance policy that includes hull coverage, third-party liability, and specifically ‘chemical drift’ coverage. This protects you if cleaning agents accidentally damage nearby vehicles or landscaping during operation.
How do I price drone washing services for clients?
Pricing is typically calculated by the square foot for large surfaces or a flat day rate for complex structures like solar farms. Most operators aim for a higher margin than traditional washers because they offer faster completion times and lower liability for the property owner.

Similar Posts