
So you want to build a drone from scratch? Well, you’ve come to the right place! In this article, I’ll guide you through the process of building your own drone, from gathering the necessary components to putting it all together. Whether you’re a beginner looking for a fun DIY project or a professional seeking to customize your drone for specific tasks, this step-by-step guide will provide you with all the information you need. So let’s get started and embark on an exciting journey into the world of drone building!
Prime for Young Adults — 6 Months Free
Exclusive Offer Amazon Prime for Young Adults, Students and 18–24s get six months of Prime free, then half price.
Start 6 Months Free As an Amazon Associate I earn from qualifying purchases.Preparation
Building a drone from scratch can be an exciting and rewarding project. Before you dive into the assembly process, it’s important to gather all the necessary components to ensure a smooth build. Here are the essential items you’ll need:
Gather the necessary components
To build a drone, you’ll need the following components:
-
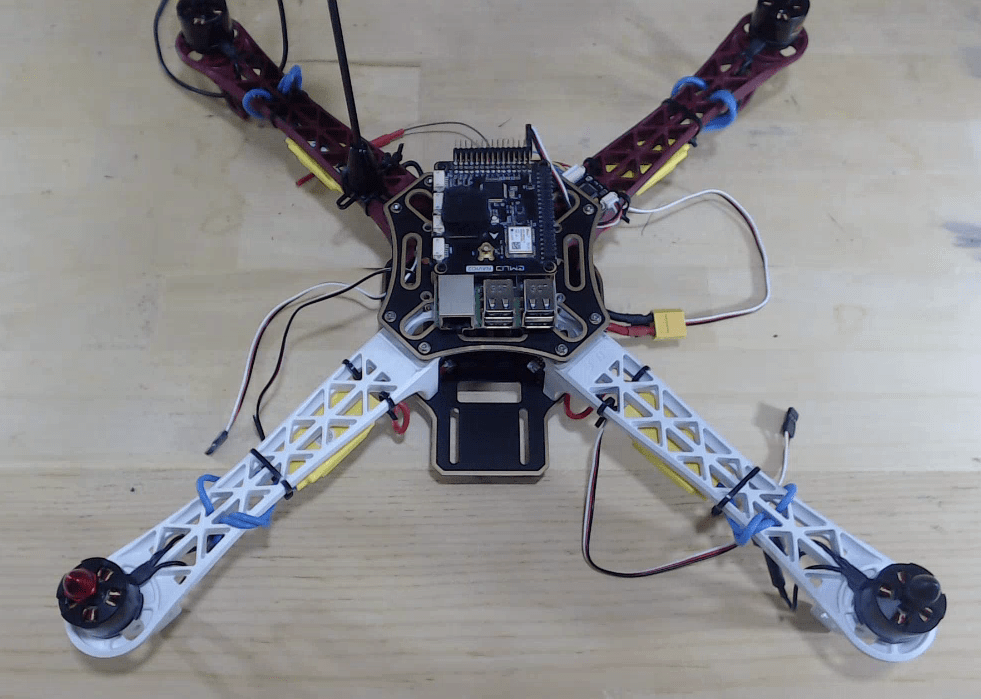
Frame: The frame is the foundation of your drone and provides the structure for attaching all other components.
-
Motors and propellers: Motors provide the power needed to lift and maneuver the drone, while propellers generate thrust.
-
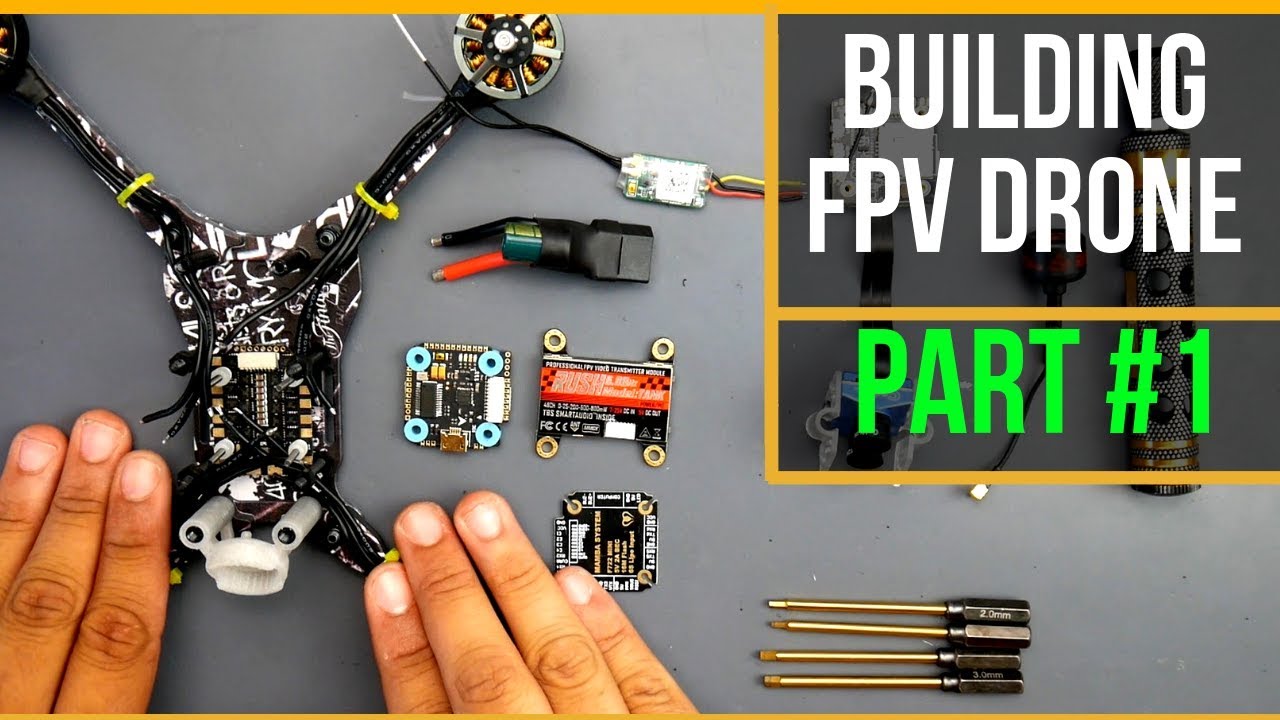
Flight controller: The flight controller is the brain of your drone and handles tasks such as stabilization, navigation, and control.
-
Electronic Speed Controllers (ESCs): ESCs regulate the speed of the motors and are responsible for translating the flight controller’s commands into motor control signals.
-
Batteries: Batteries provide the necessary power to keep your drone airborne. It’s important to choose the right battery to ensure a balance between flight time and weight.
-
Power Distribution Board: The power distribution board manages the distribution of power from the battery to the different components of your drone.
Choose the right frame
When selecting a frame for your drone, there are a few factors to consider. First, determine the size and weight of the drone you want to build. This will affect the size of the frame you’ll need, as well as its material (such as carbon fiber or aluminum) to handle the weight and stress of your components.
You’ll also want to consider the layout of the frame. Certain frames may have specific mounting points or configurations that are better suited for your particular drone build. Additionally, consider the availability of spare parts and the ease of assembly and maintenance.
Select the appropriate motors and propellers
Choosing the right motors and propellers for your drone is crucial for achieving the desired performance. The key factors to consider when selecting motors are:
- Thrust-to-weight ratio: The motors should be able to generate enough thrust to lift your drone while keeping it lightweight for optimal flight time.
- Kv rating: The Kv rating indicates how many RPMs the motor will spin per volt of input. Higher Kv motors are suitable for faster, agile drones, while lower Kv motors are better for heavier payloads.
- Torque: Higher torque motors are necessary for drones that require more lifting power or for acrobatic maneuvers.
Pair your motors with suitable propellers that match their specifications, such as size and pitch. It’s important to ensure that the propellers are balanced to avoid vibrations and ensure smooth flight.
Decide on the flight controller and ESCs
The flight controller is the brain of your drone and will determine the stability, control, and features of your drone. Some popular flight controllers include the Betaflight, Cleanflight, and Ardupilot.
Prime for Young Adults — 6 Months Free
Exclusive Offer Amazon Prime for Young Adults, Students and 18–24s get six months of Prime free, then half price.
Start 6 Months Free As an Amazon Associate I earn from qualifying purchases.When choosing ESCs, consider their compatibility with your flight controller and the number of motors your drone will have. ESCs come with different amp ratings, so be sure to choose ones that can handle the current draw of your motors.
Get the required batteries and power distribution board
Selecting the right batteries is essential for determining the flight time and overall performance of your drone. Consider factors such as voltage, capacity, and discharge rate when choosing batteries.
To power all the components of your drone, you’ll need a power distribution board. This board will connect to your battery and distribute power to the flight controller, ESCs, and other onboard systems.
Assembly
Recommended Best Deal Products


Now that you have all the necessary components, it’s time to begin the assembly process. Follow these steps to build your drone from scratch:
Start with the frame
Begin by assembling the frame according to the manufacturer’s instructions. This typically involves attaching different sections or arms together to form the frame structure.
Make sure to securely fasten the screws or bolts to ensure the frame is stable and rigid. Pay attention to any specific mounting points or configurations required for your particular frame.
Attach the motors and propellers
Once the frame is assembled, it’s time to attach the motors and propellers. Each motor will have mounting holes on the frame where you can screw them in. Make sure to align the motors properly with the motor mounting points on the frame.
Prime for Young Adults — 6 Months Free
Exclusive Offer Amazon Prime for Young Adults, Students and 18–24s get six months of Prime free, then half price.
Start 6 Months Free As an Amazon Associate I earn from qualifying purchases.Next, attach the propellers to the motor shafts. Propellers typically have a marking indicating the direction in which they should be rotated. Follow these markings to ensure the propellers are correctly installed.
Connect the flight controller and ESCs
The flight controller and ESCs are critical components that need to be connected properly. Start by connecting the ESCs to the appropriate motor outputs on the flight controller. Each ESC should be connected to its corresponding motor output.
Next, connect the flight controller to the receiver using the appropriate cables. The receiver is responsible for receiving signals from your transmitter and relaying them to the flight controller for control.
Install the power distribution board
Mount the power distribution board onto the frame according to the manufacturer’s instructions. This typically involves securing it to a designated area on the frame using screws or mounting brackets.
Once the power distribution board is installed, connect the positive and negative leads from the battery to the corresponding terminals on the board. This will provide power to all the components of your drone.
Connect the batteries
Now that all the components are in place, it’s time to connect the batteries. Connect the battery to the power distribution board using the appropriate connector. Ensure a secure connection and take necessary precautions to avoid short circuits.
Wiring and Configuration
With the physical assembly complete, it’s time to wire up the different components and configure your drone for flight. Follow these steps to ensure proper wiring and configuration:
Connect the wiring between components
Begin by connecting the necessary wiring between components. Refer to the pinout diagrams provided by the manufacturers of your flight controller, ESCs, and receiver to ensure the correct connections.
Make sure to connect the ESC signal wires to the corresponding motor outputs on the flight controller. Connect the receiver to the flight controller using the appropriate cables or connectors. Double-check all connections to ensure they are secure and properly seated.
Configure the flight controller
Before your drone can take flight, you’ll need to configure the flight controller. Connect the flight controller to your computer using a USB cable and open the appropriate software, such as Betaflight or Cleanflight.
Calibrate the accelerometer and the gyroscope to ensure accurate sensor readings. Configure the flight modes, arm and disarm settings, and other parameters according to your preferences.
Set up the transmitter and receiver
To control your drone, you’ll need a transmitter and receiver. Bind the receiver to your transmitter according to the manufacturer’s instructions. Set up the transmitter controls to your desired configuration and make sure the channels are properly mapped to the flight controller’s inputs.
Calibrate the ESCs
Calibrating the ESCs is an important step to ensure they are properly synchronized with the flight controller. Follow the instructions provided by the ESC manufacturer to calibrate each ESC.
Typically, this involves connecting the ESCs to a power source, entering calibration mode, and following a specific sequence of throttle inputs. Once calibrated, the ESCs will communicate effectively with the flight controller.
Test the drone for basic functionality
Before taking your drone for a flight, it’s important to test the basic functions and ensure everything is working as expected. Perform the following tests:
- Motor spin test: Gradually increase the throttle on your transmitter and ensure each motor spins in the correct direction.
- Control surface test: Use the transmitter controls to verify that the control surfaces, such as the pitch, roll, and yaw, respond appropriately to your inputs.
- Flight mode test: Switch between different flight modes and verify that the drone responds accordingly.
These basic tests will help you identify any issues or abnormalities that need to be addressed before your drone takes to the skies.
Flight Testing
Recommended Best Deal Products


Now that your drone is assembled and configured, it’s time to take it for its first flight. Follow these steps to ensure a successful flight testing process:
Perform a pre-flight checklist
Before every flight, it’s important to perform a pre-flight checklist to ensure the safety and proper functioning of your drone. Here are some key items to check:
- Check the tightness of all screws and connections.
- Verify that the propellers are securely attached and balanced.
- Ensure the battery is fully charged and securely attached.
- Check for any visible damage or abnormalities in the frame or components.
- Confirm that the flight controller is properly configured and calibrated.
- Test the control surfaces and verify that they respond correctly to inputs.
Completing a pre-flight checklist will help minimize the risk of accidents or malfunctions during flight.
Start with small, controlled flights
When testing your drone for the first time, it’s important to start small and gradually increase the complexity of the flights. This allows you to become familiar with the controls and behavior of the drone.
Begin by performing short, controlled flights in a confined area. Focus on maintaining stability and practicing basic maneuvers such as hovering, forward flight, and turns. Gradually increase the flight duration and complexity as you gain more confidence and experience.
Gradually increase altitude and maneuverability
As you become more comfortable flying your drone, you can gradually increase the altitude and maneuverability. Start by flying at low altitudes and gradually increase the height as you gain confidence.
Practice different maneuvers such as banking turns, figure-eight patterns, and controlled descents. Pay attention to the responsiveness of the drone and make adjustments as needed to improve stability and control.
Ensure stability and responsiveness
During flight testing, it’s important to assess the stability and responsiveness of your drone. Pay attention to any vibrations, oscillations, or unusual behavior that may indicate an issue.
Make necessary adjustments to the PID settings on your flight controller to fine-tune the stability and responsiveness of the drone. This may involve adjusting the gains for roll, pitch, and yaw control.
Adjust PID settings if necessary
The PID (Proportional, Integral, Derivative) settings on your flight controller determine how the drone responds to different flight conditions. Fine-tuning these settings can greatly improve the stability and performance of your drone.
Monitor the behavior of your drone during flight and make small adjustments to the PID settings if necessary. This can help eliminate any oscillations, improve maneuverability, and enhance the overall flying experience.

Troubleshooting
When building and flying a drone, it’s inevitable that you may encounter some issues along the way. Here are some common troubleshooting steps to help you address and resolve problems:
Identify common issues
Some common issues you may encounter include motor failures, stability problems, loss of control, and connectivity issues. Identifying the exact issue is the first step towards finding a solution.
Check for loose connections or damaged components
Loose connections or damaged components can cause erratic behavior in your drone. Inspect all the wiring and connections to ensure they are secure and properly seated. Look for any signs of damage or wear on the components and replace them if necessary.
Troubleshoot flight controller and sensor problems
If you’re experiencing stability or control issues, the flight controller or its sensors may be the culprit. Check for any error messages or abnormal readings in the flight controller software.
Make sure the flight controller is properly calibrated and configured. Revisit the calibration process and ensure the accelerometer and gyroscope readings are accurate.
Address motor or propeller issues
If you’re noticing uneven or weak motor performance, it may indicate a problem with the motors or propellers. Inspect the motors for any signs of damage or overheating. Check the propellers for balance and ensure they are securely attached.
Replace any faulty motors or propellers and retest to see if the issue is resolved.
Debug software or firmware errors
Sometimes, software or firmware errors can cause unexpected issues with your drone. Ensure that you are using the latest firmware for your flight controller and peripherals.
If you’re experiencing software-related issues, consider reaching out to the manufacturer’s support or online forums for assistance. They may have troubleshooting guides or firmware updates that can help resolve the problem.
Safety Considerations
Recommended Best Deal Products
When building and flying a drone, safety should be a top priority. Here are some important safety considerations to keep in mind:
Follow local regulations and airspace restrictions
Before flying your drone, familiarize yourself with the local regulations and airspace restrictions in your area. Ensure that you are flying within the permitted zones and comply with any registration or licensing requirements.
Wear safety gear and protective clothing
When working on your drone or flying it, wear appropriate safety gear and protective clothing. This includes safety glasses, gloves, and closed-toe shoes to protect yourself from any potential accidents or injuries.
Perform regular maintenance and inspections
Regular maintenance and inspections are essential for keeping your drone in optimal condition. Check for any signs of damage or wear on the components and replace them if necessary. Clean the frame, motors, and propellers regularly to remove any dirt or debris.
Keep a safe distance from people and property
When flying your drone, always maintain a safe distance from people and property. This will help minimize the risk of accidents or damage. Be mindful of your surroundings and avoid flying over private property without permission.
Be aware of weather conditions
Weather conditions can greatly affect the flight characteristics of your drone. Avoid flying in strong winds, rain, or storms, as these can pose a significant risk to your drone’s stability and control. Always check the weather forecast before planning a flight.
Advanced Customization
Once you have mastered the basics of building and flying a drone, you may want to explore advanced customization options. Here are some ideas for taking your drone to the next level:
Add additional sensors for advanced functionality
By adding additional sensors to your drone, you can unlock a range of advanced functionality. Sensors such as GPS, barometers, and altimeters can enable features like autonomous flight modes and altitude hold.
Research the compatible sensors for your flight controller and explore the possibilities of advanced functionality they can offer.
Install a camera or gimbal for aerial photography or videography
If you’re interested in aerial photography or videography, consider installing a camera or gimbal on your drone. This will allow you to capture high-quality images and videos from unique perspectives.
Ensure that your drone is capable of carrying the additional weight of the camera or gimbal, and choose one that is compatible with your flight controller and camera system.
Integrate GPS for autonomous flight modes
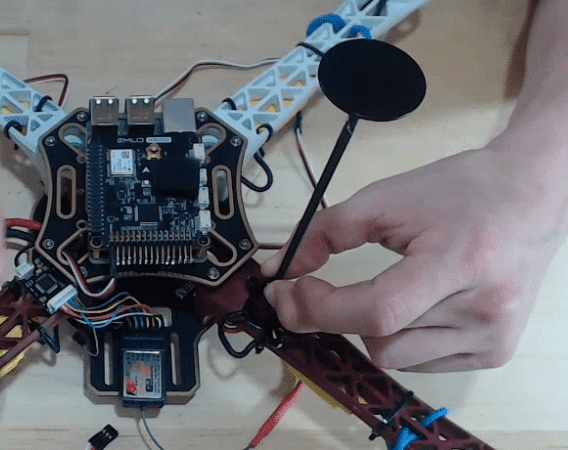
GPS capabilities can enable your drone to navigate autonomously and perform tasks such as waypoint navigation, return to home, and follow me modes. Research GPS modules that are compatible with your flight controller and learn how to set up and configure autonomous flight modes.
Upgrade to higher performance motors and ESCs
If you’re looking for more power and agility, consider upgrading to higher performance motors and ESCs. These upgrades can provide increased lift capacity, speed, and responsiveness, allowing you to push the limits of your drone’s capabilities.
Ensure that your frame, power distribution board, and battery can handle the increased demands of the higher performance components.
Implement advanced flight modes like acrobatics or waypoint navigation
Once you have mastered the basics of flight, you may want to explore more advanced flight modes. Acrobatic flight modes, such as flips and rolls, can add excitement and thrill to your flying experience.
Additionally, waypoint navigation can enable your drone to fly predetermined routes or perform complex maneuvers automatically. Research the capabilities of your flight controller and learn how to implement these advanced flight modes.
Legal and Ethical Considerations
When building and operating a drone, it’s important to be aware of the legal and ethical considerations involved. Here are some key points to consider:
Register your drone with the appropriate authorities
In many countries, it is necessary to register your drone with the appropriate authorities before flying. Familiarize yourself with the registration requirements in your country and ensure compliance to avoid any legal issues.
Understand local laws and regulations
Stay up to date with the local laws and regulations governing drone operation in your area. This includes restrictions on flight altitude, no-fly zones, and any licensing or certification requirements.
Always fly within the permitted areas and respect any privacy laws or restrictions in place.
Respect the privacy of others
When operating a drone, it’s important to respect the privacy of others. Avoid flying in areas where privacy may be violated, such as private property or public spaces where people expect privacy.
Do not capture or distribute images or videos that may infringe on someone’s privacy without their consent.
Ensure safety while operating the drone
Safety should always be a top priority when operating a drone. Fly in open areas away from people, animals, and property to minimize the risk of accidents or damage. Follow safe flying practices and prioritize the safety of yourself and others.
Be mindful of noise pollution
Drones can produce a significant amount of noise, especially when flying at high speeds or with powerful motors. When flying in residential areas or public spaces, be mindful of the noise pollution you may be generating.
Consider the impact of noise on the surrounding environment and try to minimize disturbances as much as possible.
Resources for Further Learning
Building and flying a drone is a continuous learning process. Here are some resources that can help you further enhance your knowledge and skills:
Online drone communities and forums
Join online drone communities and forums where you can connect with other drone enthusiasts. These platforms provide a wealth of knowledge and support, and you can learn from experienced builders and flyers.
Educational websites and tutorials
There are many educational websites and tutorials available that provide step-by-step guides and tutorials for building and flying drones. These resources can help you understand the technical aspects and provide valuable tips and advice.
Books and publications on drone building
Look for books and publications that cover the topic of drone building and flying. These can provide in-depth knowledge, troubleshooting techniques, and advanced techniques to take your drone-building skills to the next level.
Drone building workshops and courses
Consider attending drone building workshops or courses in your area. These hands-on experiences can provide valuable guidance and allow you to learn from experts in the field. Workshops often offer the opportunity to build and fly a drone under the supervision of experienced instructors.
YouTube channels and video tutorials
YouTube channels dedicated to drone building and flying offer a wide range of video tutorials and demonstrations. These visual resources can be a valuable tool for learning new techniques, troubleshooting issues, and staying up to date with the latest trends in the drone industry.
Call to Action
Building a drone from scratch can be a challenging but rewarding experience. Whether you’re a beginner, enthusiast, or professional, there’s always something new to learn and explore in the world of drone technology.
We hope this comprehensive article has provided you with valuable insights and guidance on how to build a drone from scratch. If you have any experiences or questions related to drone building, we encourage you to leave a comment below. Share this article with others who may be interested in building their own drones and join our drone building community for ongoing support and guidance.
Remember to stay safe, respect the regulations, and enjoy the thrilling experience of building and flying your own drone!
